A classic map is remastered and brought into 2020 just the way veterans remembered it. This is your day one intel on Talsik Backlot
Modern Warfare Tactical Map Intel: Talsik Backlot
A classic map is remastered and brought into 2020 just the way veterans remembered it. This is your day one intel on Talsik Backlot
April 08, 2020
by James Mattone
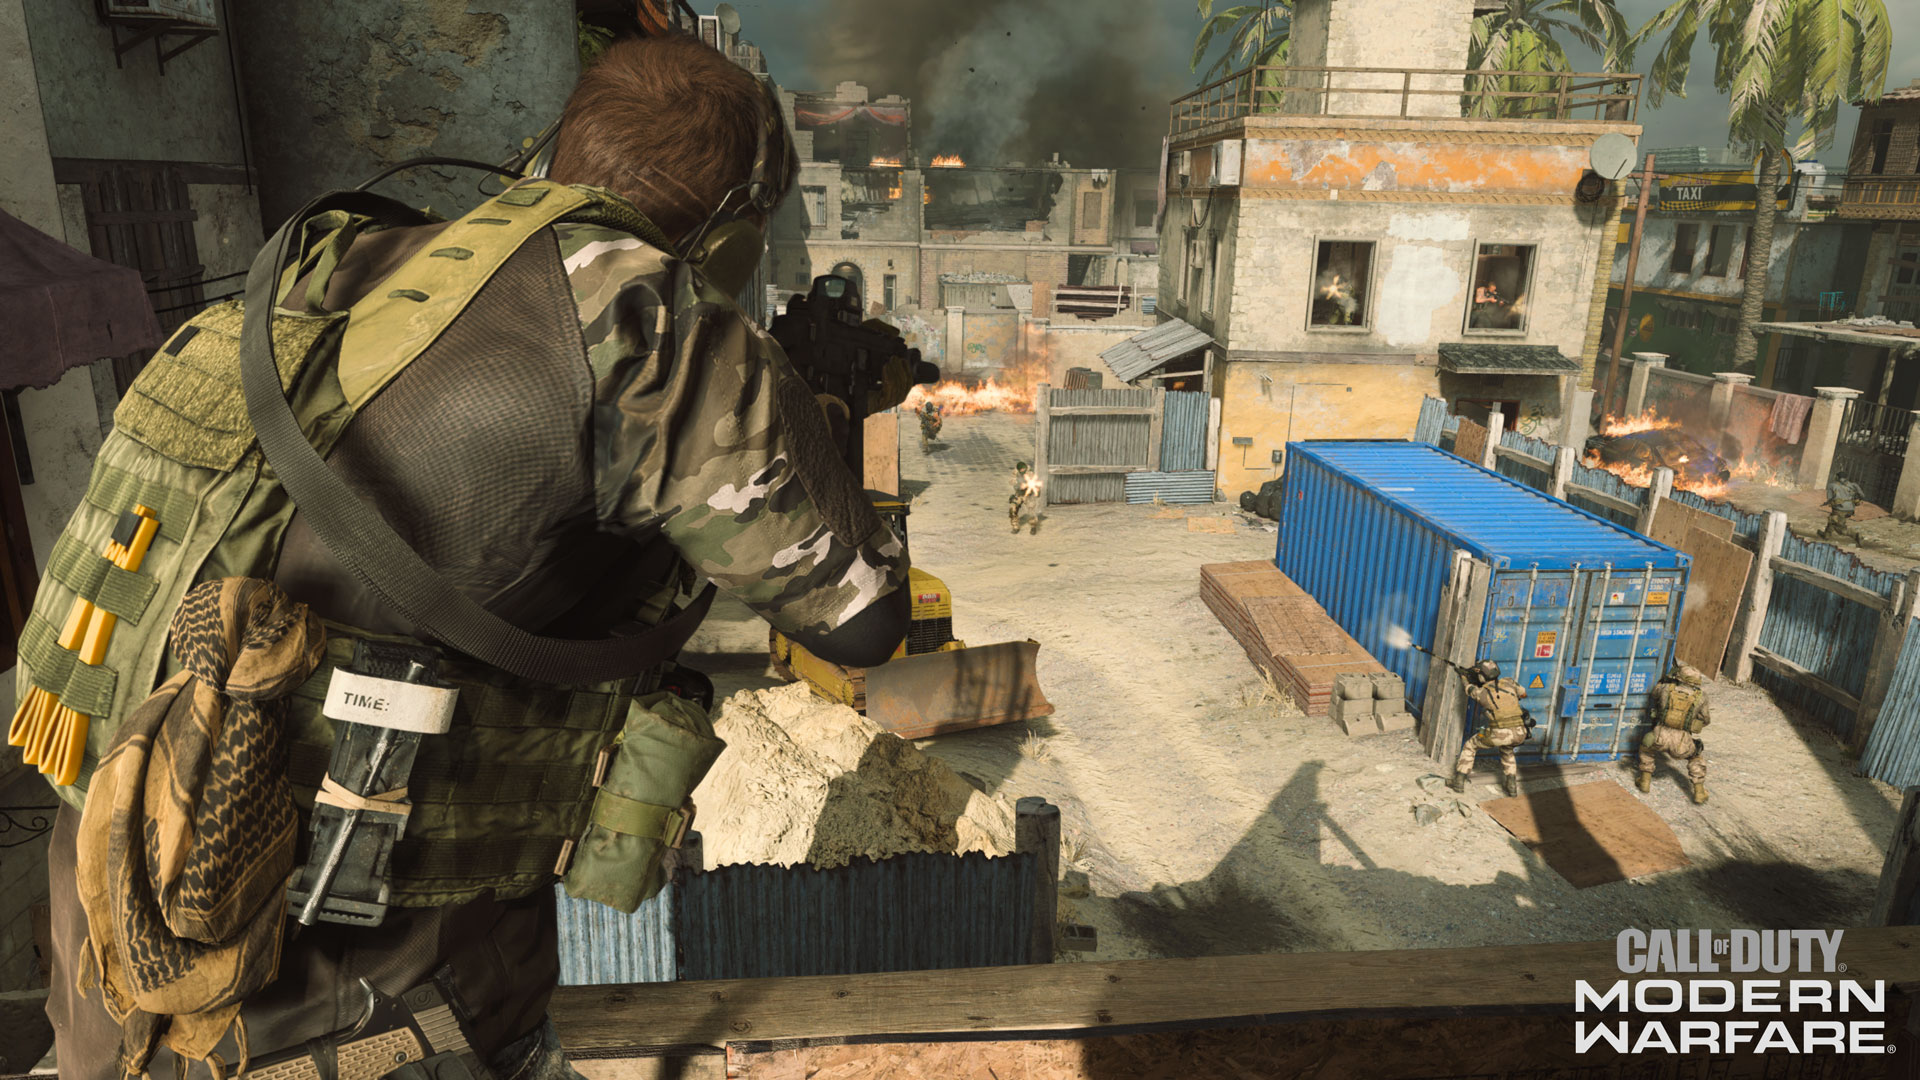
A familiar construction site towering over a desert urban landscape will signal home for veterans of the Call of Duty franchise, and for those experiencing it for the first time, Talsik Backlot welcomes you to fast-paced urban warfare.
Straight out of Call of Duty 4: Modern Warfare, Talsik Backlot takes the classic Backlot design and remasters it. While those who sank hours into the original will find their old strategies work just as well, some of the new mechanics within Modern Warfare allow for newcomers to compete alongside these grizzled veterans.
Here’s breakdown of Talsik Backlot, from East Street to West Street and everywhere in between:
Lay of the Land:
The Kushaak construction company’s latest project is now idle in the middle of Urzikstan due to the growing conflict. Before the war, this vibrant urban community was in the middle of renovations, with its center getting a new multi-floor building.
Unfortunately, when the world shifted, this Backlot was forcibly abandoned. During the evacuation, one building on the North side of town crumbled and caught fire, only heightening the chaos in the region.
As a member of the Coalition or Allegiance, your objective is to secure the area before members of Al-Qatala claim it for their own. Few, if any, references to their regime are seen in this locale, but if no order is established before they arrive, this community may not last long.
Map Detail:
Talsik Backlot is a medium sized, building dense map that is suited for 6v6 playlists. The diversity of zones within this map opens the opportunity for all playstyles to be viable.
Here are the 20 distinct zones that this map contains:
1. West Street – Allegiance Spawn
2. Back Alley
3. Garage
4. Laundromat
5. Gas Station
6. Parking Lot
7. Bike Shop
8. Main Street
9. Destroyed Building
10. Center
11. Tin Building
12. Market
13. Crawl Space
14. Construction Site
15. Workshop
16. Construction Building
17. East Street – Coalition Spawn
18. Tank
19. Taxi Building
20. Passage
Map Overview
The following set of maps detail the entirety of Talsik Backlot, including the zones, the locations of important areas in different game modes, and a topographical image. Swipe or click left or right to see them all:
Talsik Backlot: Map Overview
Talsik Backlot: Map Zones
Talsik Backlot: Domination
Talsik Backlot: Search and Destroy
Talsik Backlot: Headquarters
Talsik Backlot: Cyber Attack
Talsik Backlot: Topography
Map Zones Overview:
1. West Street – Allegiance Spawn
The Allegiance get their due for a westside initial spawn in Backlot, as they will roll into battle in between the Parking Lot to the Bike Shop and the Back Alley/Garage areas.
Those spawning here will either want to head straight up north or south, or if you want to tackle the enemy head on, barrel right on through to Main Street.
2. Back Alley
Nestled in between the Garage and Laundromat is this Back Alley, which promotes close quarters combat due to its relative size.
Note the small staircase on the west side of this alley, which is accessible. Coming up to here may give you some advantageous high ground against those travelling through here, or may allow you to snipe southwards, potentially countering someone in the Bike Shop.
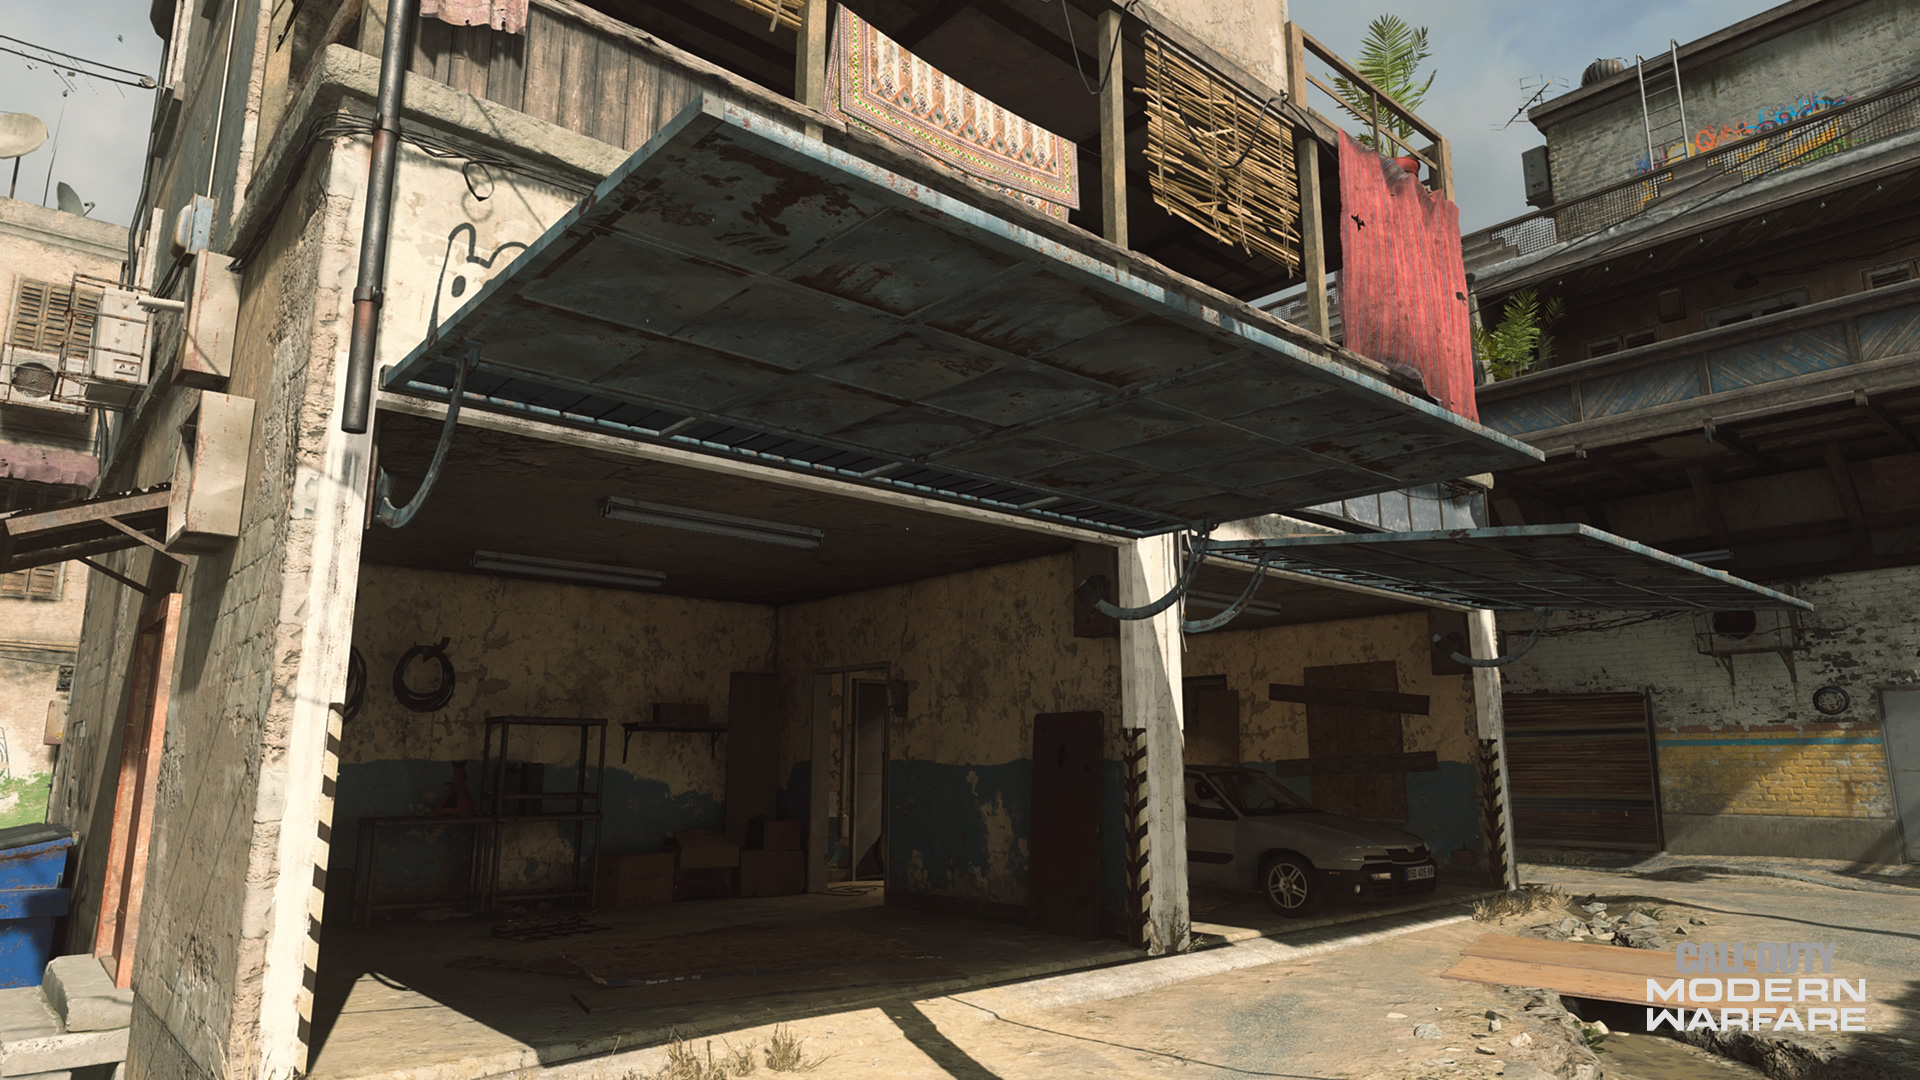
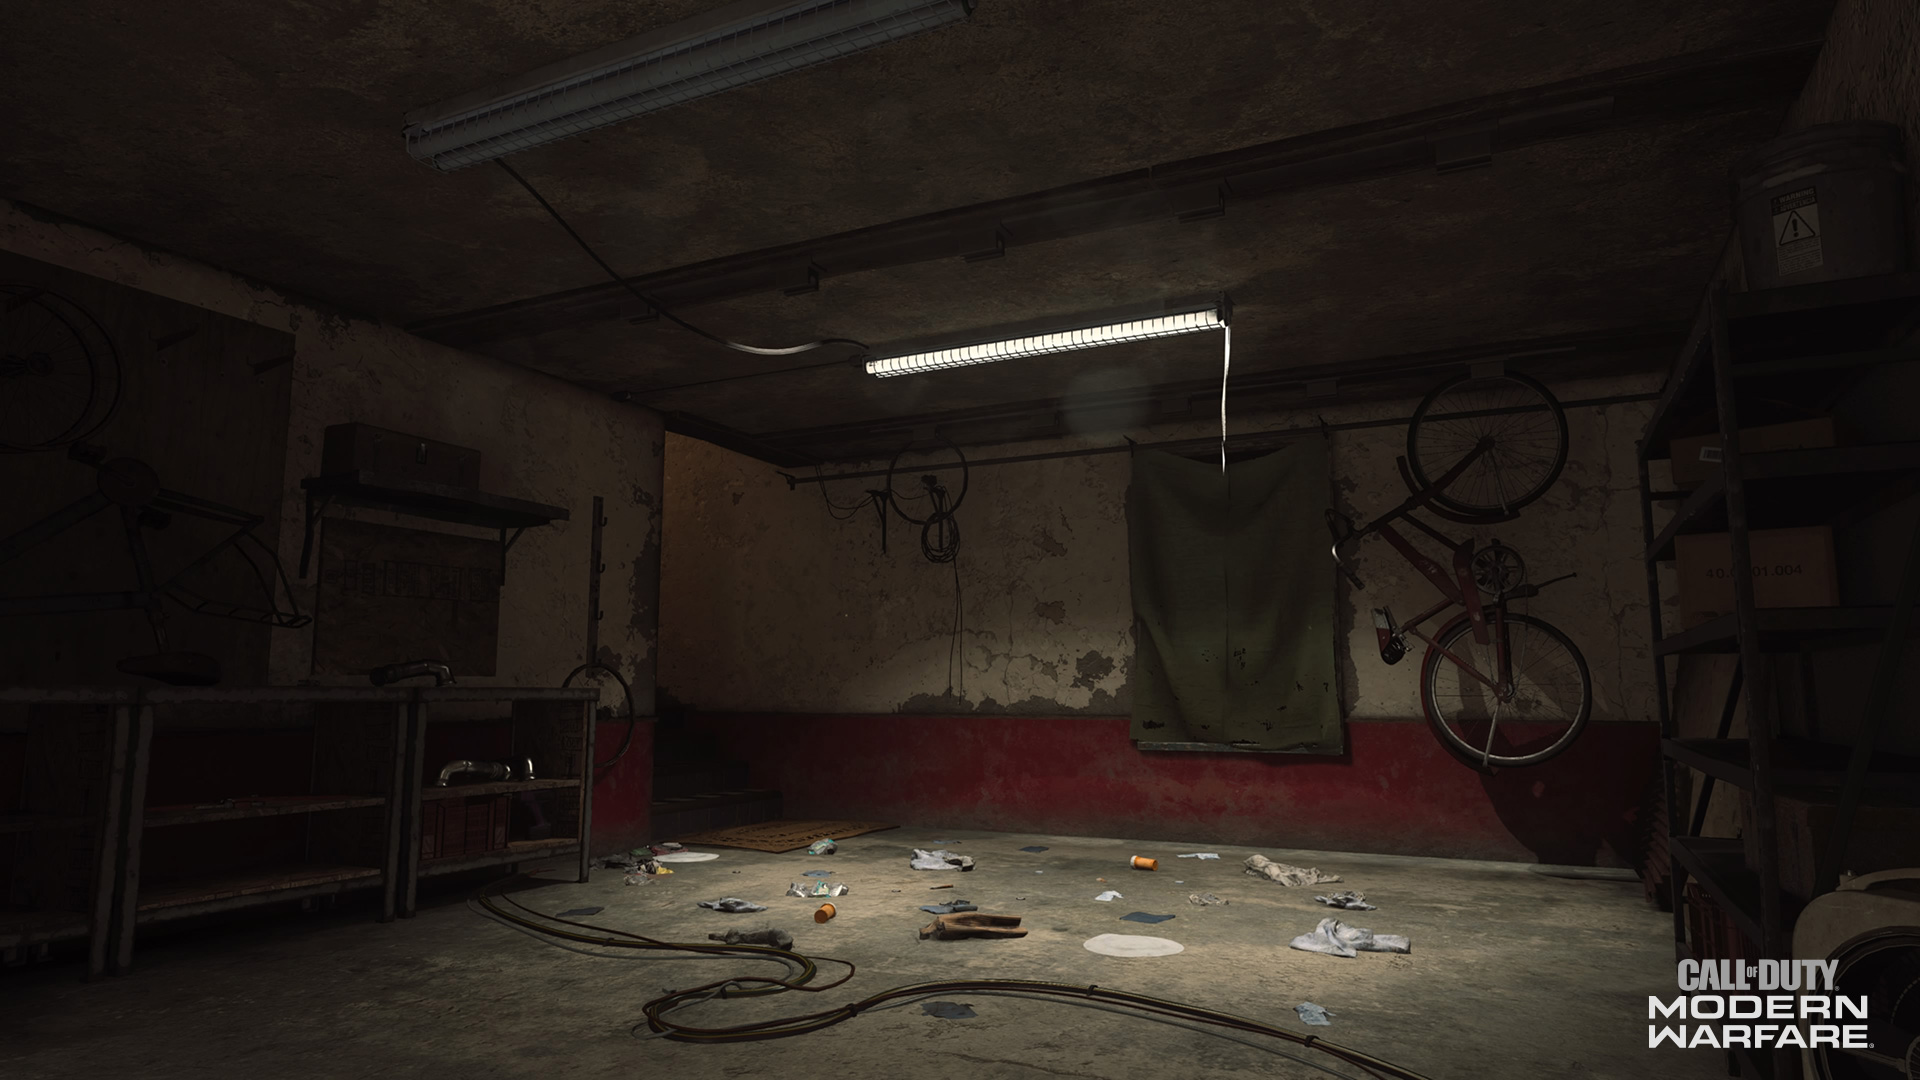
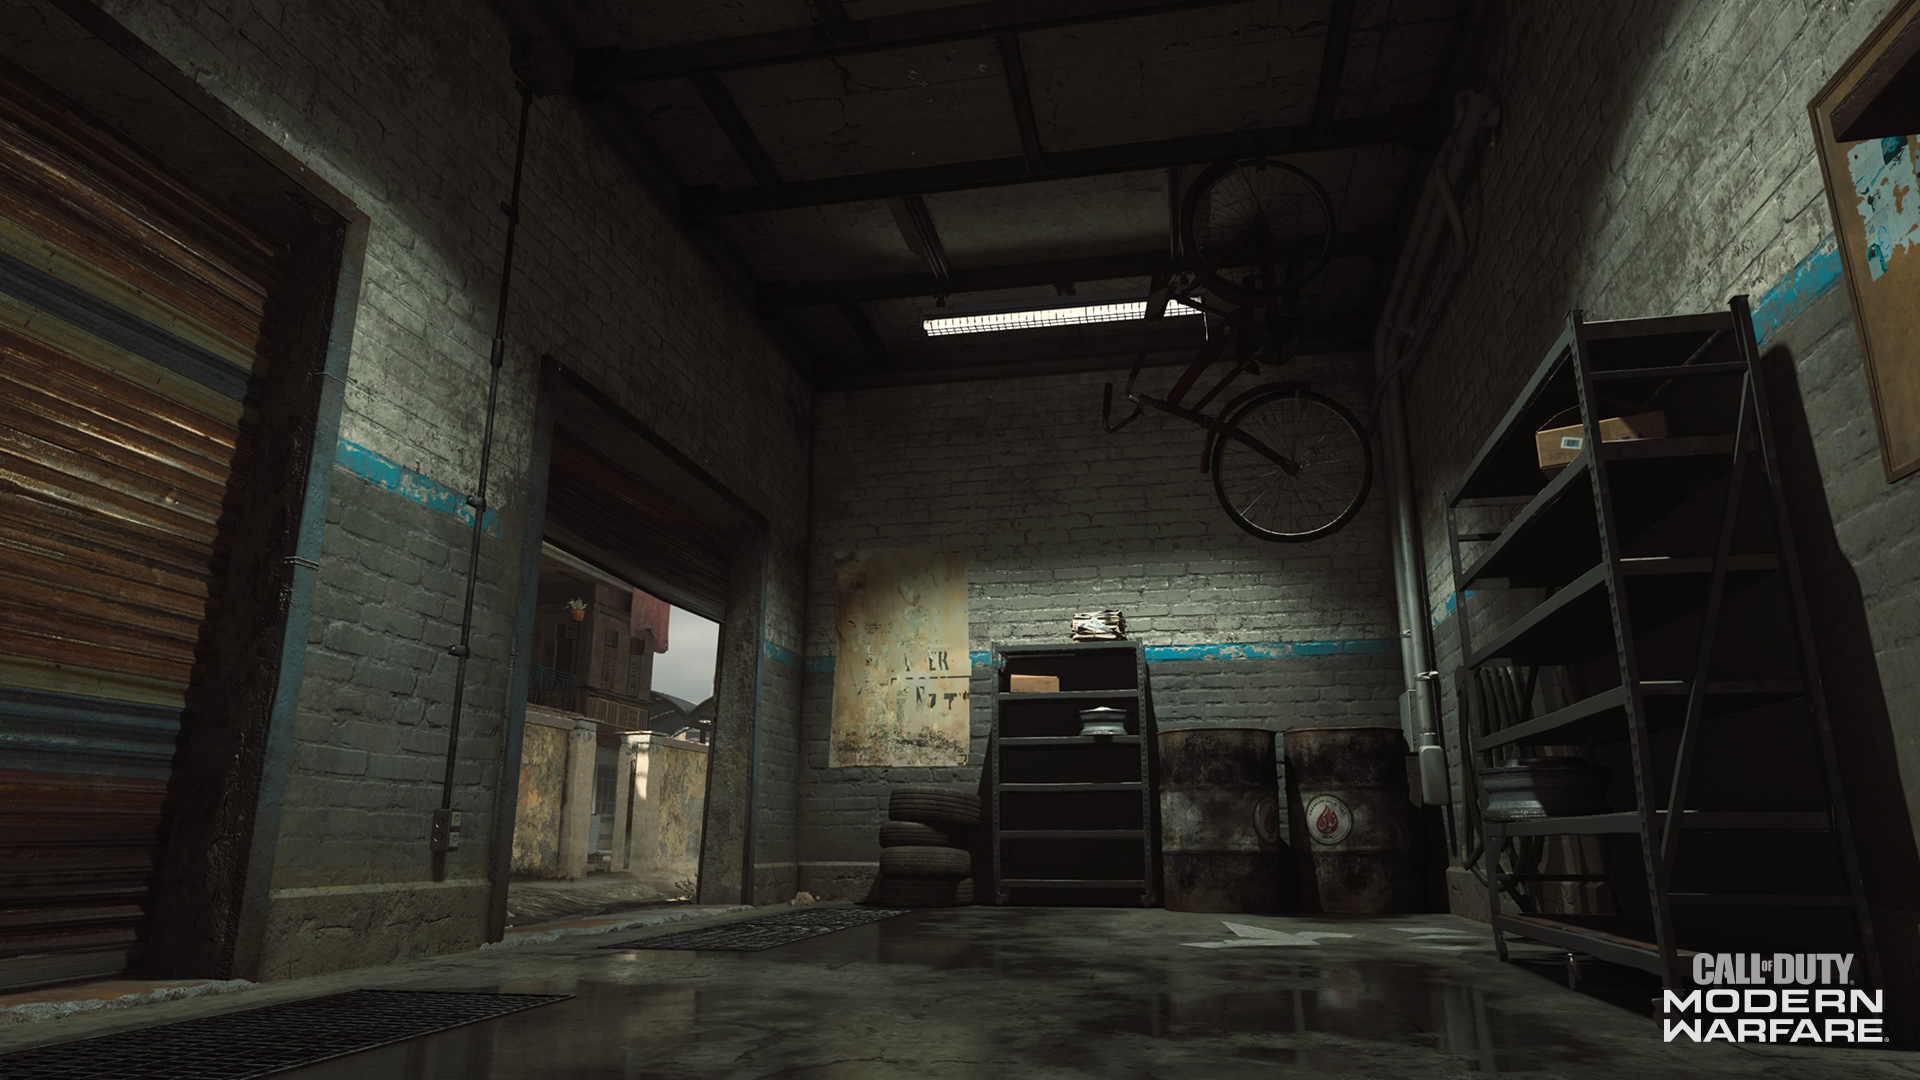
3. Garage
Right off West Street is a garage that has both of its large doors facing the Bike Shop swung open. Within this single room are two main entrances on the east and west walls.
If you are travelling through here, be careful of enemies that can, and will, shoot on your flank, as those lifted garage doors welcome in plenty of sightlines from the south.
Watch those flanks, and if the enemy is especially troublesome, try throwing a Smoke Grenade to deny a wide-open look inside this room.
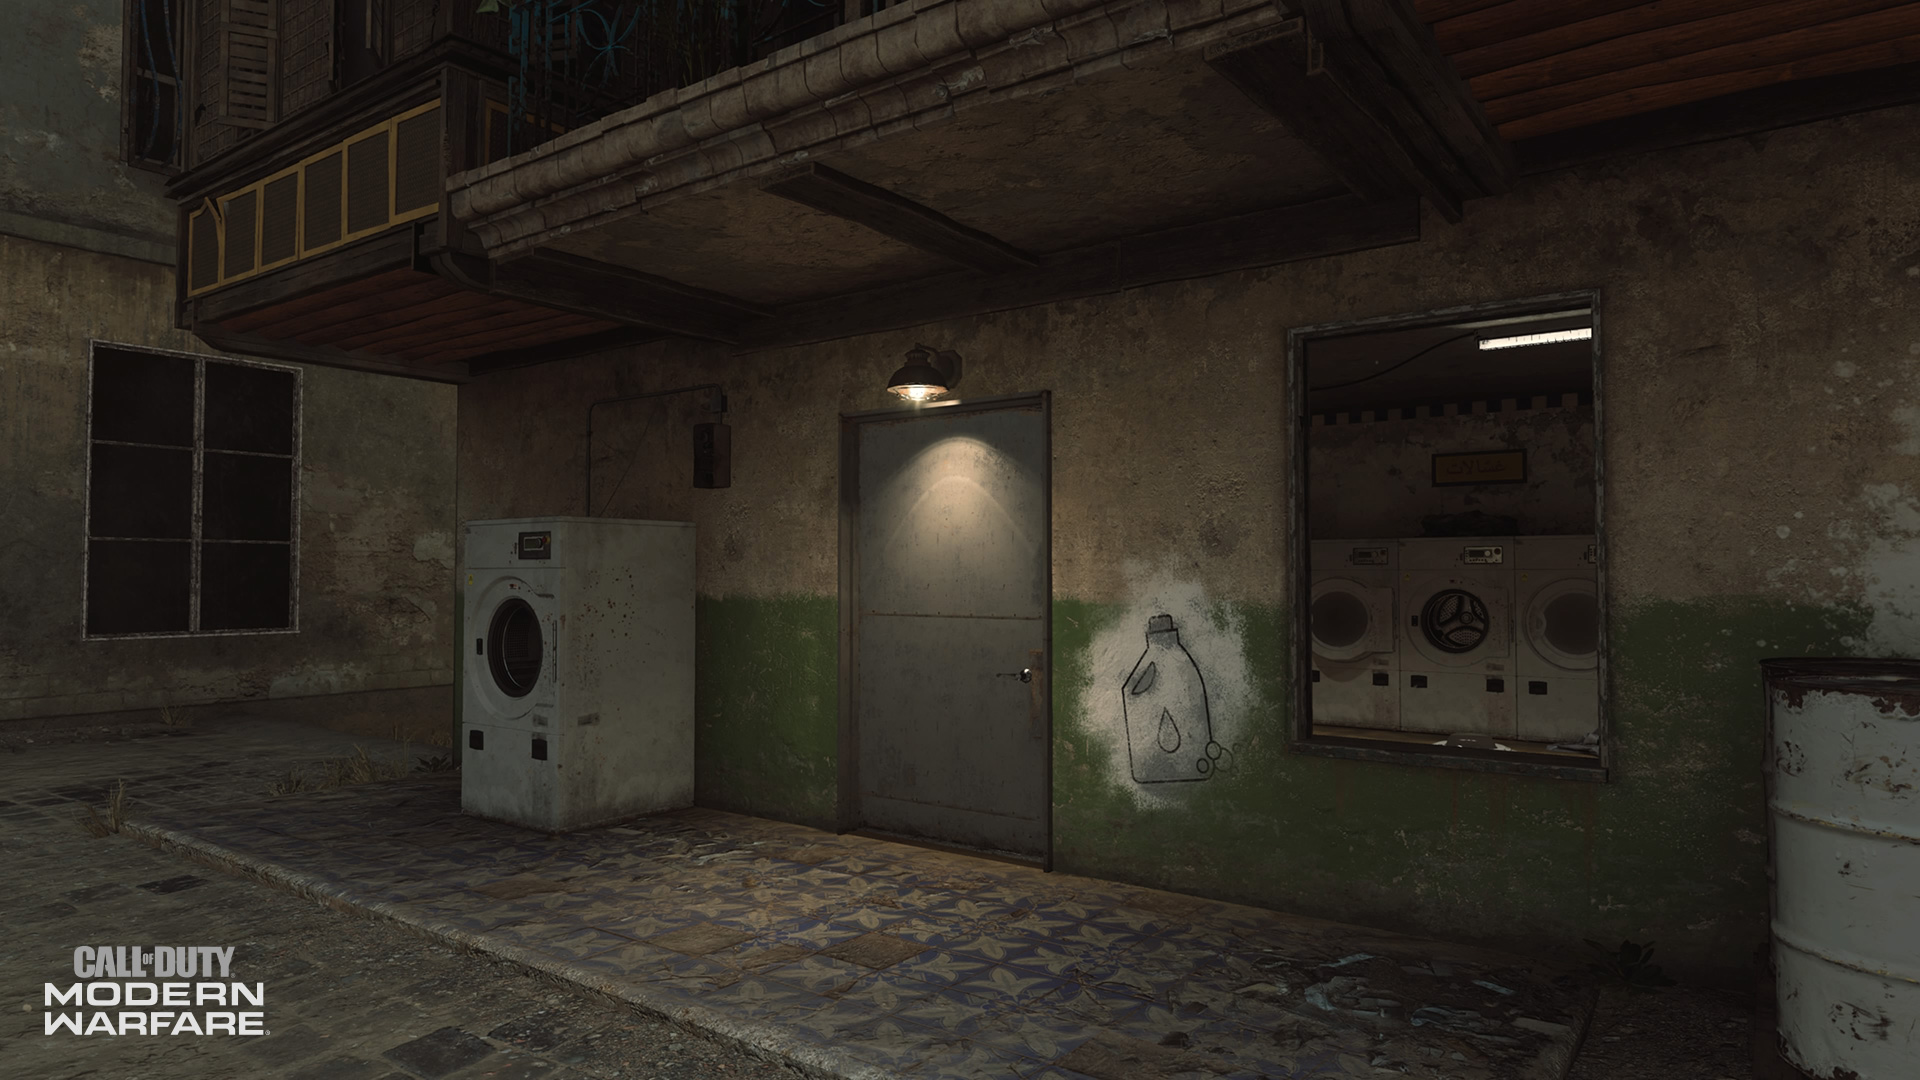
4. Laundromat
Right off the Back Alley is this small Laundromat, which has another doorway that leads to Main Street, and a third that puts you right outside the Gas Station.
Expect fights to devolve close to fisticuffs within this area and watch for grenades coming in from Main Street as you maneuver through here.
In Hardpoint, this is the second hill within the deep rotation of objective locations. If your squad happens to lose the first hill at the Center, don’t be afraid to rotate around it and get a forward position on this one, setting up defenses at the door and window facing the middle of the map.
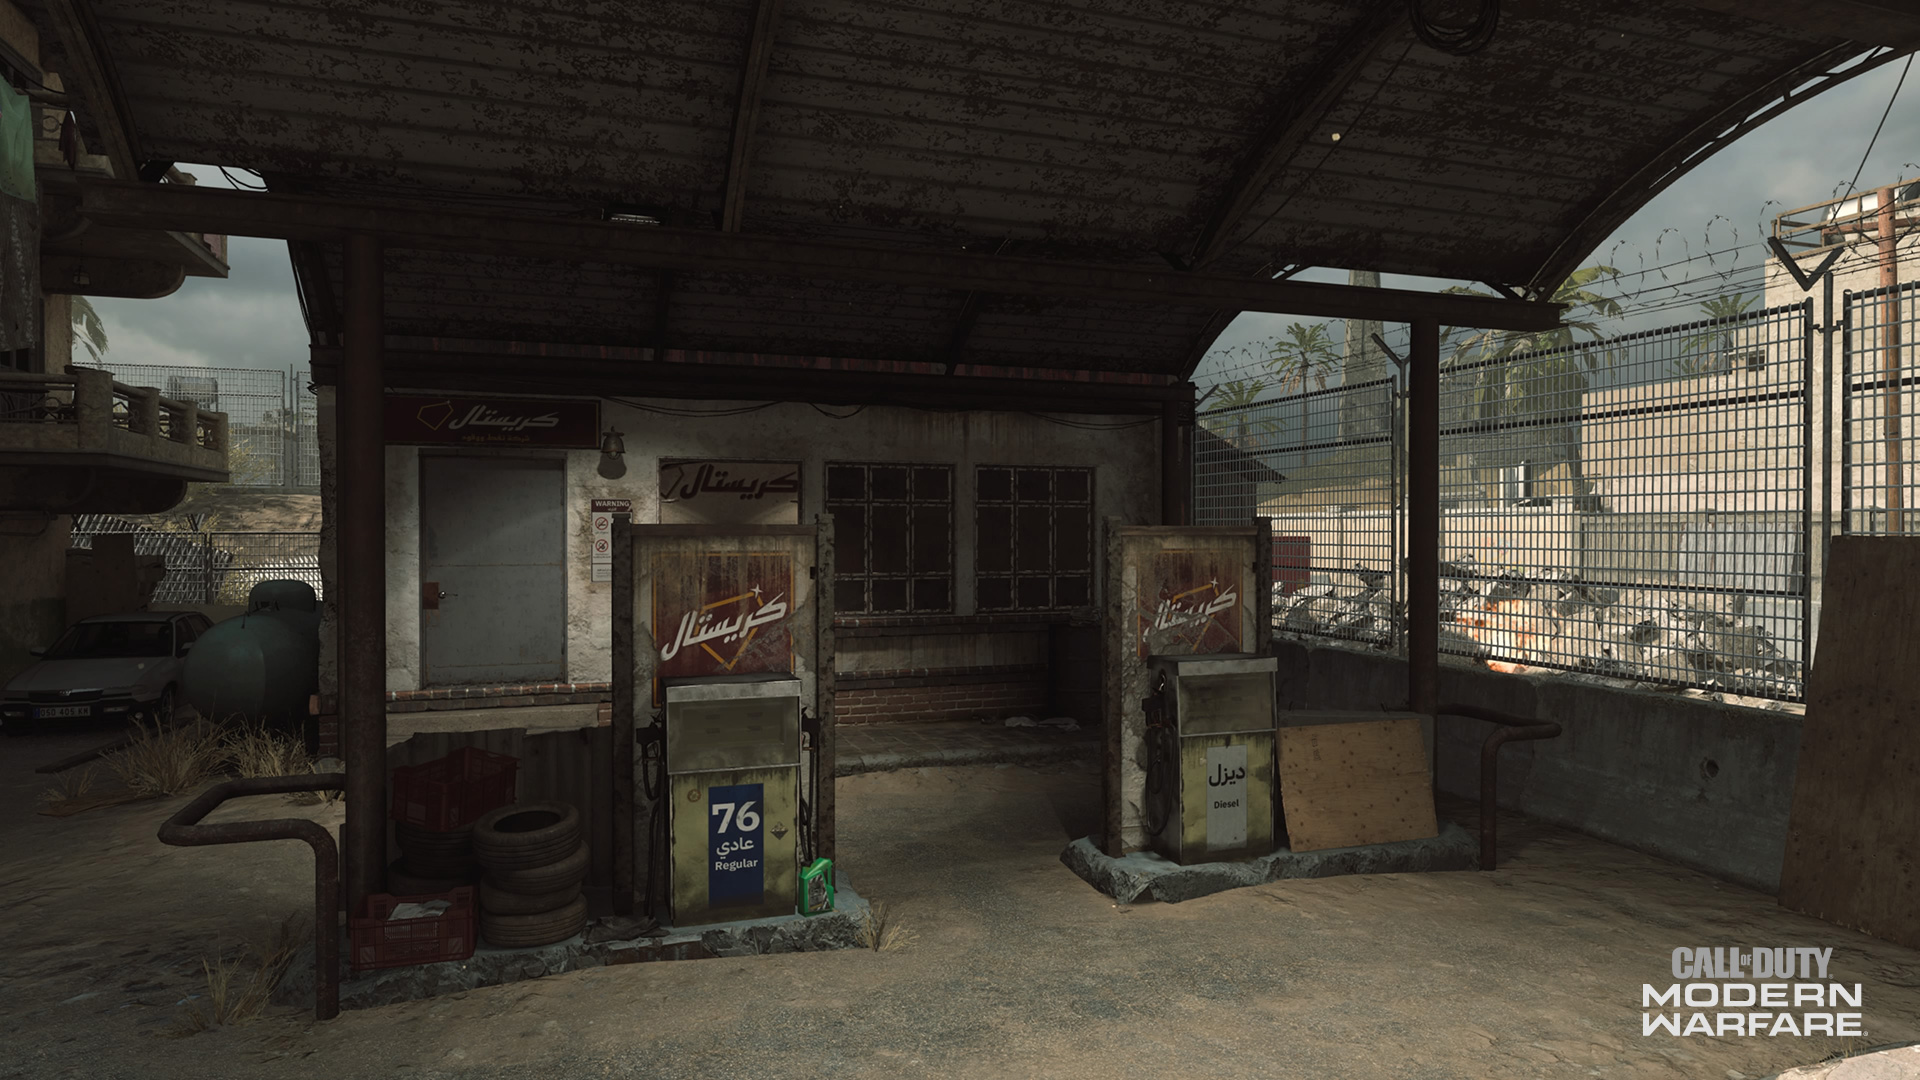
5. Gas Station
The northwest-most zone of the map may not see as much play outside of Hardpoint, Search & Destroy, and Headquarters, where it acts as an objective location in those game modes.
However, with its proximity to the Destroyed Building, the Gas Station has some untapped potential.
Instead of facing enemies head-on within that building, it may be a smarter idea to catch them rotating past this locale. Alternatively, if they get too close for comfort, you can use the interior convenience store or the gas pumps to force a close-quarters engagement with an SMG or shotgun.
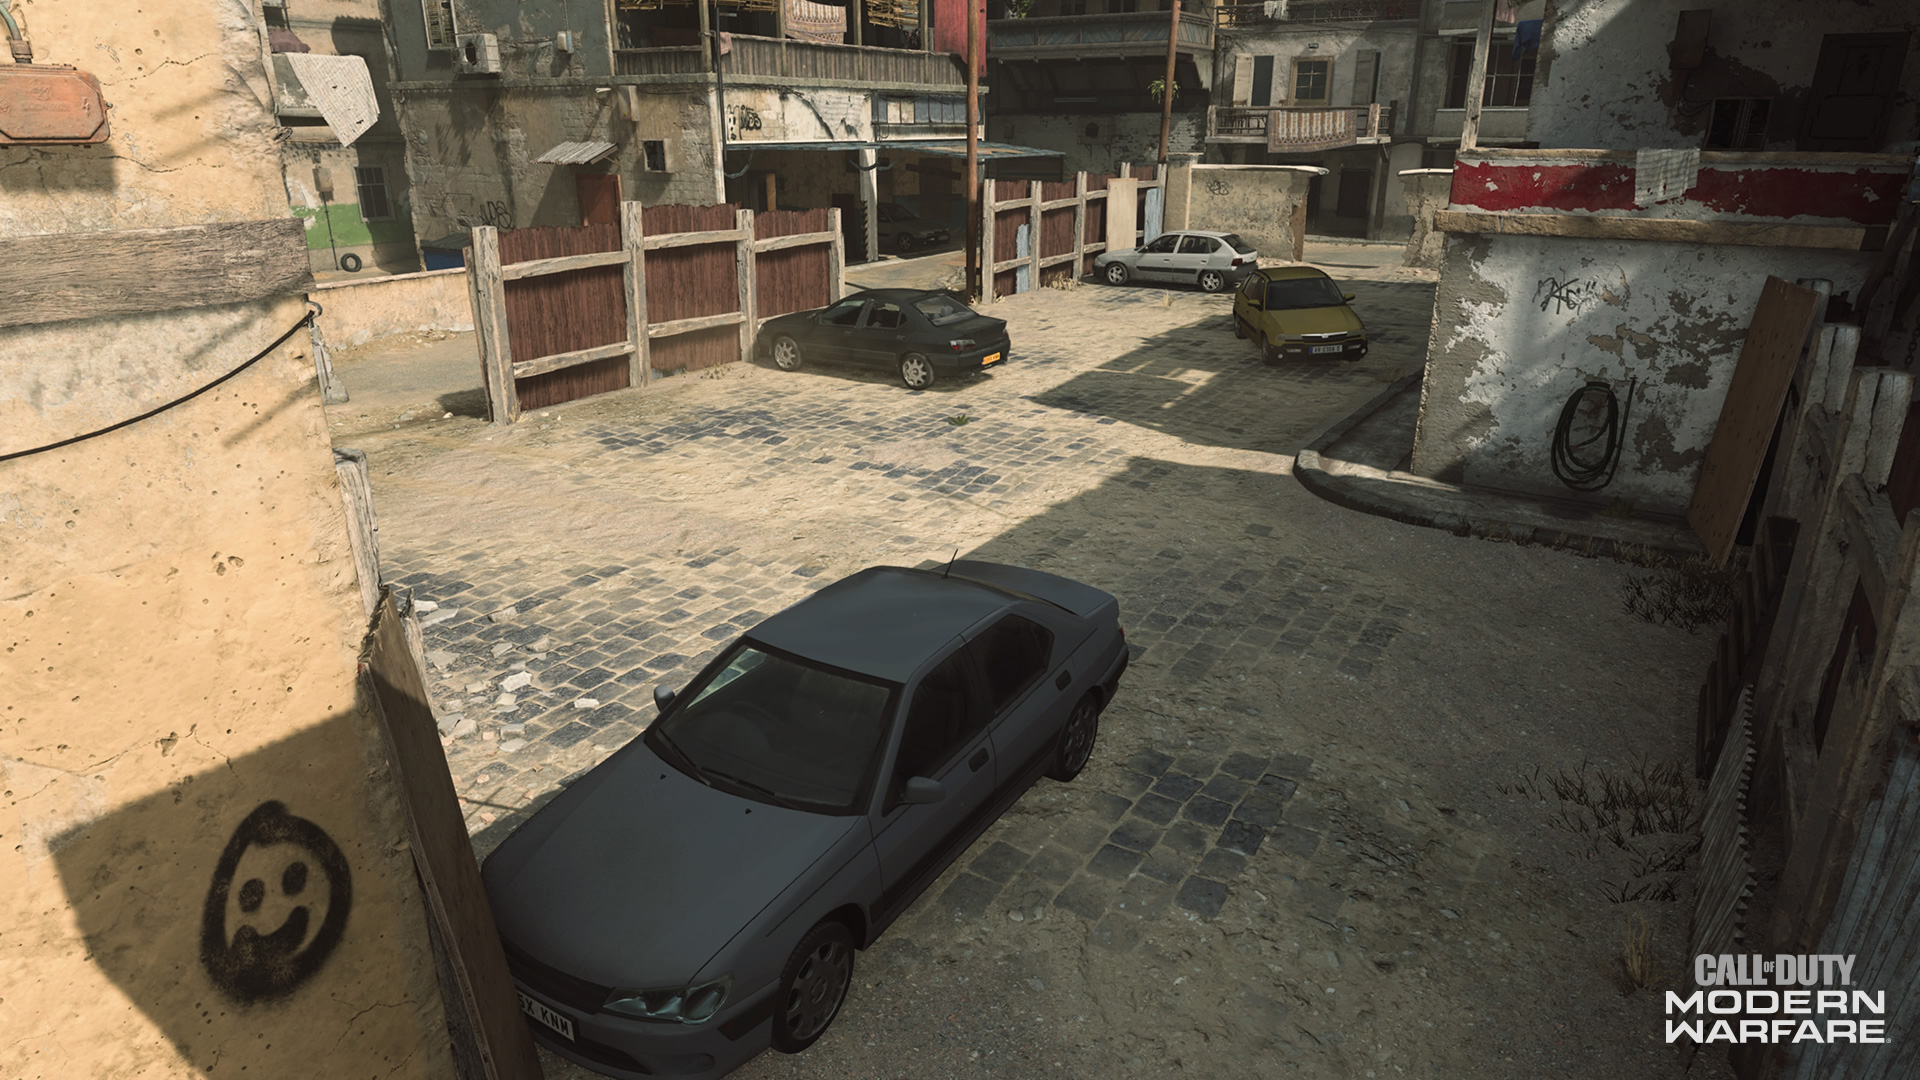
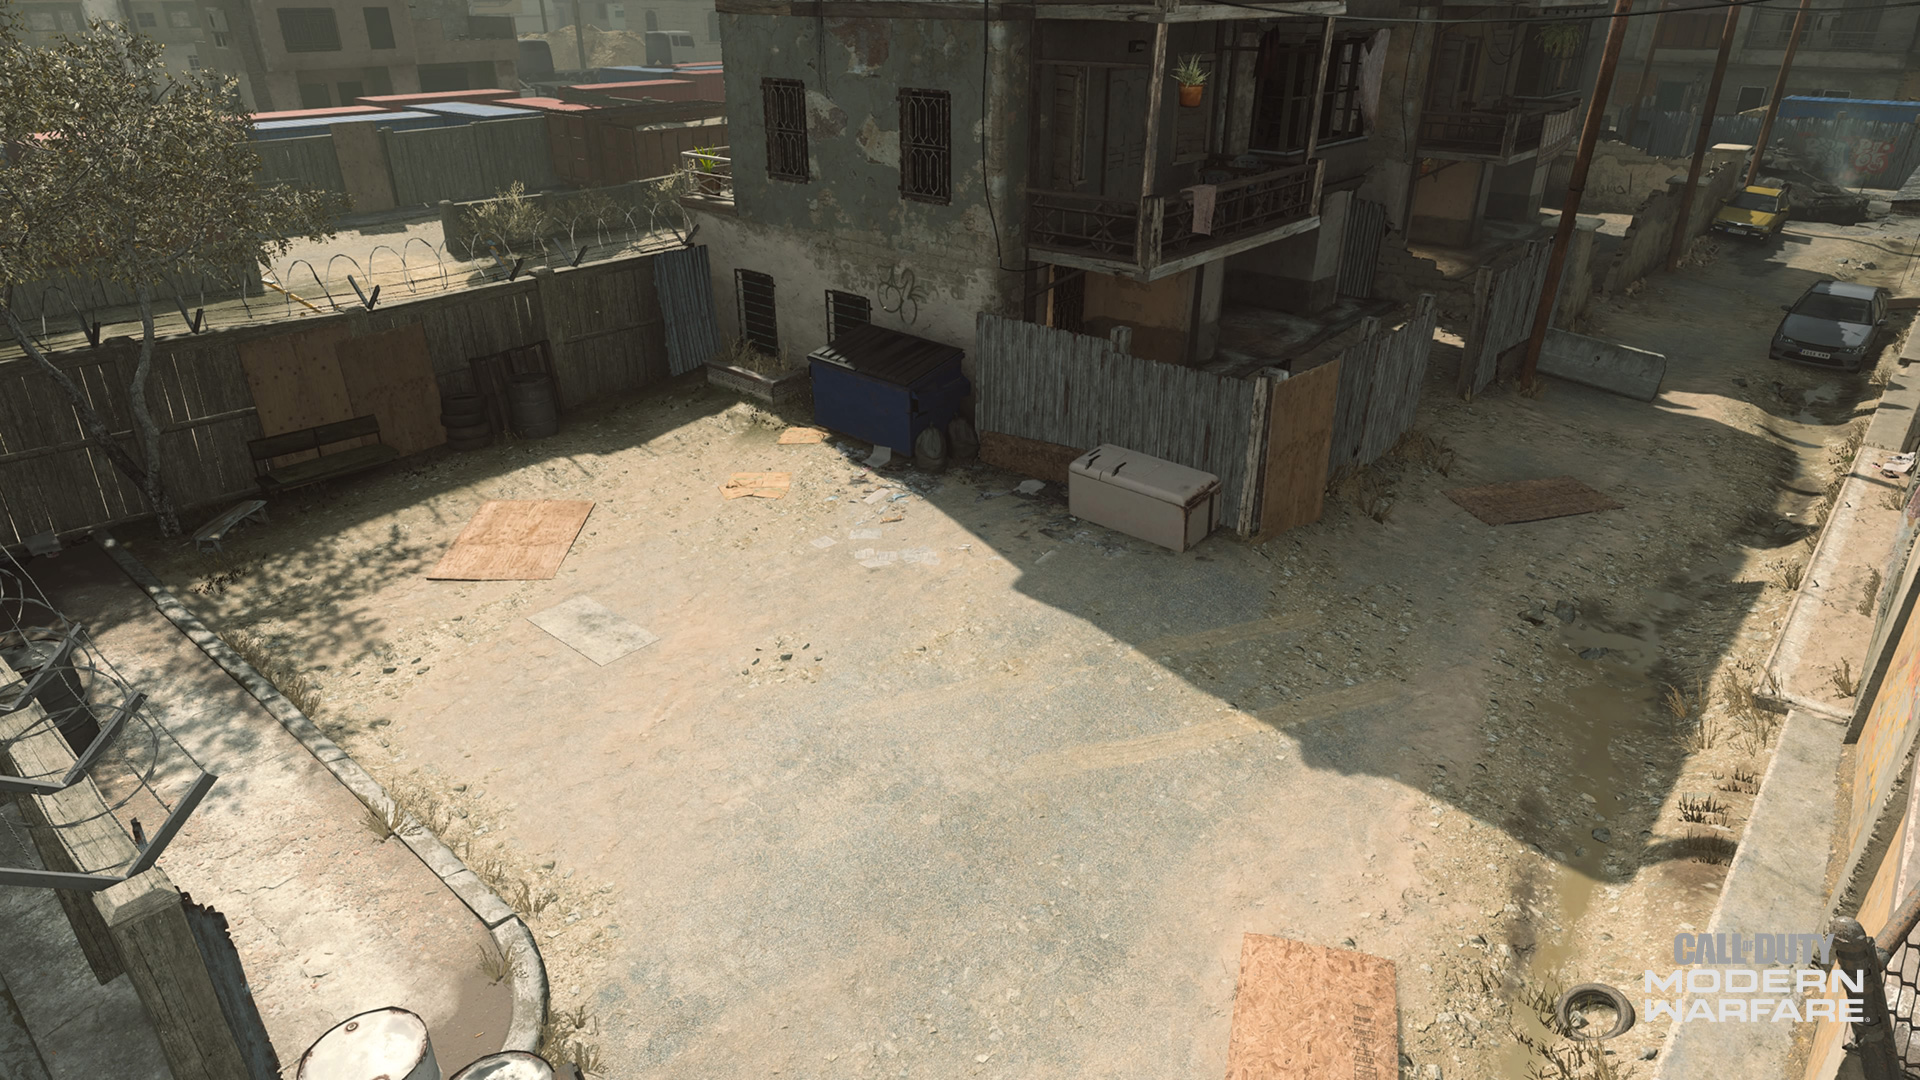
6. Parking Lot
Allegiance members will most likely spill into here if they decide to go for Backlot’s south lane off their initial spawn. Outside of a few parked cars and a notable back corner, this serves as a transition are to the Bike Shop and Main Street.
Note the far back corner of this lot – you may want to double check this corner in case of someone visiting here to pilot a Killstreak.
Also, demolitionists should beware: the cars found in here can, and will, explode, so think twice before sending a rocket or a grenade over here.
7. Bike Shop
Whenever a resident needed a clean way to get around town, or just fix up their ride, they came to this two-story building right off Main Street.
Although the first floor is great for close-range fighting, the upper level is where snipers may congregate from the Allegiance spawn or from the center. With solid sightlines over the Parking Lot and down to part of the Construction Site, this proves to be a popular sniper spot outside of Backlot’s center.
Because there are entry points facing the Construction Site and Parking Lot, be sure you have someone else up here covering your flank or have some defensive equipment on hand to lock this building down.
8. Main Street
Wrapping around the center of Backlot on the West and North is Main Street, a transitionary area with little safe cover to take.
The cover that does exist are multiple parked vehicles, which can explode if they are hit with enough bullets or a well-placed equipment piece or rocket. Therefore, on Main Street, you are either one of two Operators: the one making longshots down these open lanes, or the one trying to get through here as quickly as possible to your next destination.
Whether it’s a sniper glint or intel on an enemy Killstreak coming, it’s a wise move to stay clear of the streets when danger is afoot.
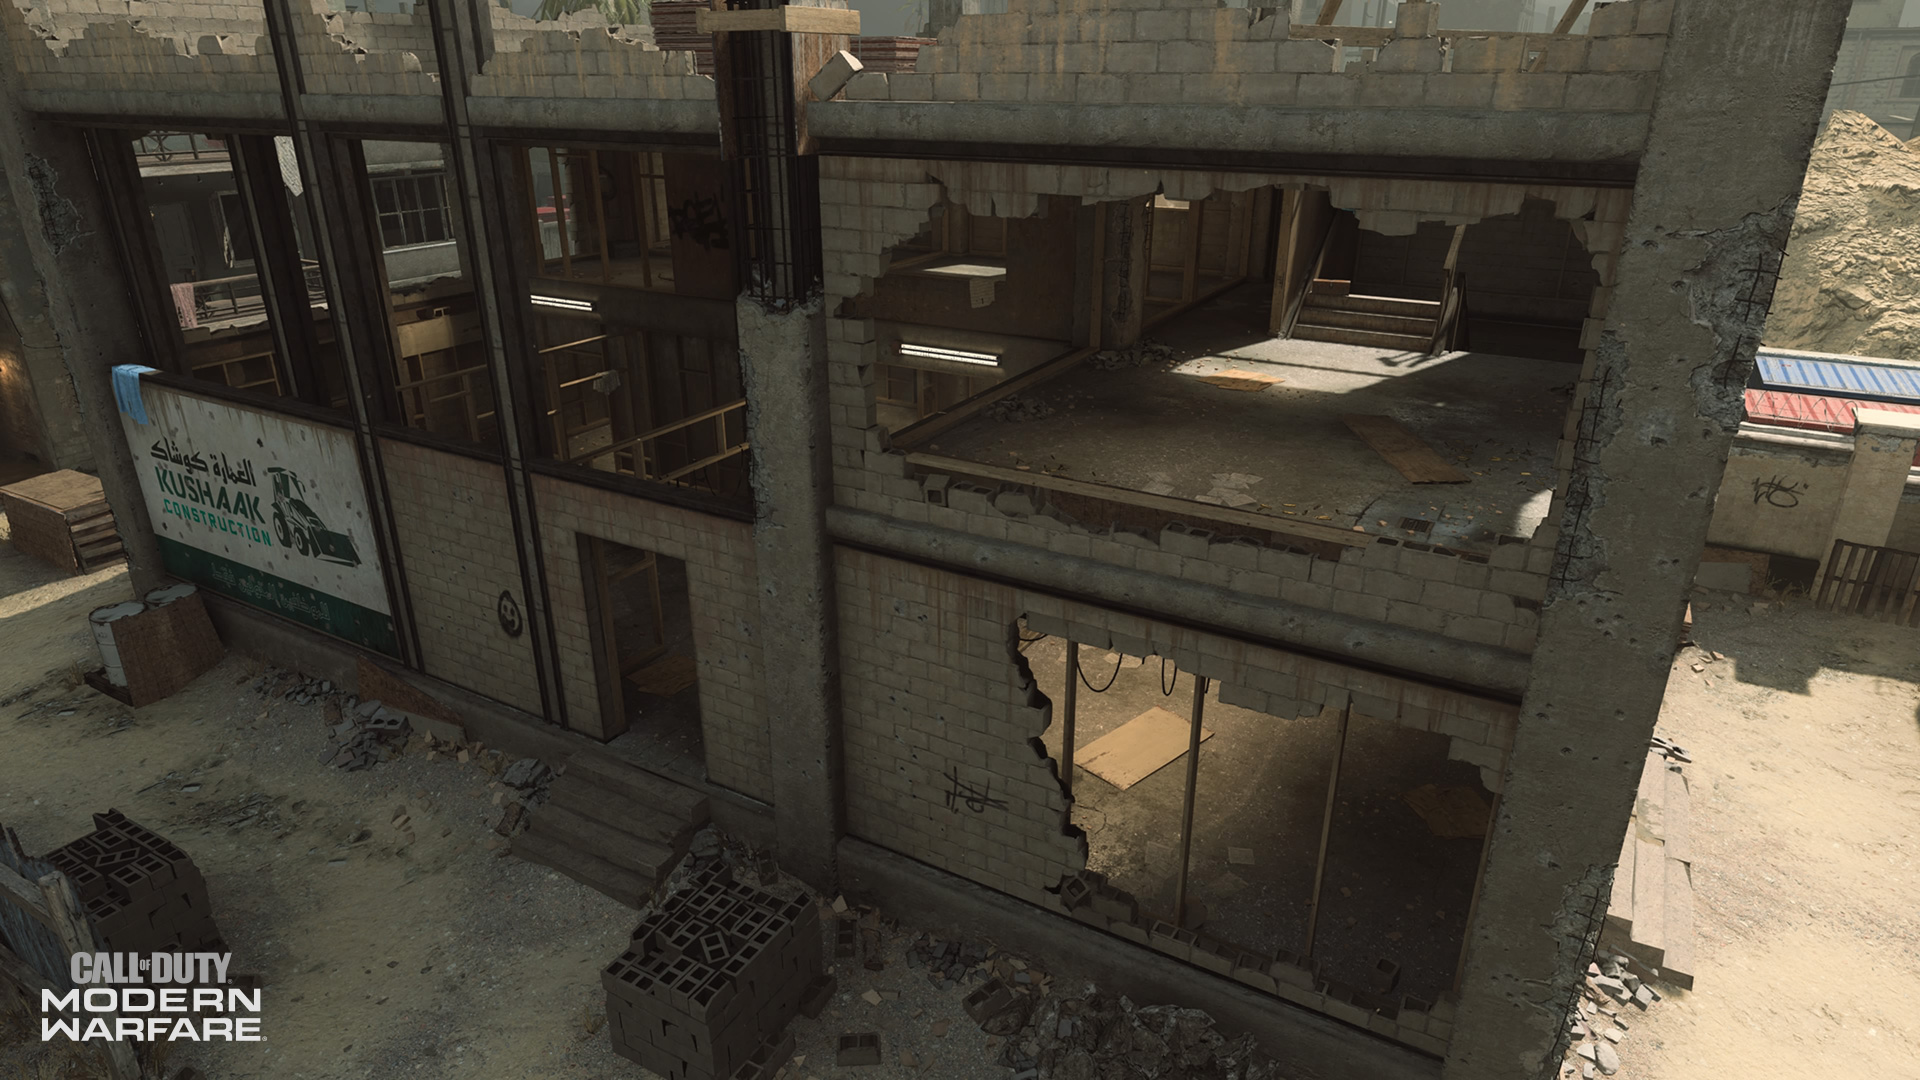
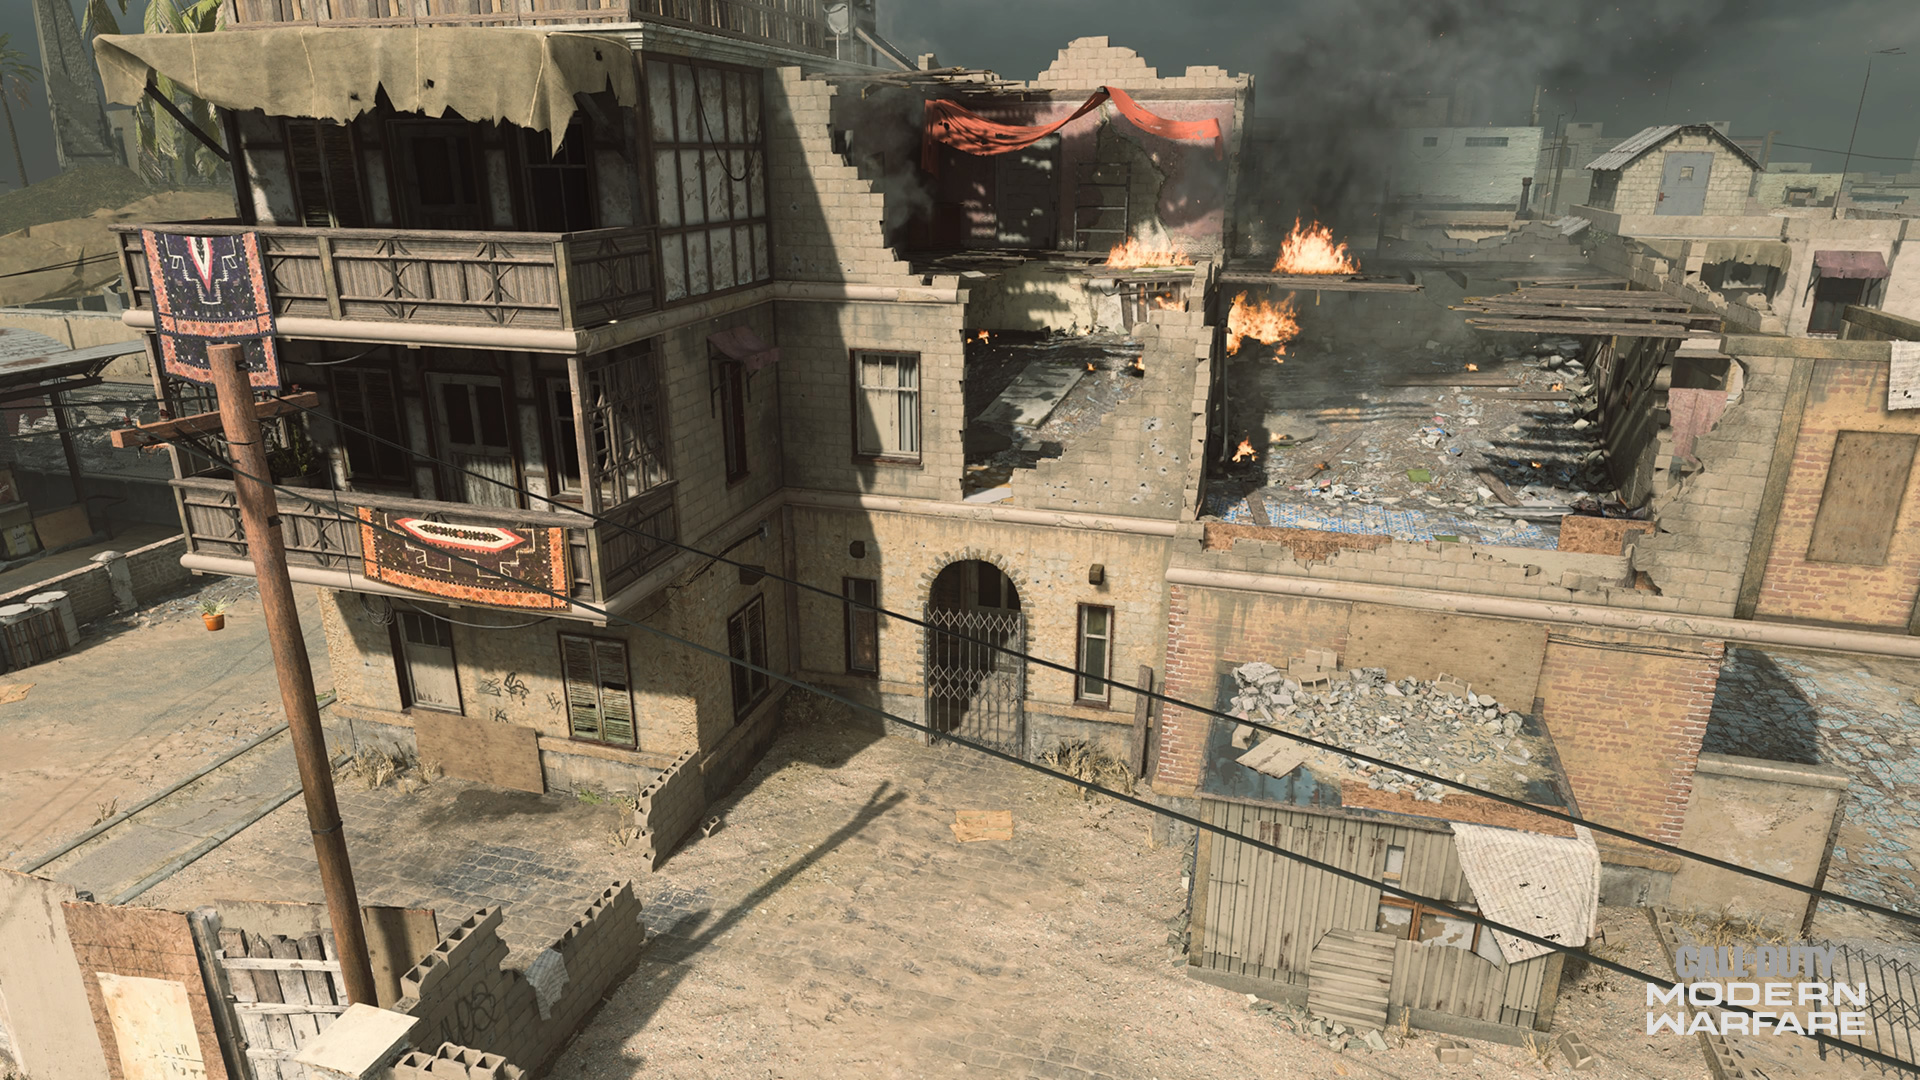
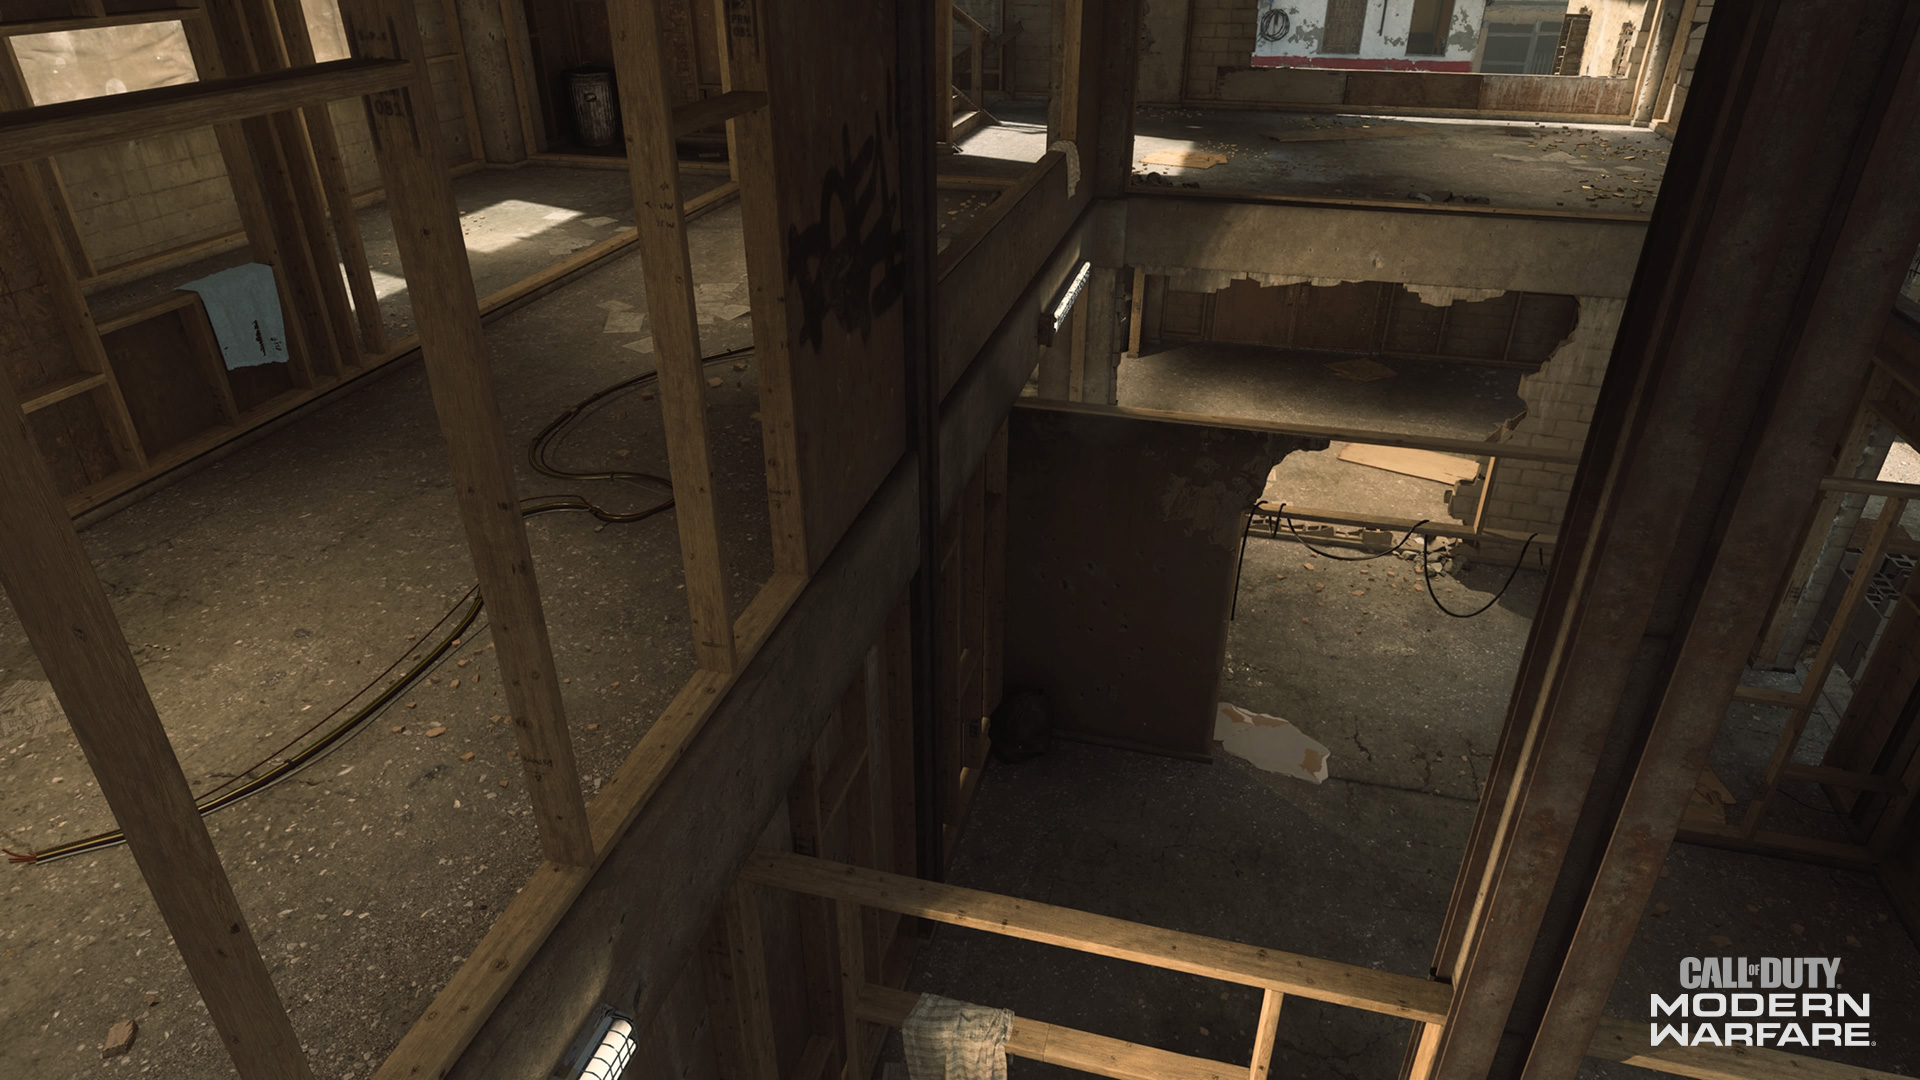
9. Destroyed Building
This partially Destroyed Building may be a fixer-upper, but to those looking for sightlines, this zone is prime real estate.
Although several bombed out walls leave you exposed to the elements, the views down Backlot’s center are rivaled by few other locations. Against someone sniping from the Construction Building – or someone attacking the Gas Station during objective game modes – the Destroyed Building acts as a great counter-sniping or overwatch position.
Be advised that there are not just two stairwells up to the “second floor” of this building; with some parkour, a dumpster out front can be mantled on and used to access the east side of this sniping perch. If you are trying to snuff out a sharpshooter here, it may be worth considering that unconventional route up to that Operator’s level.
10. Center
Part of Backlot’s true center is a zone simply named Center. From here, you can access the Tin Building, the Market, Main Street, and the Construction Site.
While this usually serves as a transition area with little cover to take, Center has plenty of objective importance across multiple game modes, such as Domination where it is the B flag site.
If you are trying to attack this area, figuring out the correct angles to lob grenades into it from the street or Construction Site can help you clear out any enemies that are on the objective. On the other hand, if your team is defending an objective here, it may be smart to only have one or two Operators on the objective while the others use the Market and Tin Building to protect them.
11. Tin Building
The Tin Building may not be the most accessible location, but with its open second floor and how it breaks up the Center, it has plenty of tactical use for multiple playstyles.
For the run-and-gunner, you could bait someone in the Center to chase you down the small alley it creates before you hit them with a close-range punch.
As for snipers – or even an assault rifle user – the second floor of this building provides decent sightlines over mid-map and even points west. Using the back ladder to climb up here, shoot through the openings made by the lack of wood and tin panels to pick off enemies down range.
Because there is no roof here, beware of enemy Killstreaks that can, and will, take you out from the top-down.
12. Market
This small two-story building is the other main structure flanking the Center, providing snipers with fantastic views of the surrounding area as well as cover from Killstreaks.
In objective game modes where the center of the map is important, such as Domination or multiple times during Hardpoint and Headquarters, locking down this building could be advantageous to your team’s success. From here, you can pick off players roaming through Backlot’s center, as well as counter-snipe those who like to hole up in the Construction Building.
This building even acts as a Hardpoint hill or Headquarter in those respective game modes, with the hill/HQ being on the second floor. When trying to attack this building during those game modes, a well-placed explosive could clear several defenders out, while objects around the building, such as a dumpster, could allow for some parkour into the Market.
13. Crawl Space
Nestled next to the Market building is a tiny alcove with a hole in the wall, large enough to fit an Operator lying prone.
Fights in this area will usually be won by those using close quarter builds, as there is plenty of cover in this cramped space. However, the more tactical use of the Crawl Space is as a transition area from the West Street to the Center.
If timed correctly, a silent Operator can shimmy through this hole and pop out on the other side, ready to flank an enemy team rolling through the Center. While it is less effective going from the Center to the Street, it could be necessary when trying to avoid an enemy player hot on your tail.
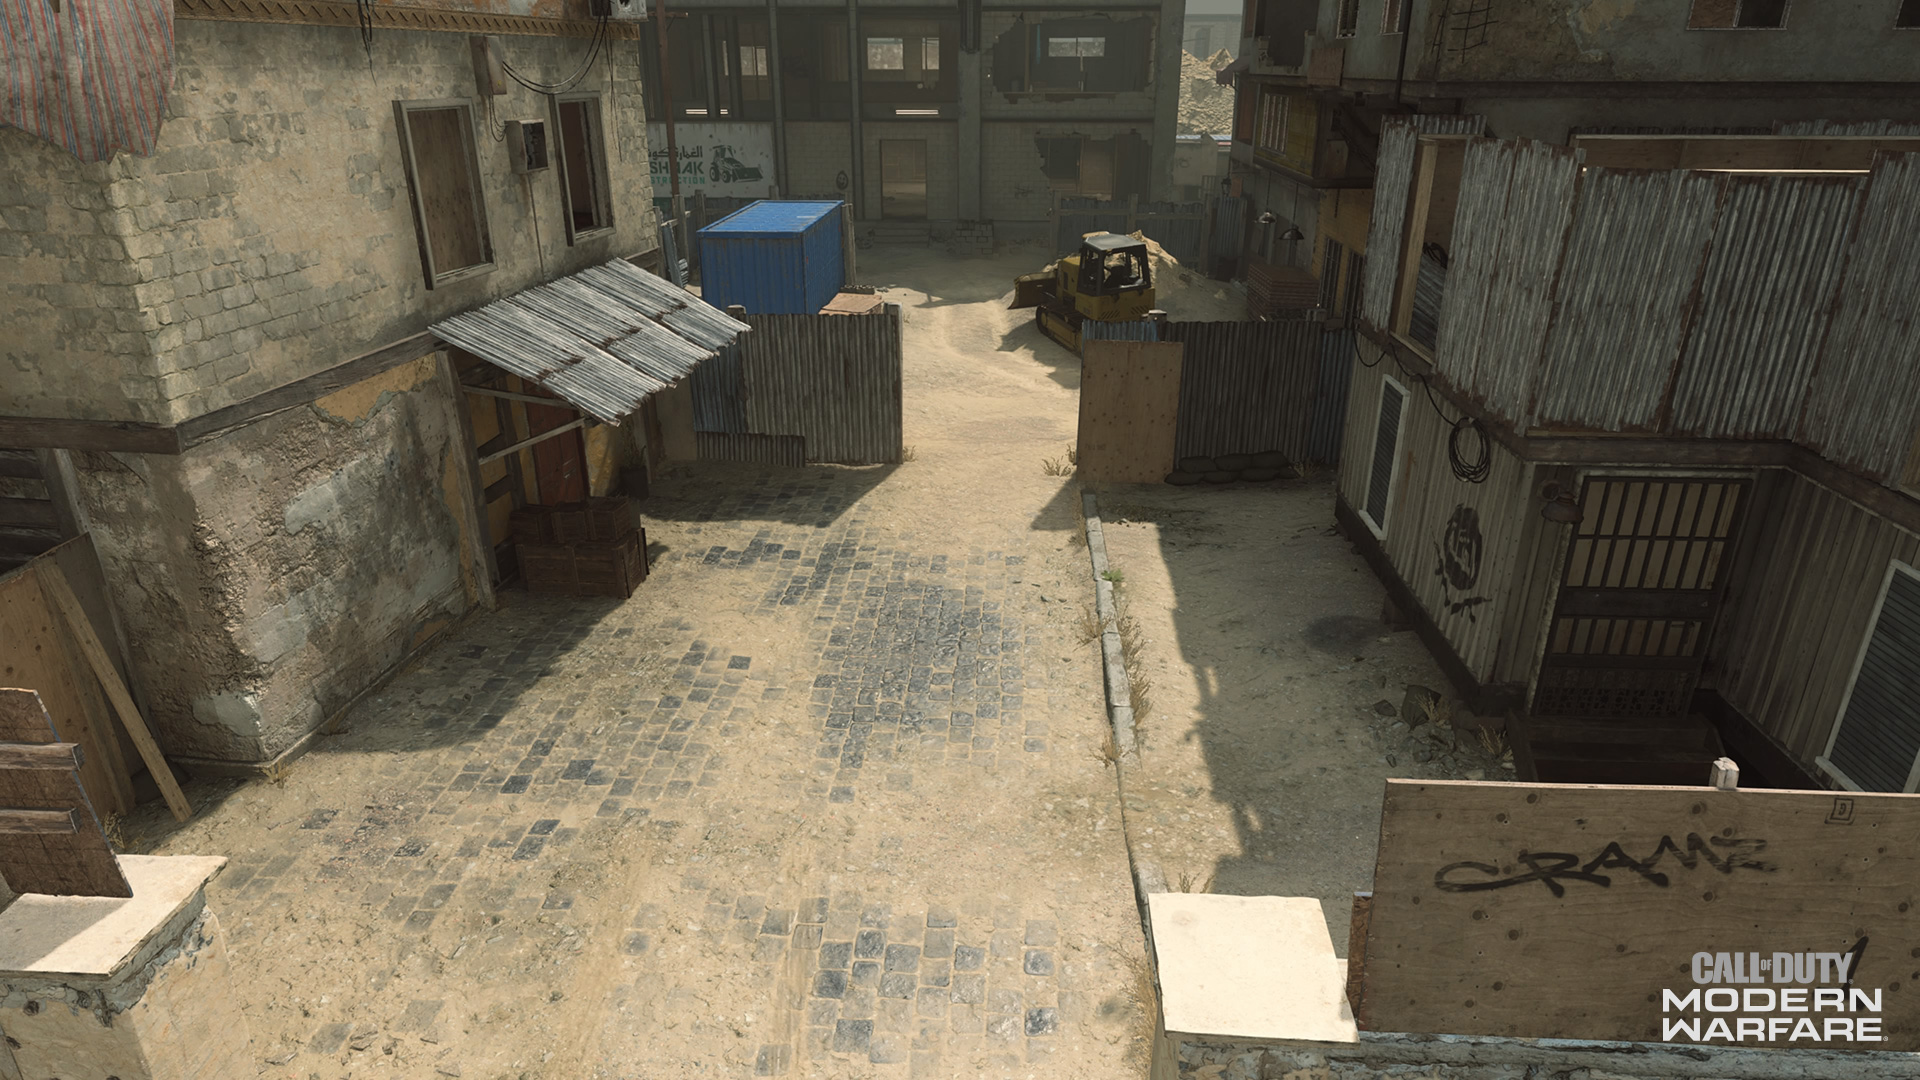
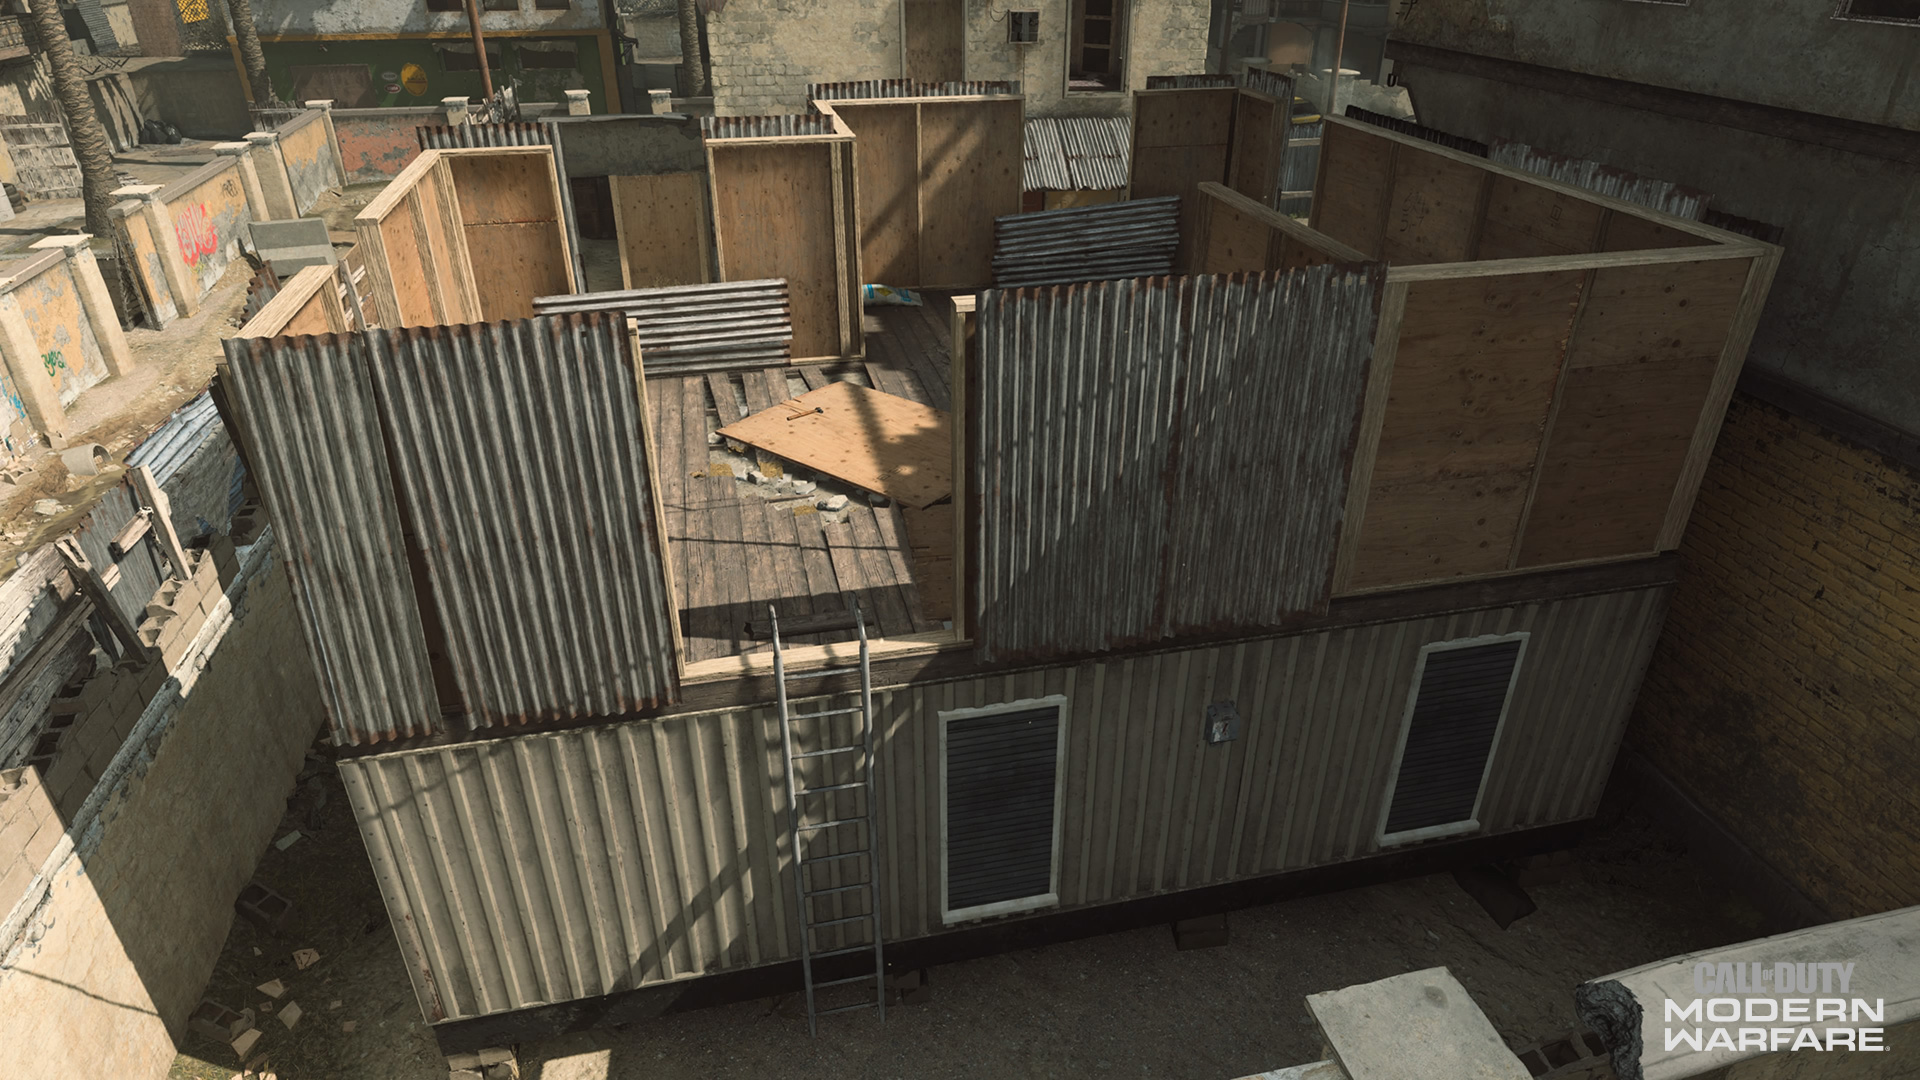
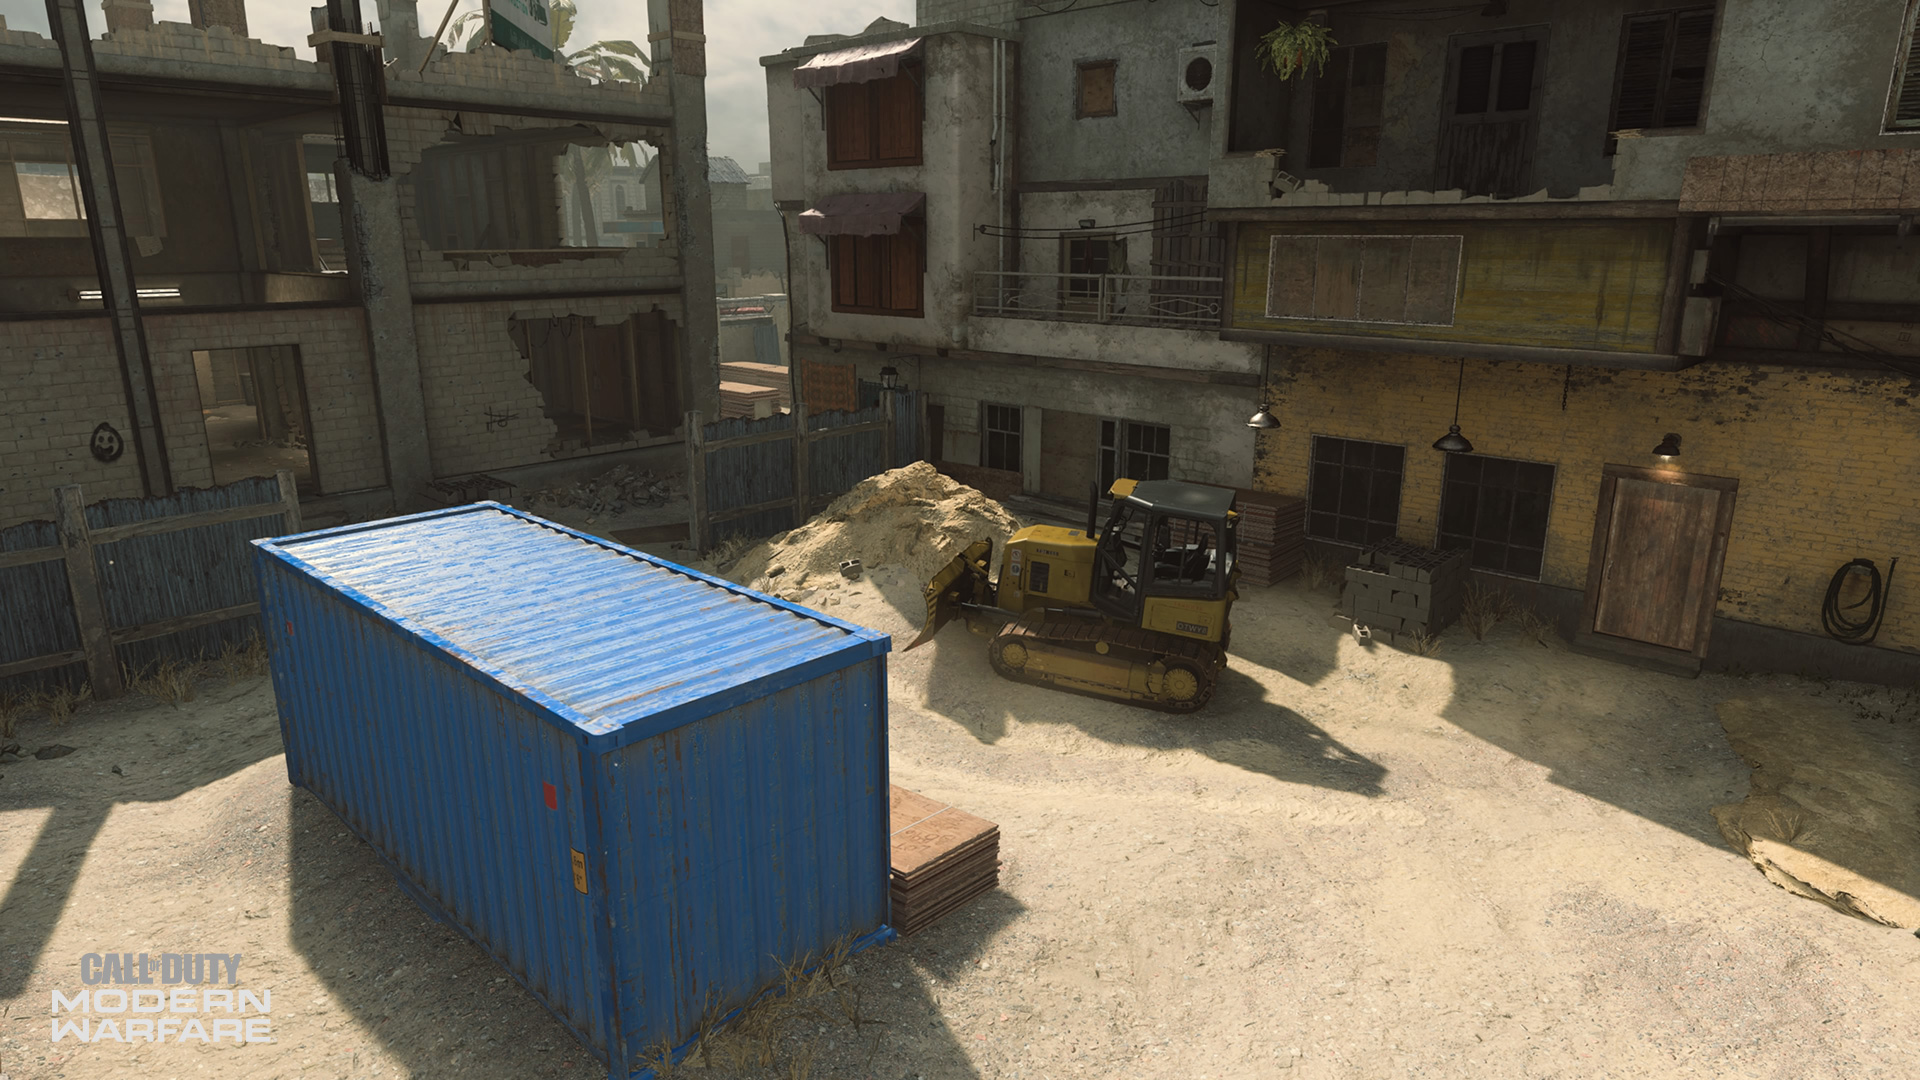
14. Construction Site
The other half of Backlot’s center is the Construction Site, which contains a few pieces of major cover, such as a shipping container and a giant mound of dirt, and even leaks over into the south lane, next to the Bike Shop.
Within this area, using cover can force close engagements where an SMG can shine. Even from end to end, the range on some SMGs can still allow you to knock down an enemy in a few shots.
However, the main concern while travelling through here is that it is at the foot of the Construction Building, which has been known to house snipers and other players looking to control Backlot’s Center. Be extra cautious when travelling through here, looking up towards the Construction Building’s second floor often for potential snipers.
15. Workshop
An open garage door facing West Street invites you into this small workshop, which can spill you out onto the Construction Site by way of a small door on the other side of the room.
This area is small enough to where a shotgun or a well-placed explosive could easily clear the room. And due to its position between the Allegiance’s initial spawn and Backlot’s center, traffic through here could be high.
Still, when a Killstreak comes to tear up the Backlot, the Workshop is a relatively safe area to hide in. If you are trying to hit someone inside of here from the top down, try angling your Killstreak through the open garage door, as it gives you the best chance of hitting someone or something in here.
16. Construction Building
The main building on Backlot’s south lane, the Construction Building is a magnet for those looking for longshots down mid-map. With 270 degrees of views around this building, this can be paradise for a skilled sniper.
The first level is where those trying to counter a sharpshooter with a CQB weapon can shine, as the partially constructed walls break up the otherwise open concrete floor. However, because the second story isn’t built-up either, Operators who roam down here will have to watch out for enemies shooting down a level onto them.
Speaking of the second floor, this is where sharpshooter will want to lock down off the break from their respective spawns. Doing so could give you the ability to make those initial picks needed for an early advantage in any game mode.
Still, this area isn’t without its flaws: its open design leaves it exposed to equipment and Killstreaks, which are recommended for knocking out anyone who claims squatter’s rights on the second floor.
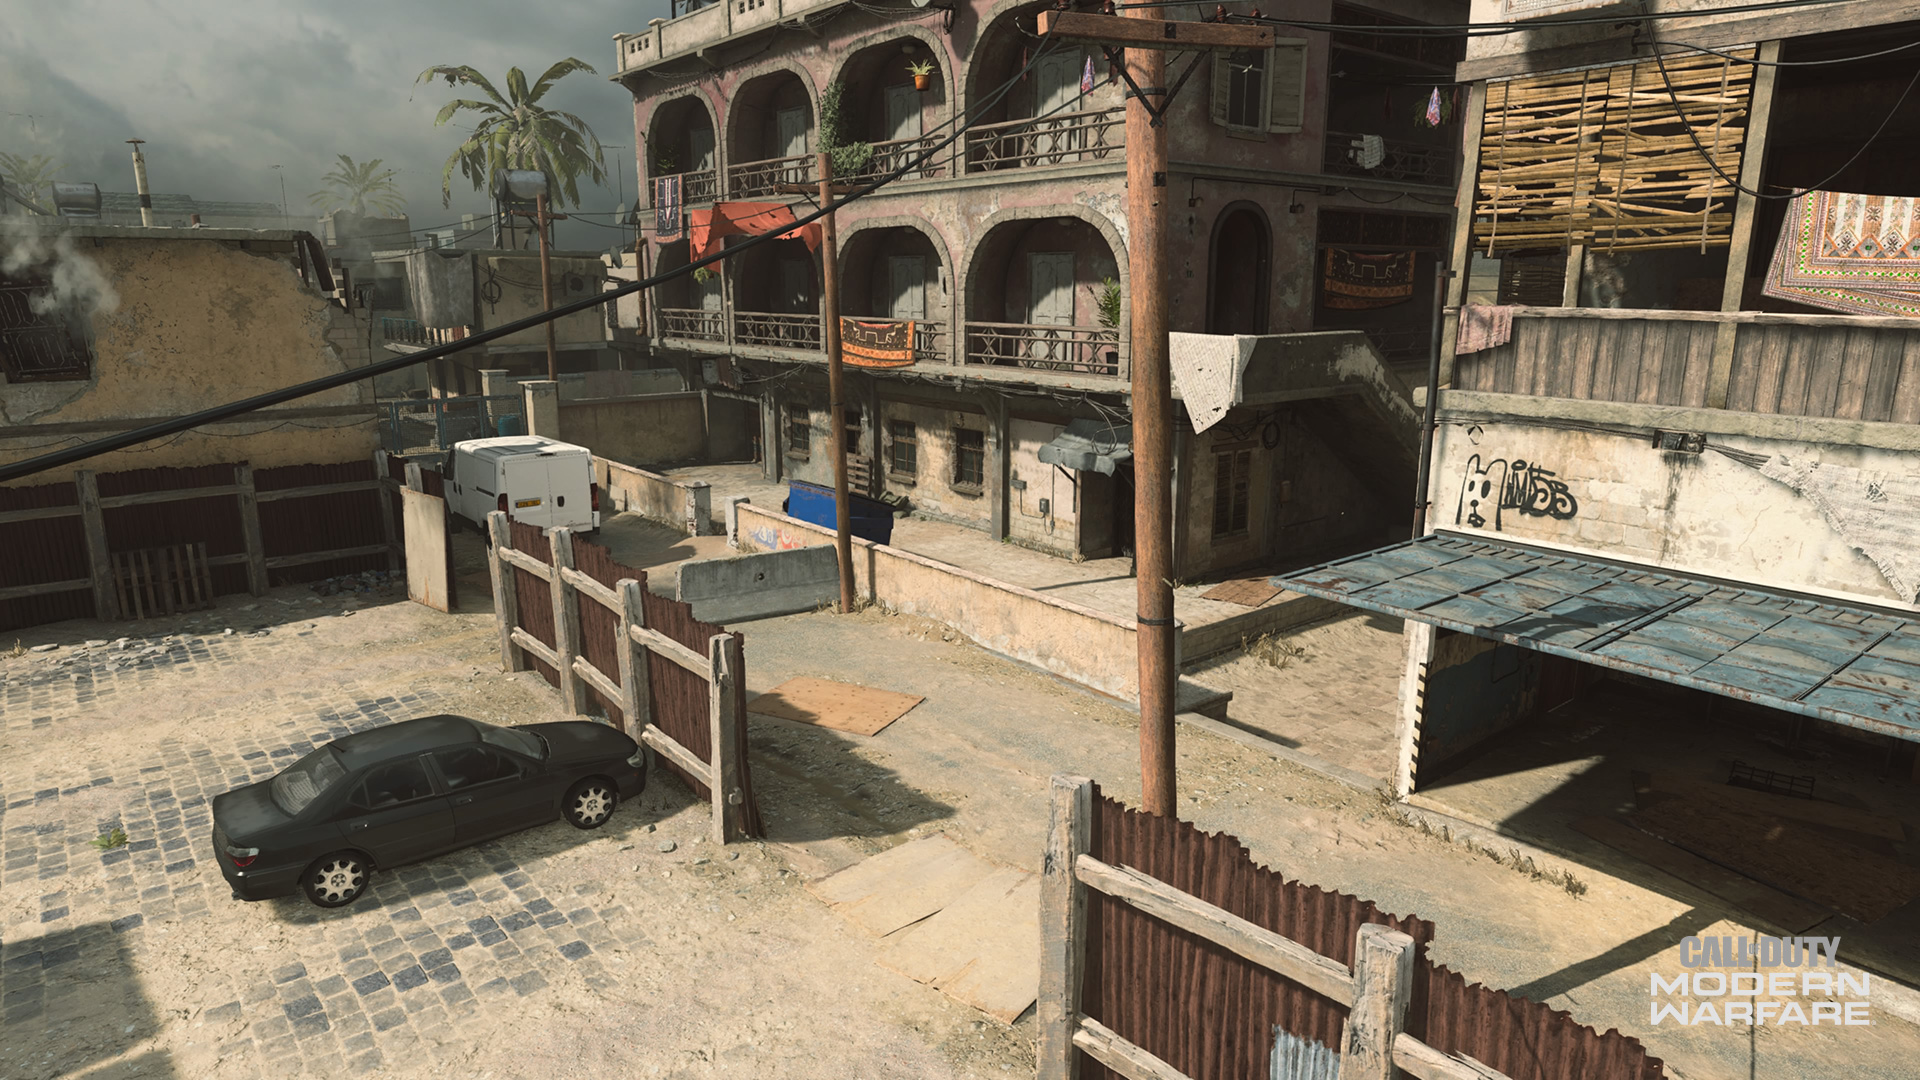
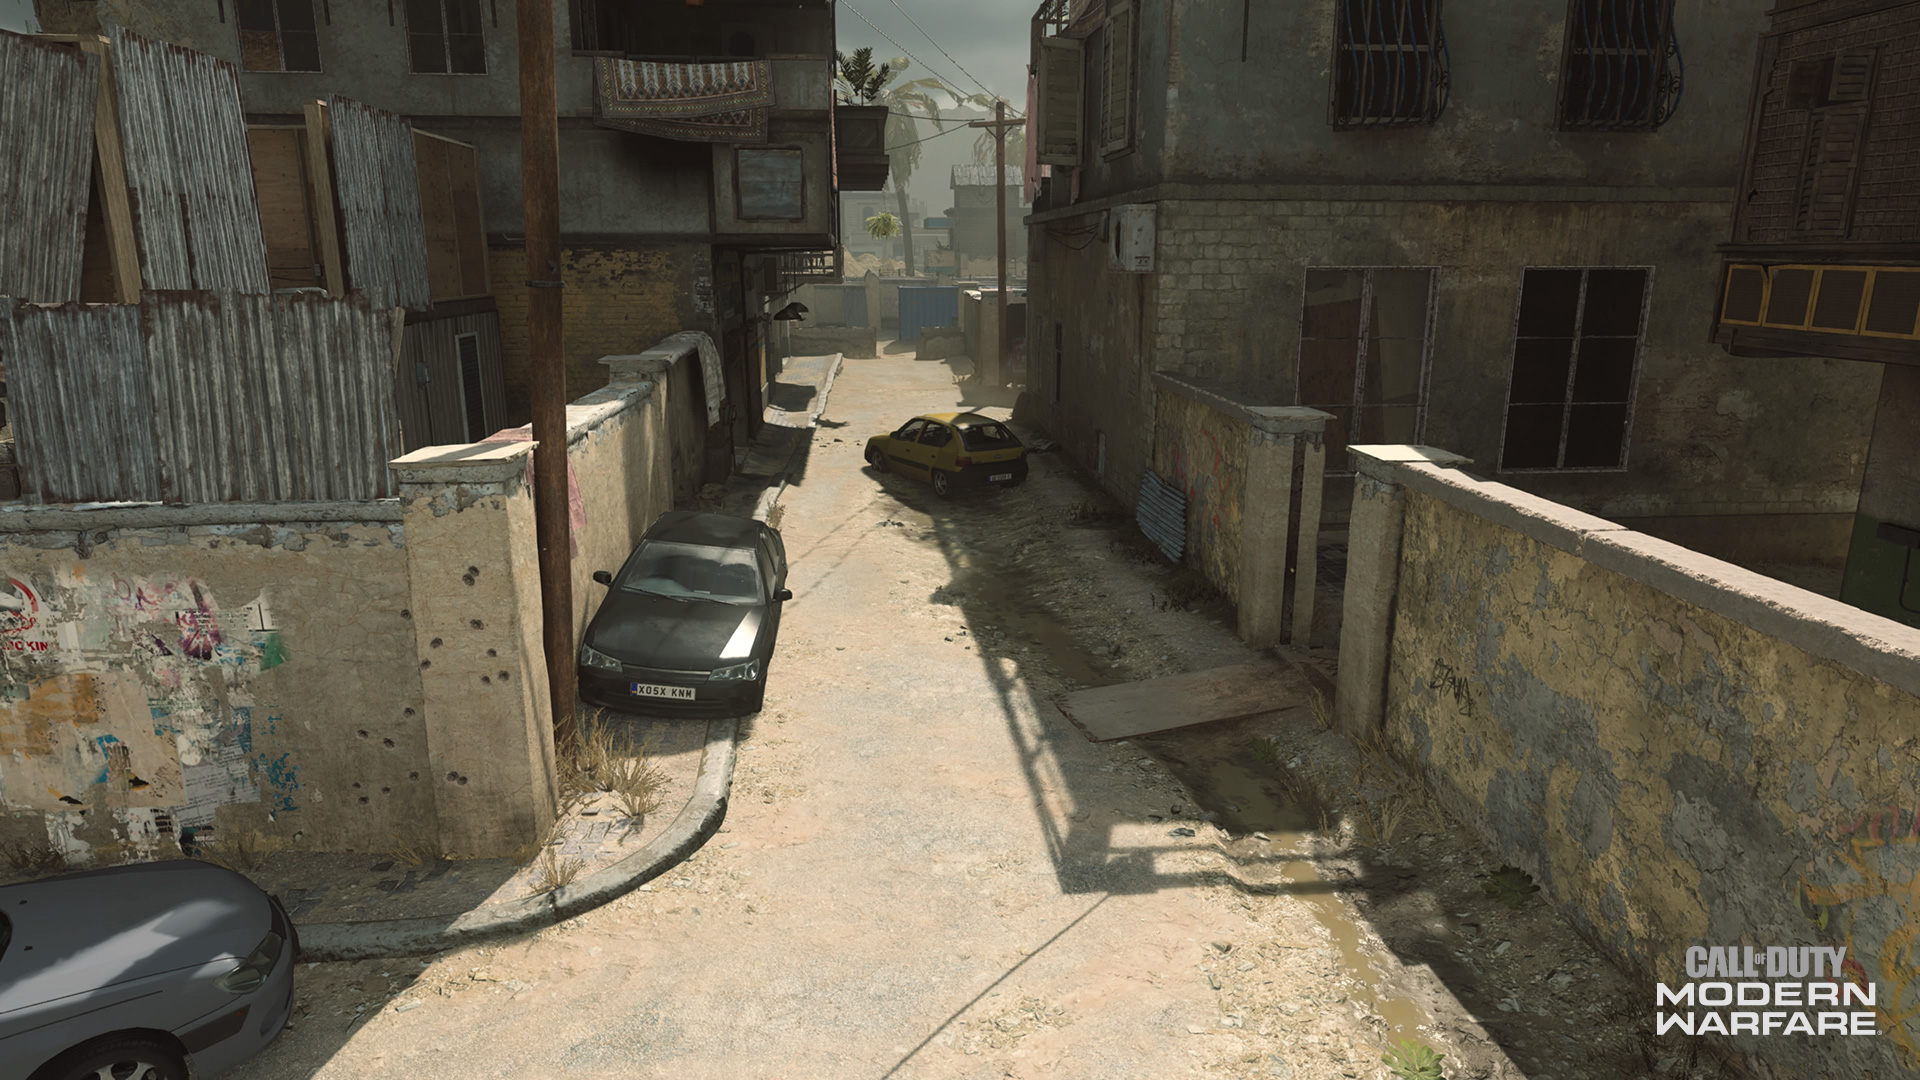
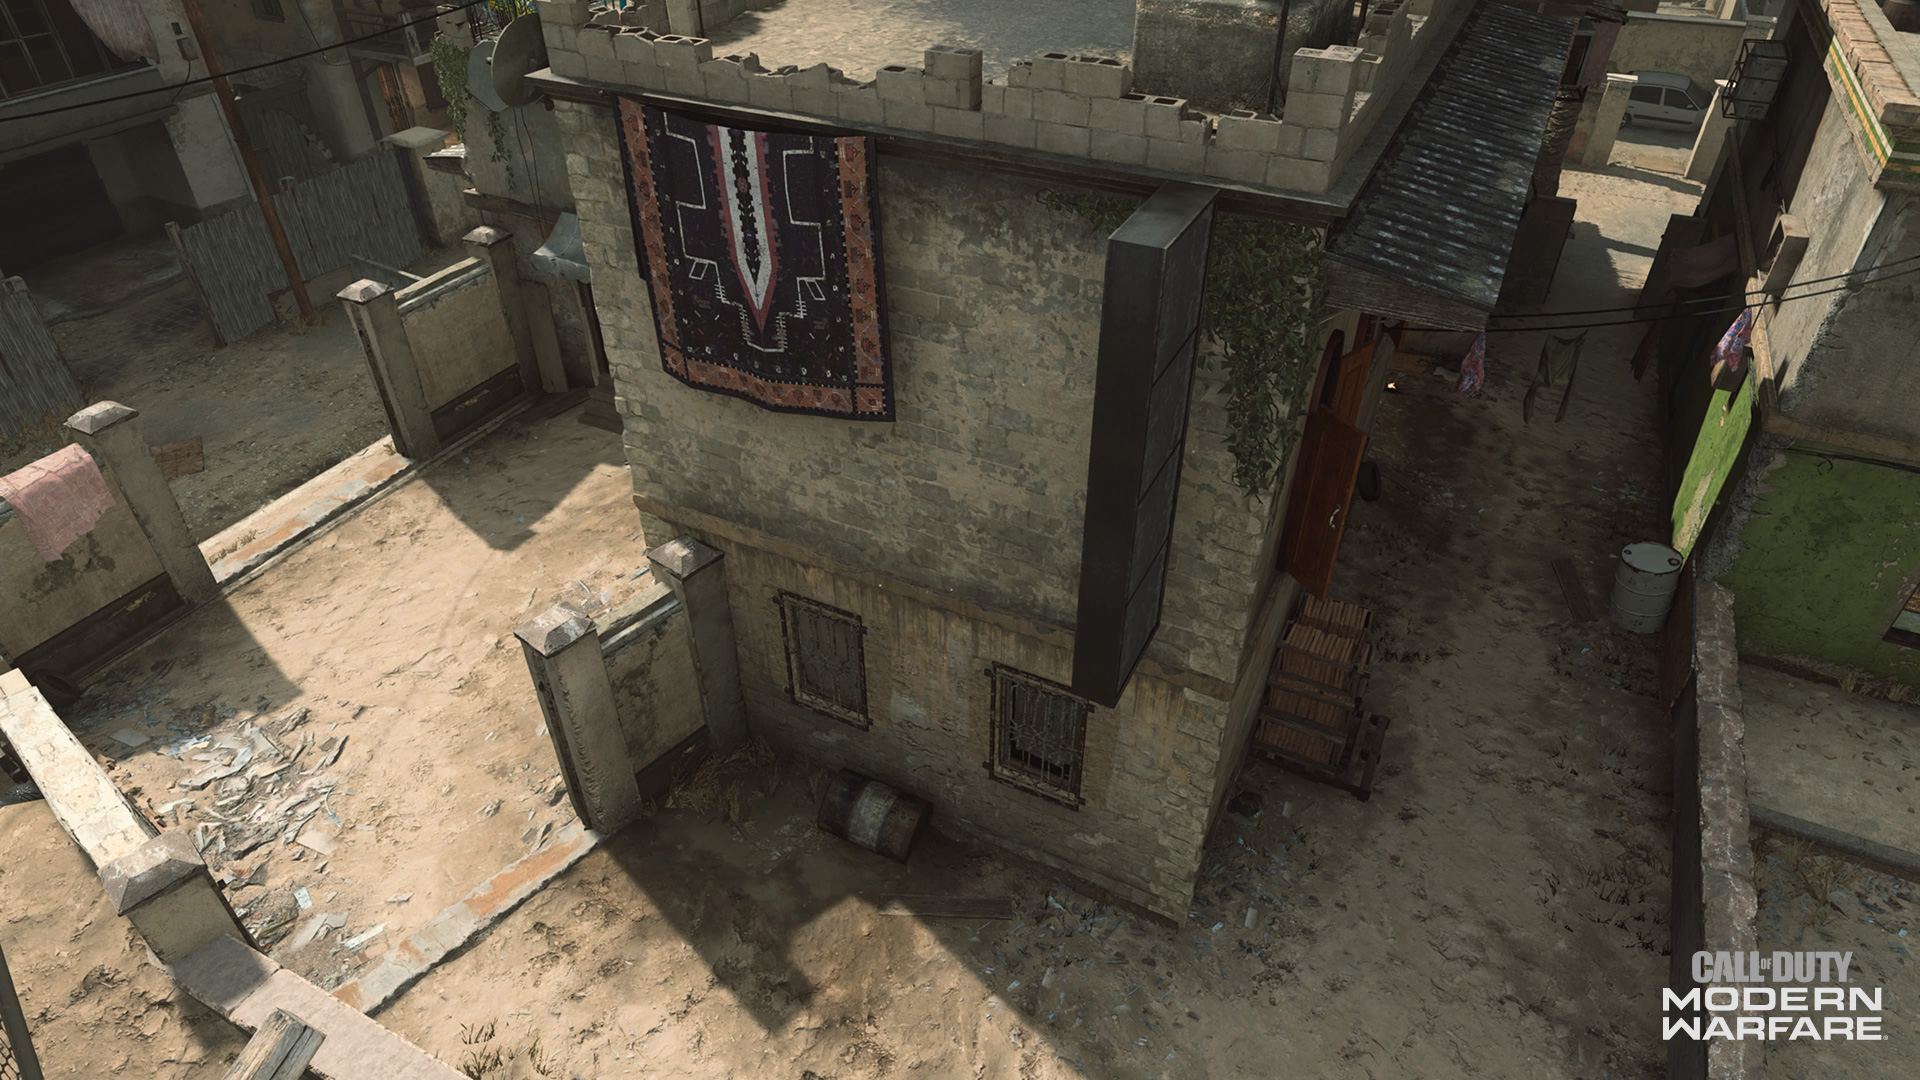
17. East Street – Coalition Spawn
Stretching from the eastern-most lot – the Coalition’s initial spawn in team game modes – all the way past the Tank and connecting to Main Street, East Street is the fast lane to multiple areas on Backlot’s east side.
The street itself offers little cover outside of a few cars that could explode, with a small row of houses on the side of the lot acting as a safer route to the Backlot’s south lane. You may have to hop over a few short walls to get to your destination, but overall, this is where players with close-quarter builds will want to run through rather than down a wide-open street.
Alternatively, there are a few chances to duck into the Passage, which offers a fast track into Backlot’s north lane.
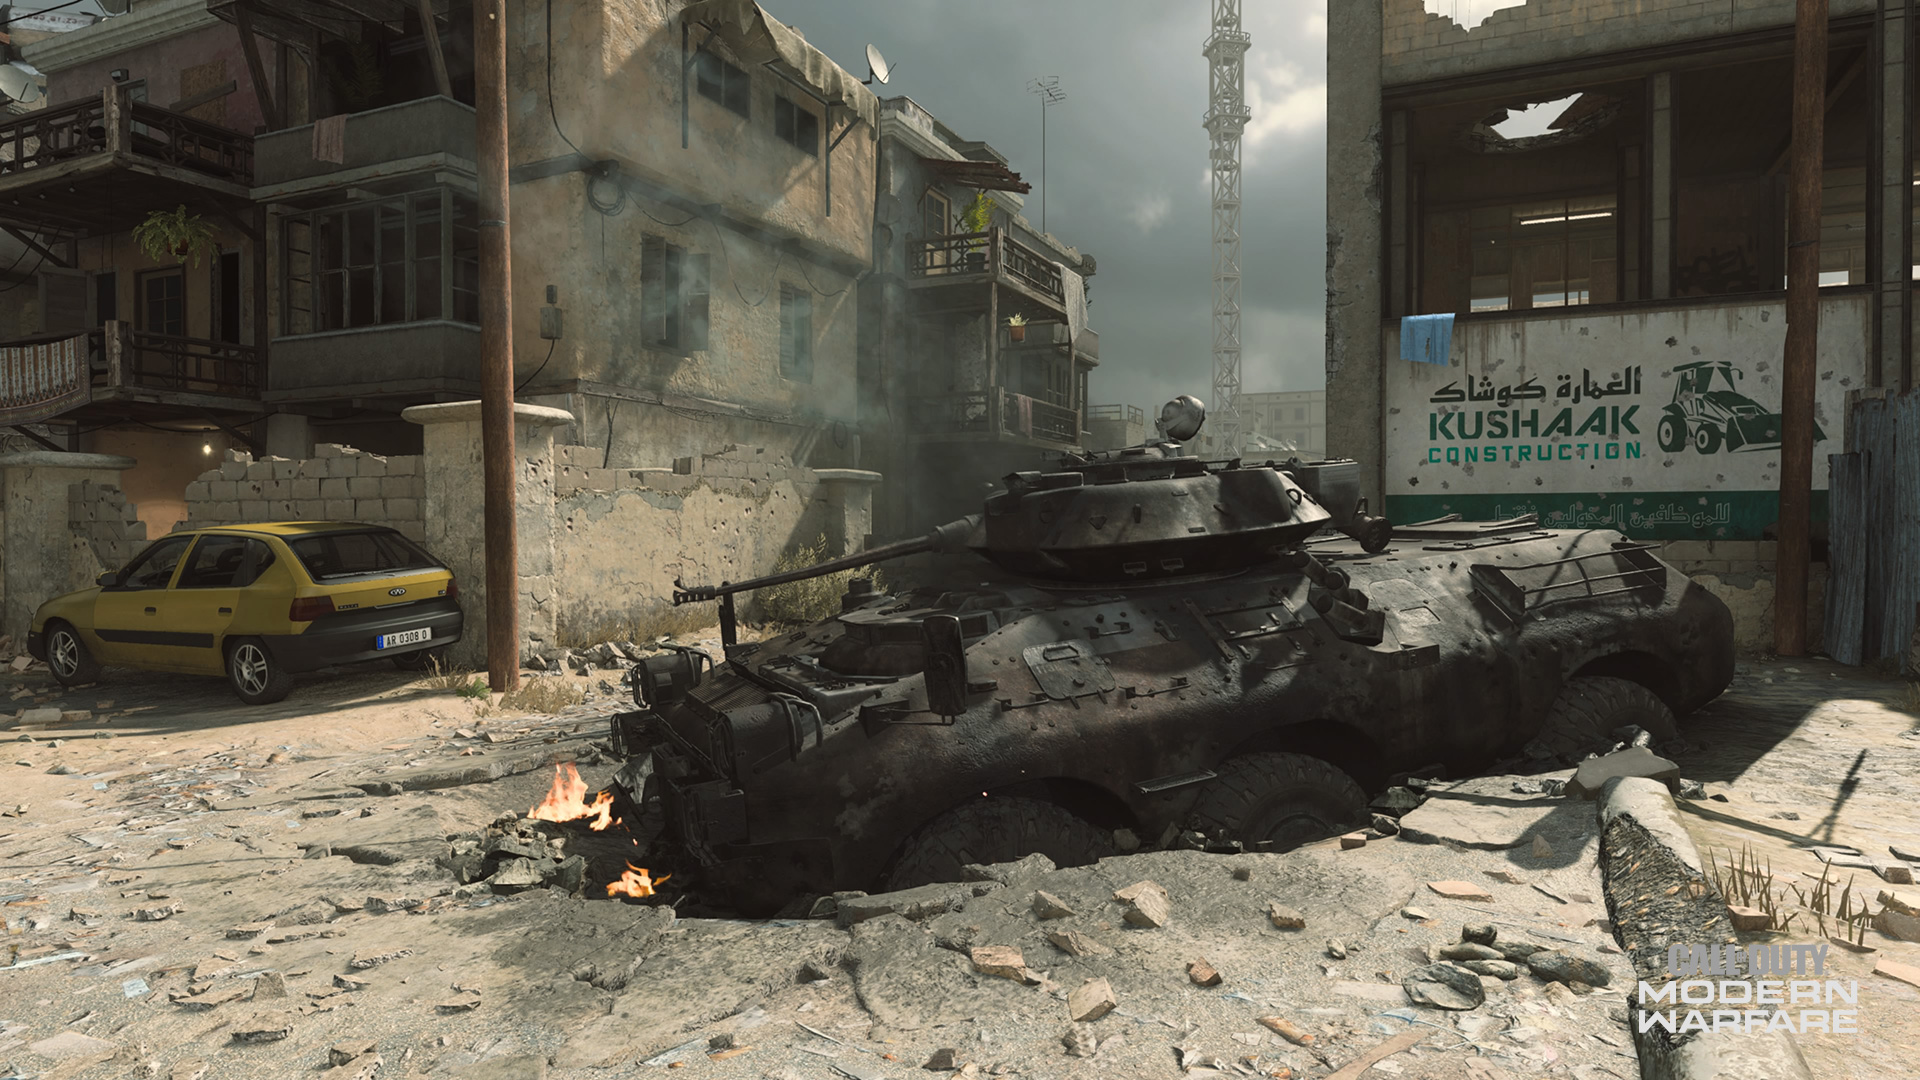
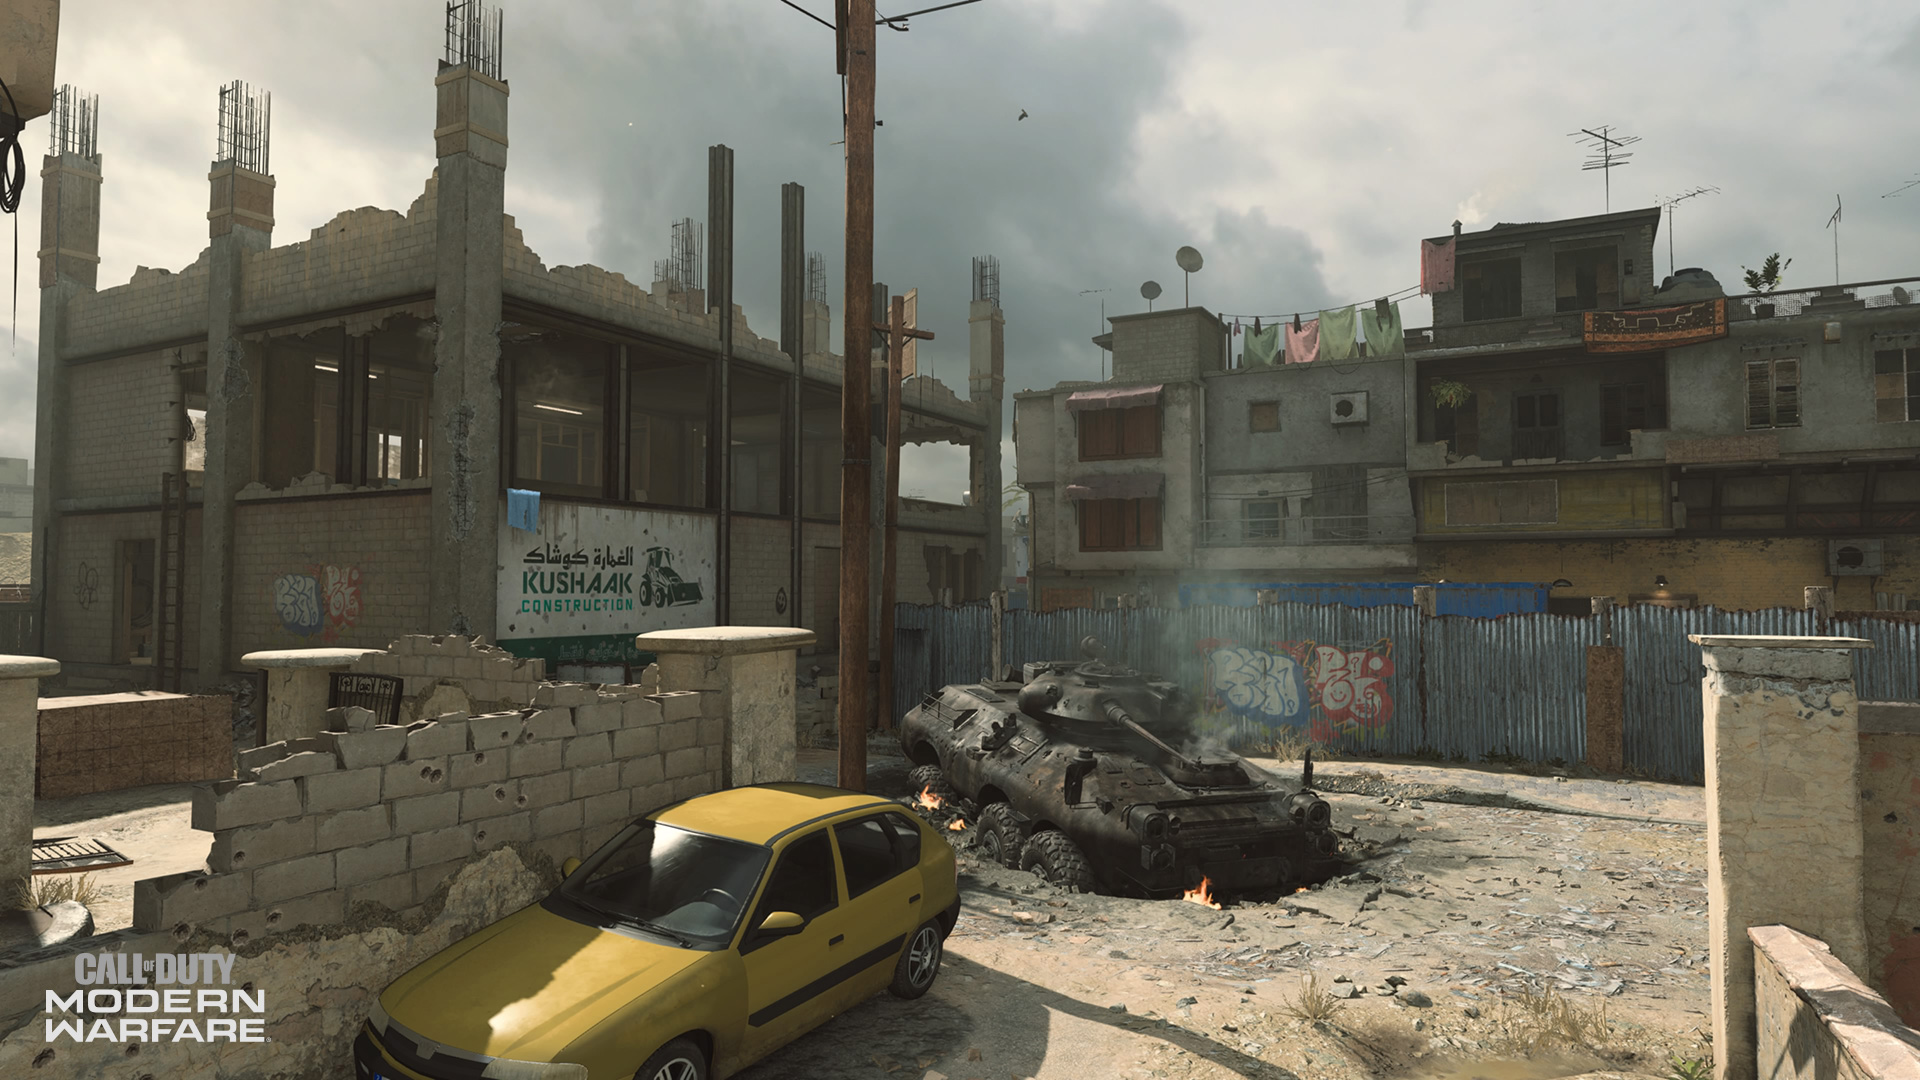
18. Tank
Stuck in the middle of East Street outside the Construction Building is a massive broken-down Tank.
The Tank itself has a few uses: as cover from those sniping from the Construction Building or elsewhere, as high ground to counter said snipers or to look down into mid-map, or a barrier to break up close range combat in this area.
No matter how this Tank is used, it is a major callout landmark that can help direct your team towards safety.
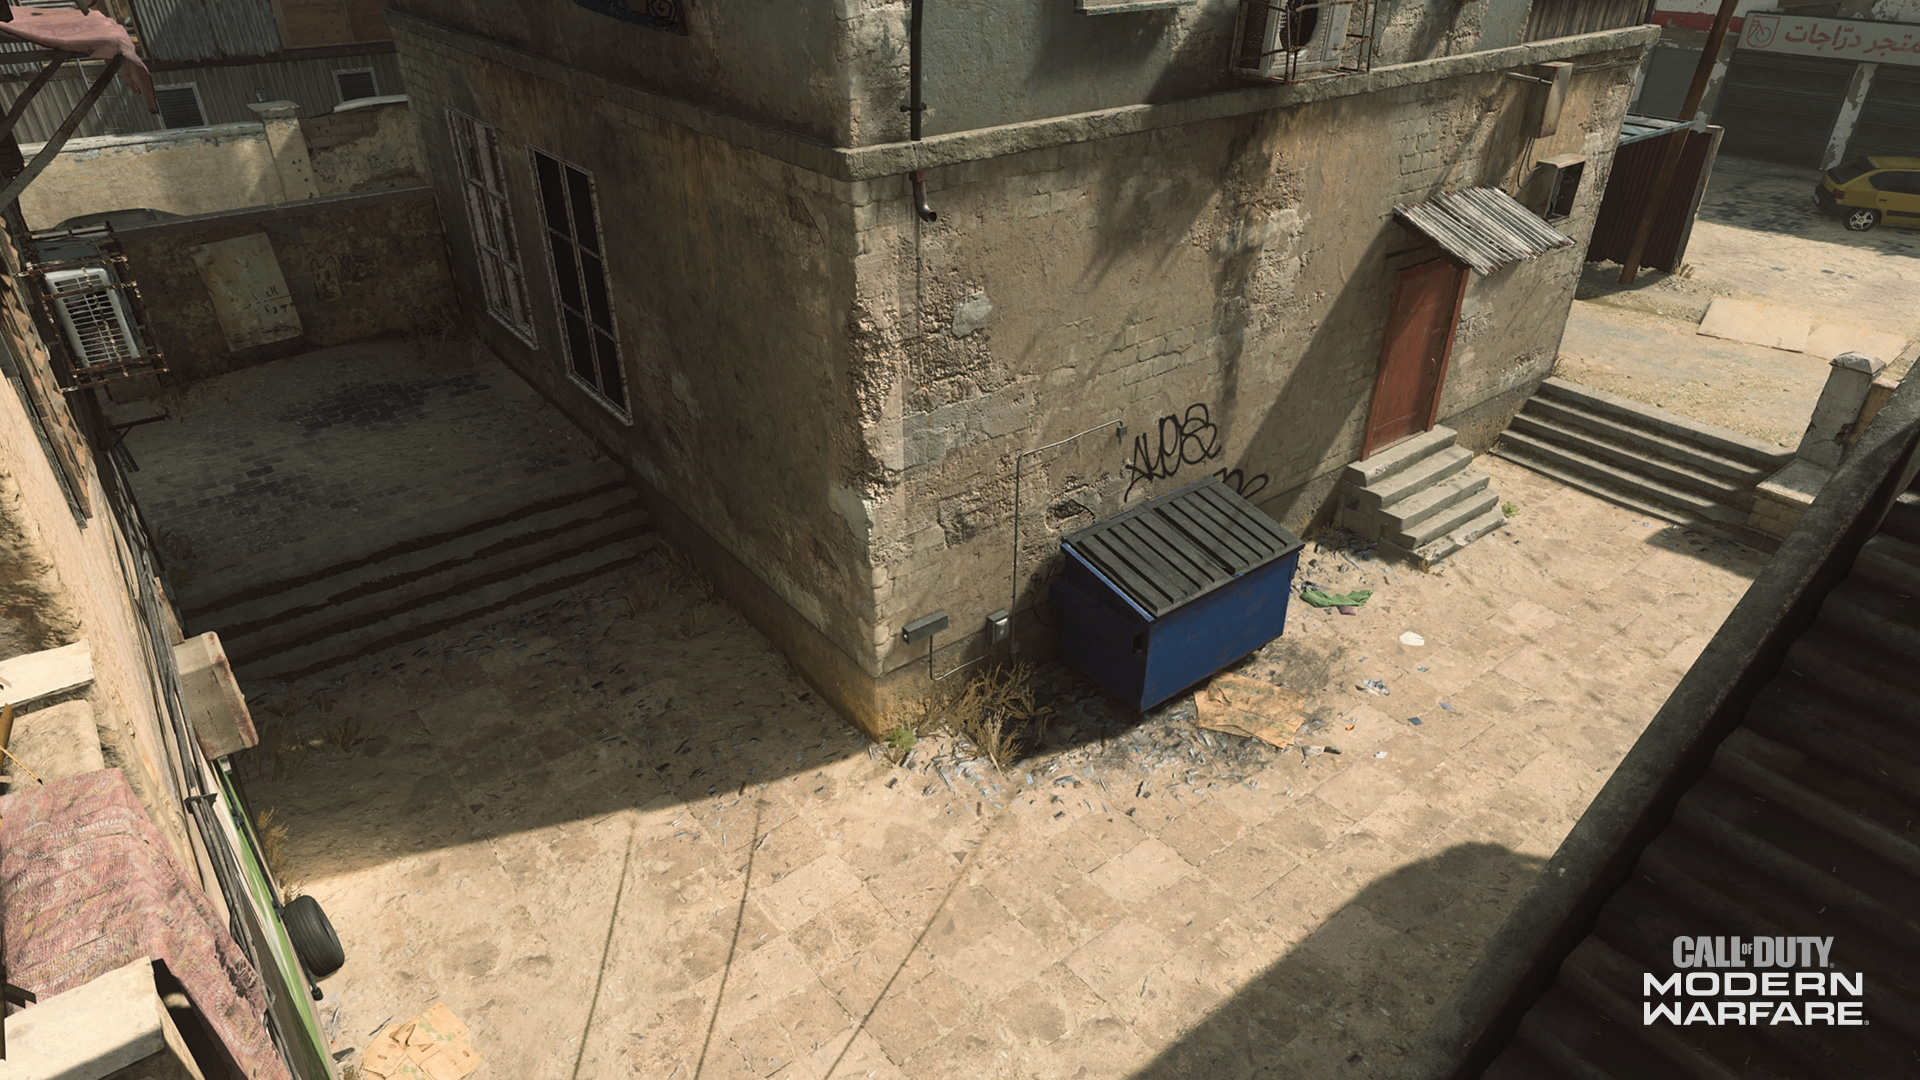
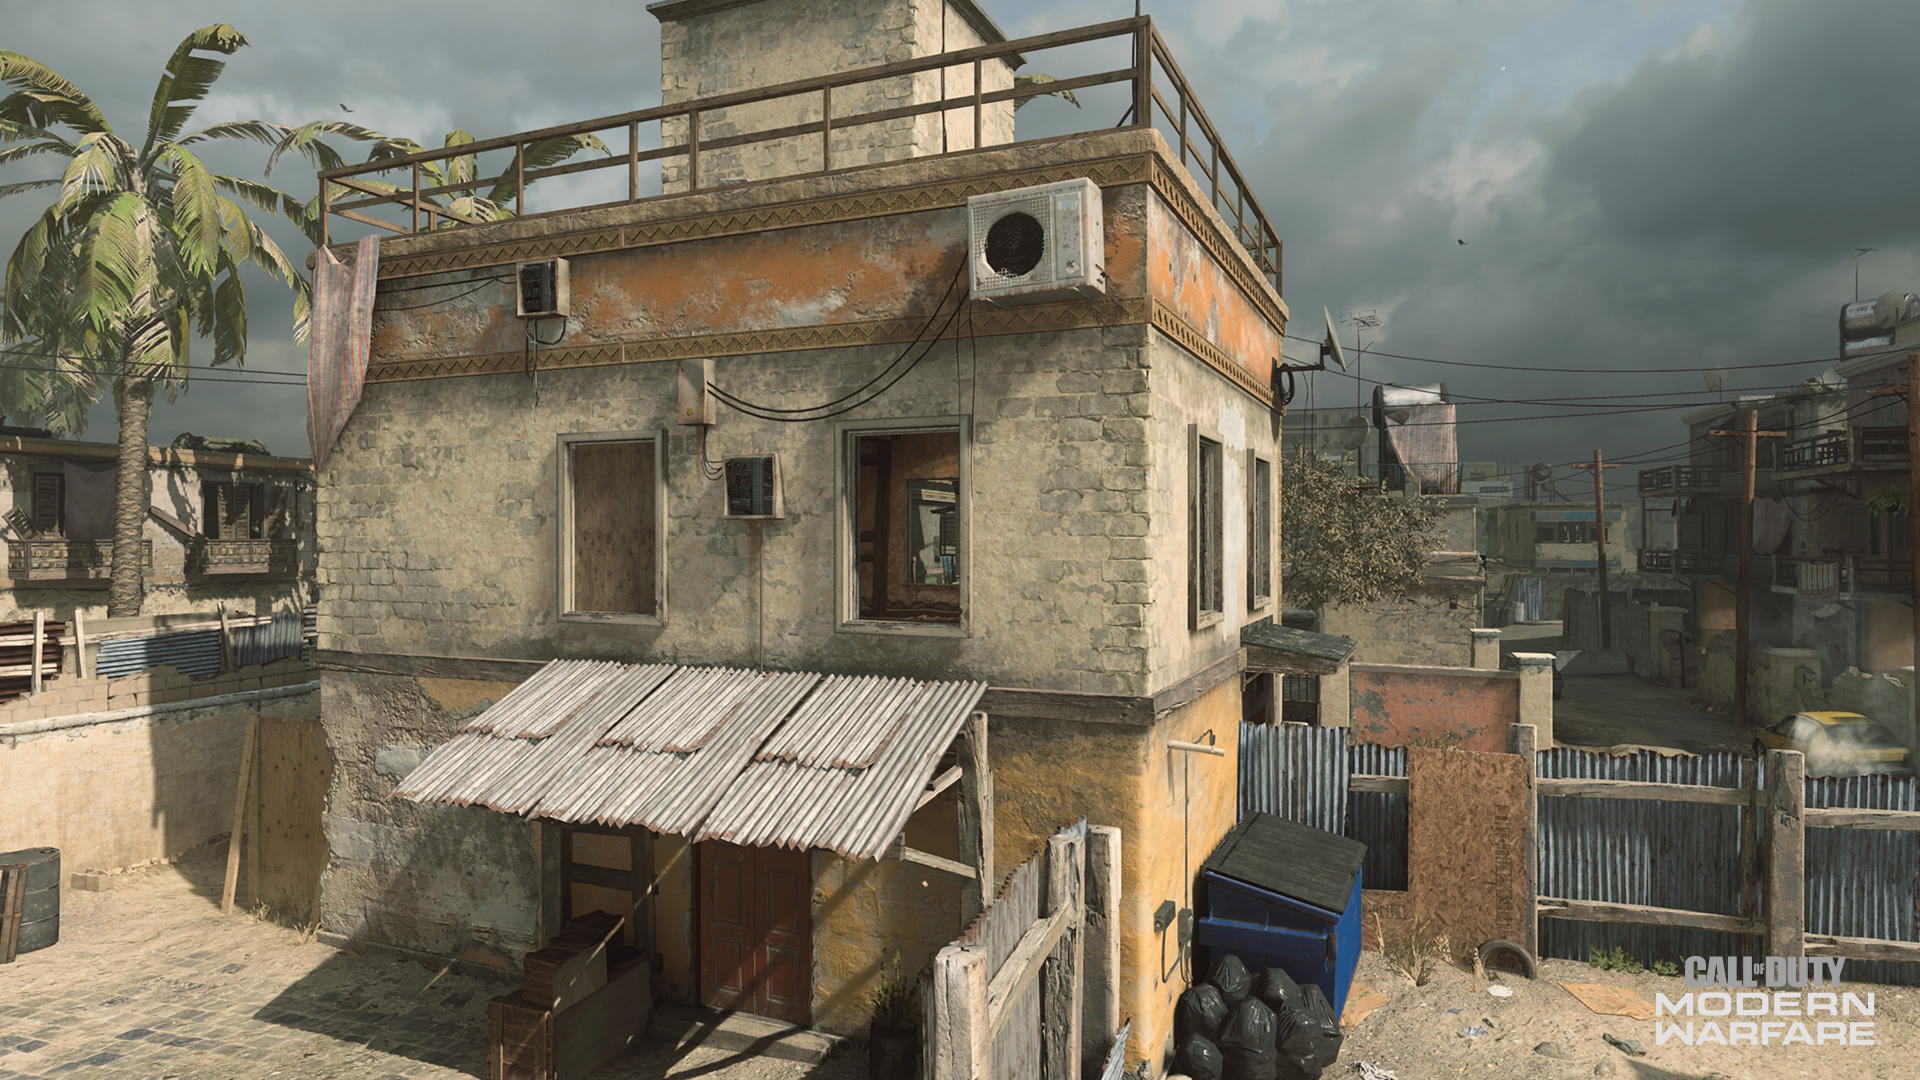
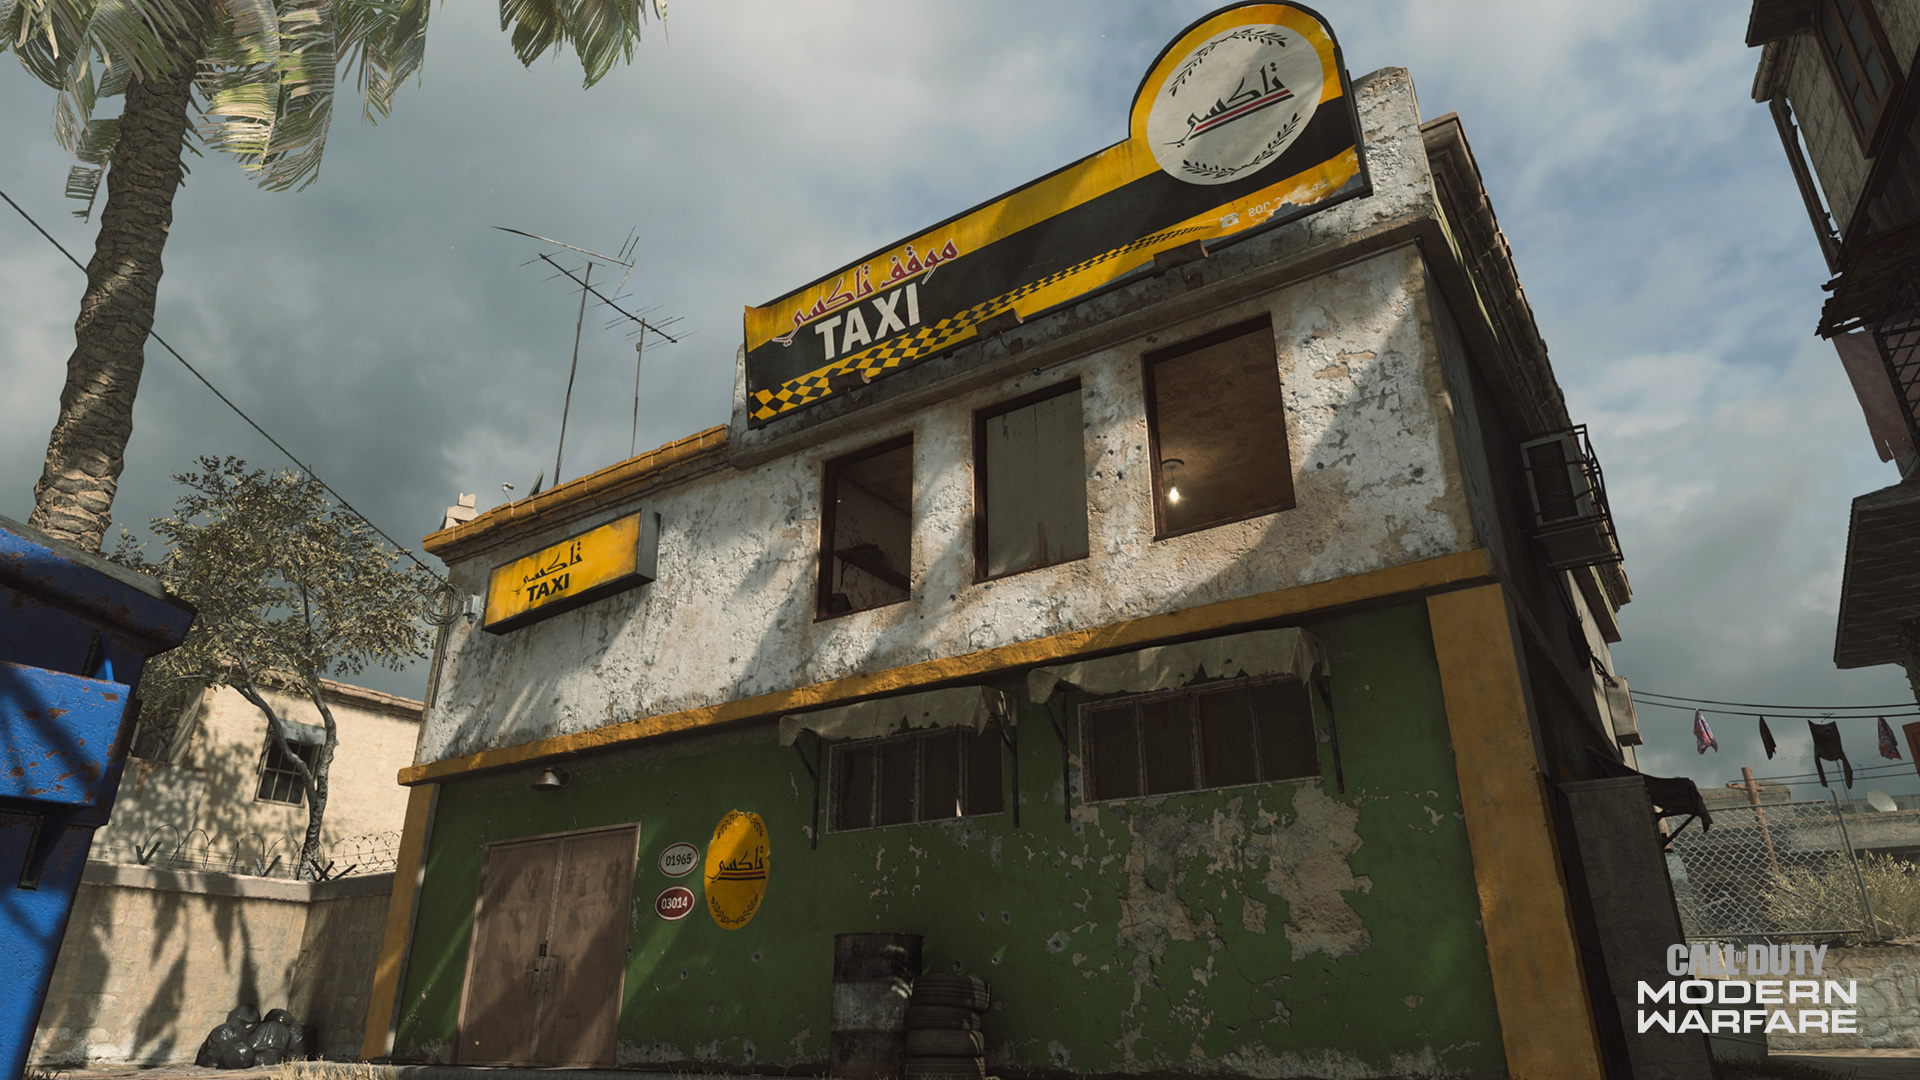
19. Taxi Building
A two-story TLC company’s building has a few windows with views across the north lane of Backlot and includes a small parking lot in the back.
The interior is mostly suited for an Operator with an SMG or shotgun, who can clear the way for a sharpshooter that would set up on the second floor. Once there, the sniper would have solid sightlines over both West and Main Street, allowing for long range picks that could wipe out a north side flank.
Although the front and side door are obvious points of entry, watch out for potential flankers that can jump the window in the parking lot.
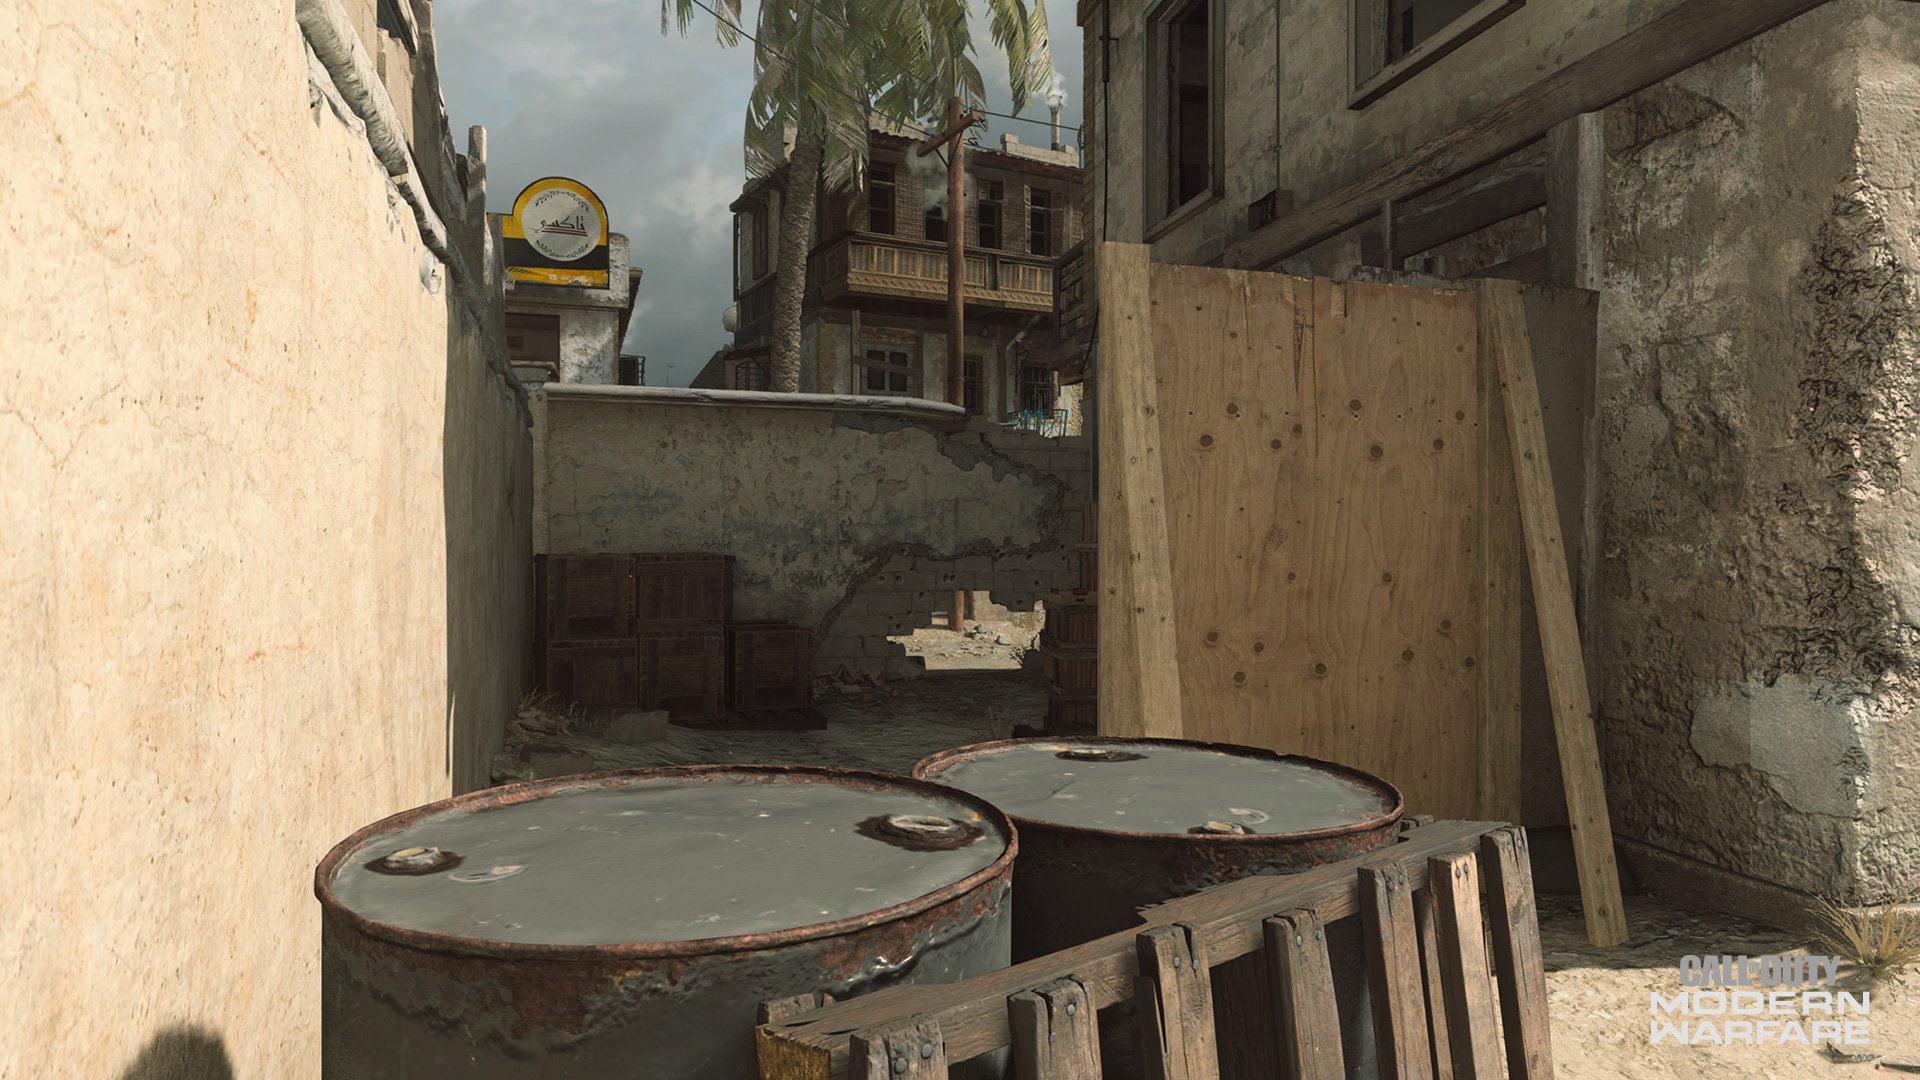
20. Passage
A small network of dirt paths allows for an alternative route to and from different sections of East Street, going past the side entrance and parking lot of the Taxi Building along the way.
As a transition area, this may be a great place for stealthier Operators to flank those coming out of the Taxi Building or either end of East Street. With Dead Silence activated and a suppressed weapon, it may be difficult to find someone weaving between cover points within this Passage.
However, that strategy is usually suited for later game antics. At the beginning of a match, Coalition forces may want to rush through here in order to get a head start at capturing the Destroyed Building.
General Tips:
· Anything Goes! Whether you run-and-gun from door-to-door or look to the streets for sniping sightlines, Backlot suits a variety of playstyles. Don’t be afraid to experiment with different weapon classes to find what works for you here.
· Lob City. With multiple windows, bombed-out sections of walls, or unfinished structures, learning when and where to lob grenades can potentially swing a game in your team’s favor. Learn the right angles for throwing equipment pieces across the map, and the other team may not know what hit them.
· No Hard Hats Here. The Construction Building is a popular spot for sharpshooters. Either take control of this area early, or wrestle it back by using CQB weapons on the first floor and well-timed grenades.
· Street Sweeper. All three streets – Main, East, and West – are relatively open areas where a true sharpshooter can wreak havoc. Avoid these as much as possible if you are using a CQB weapon or be ready to counter-snipe if you have the long-range firepower.
· Hardpoint and Headquarters: Don’t Overthink. With a ton of potential objective locations, learning exact rotations can be complicated. Caring less about rotations and opting for a more free-flow strategy may leave you better off, as you can adapt on the fly to wherever that next hill or HQ pops up.
For more information and the latest intel on Call of Duty®: Modern Warfare®, check out: www.callofduty.com, www.youtube.com/callofduty and follow @InfinityWard and @CallofDuty on Twitter and Instagram and Facebook.