The latest Gauntlet to come to Zombies on Black Ops 4, ‘The Labours of Hercules’ is based on the Ancient Evil map and puts you through 30 Rounds fit for a demi-god of zombie slaying. Do well during your labours and ye shall reap the rewards, and for those that don’t…
Well, you can just restart and try again?
Much like our guide on Super Blood Wolf Moon, here are tips for the first ten rounds… after which, we’ll leave the rest up to you, especially as the latter rounds require a bit of Easter Egg knowledge to complete.
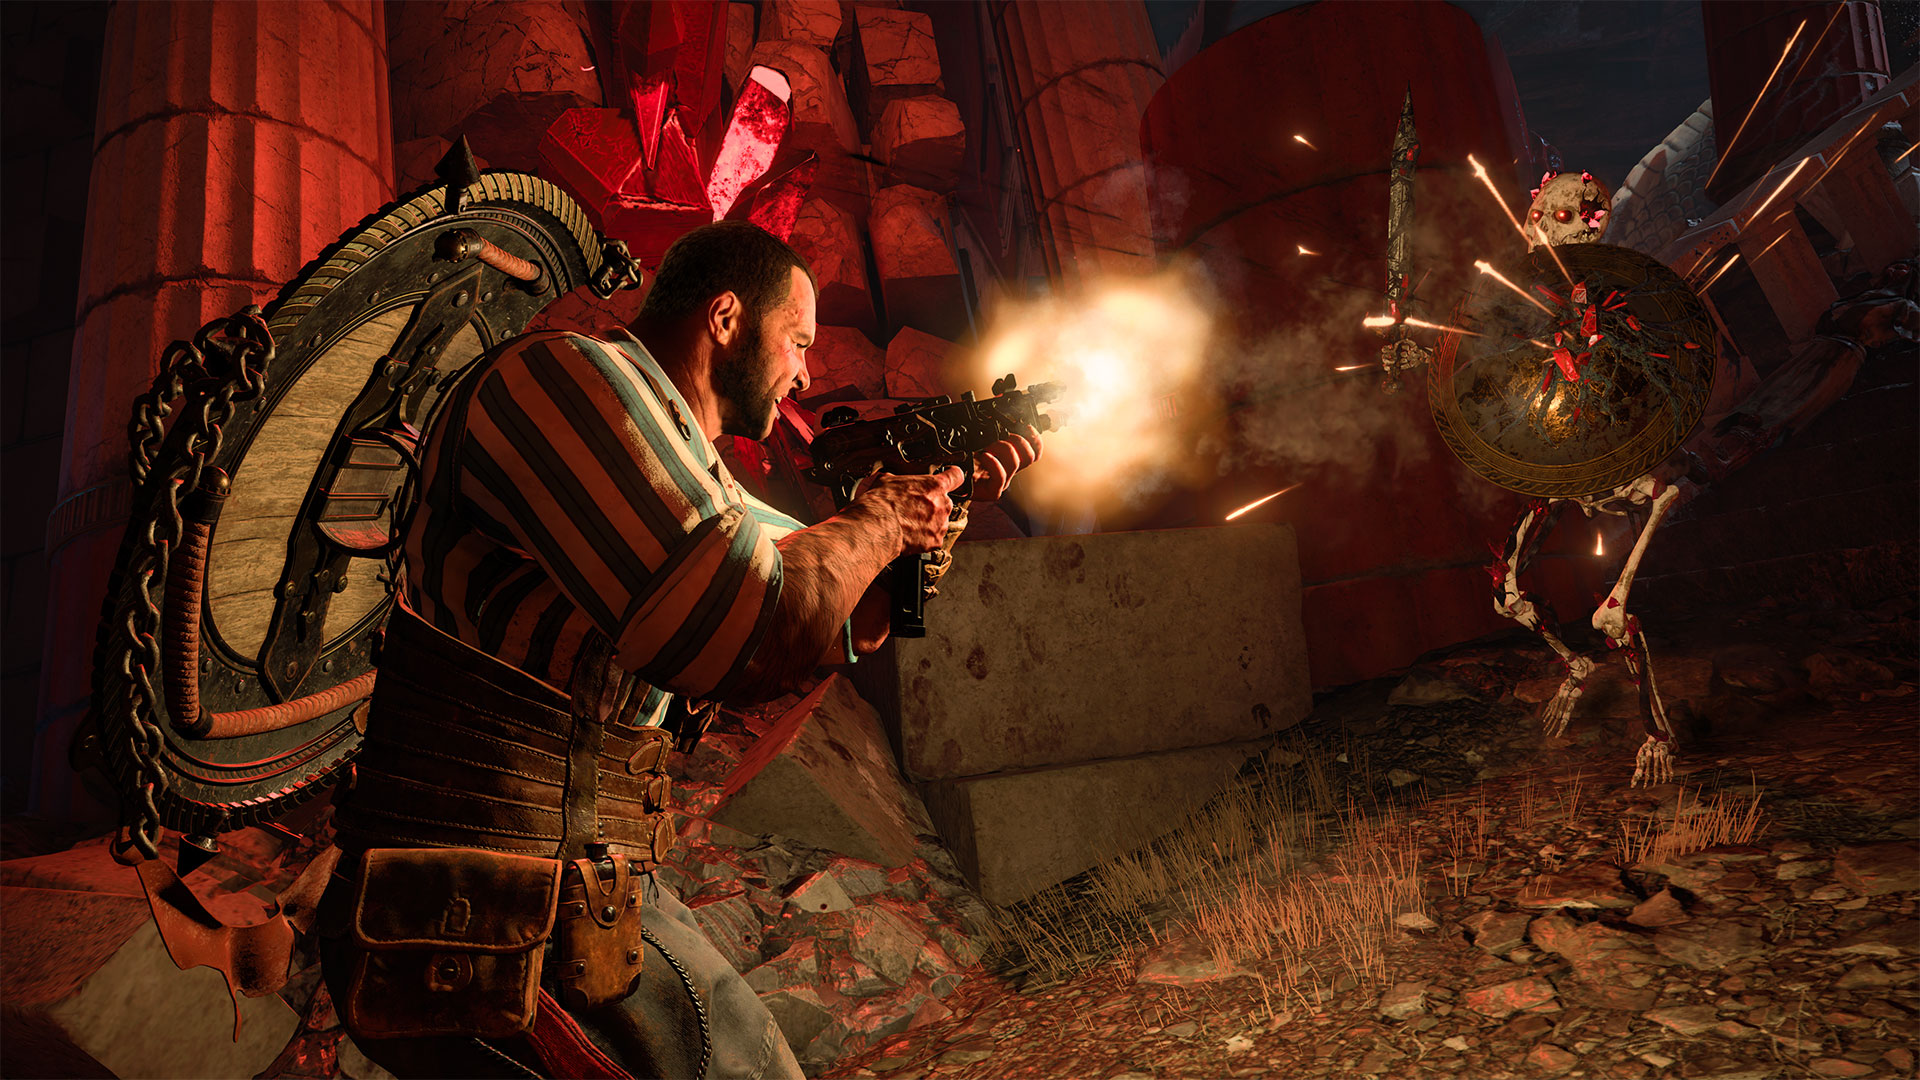
Round 1: Quick Kills
Melee Kill All Zombies within the Time Limit
Chop chop!
Don’t worry about waiting for zombies to crawl in; all the ones you’ll need to kill are surrounding you. Just react fast and this round will be over in no time. When playing with teammates, make sure you’re not wasting time by going after the same zombie!
At the end of this round, you’ll get a nice bonus that will come in handy for the later rounds.
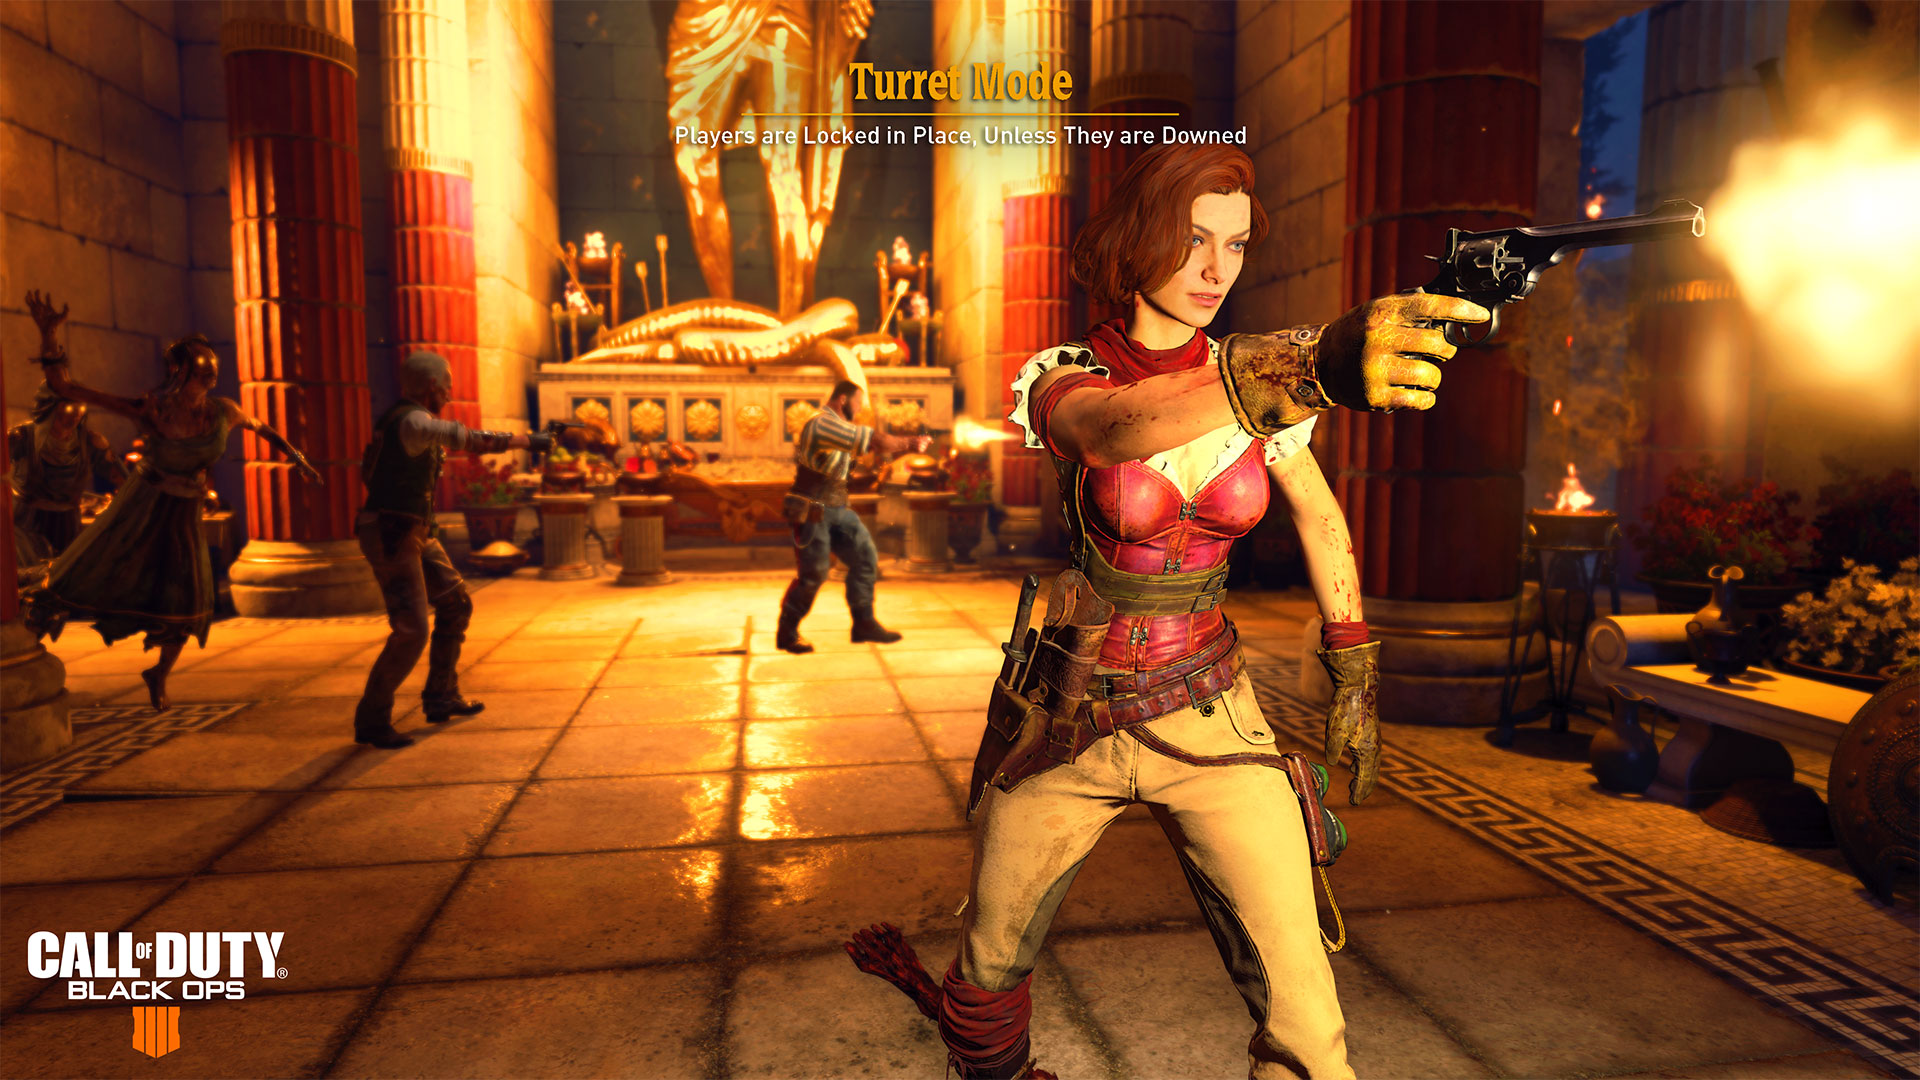
Round 2: Turret Mode
Players are Locked in Place. Unless They are Downed.
Like tower defense games? Consider this the Call of Duty® zombies version of it!
Before you are locked in place, you’ll have a few moments to choose a starting position. Coordinate your positioning with your teammates and relative to where the zombies will spawn from.
With this round in mind, you can choose a starting weapon that you’ll feel comfortable using locked in place. Remember it’s only round two, so you shouldn’t need that much firepower to take down zombies.
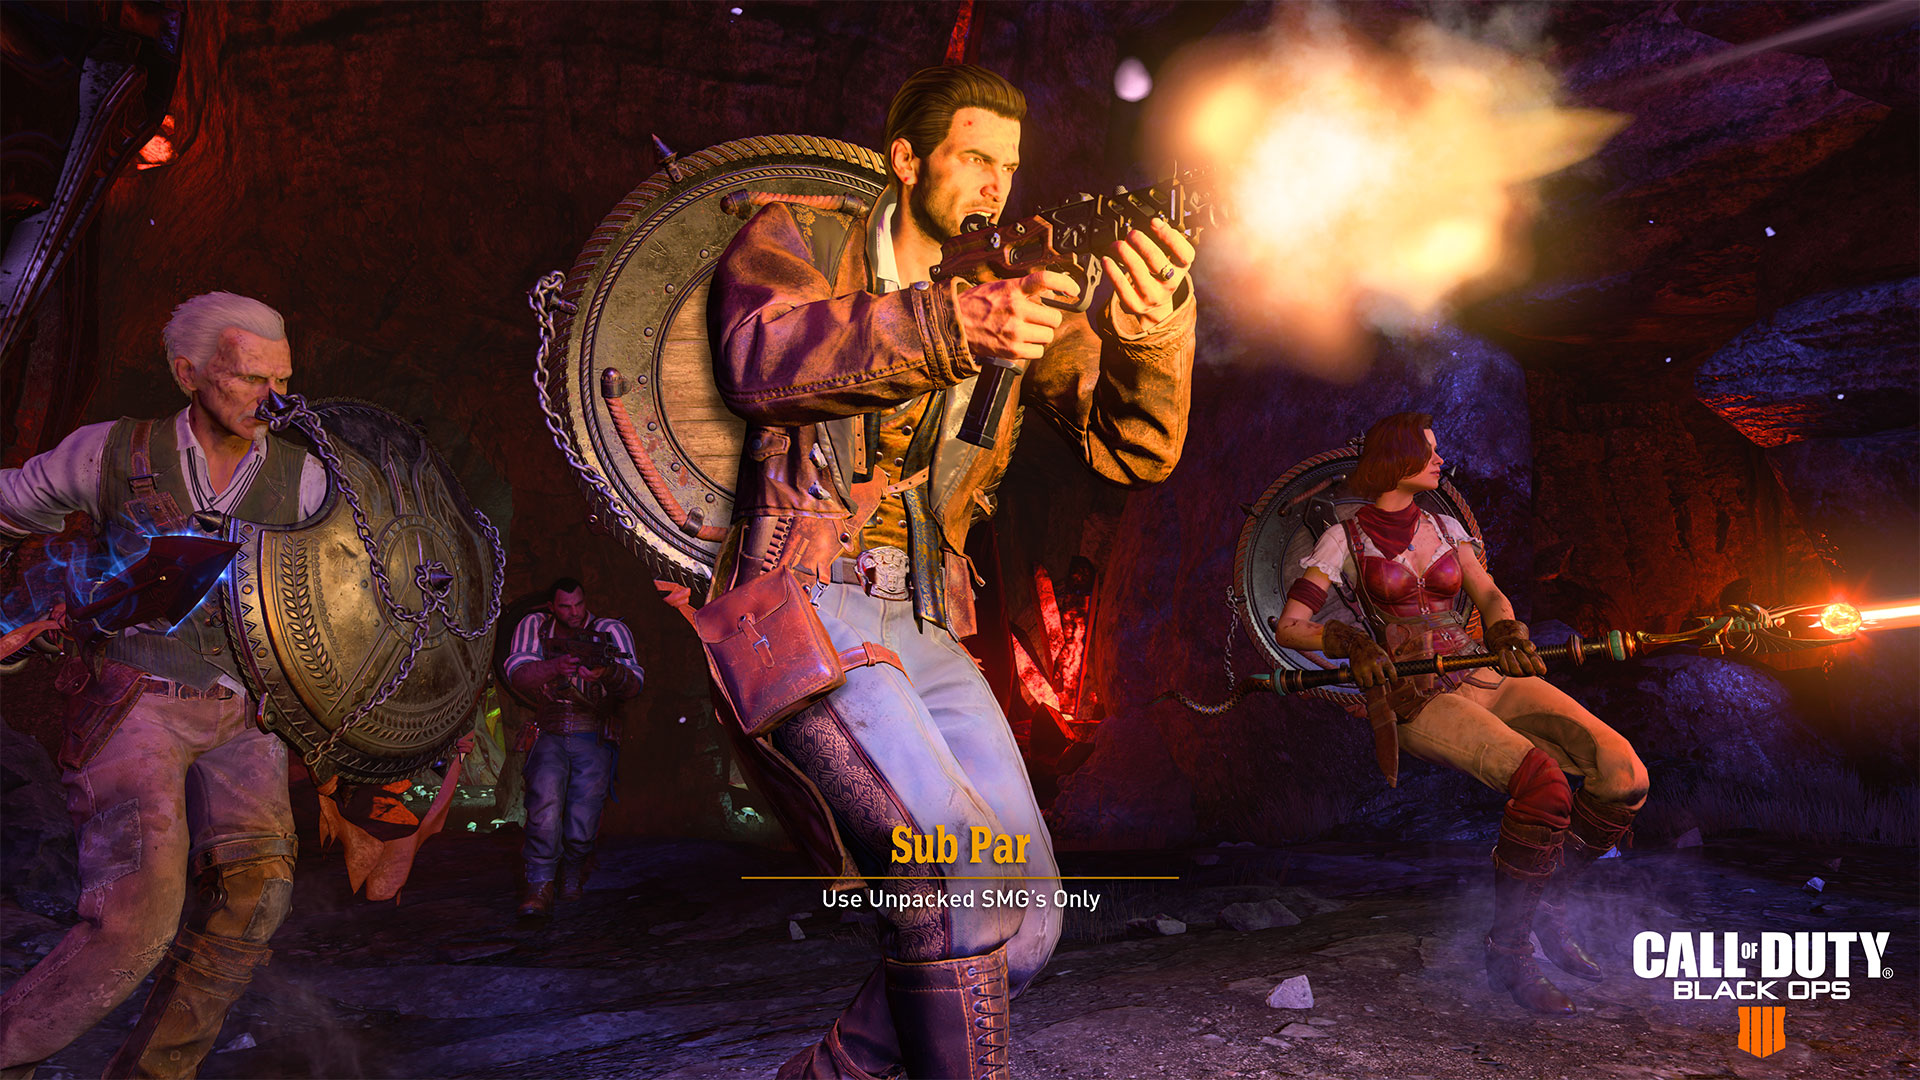
Round 3: Sub Par
Use Unpacked SMGs Only
If you haven’t unlocked it, or you’ve misplaced it, there are a few on-screen objective markers that will lead you to the nearest submachine-gun.
Once you have an SMG in hand, let it rip.
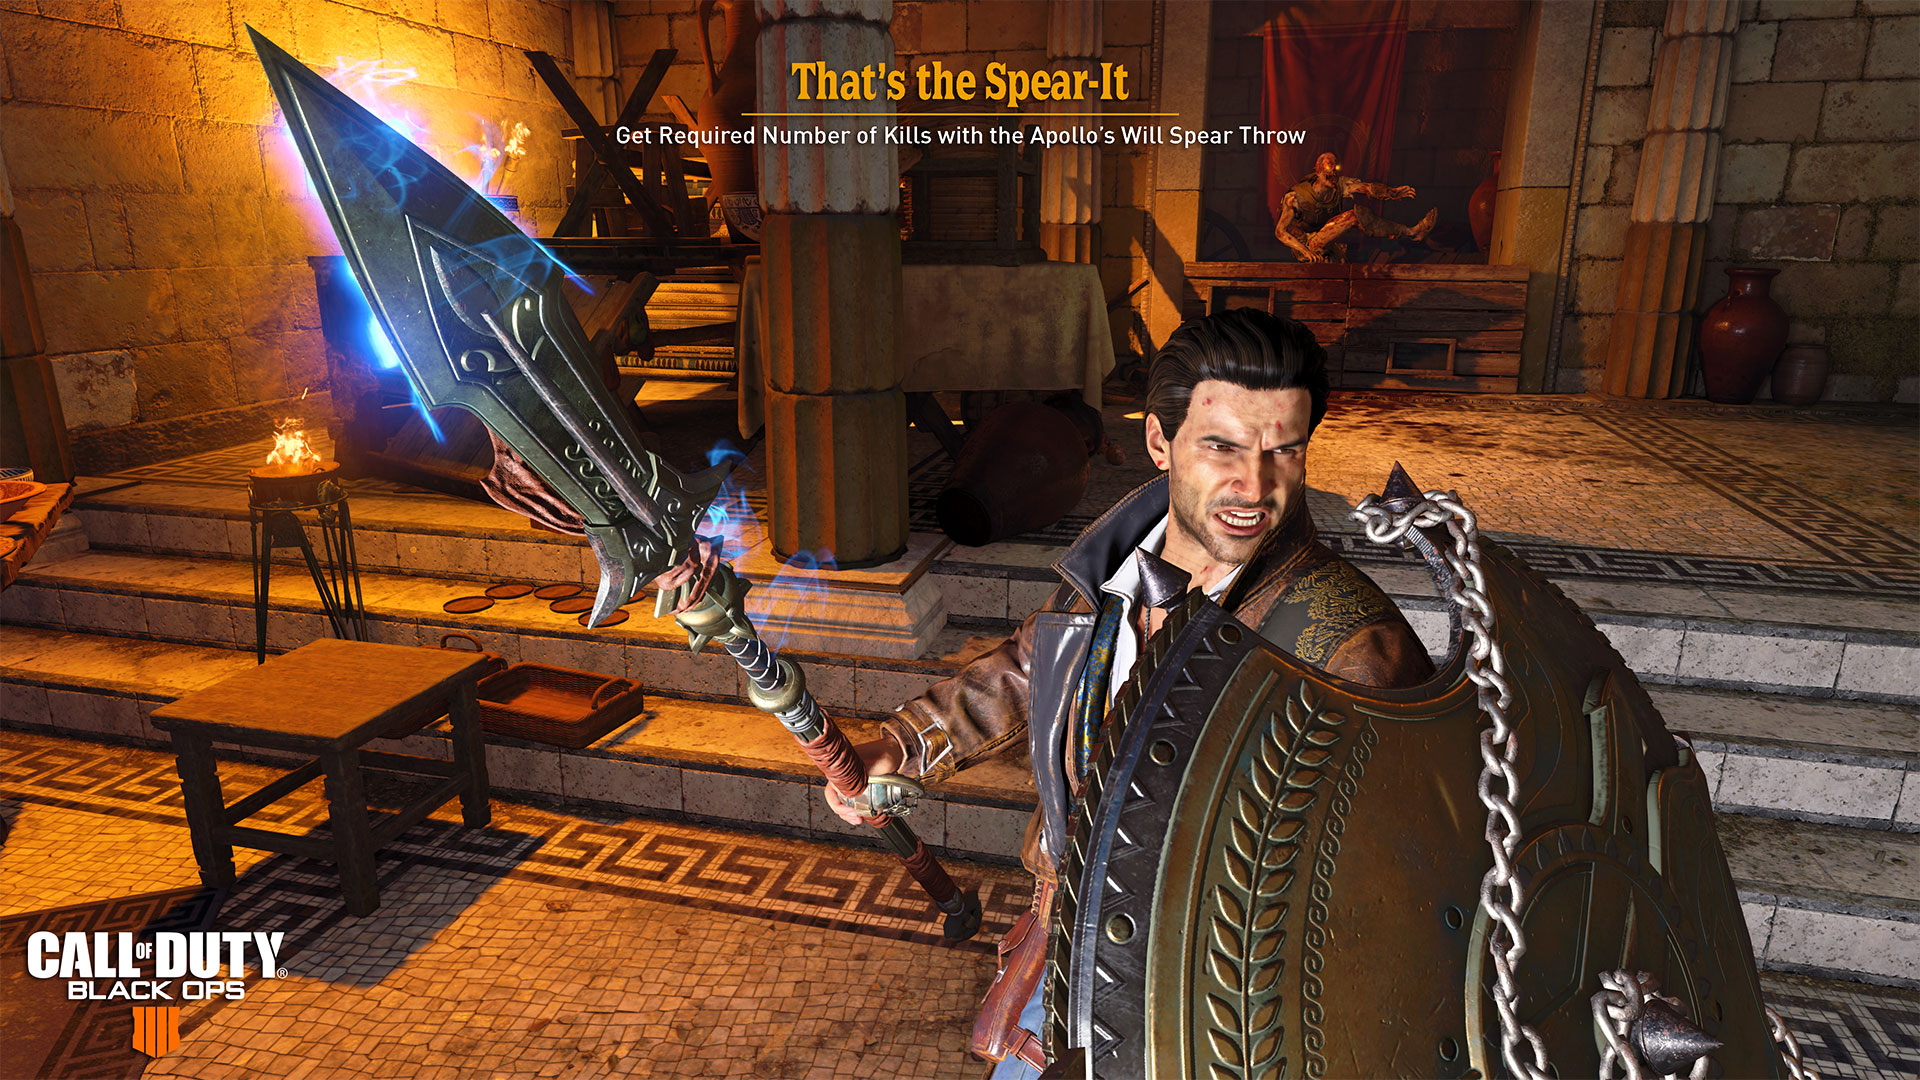
Round 4: That’s the Spear-It
Get Required Number of Kills with the Apollo’s Will Spear Throw
In order to complete this round, you first have to put together Apollo’s Will. Once you have the shield, you’ll be able to see the number of zombies you must kill with the Apollo’s Will Spear Throw. It’s important to not kill a lot of zombies with regular weapons or you won’t have enough leftovers.
Assembling the shield is its own task and requires a bit of searching. It might be worth considering putting the shield together before this round starts. Plus, there are Elixirs that make getting the shield a lot easier.
The round requires some map savvy and involves killing a Gengenees - the big four-armed spear-wielding giant. When the round starts, a counter will appear next to your total points indicated how many zombies you need to kill with the spear throw. Once you’ve completed the task, you’ll have a check mark next to your score.
All players need to get spear throw kills, so share the zombies with your teammates.
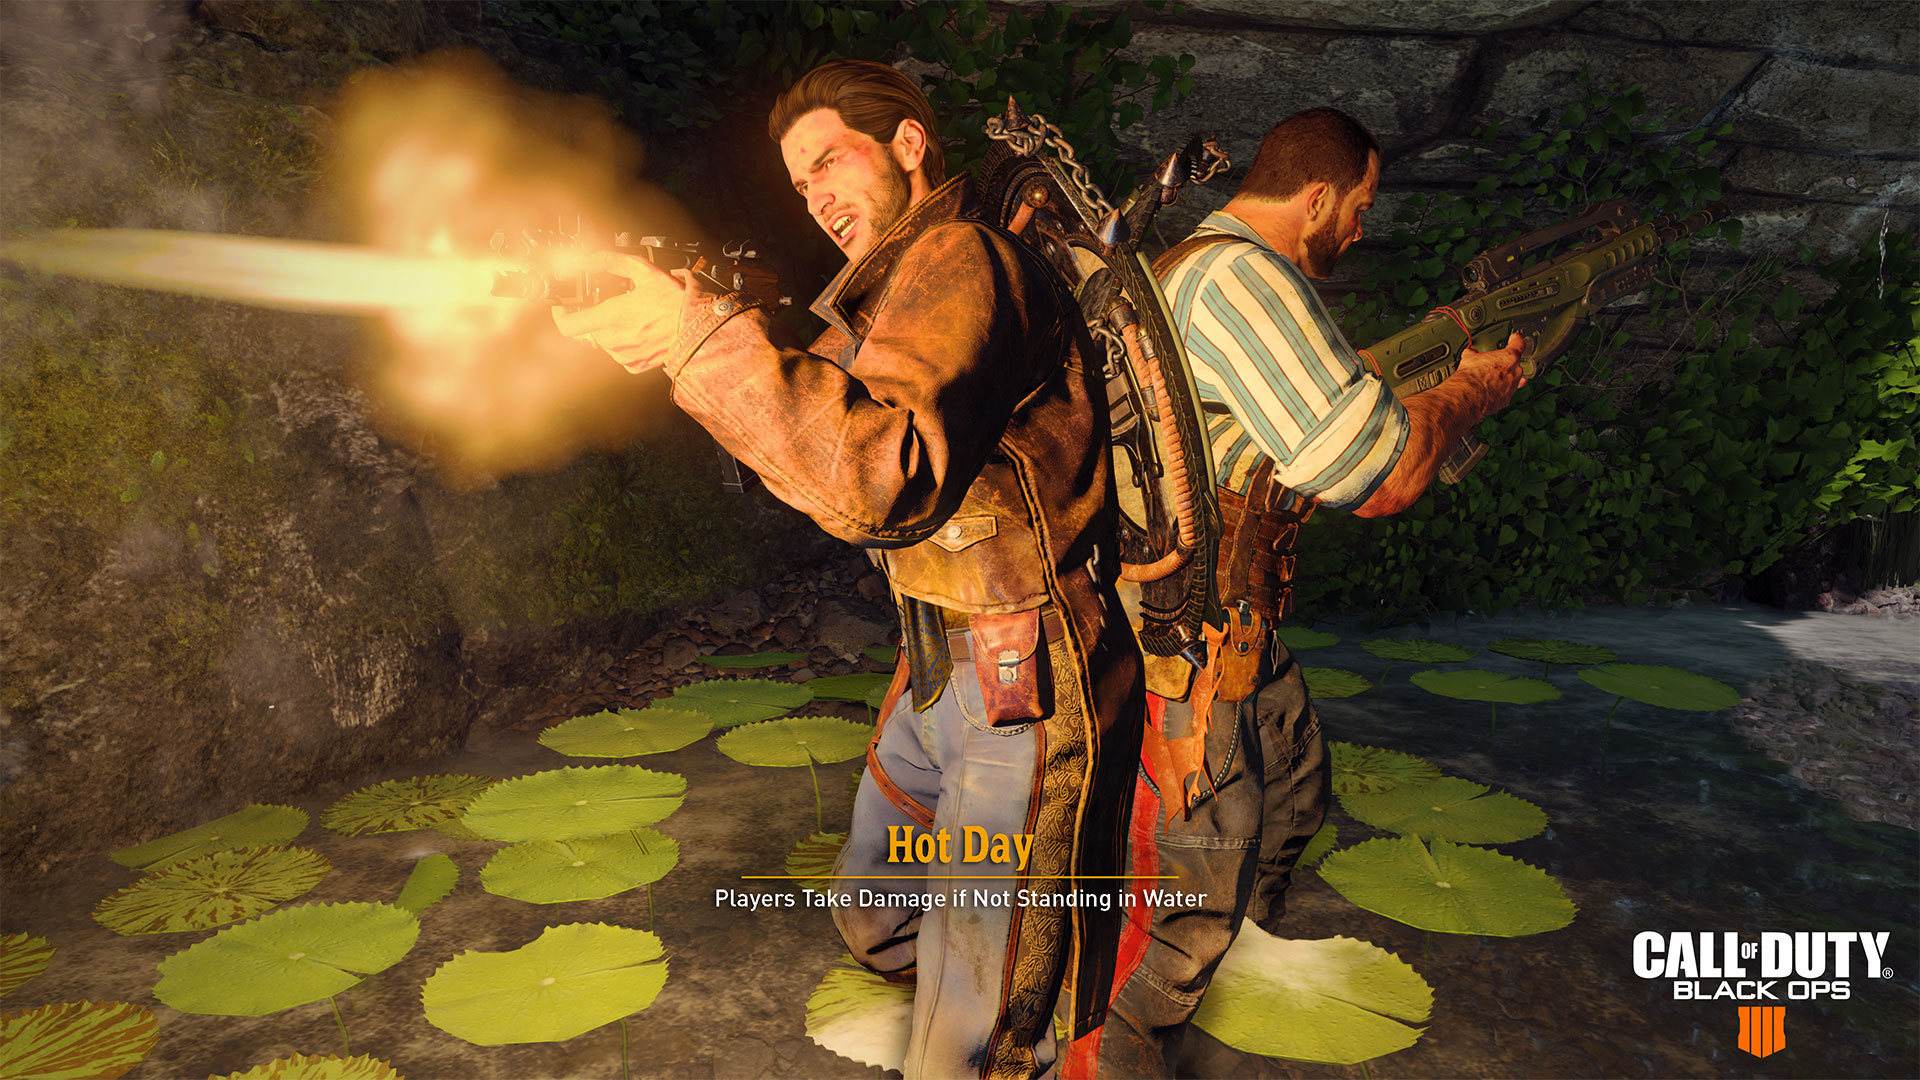
Round 5: Hot Day
Players Take Damage if Not Standing in Water
Time to take a dip in the Gymnasium Bathhouse or in the river!
Get your best weapon and make circles within the water to throw off zombies that are trying to ruin the impromptu pool party. There isn’t much room to run here, but by this point, Apollo’s Will and any other weapons on you will be enough to fend off the undead.
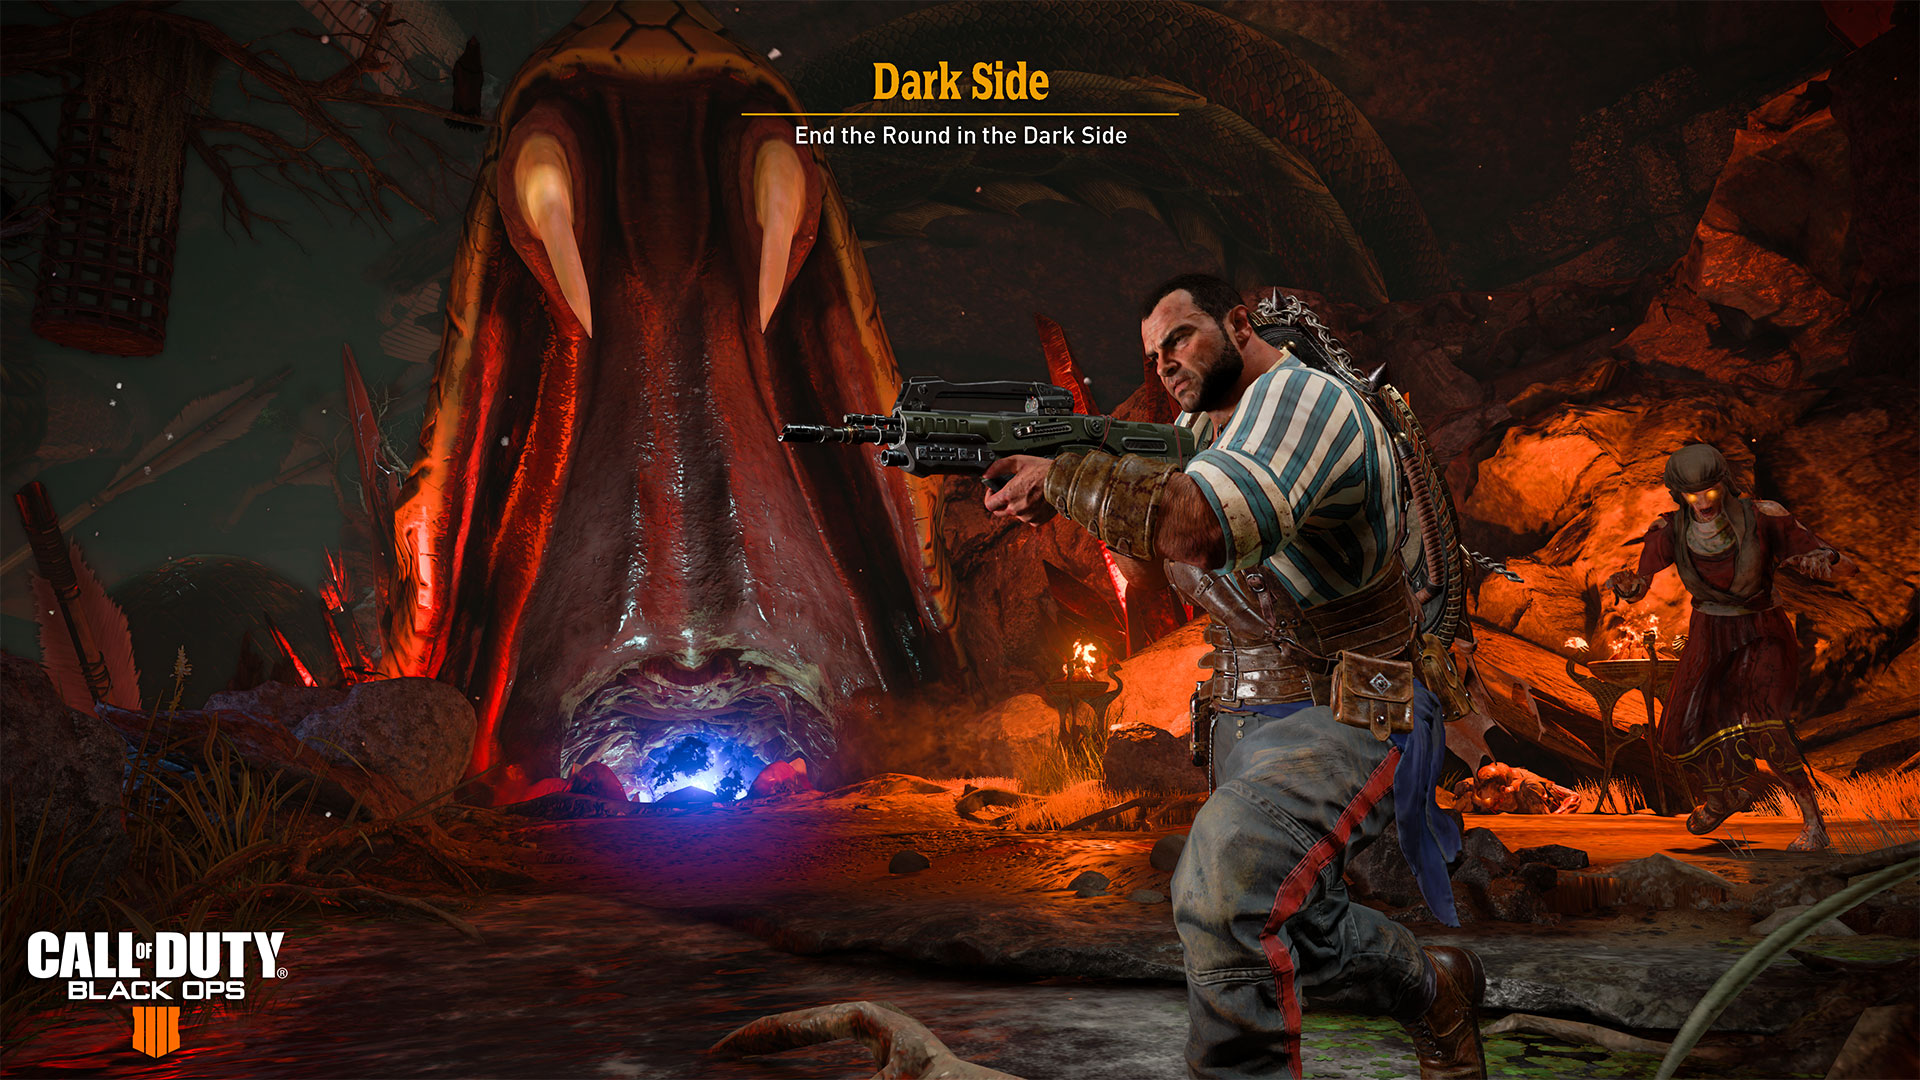
Round 6: Dark Side
End the Round in the Dark Side
The Dark Side is another “side” of the “Ancient Evil” map.
You’ll need the help of a mythical winged-beast to carry you to the Dark Side. You can travel there in the middle or even before the round starts.
Just make sure you are on the Dark Side before the last zombie falls.
Round 7: Loaded
End the Round with Guns and Equipment at Full Ammo.
Finding a Max Ammo is the easiest way to accomplish this. You can get one courtesy of a few Elixirs or by killing a Gengenees if you can find one.
If a Max Ammo is off the table, you’ll need to wall-buy ammo in order to be fully stocked. Plus, you’ll just need to make a mental note to NOT use any equipment.
Once you are full stocked, you can use other weapons (not guns or equipment) to eliminate zombies. You will still have your shield from round 4 and you’ll have your special weapon like Viper and Dragon. You can use either of these and it won’t count against you.
Round 8: Double Damage
Enemies do Double Damage
If you haven’t gotten it by now, the undead will pack a punch in this round. Be extremely cautious during this round, especially if you decide to stay on the Dark Side. A good tip is to keep moving.
Before even starting the game, it may be wise to equip the Hammer of Valhalla as your Special Weapon, as it can give you temporary armor to work with.
By this point, you should have a worthy arsenal of weapons, but it’s also a good time to figure out how to Pack-a-Punch these weapons. Fighting double damage with double damage is definitely a viable strategy here and upgrading them now can definitely help with 22 rounds left to go.
Round 9: Half Speed
Players’ Movement Speeds are Halved. Sprinting and Sliding are Disabled.
After going double time, it’s only fair to then go at half speed.
Think of this round like Round 2, except you can move a little bit. You will not be able to outrun the horde, hence why having a Pack-a-Punch weapon can help.
The Perk Stone Cold Stronghold can be useful here (as well as in Round 2, if you can somehow activate it that early), for it creates a damage boost circle that also gives armor over time just for remaining in place for a few moments. Because your speed is already cut in half anyways, putting up the Stone Cold Stronghold may just be a wise choice compared to running away.
Equipment, Special Weapons, and the Apollo’s Will Spear Throw will come in handy in this round.
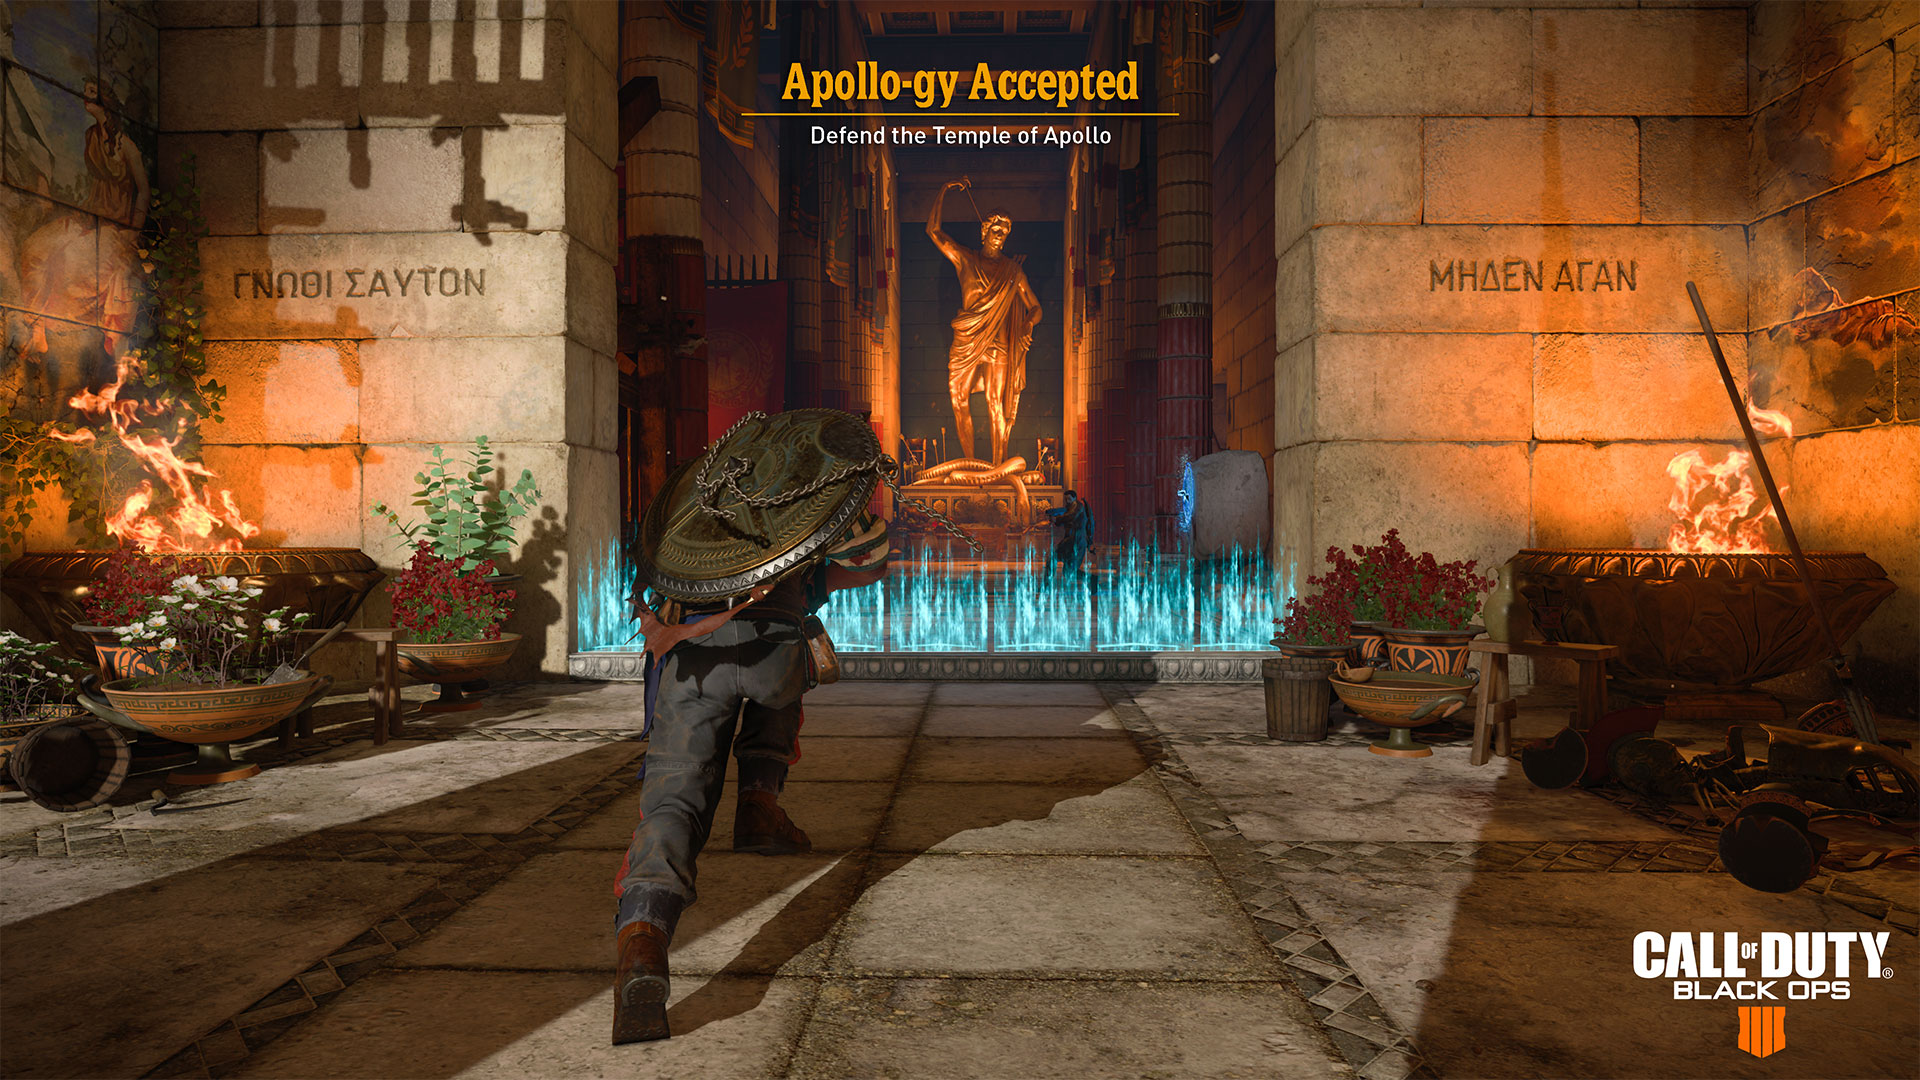
Round 10: Apollo-gy Accepted
Defend the Temple of Apollo
It all comes back to square one.
Head back to the starting area with the best weapons you can get, because the undead are going to throw everything they got to prevent you from getting the Bronze. There is little room to run around and corral zombies, so brute force may be your best bet to getting into the 11th round and beyond.
From here, having knowledge of Ancient Evil’s various Easter Eggs will be absolutely key to clearing the Gauntlet. Defeating it without losing a single round will give you an especially heroic reward, so strap on those sandals, don that gladiator helmet, and step up to complete the Labours of Hercules.
Your chariot to Call of Duty Zombies Mt. Olympus awaits.
For more intel about Call of Duty: Black Ops 4, be sure to visit CallofDuty.com/blackops4 and follow @CallofDuty and @Treyarch on Twitter.
Don’t forget to follow @Activision on Twitter, Facebook, and Instagram.