Take a closer look at the tragic remnants of Rammaza, a city destroyed in an Al-Qatala siege.
Modern Warfare® Tactical Map Intel: Rammaza
Take a closer look at the tragic remnants of Rammaza, a city destroyed in an Al-Qatala siege.
January 28, 2020
by Elle O'Brien
Operation: Rammaza
Day 306 18:43:26
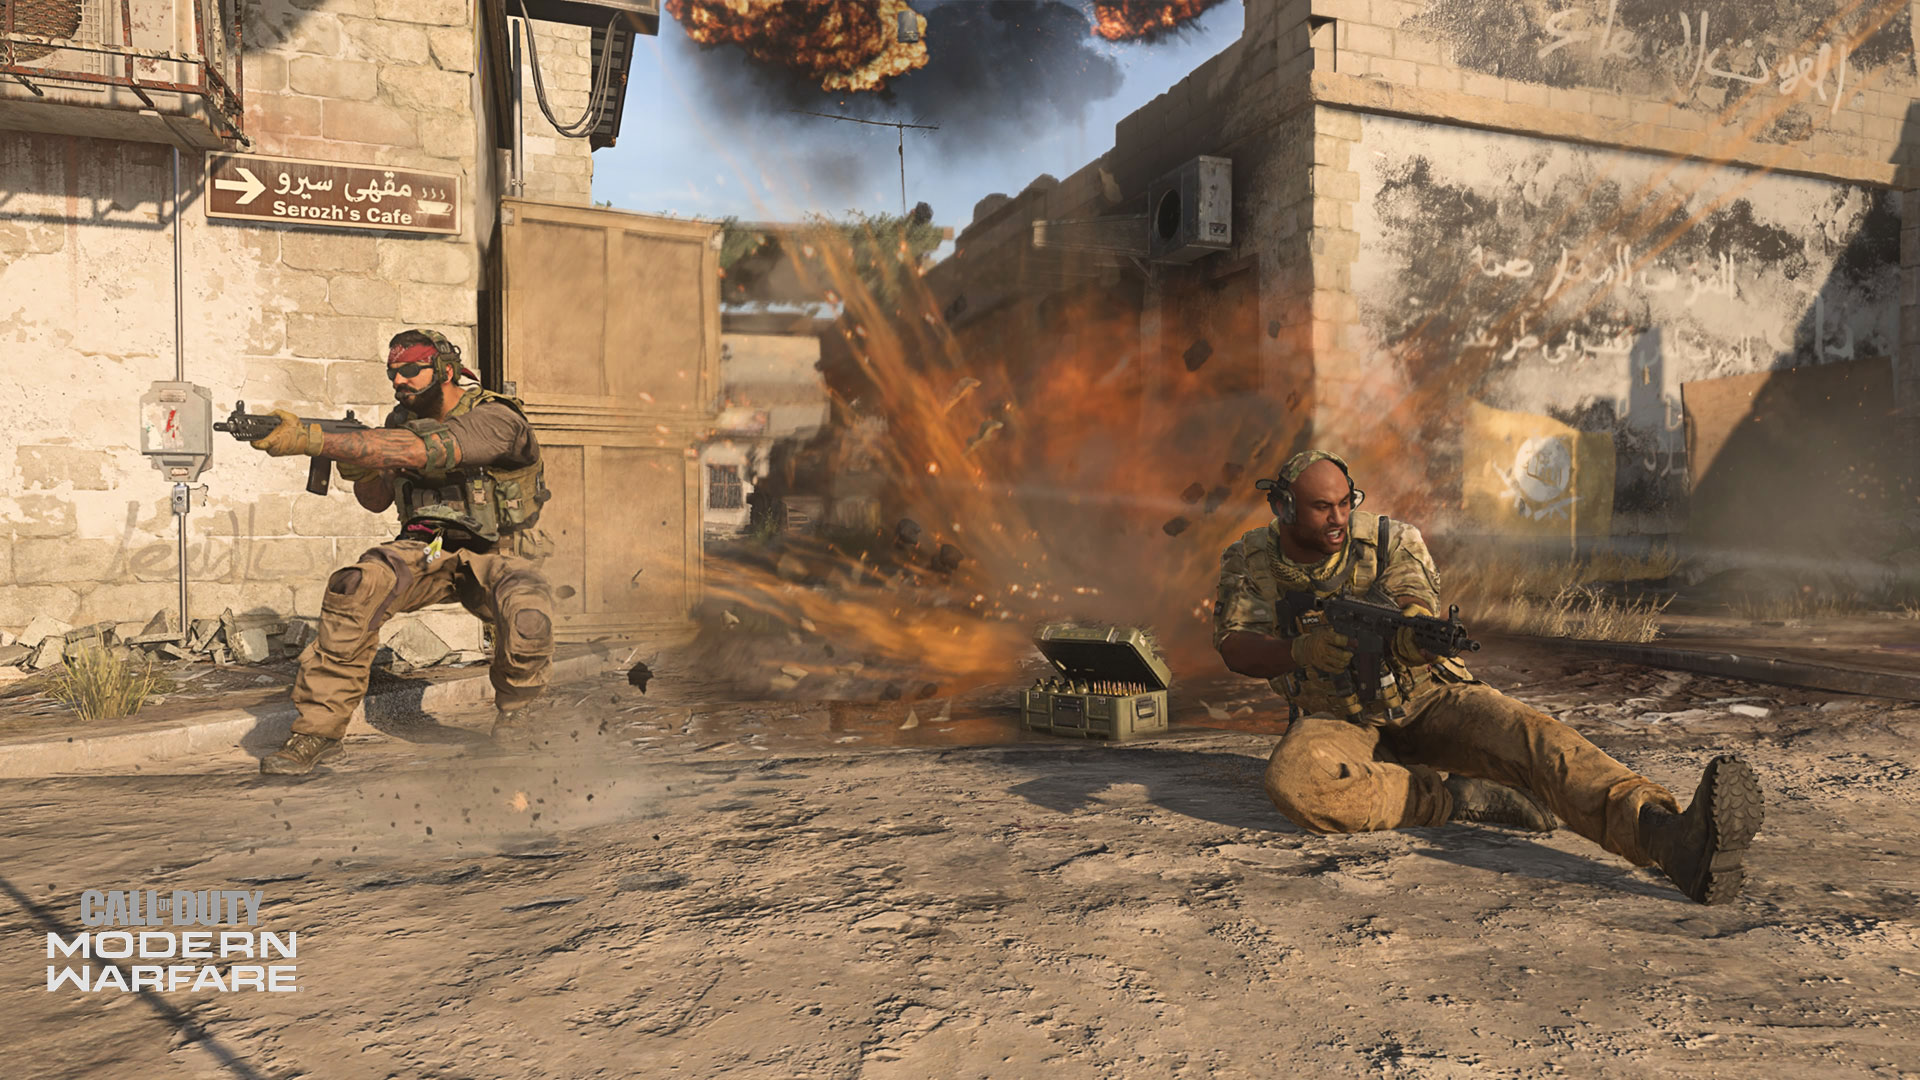
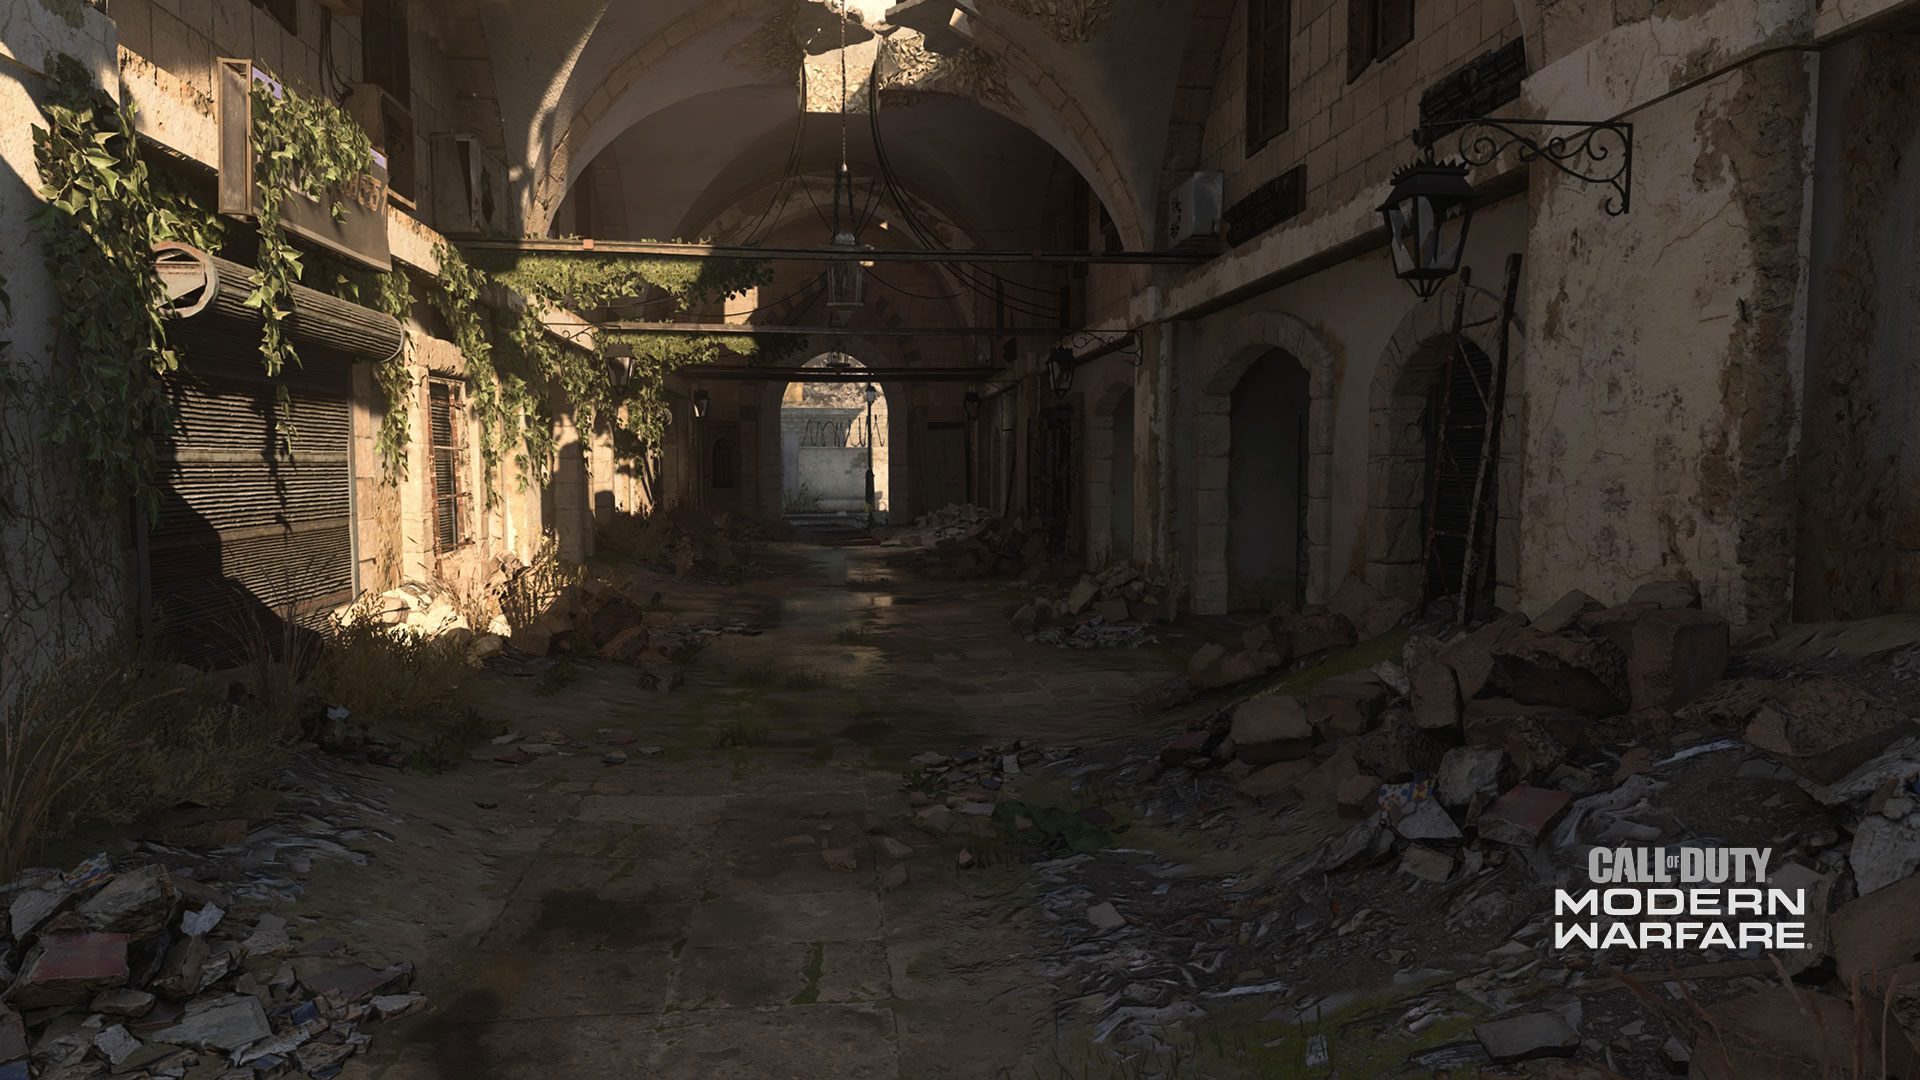
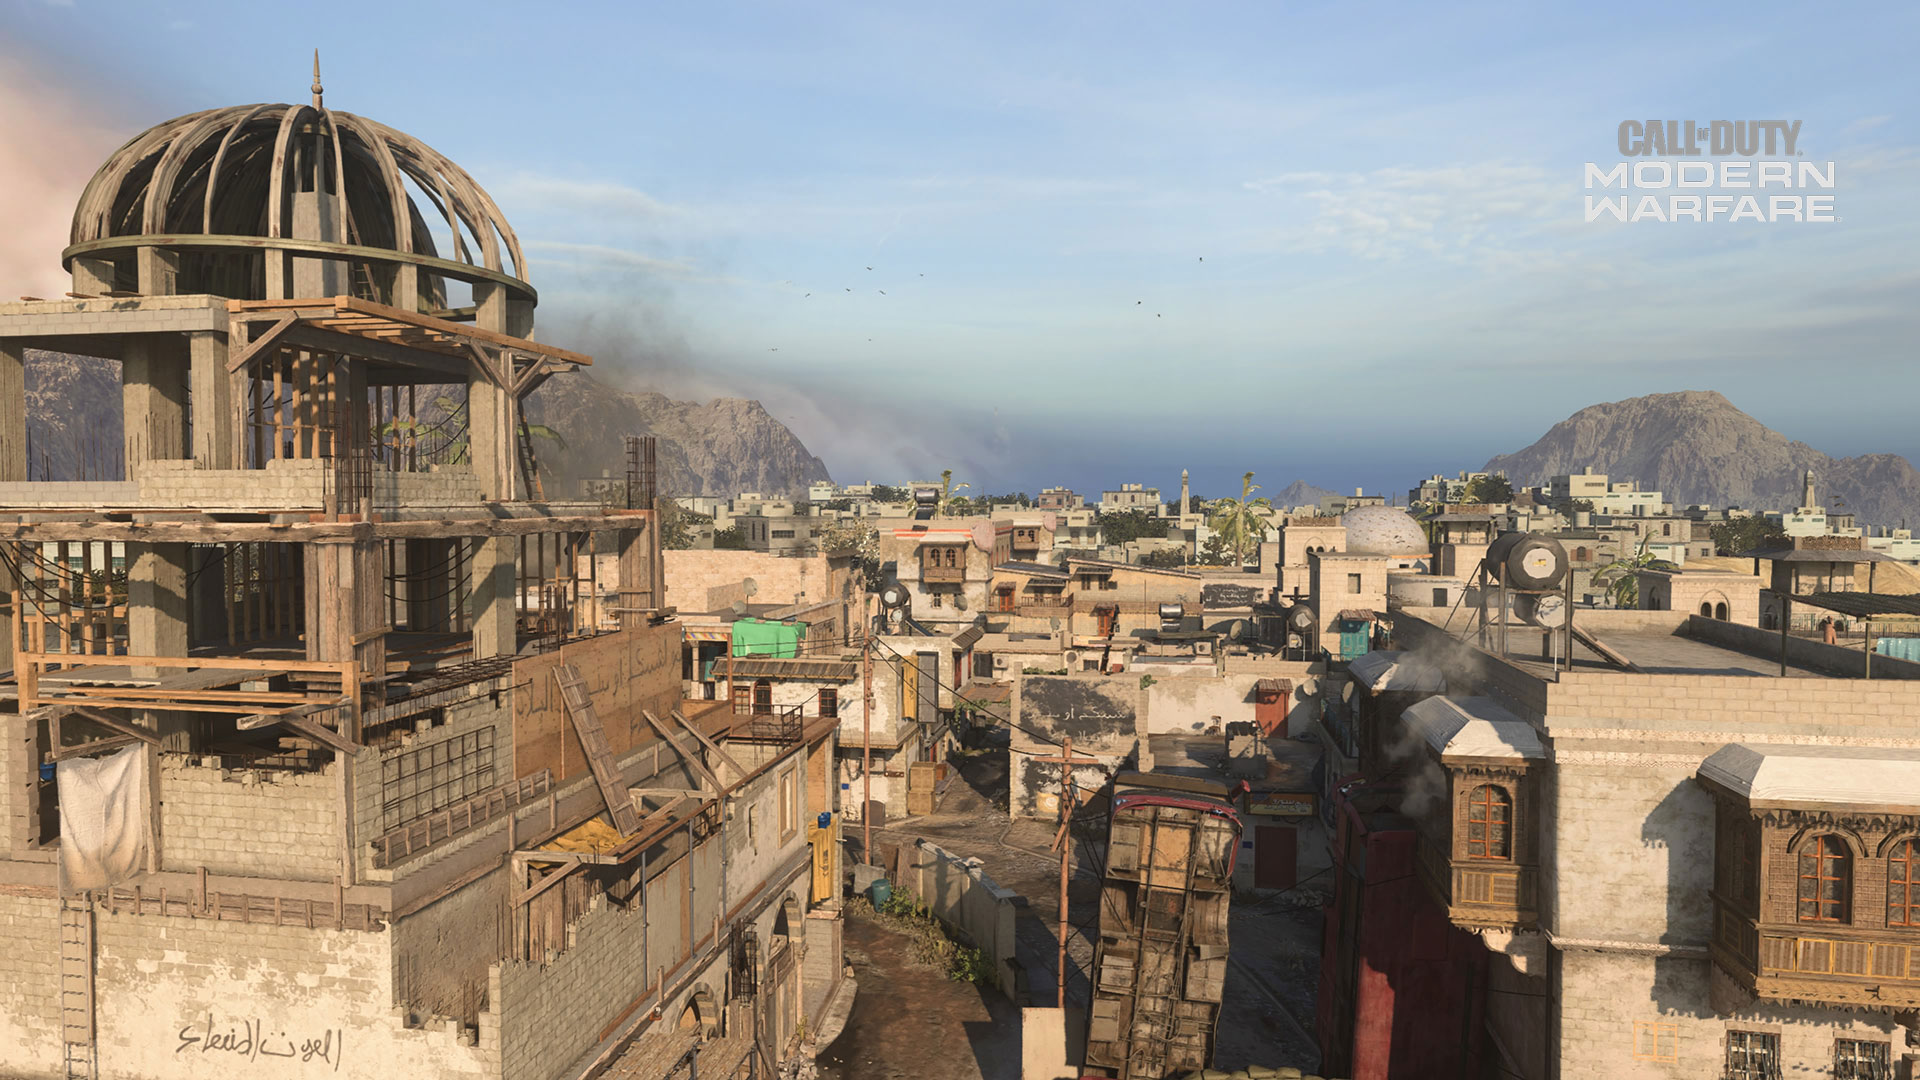
Formerly an up-and-coming civilian town, Rammaza is a location hit the hardest by Modern Warfare’s global conflict. Caught in the crossfire of the proxy war, this Urzikstan city has been utterly destroyed. Al-Qatala flags and graffiti appear in every map zone, on every imaginable surface, signifying that all is lost.
Site of the campaign story’s high-octane Hunting Party chapter, in which Al-Qatala takes over a local hospital, Rammaza is uniquely set for the unpredictable and hair-raising nature of urban warfare. Available to play in both Day and Night versions, this destroyed Urzikstan map will test your mettle in many ways.
About the Map
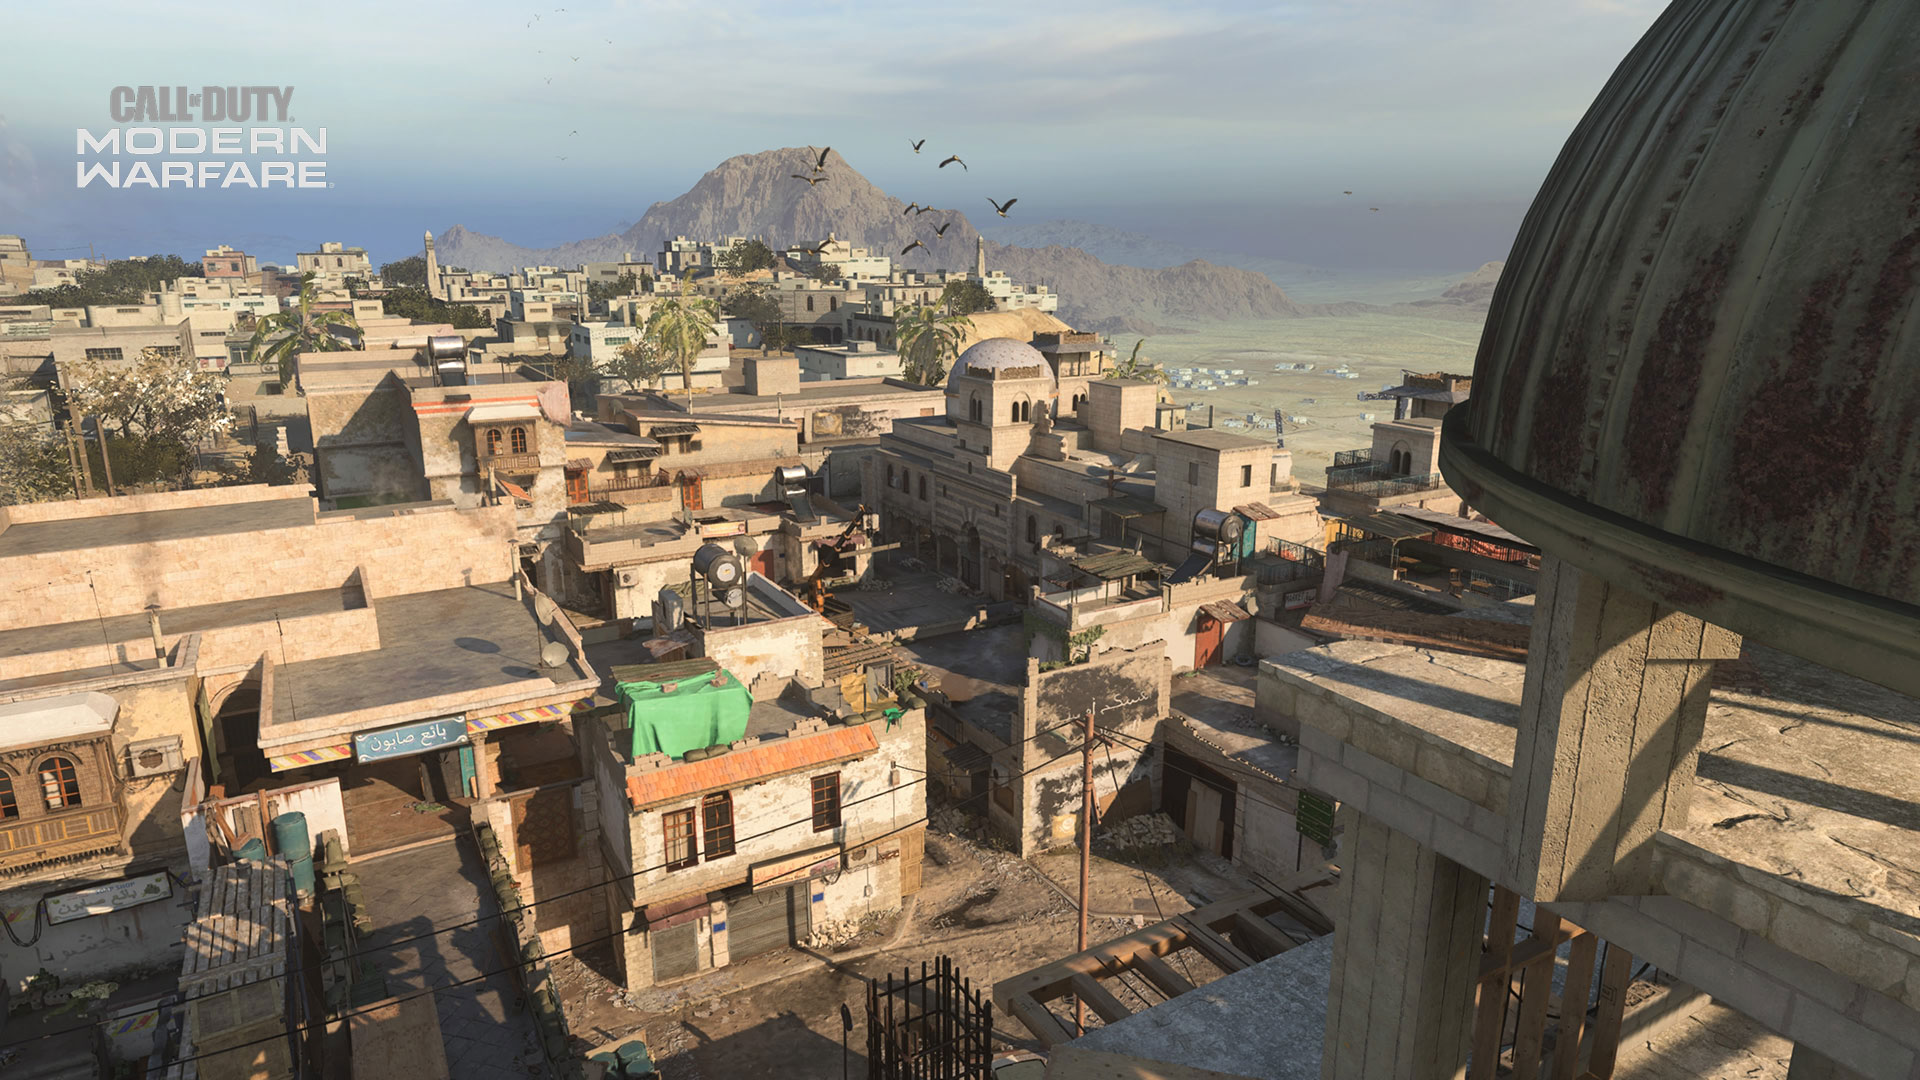
Rammaza is an expansive, complex arena, with a mix of open-air and closed-off combat settings. Three asymmetrical lanes run the length of Rammaza, with various elevated routes crisscrossing the airspace above.
Players spawn at either end of the main road that divides the map lengthwise. From there, anything goes. Multiple routes of infiltration wind the battle through ground-level shops and ruined buildings, while high-up perches and teetering walkways take the action to another level.
Fight face-to-face in open air locations, like Back Alley, Market, and Road West, or fire cross-map longshots from the high landings and towering scaffolds of Market Rooftops and Construction.
Let’s dive in.
Map Zones Overview
The following is a list of zones that make up the Rammaza map.
1. Road East
2. Barber Shop
3. Market
4. Soap Shop
5. Café
6. Market Rooftops
7. Rug Shop
8. Bridge
9. Construction
10.Road West
11.Electronics Shop
12.Back Alley
13.Gun Shop
14.Ruins
Map Collection
Before you infiltrate the Rammaza map, become familiar with the layout. Below, we’ve included several detailed maps to help you learn the lay of the land. Click through each map to see them all.
Rammaza: Map Overview
Rammaza: Map Zones
Rammaza: Cyber Attack
Rammaza: Domination
Rammaza: Headquarters
Rammaza: Search and Destroy
Rammaza: Hardpoint
Rammaza: Topography
Know the Zones
1. Road East
A blocked-off transit route filled with overgrowth, rubble, and a hurriedly spray-painted Al-Qatala flag, Road East is where the Coalition’s fight begins. Dust swirls at players’ feet as they advance into the map, with three main routes to choose from.
In Domination, Coalition players might forge straight ahead into the Barber Shop, which hosts the A Flag.
In Team Deathmatch, Coalition fighters may follow Road East into the Market square, which grants access to several unique paths into the map’s core.
Or, fleet-footed fighters may gain an advantage by following Road East into the Ruins, a semi-concealed flank route that draws players toward the map’s center. This route grants quick access to the Back Alley, where bomb locations can be found in both in Cyber Attack and Search and Destroy.
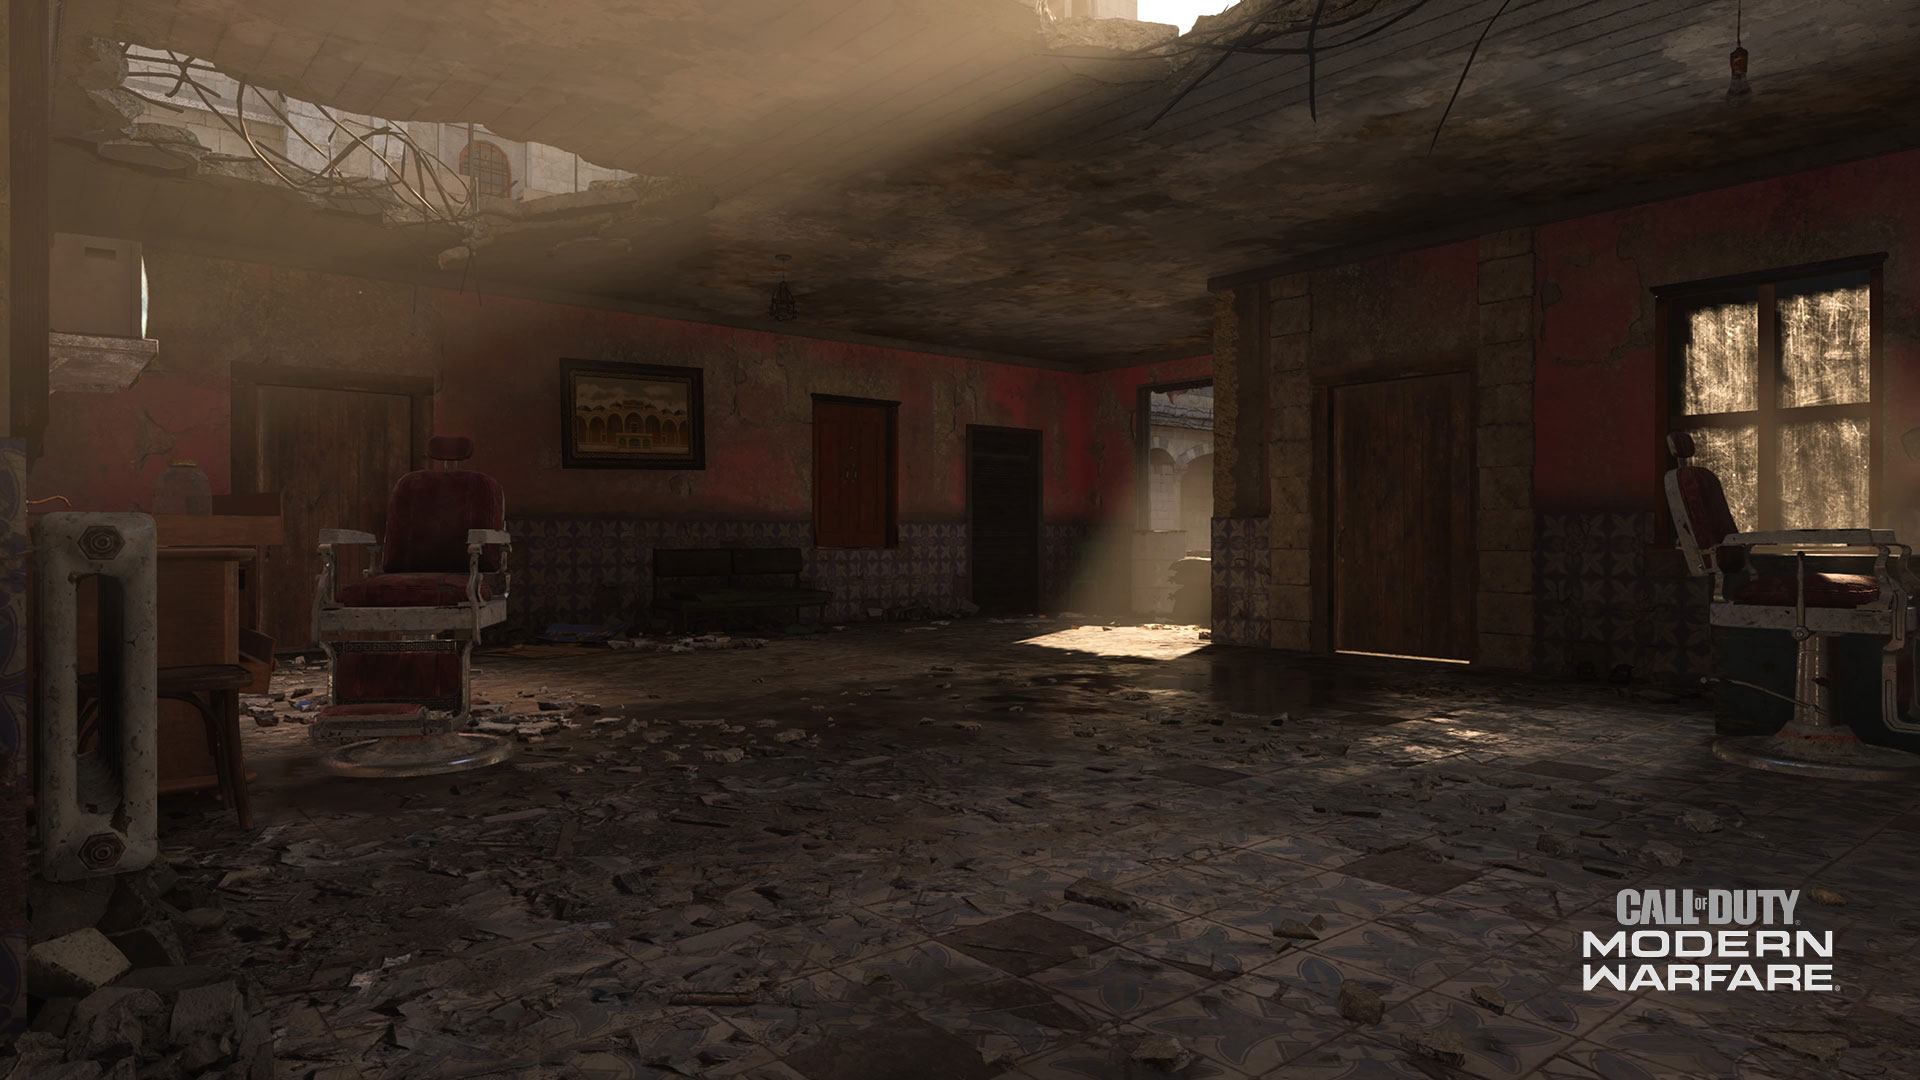
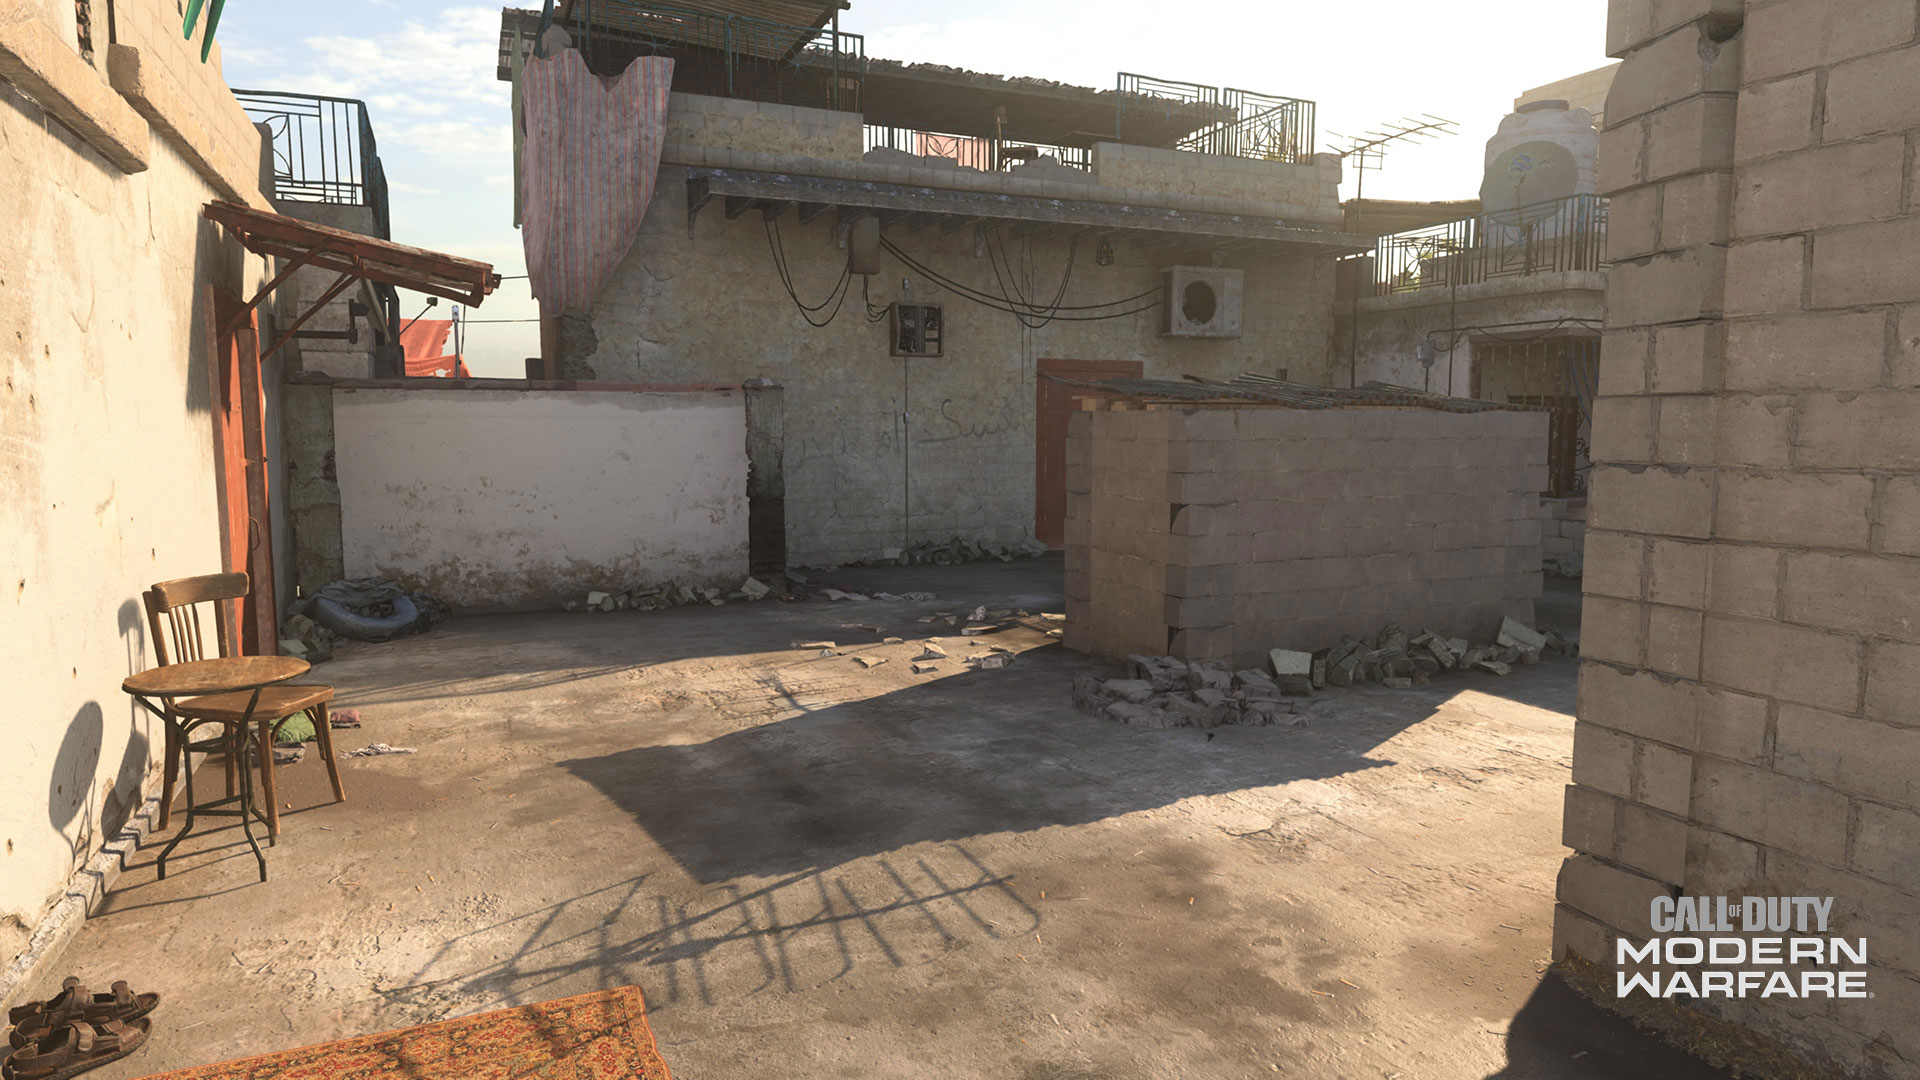
2. Barber Shop
Little remains of what was once the Barber Shop, directly accessible from the Coalition spawn. This destroyed local business is crowded with rubble. Light streams through a bombed-out hole in the ceiling, and Al-Qatala graffiti marks the humble civilian space as lost.
Access this walled-off location from any angle: two doorways on the Market side, two doorways on the Road East side, and through the smashed front window.
The Barber Shop is mostly concealed from aerial Killstreaks. But, the small hole in the ceiling can be used to root out enemies defending the third Hardpoint/Headquarter or the Data Center in Cyber Attack. All it takes is a well-aimed VTOL, Cruise Missile or Chopper Gunner to infiltrate the area and ruin enemy plans.
Is your team defending the Barber Shop Hardpoint? A Deployable Barrier set up at the back entrance, or a Molotov tossed in one doorway, can help re-route any enemies trying to contest the objective.
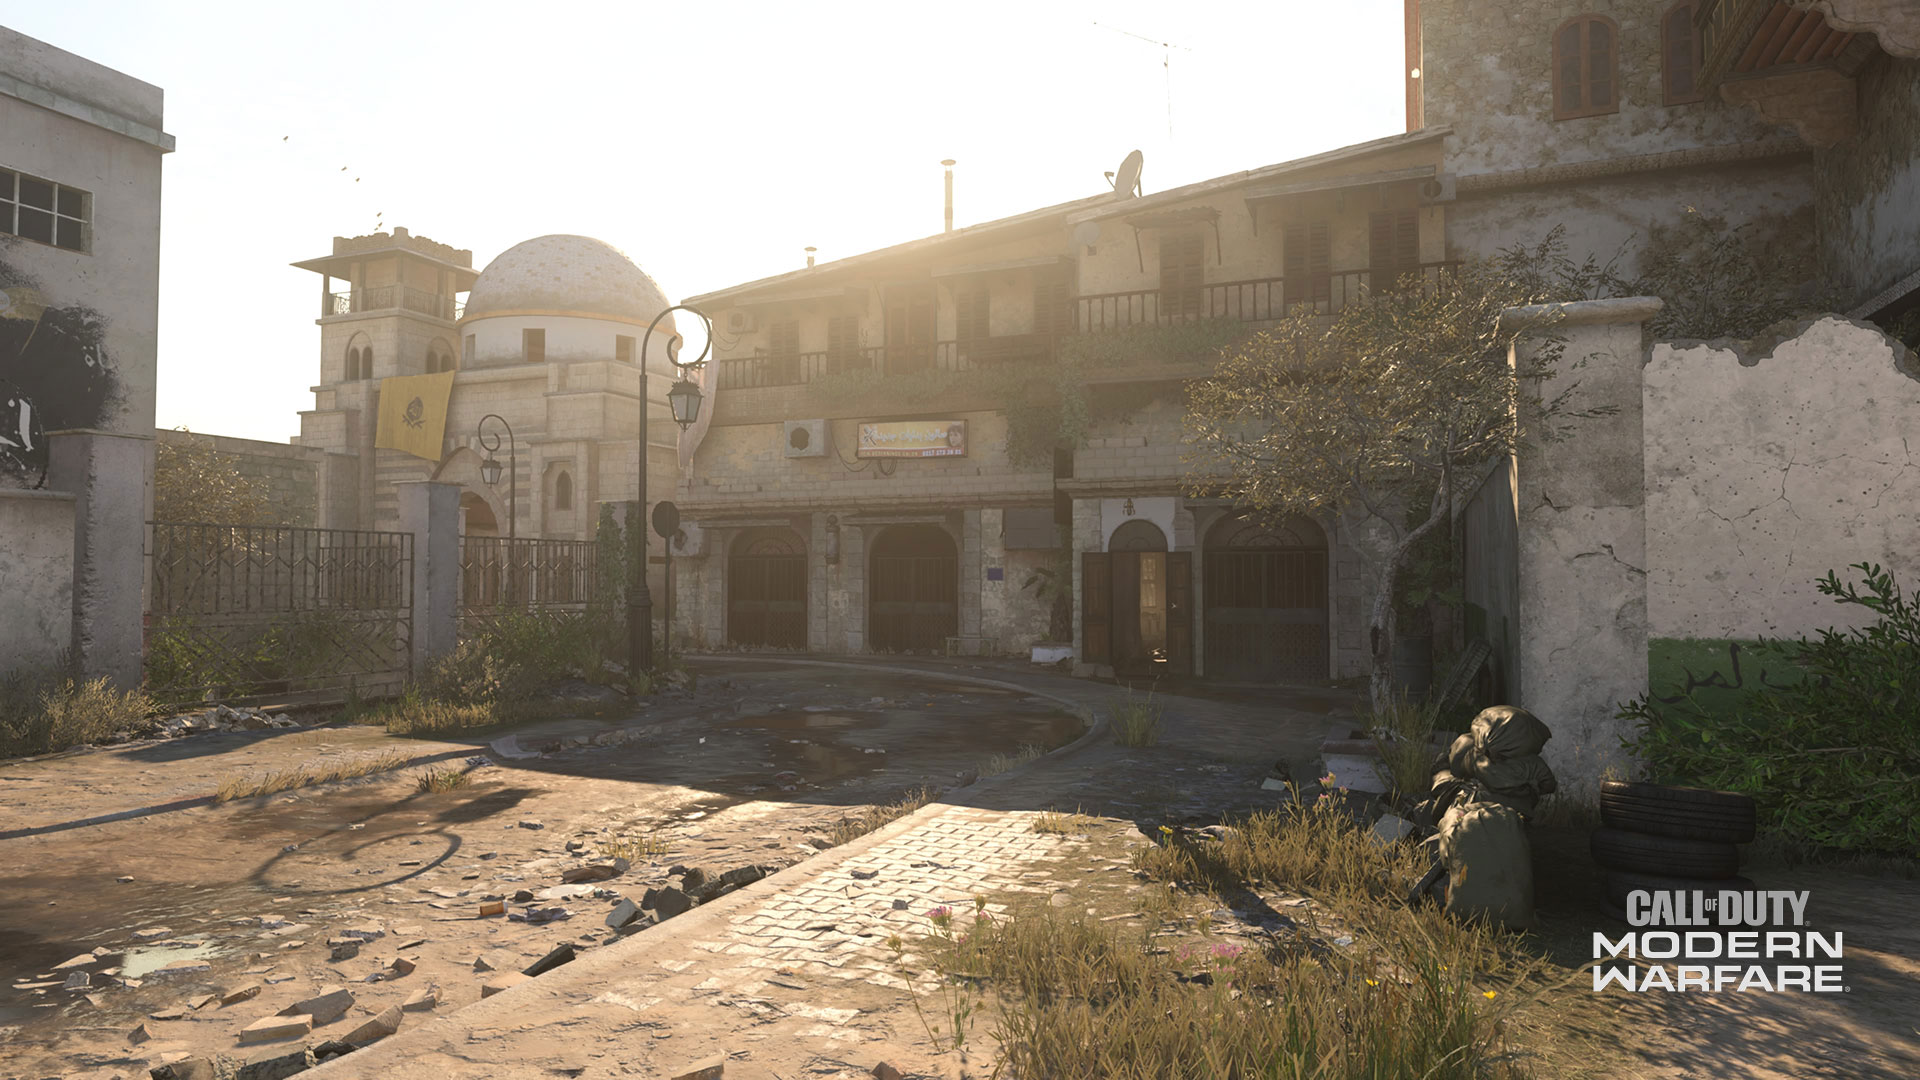
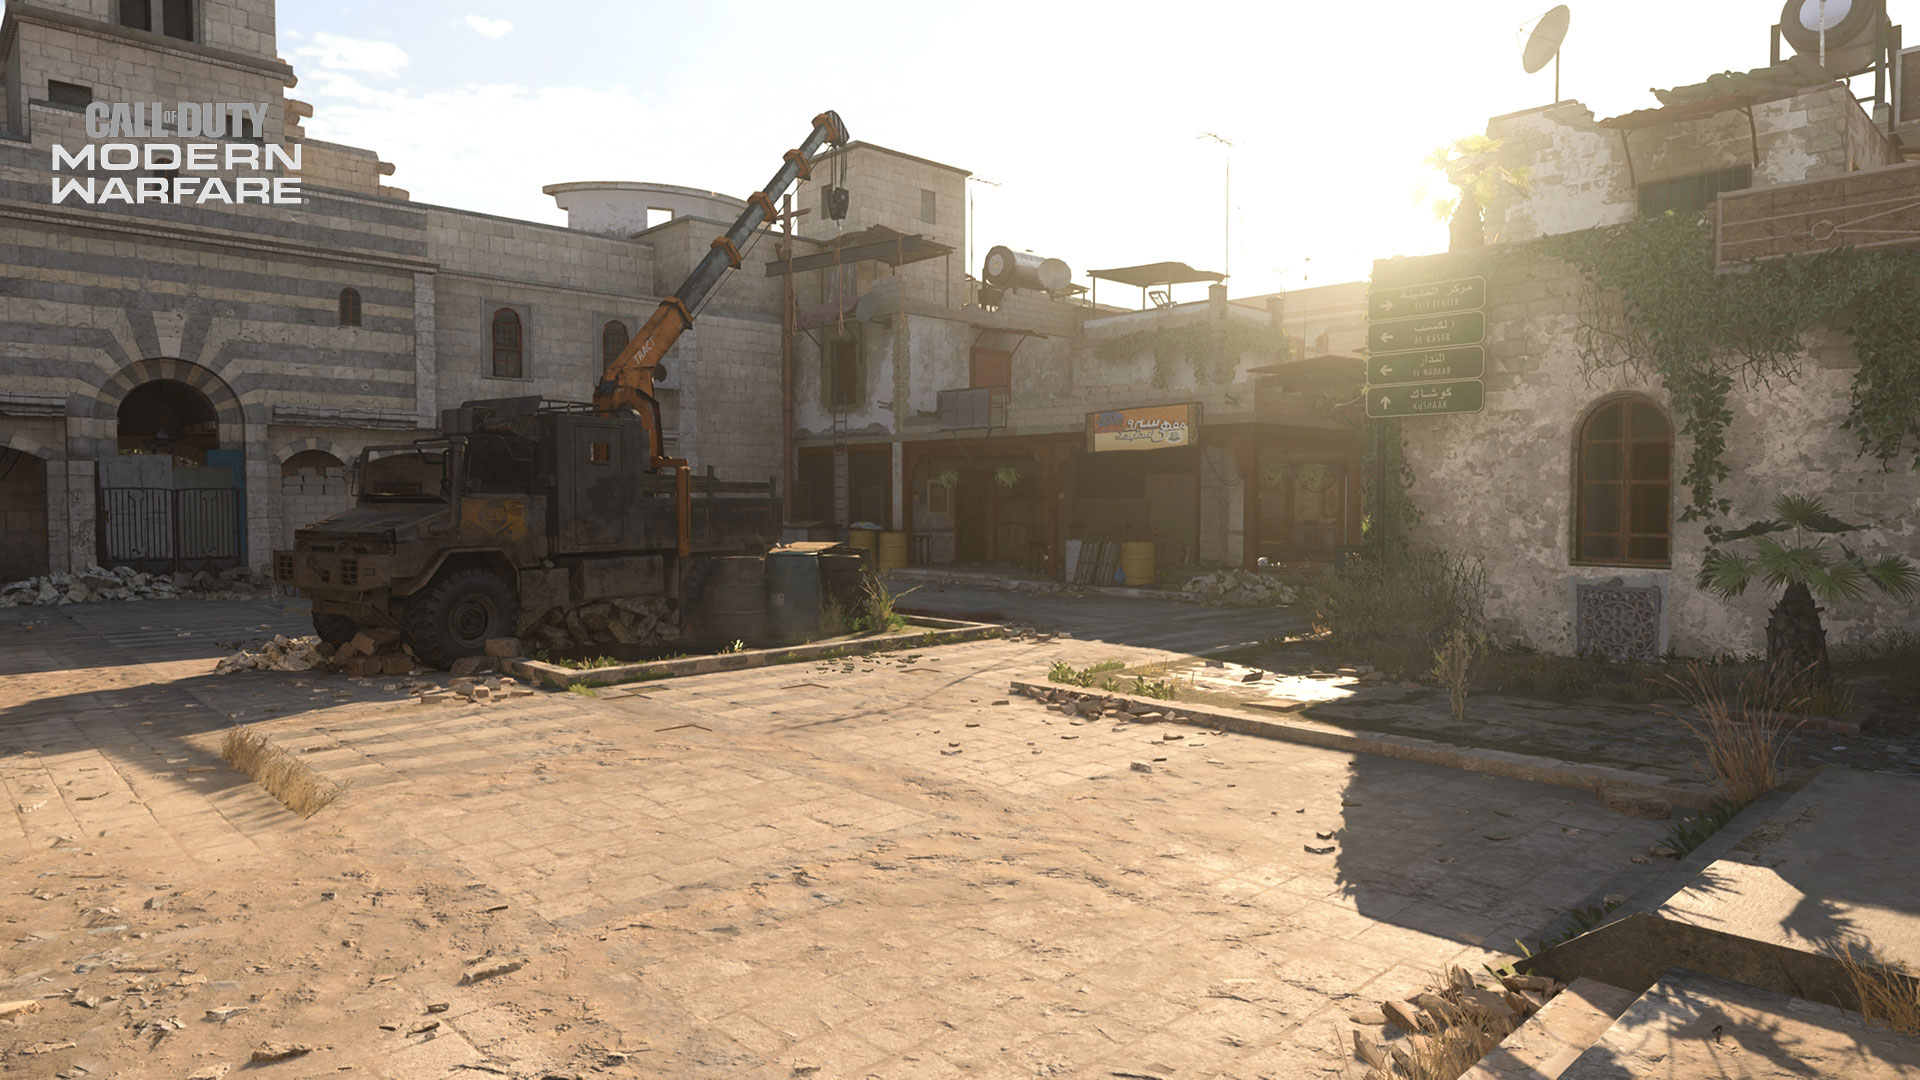
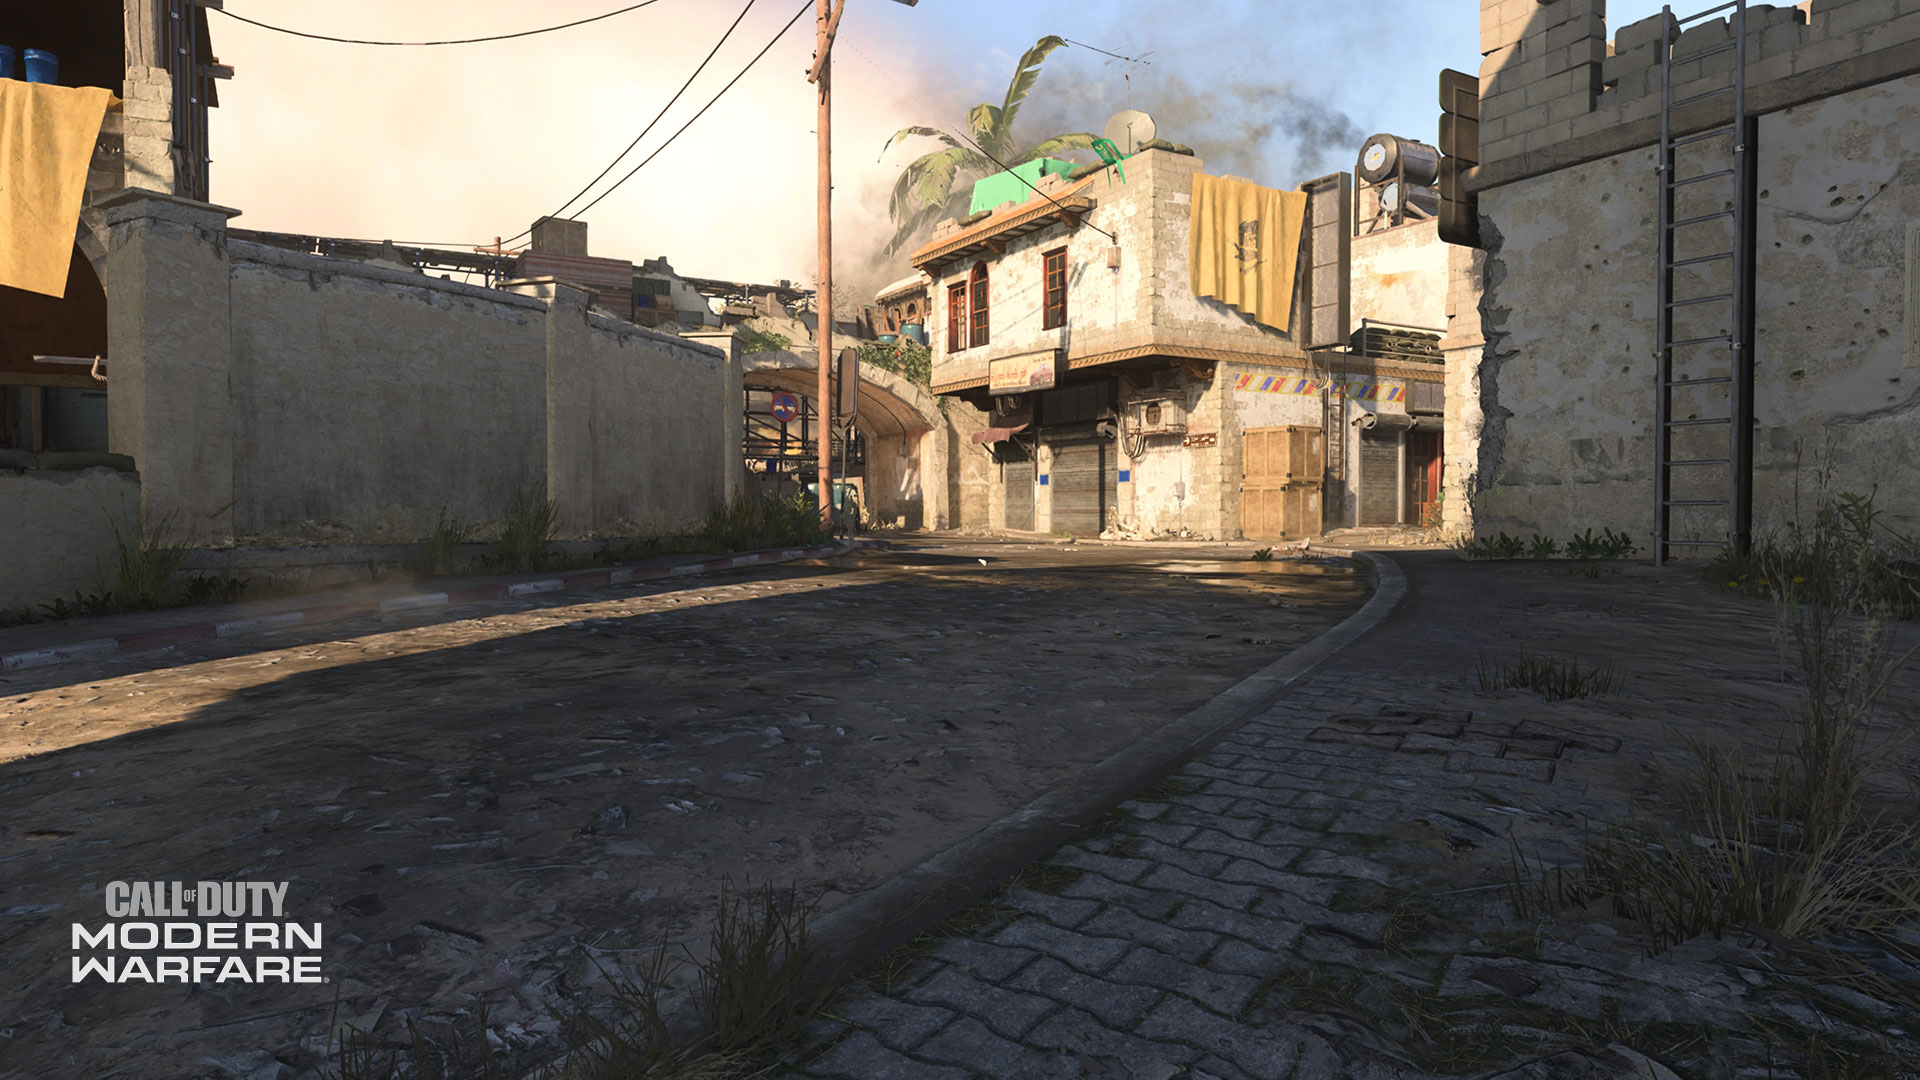
3. Market
A sunny town square directly in front of the Barber Shop, the Market is an open space that begs for confrontation from all angles. From Market, there are many options for exploring deeper – and higher – areas of the map.
A single open lane stretches from Market to Road West. This route is the most vulnerable path out of Market but is one of the quickest ways to the B flag in Domination. For a more concealed ground-level path to Road West, try navigating through the ruined Café and its many darkened rooms.
Or, bear right and enter the small but strategically placed Soap Shop, which provides a covered route to the map’s northernmost edge.
At the southwestern side of Market, a stack of barrels provides access to a ladder leading onto Market Rooftops. From this overwatch location, fighters can swiftly dispatch enemies near Barber Shop. Or, wage war atop the open-air landing, which looks down at the B Flag, across the map to Construction, and toward the map’s opposite end at Road West.
At Market’s northwestern side, an open staircase is hung with a bright yellow Al-Qatala flag. This staircase also leads to Market Rooftops’ northern location, with opportune vantage points for patrolling the Bridge Hardpoint, the B Flag in Domination, and any enemies exiting Construction.
4. Soap Shop
Look for a paned glass door leading from the main Market lane. Then, breach the doorway into a looted Soap Shop. Trash, debris and soap leftover from Al-Qatala’s infiltration litter the floors.
Soap Shop creates a useful path between the Market, the ground level beneath the Bridge, and the Construction building. Exit through the back doors of the shop for access to the Construction building at the map’s northwest corner.
Or, hang a left and follow the Road West path, where the B Flag in Domination can be found. Consider dropping a Trophy System, or deploying a Smoke Grenade, to keep enemies at a distance as you hold down the B flag.
Be careful as you pass the Soap Shop. Its concealed location makes it easy for enemies to duck in and pick off your teammates as they head into the Café or follow the open Market path.
It can be an especially deadly location in Headquarters if the HQ spawns here, as this small room can easily get overcrowded when there is an objective on the line.
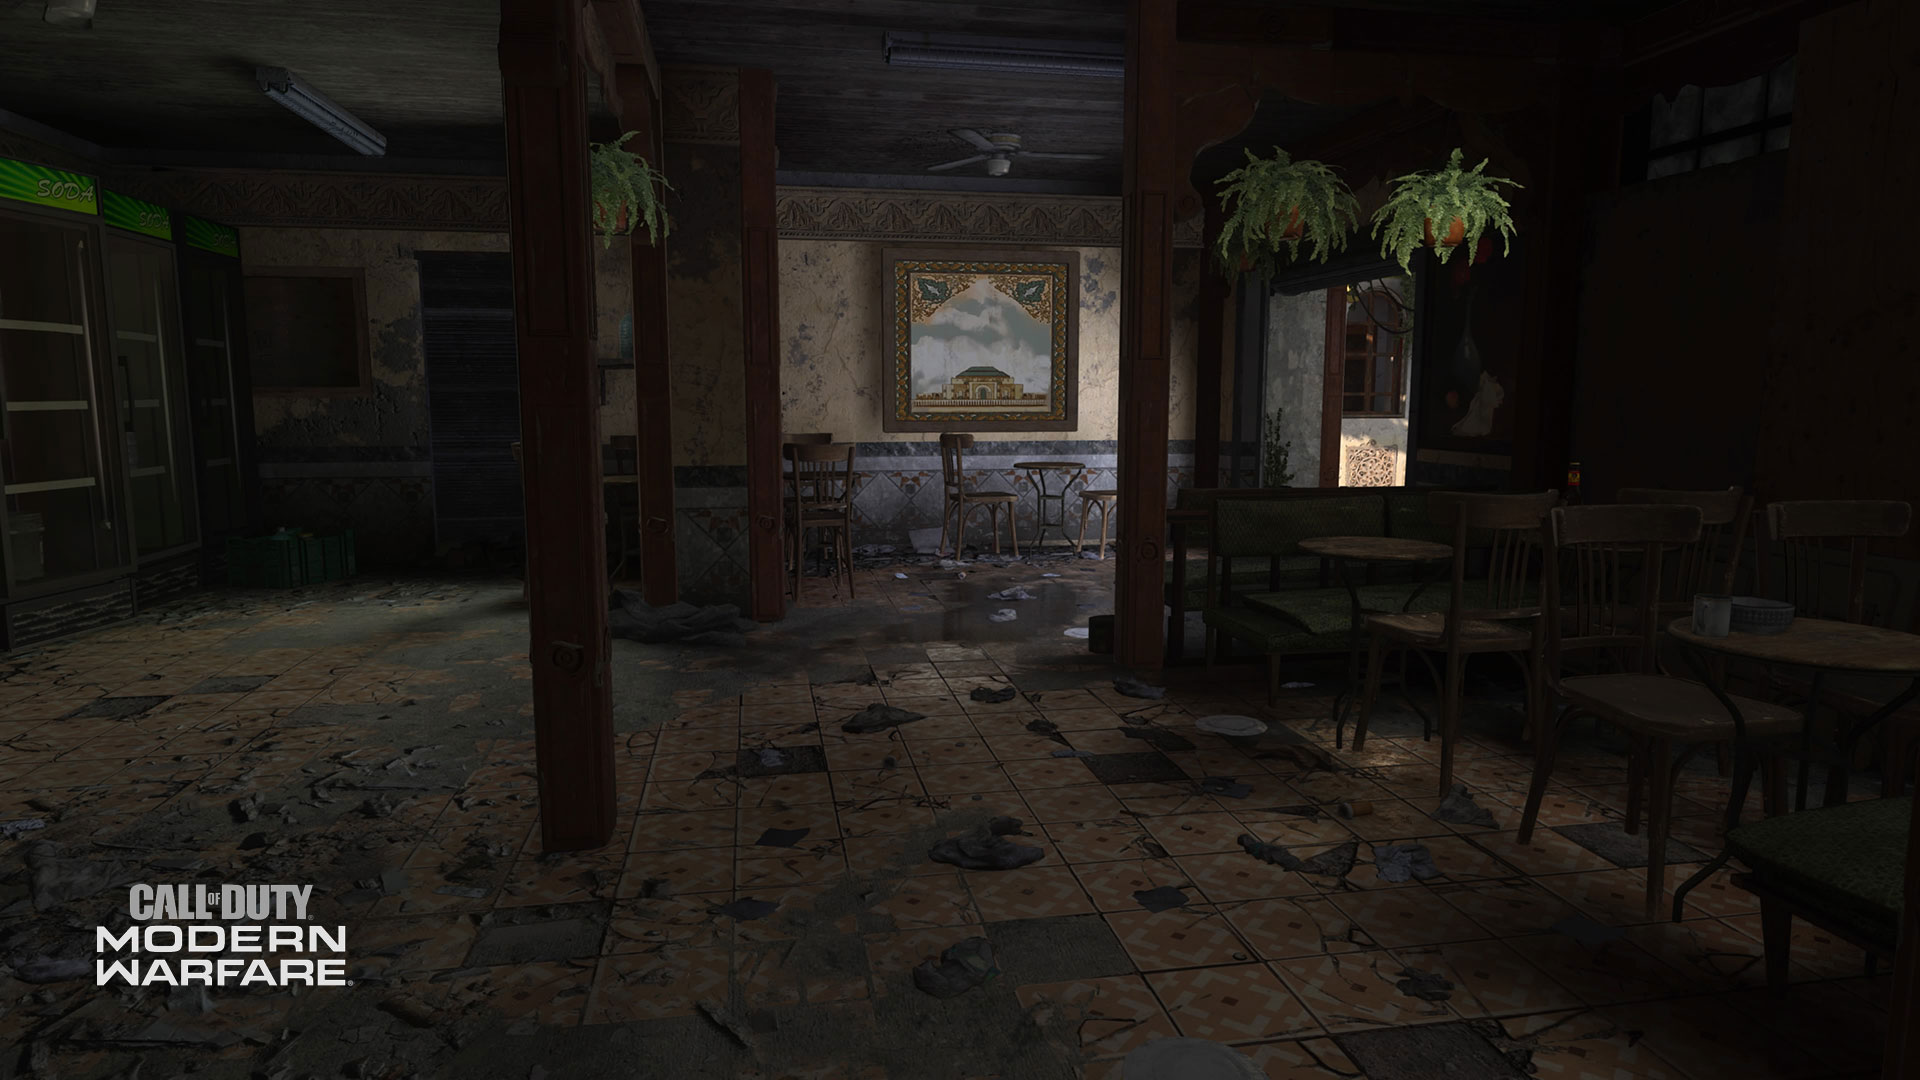
5. Café
Rubble, flies and despair: all that’s left of the formerly pleasant Café sitting at the town’s center.
If you choose to infiltrate the map’s south-central side, use the Café for cover. Be cautious and check your corners: there are several rooms tucked away in this ruined Café, and it’s clear that Al-Qatala forces have converted certain rooms into living spaces.
Creep from room to room to clear hostiles or exit through a door at the Café’s west side to infiltrate the map’s core.
The Café’s main space is where a bomb can be found in Cyber Attack. If you capture the bomb here, swap to your primary weapon and try to stick close to your teammates. Lurking enemies can catch you by surprise, giving you little chance to swap weapons or defend yourself if you’re alone.
This restaurant can also serve as a HQ location. Those defending the area may want to make use of the tables, chairs, and irregular design of this room to their advantage, confusing enemies with smart equipment placement and defensive Field Upgrades.
Upon exiting, you’ll face a ramp made from sandbags and destroyed scaffolding, which you can climb to reach the furthest end of the map at Road West, where the Electronics Shop is located.
6. Market Rooftops
The Café’s west exit also provides access to the northern part of Market Rooftops. Turn around and climb the ladder to scale the building and launch attacks from the roof.
This open-air location is perfect for launching strategic attacks into the road, across the map to the Bridge and Construction, back toward the Market, and even into the Back Alley. Use the staircase leading to Back Alley for quick access to the map’s south side.
Or, duck into the small doorway to the left of the staircase. A small room with a busted window provides an uninterrupted view of any hostile foot traffic in Back Alley.
Market Rooftops expand across the upper levels of Rammaza. Mismatched planks extend from one side of Market Rooftops to another, forming improvised walkways for quick travel.
On the southern side of Market Rooftops, players gain access to the Rug Shop, the Bridge Hardpoint and Construction. And from here, they can follow the main staircase back toward Market, if the situation calls for it.
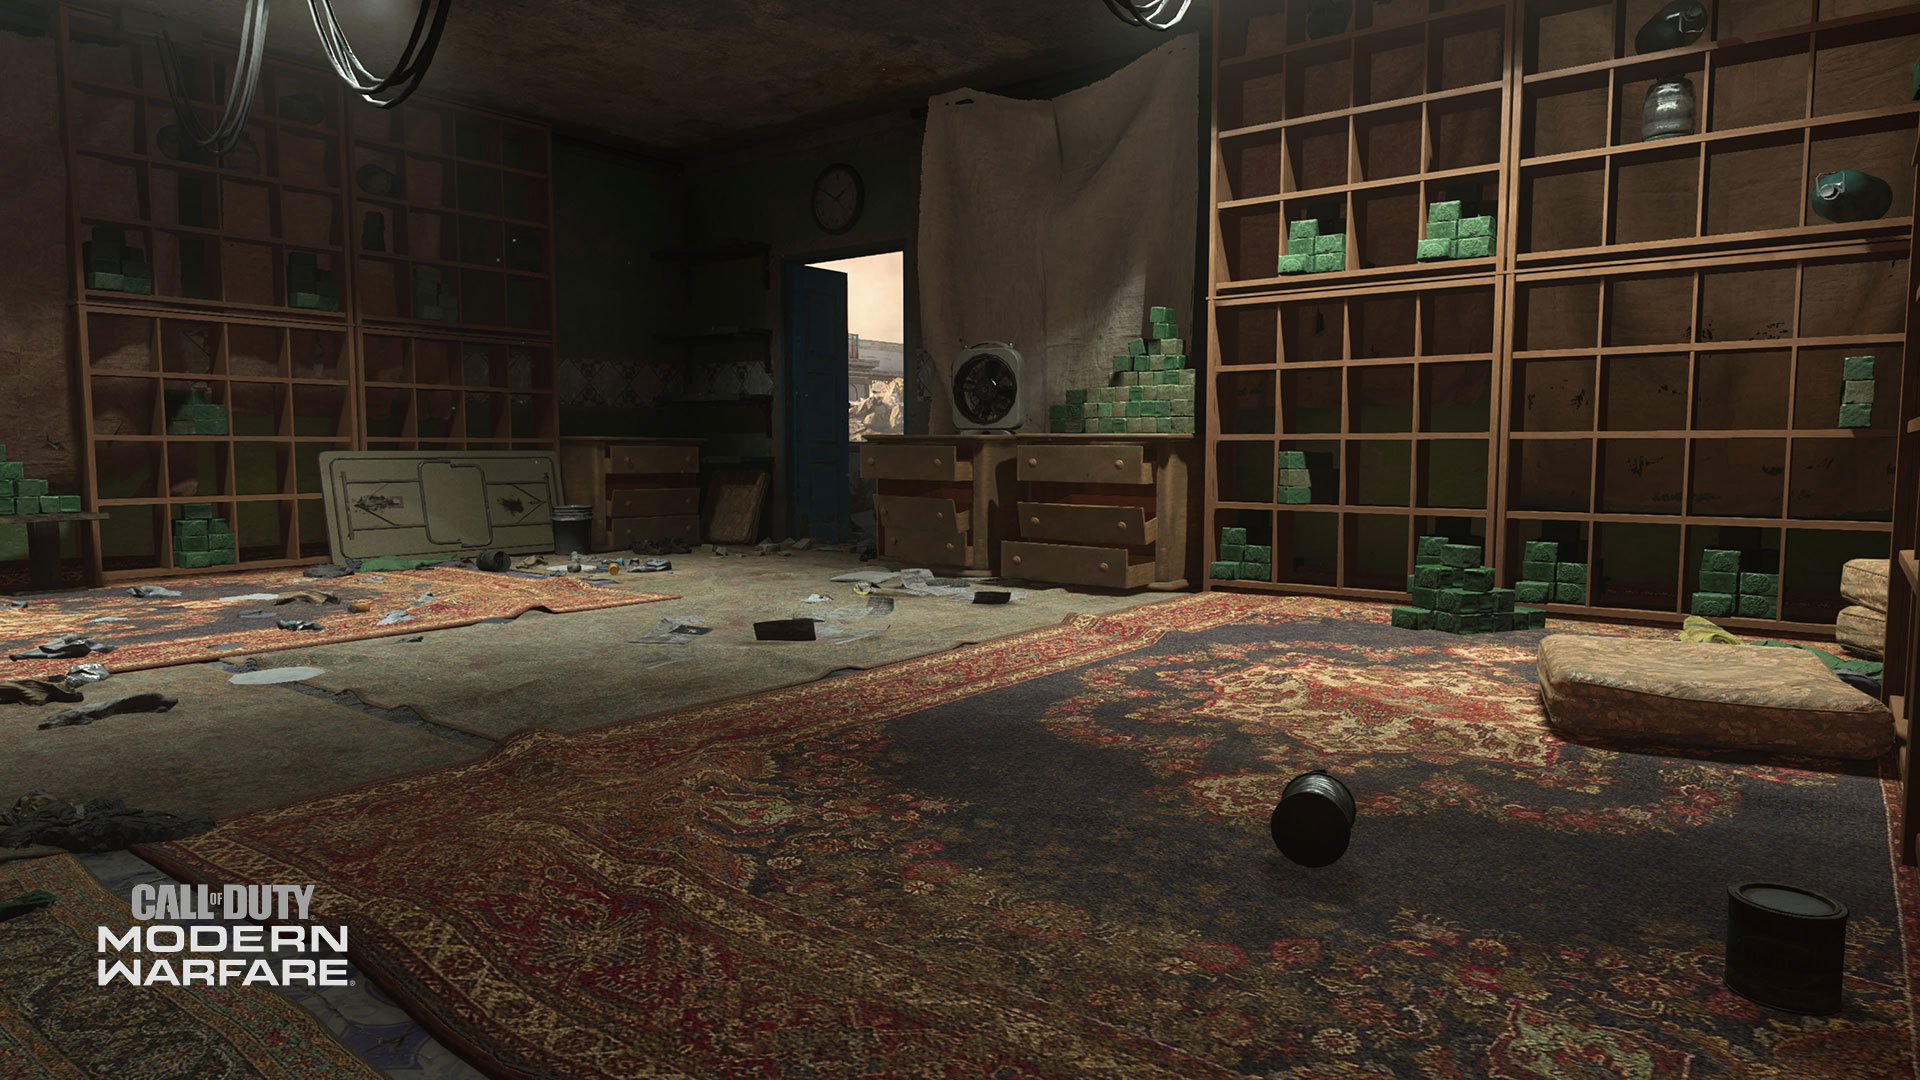
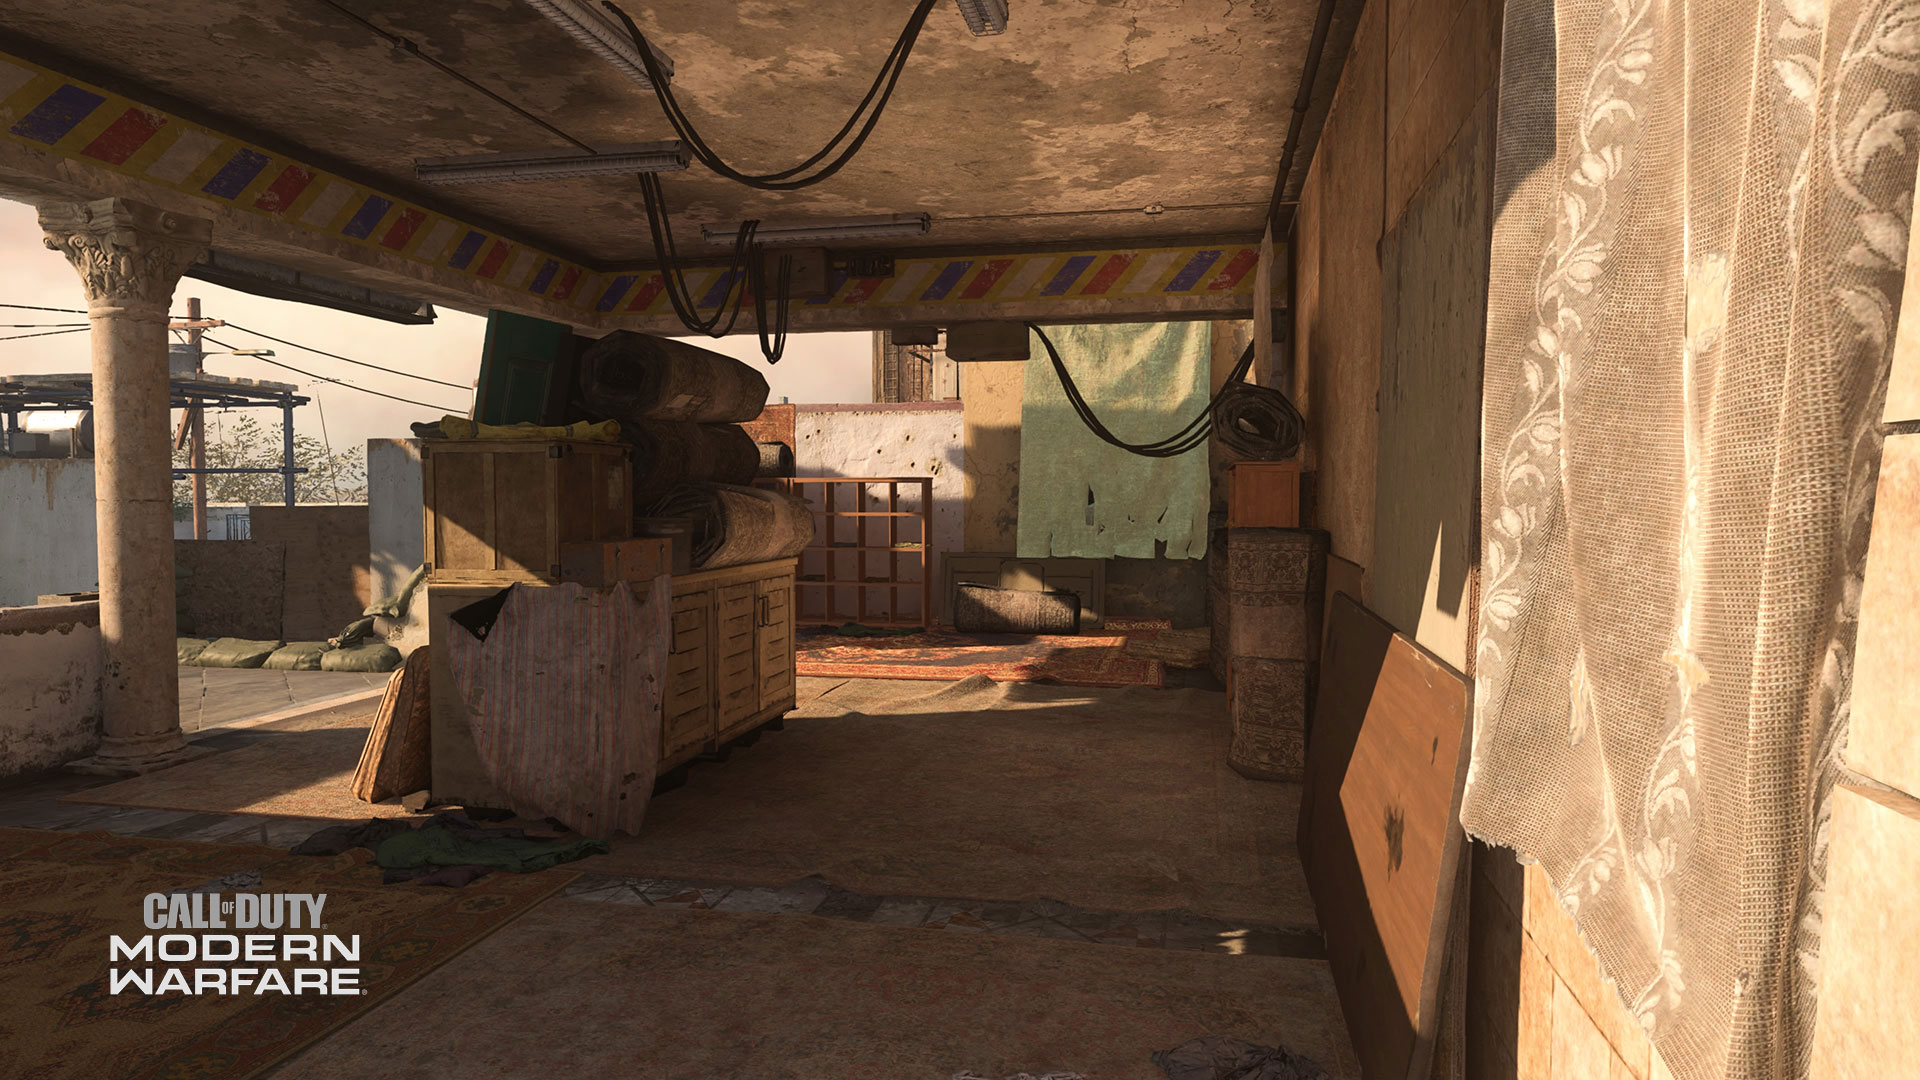
7. Rug Shop
Battered textiles and discarded décor crowd this already-cramped space. Players on the Market Rooftops should be vigilant and watch for enemies using the Rug Shop as cover.
This area directly leads to the Bridge Hardpoint. Toss a Thermite to the Hardpoint’s opposite side to keep enemies from infiltrating the objective too quickly.
In Domination, Rug Shop is a strategic overwatch for the B Flag. In Team Deathmatch and Free-for-All, it’s an opportune location for launching attacks on many areas: Construction, Road West, Market Rooftops, Bridge and more.
8. Bridge
The first Hardpoint location, a potential HQ spawn, and a bomb location in Cyber Attack, Bridge is a vulnerable but advantageous spot for all sorts of firefights.
Losing a confrontation? Duck behind the narrow scaffolding at Bridge’s edge to heal, call in a Killstreak, or swap weapons.
Like Rug Shop, Bridge also calls for open season on the B Flag in Domination. However, watch for enemies at Market Rooftop’s opposite end, who may be looking to complete their Longshot Camouflage challenge. (If so, make sure your longshots land first!)
Pro tip: the ground below Bridge is also designated as “Bridge.” With two levels of play in one zone, be cautious when following up on a teammate’s alert that there’s an “Enemy at the Bridge!”
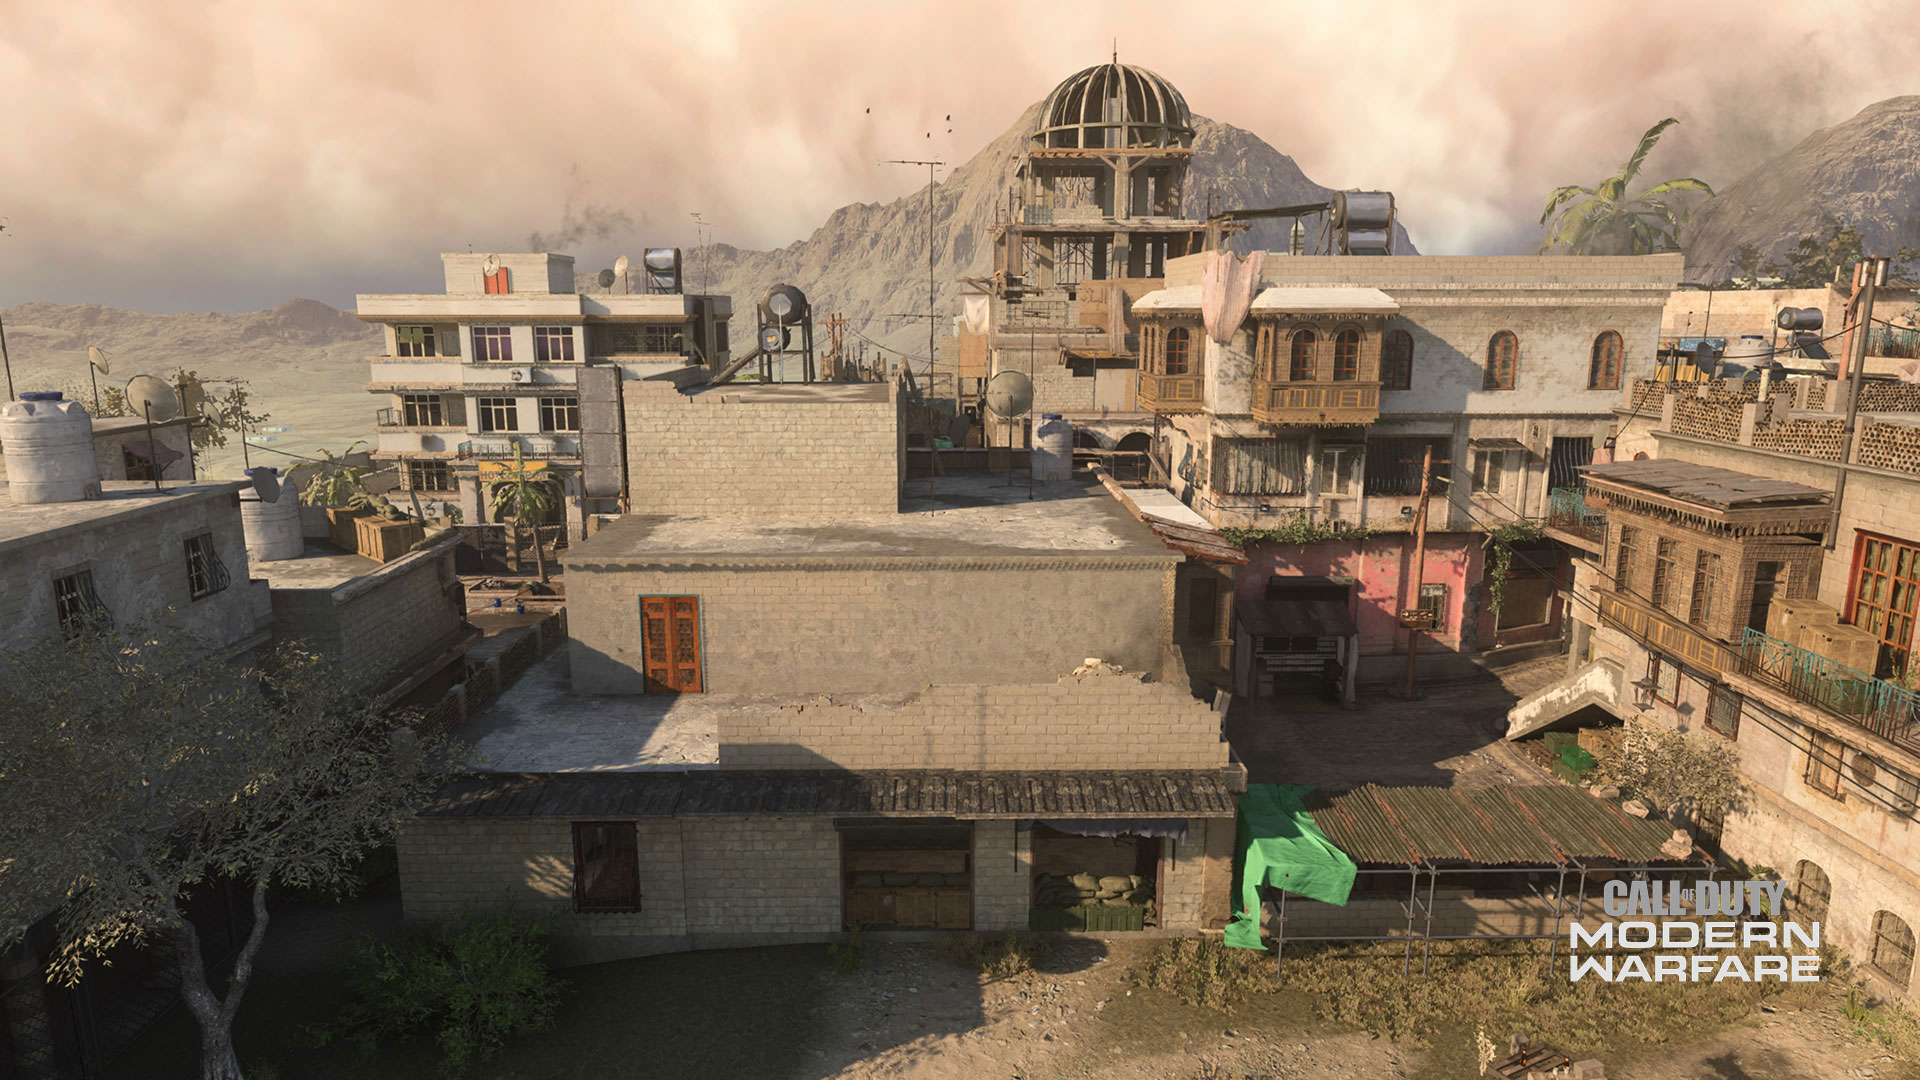
The Bridge provides several access points into Construction, a towering, semi-empty space with a mix of concealed routes, outdoor scaffolding and winding pathways. Several objective modes require breaching this massive site; read on to find out more.
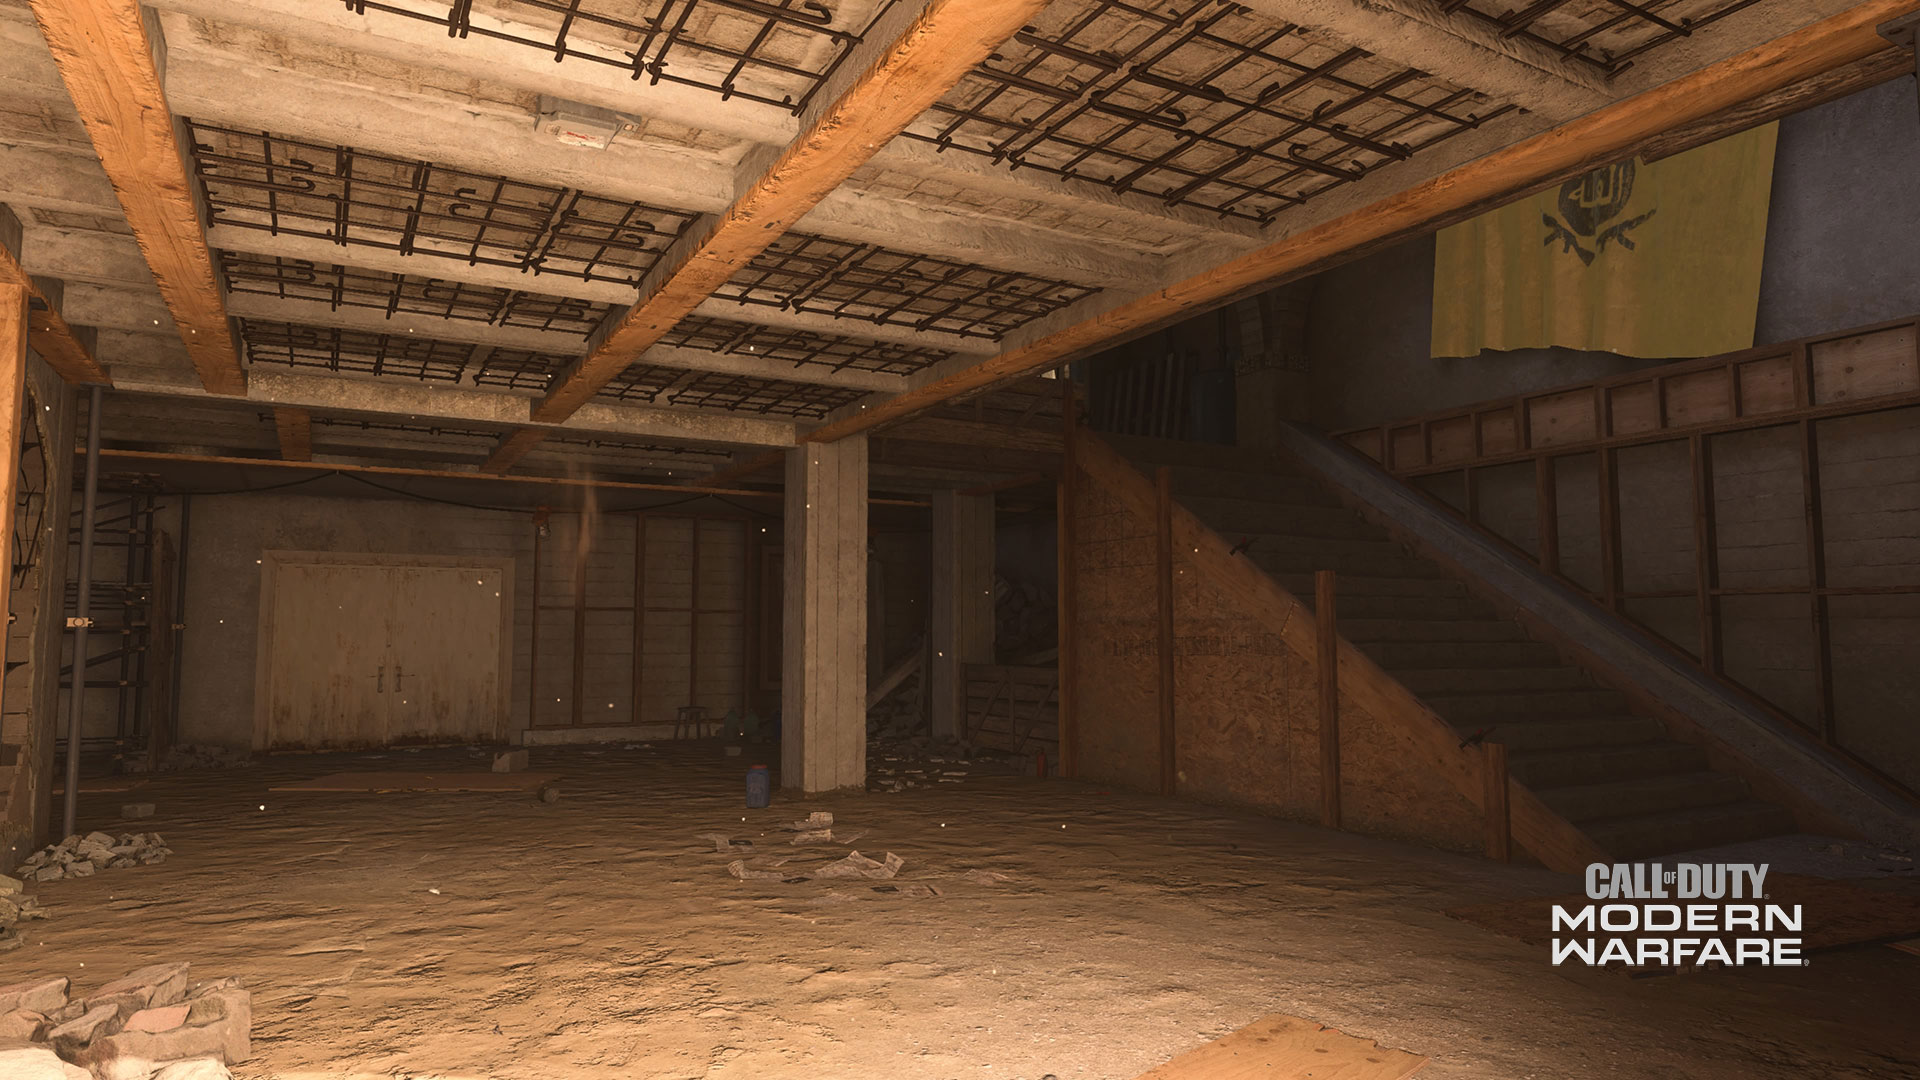
9. Construction
With multiple ways to infiltrate this unfinished building, Construction is a shadowy and dusty space where threats can lurk at every corner.
From the Bridge, several semi-concealed walkways grant access to Construction. Each path leads to a different side of Construction’s ground floor, where the fourth Hardpoint a HQ location can be found. Another HQ location can spawn here on the second floor, with the top floor acting as a way to potentially break defenses through aiming down holes in the ceiling.
At this objective site, remember you’ll be easily heard, if not seen, by any enemies infiltrating Construction from Road West. The unsteady scaffolding is a major movement giveaway, so try equipping the Dead Silence Field Upgrade to infiltrate the objective unscathed.
In Domination, keep an eye out for spawning Allegiance fighters using Construction for a strategic way to approach the B Flag. But, in all modes, this spot provides cover for the Allegiance to push deeper into the map with little detection. Infiltrate with caution.
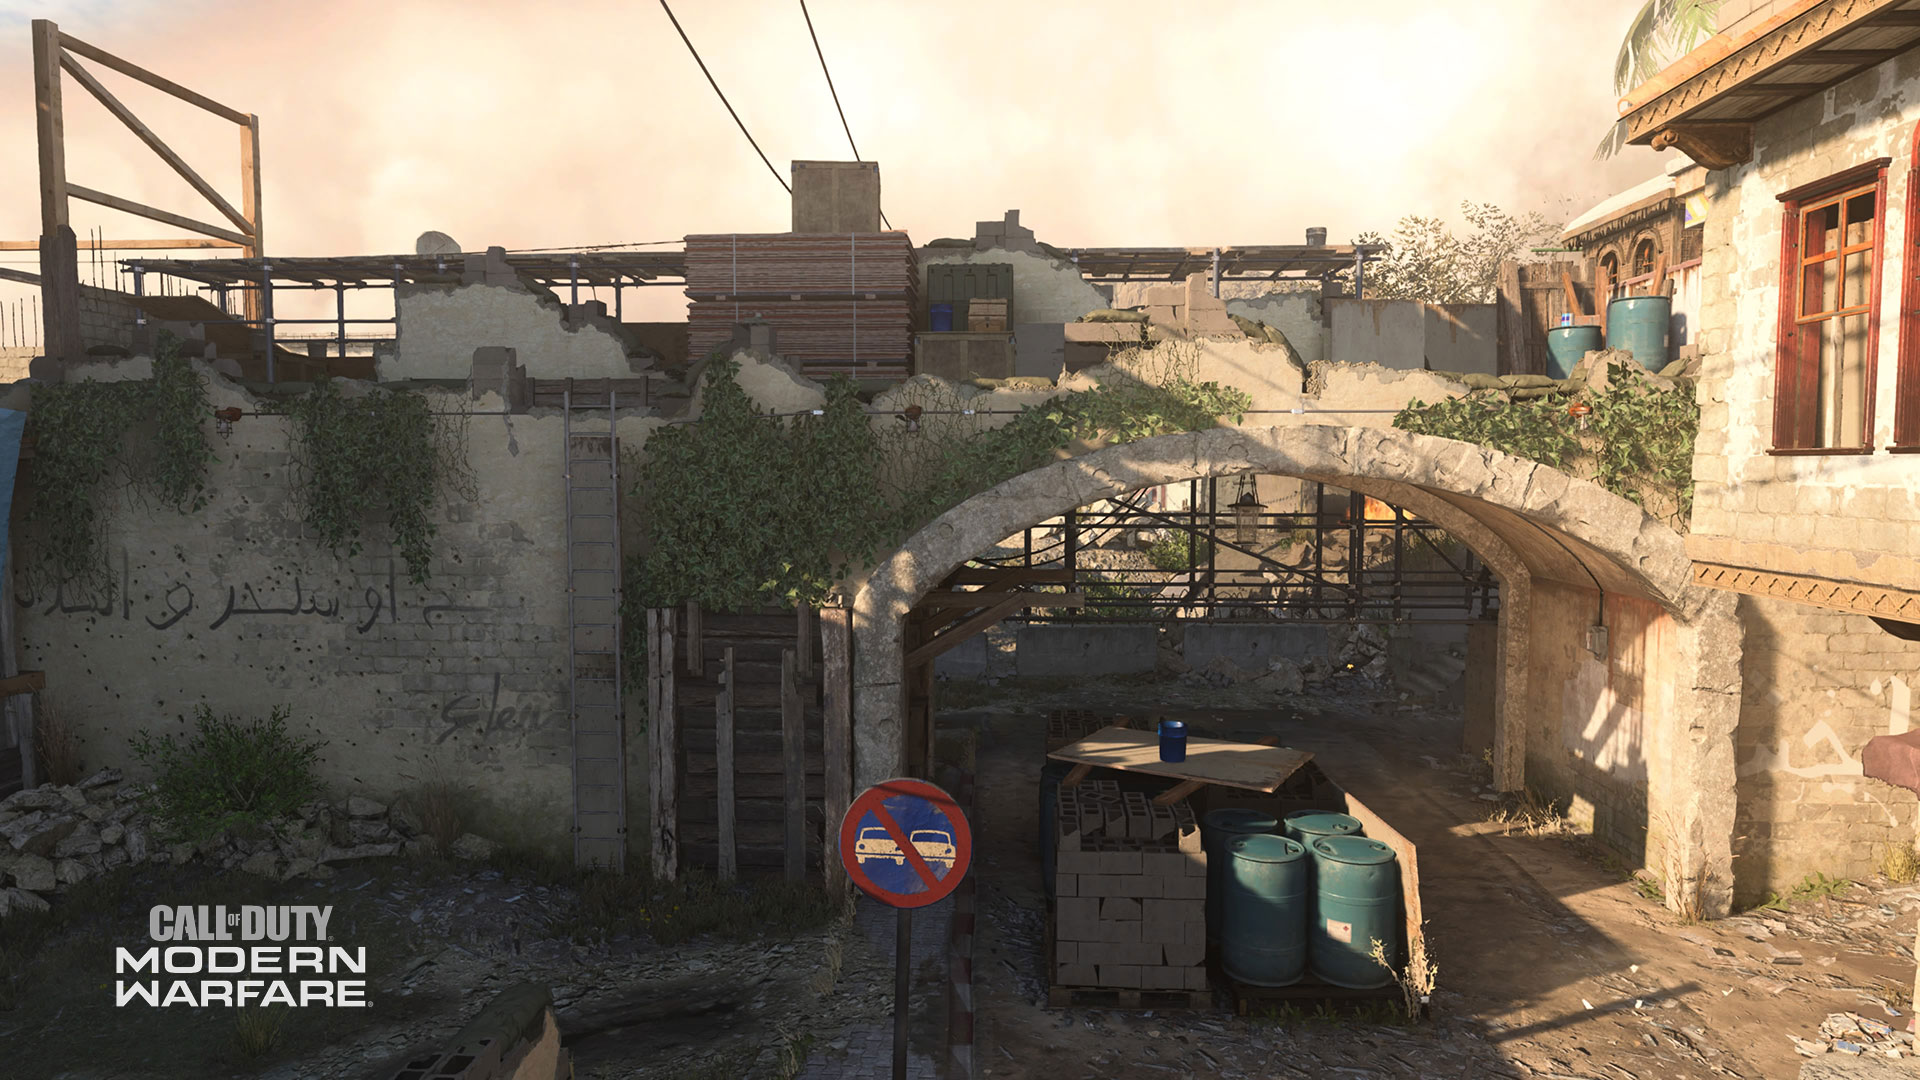
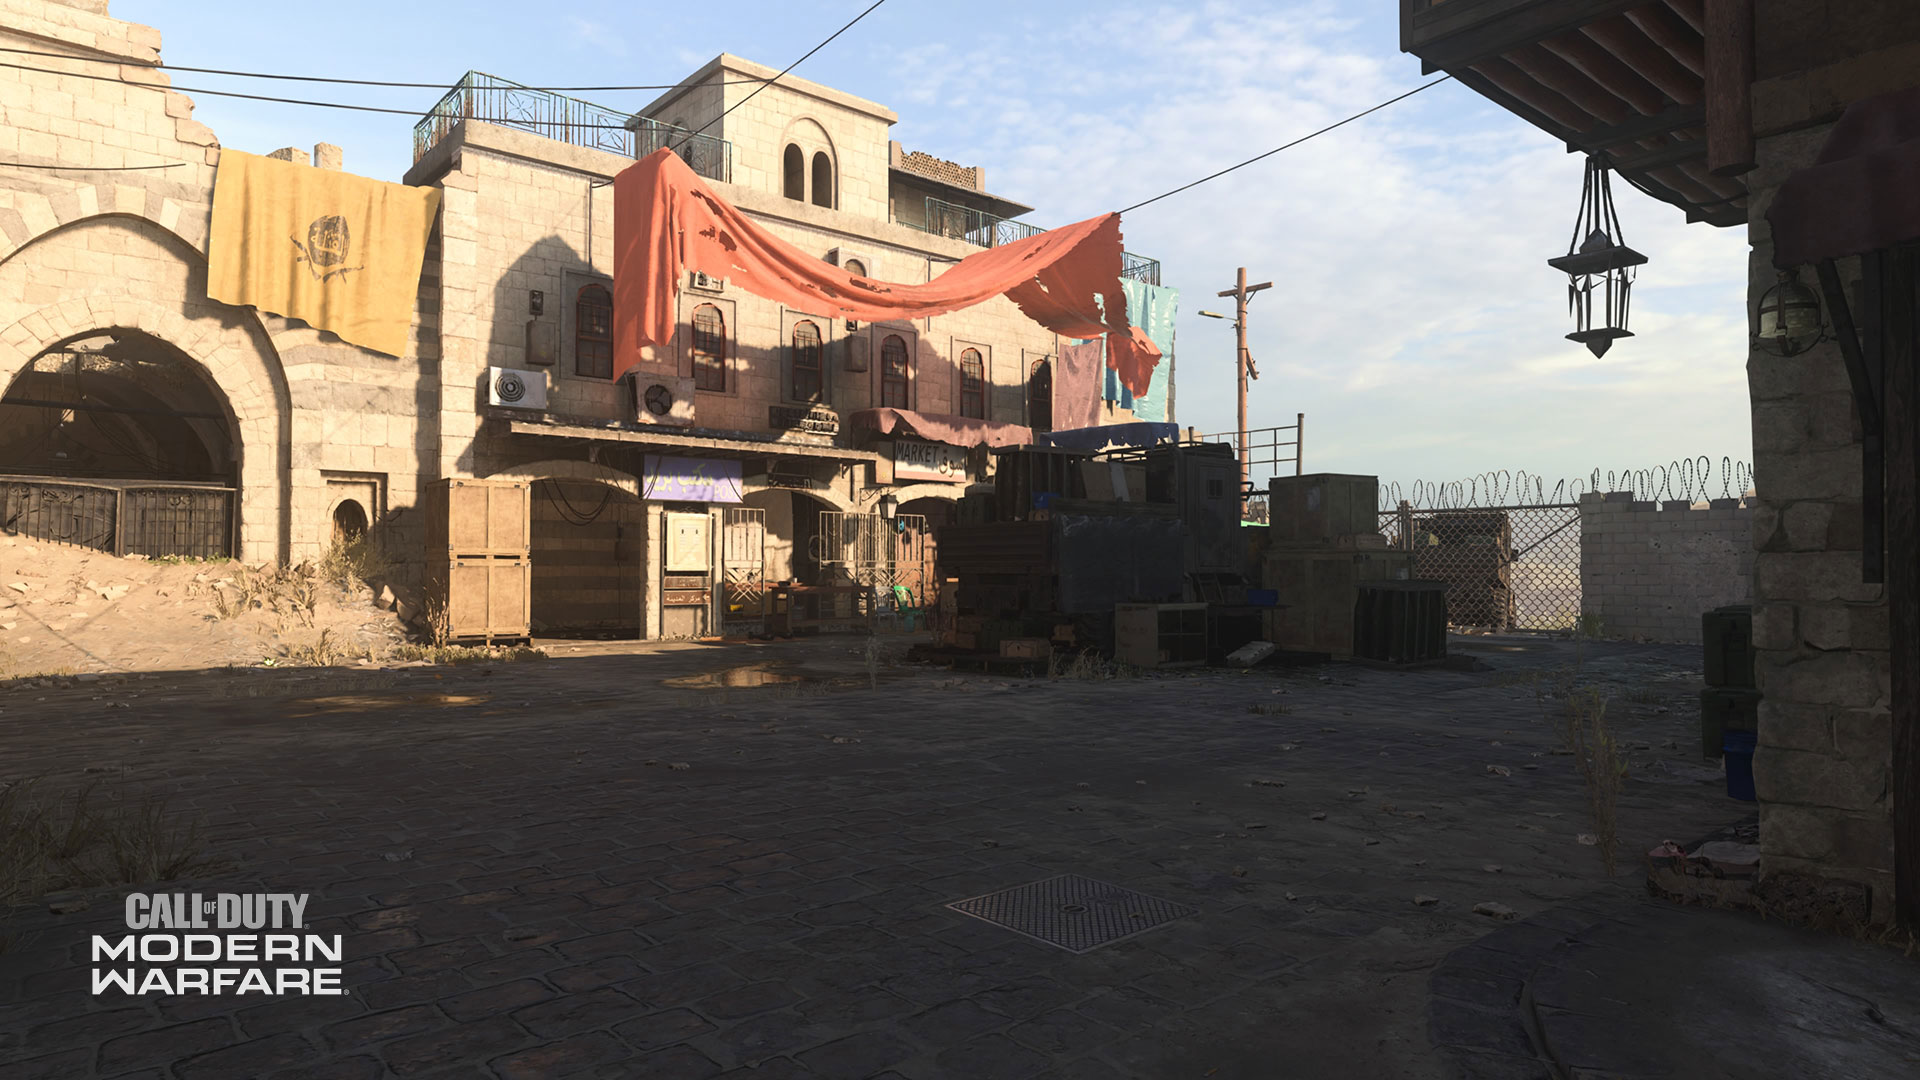
10. Road West
Barbed wire, debris, noxious puddles and a single white van crowd the Allegiance spawn at Road West. Once a hub of civilian business, Road West is now a highly unfriendly area. To the north, a boarded-up hotel lies out of reach. To the south, storefront signs hang askew, or are concealed altogether by Al-Qatala’s ever-present flag.
This area leads to the Electronic Shop and Construction. Straight ahead, enemies have propped planks and sandbags against a disabled bus. This makeshift ramp provides a slight overlook into the map’s center and the B Flag in Domination.
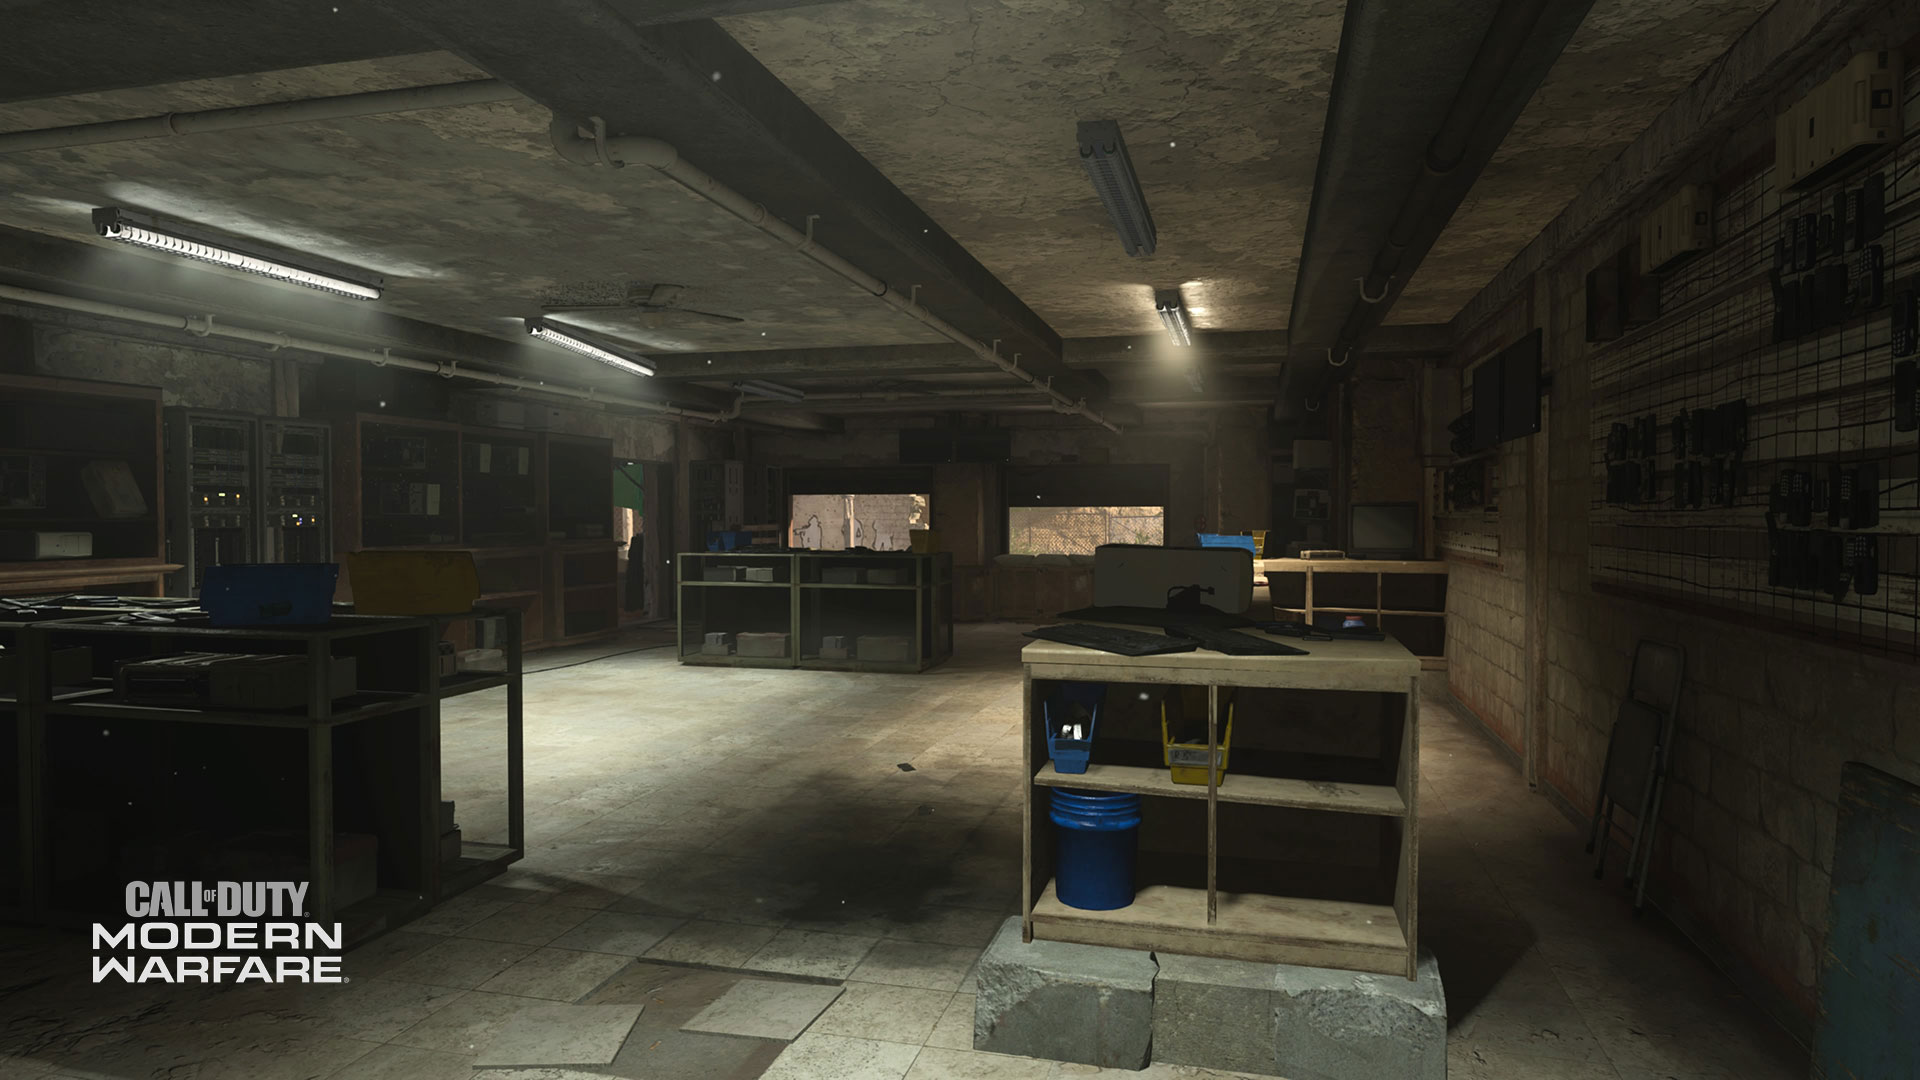
11. Electronics Shop
Hotly contested in any mode of gameplay, the Electronics Shop is the location of several important objectives.
Here, players find discarded servers on the fritz, frantically blinking. Destroyed CPU towers and buzzing radios have been left behind, while the area’s main hiding space – a row of cabinets – have been swiftly cleared out.
The Electronic Shop is the second Hardpoint location, following the first rotation at the Bridge. Coalition fighters should keep this in mind, as the western locations of both hardpoints can be easier to access for Allegiance.
If Allegiance captures this hardpoint before you can reach it, make use of the multiple routes that lead into Electronics Shop. A hidden back room, accessible from the very edge of Road West, can be an excellent path for clearing unknowing enemies from the Electronics Shop Hardpoint.
This tactic works at all hours, but especially at night when your movements are naturally more concealed.
12. Back Alley
The Back Alley is really a two-part location. One part links the Electronics Shop to the Gun Shop. Here, a tall crate can be used as leverage to hop the wall that separates Back Alley from Road West. The second part of Back Alley wraps around the Gun Shop, leading to the Ruins and a two-flight staircase granting access to Market Rooftops.
In the second stretch of Back Alley, between the Gun Shop and Ruins, players can locate the bomb objectives in both Cyber Attack and Search and Destroy. These will appear beside a stopped truck and a disabled cache of missiles, right at Back Alley’s center.
If capturing or defending the explosives here, you might be exposed to the multiple routes of entry that lead to it.
Some enemies might hang out inside the main lane of Ruins, trying to pop shots over the wall and into your grill as you navigate Back Alley. An FMJ attachment is great for making mince-meat of partially hidden hostiles.
The Back Alley is also a key flank route, carving an asymmetrical path from Electronics Shop to Ruins and Road East.
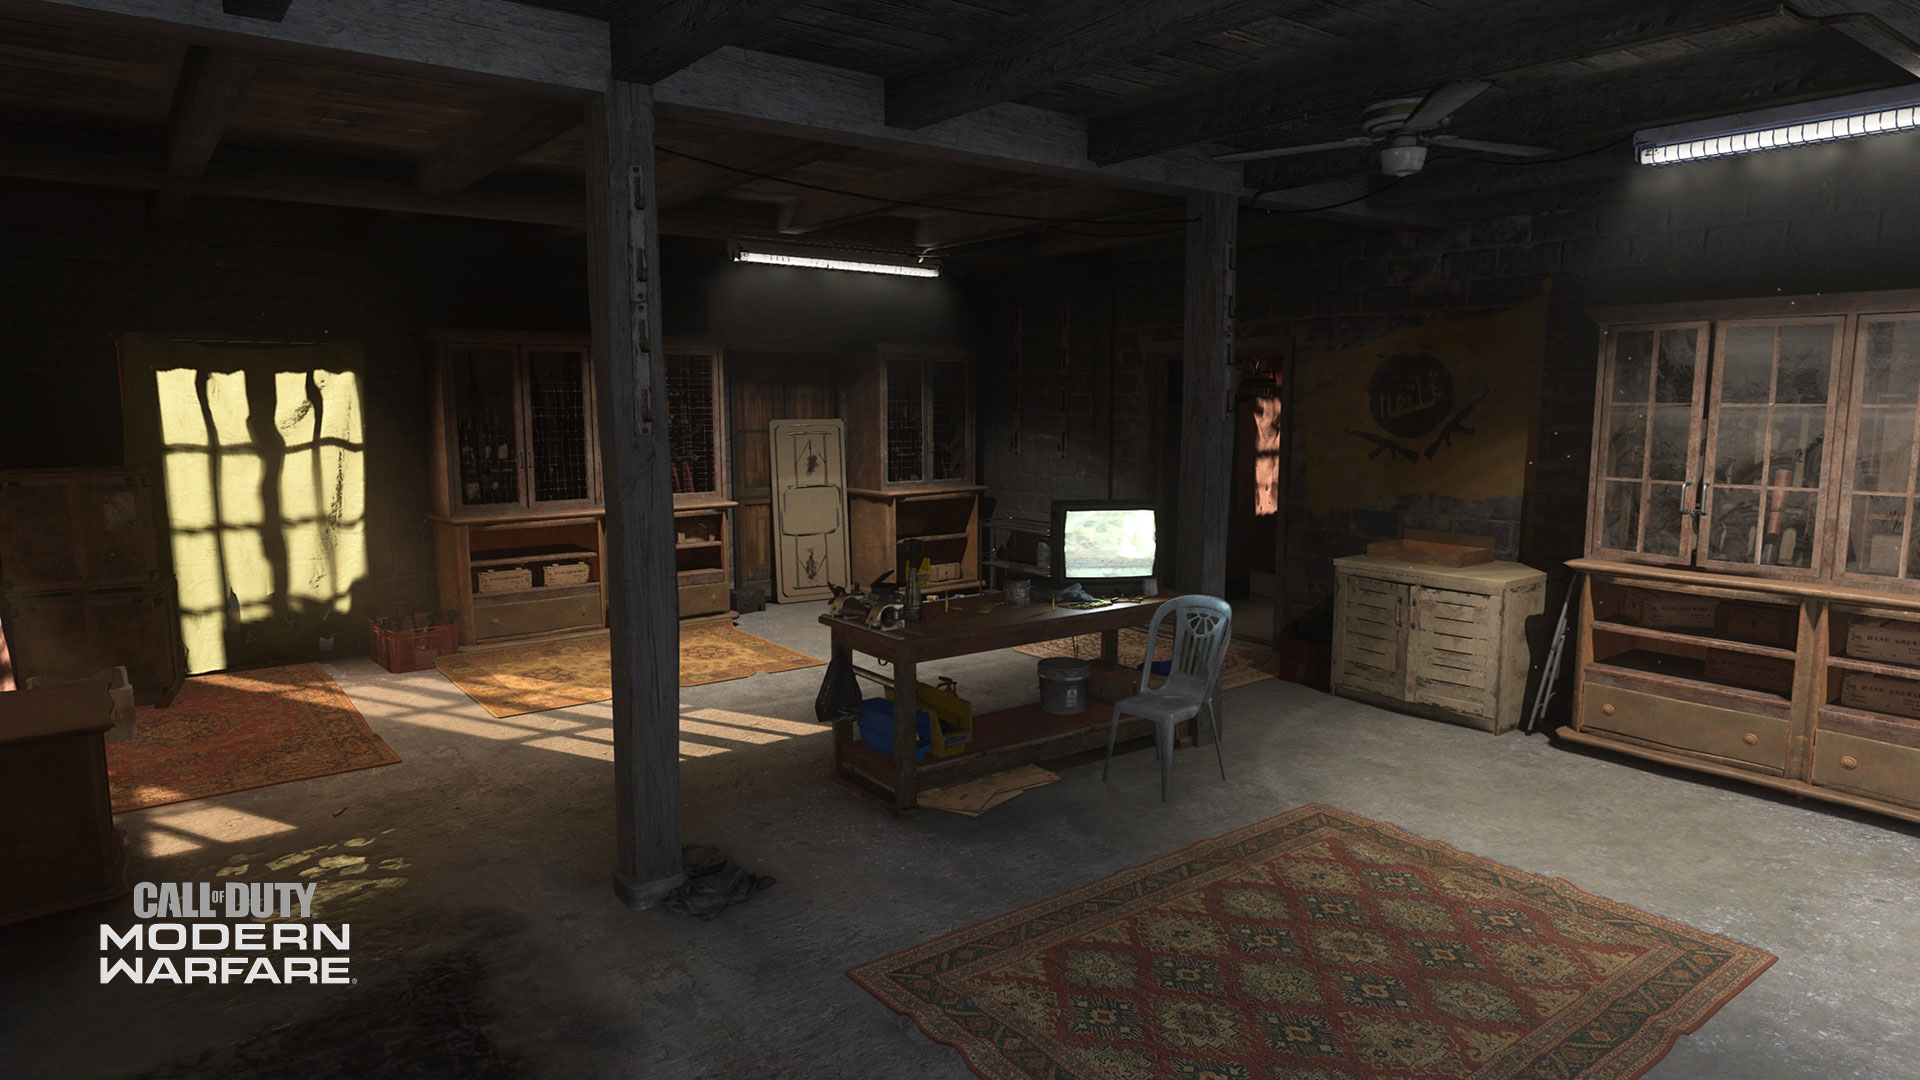
13. Gun Shop
Explore the two-story outpost that was once a humble Gun Shop, but now bears the mark of Al-Qatala.
The main landing is accessible via two staircases. Climb the staircase at the Electronics Shop side and make your way to the back of the Gun Shop’s first floor, where a door leads into Back Alley.
Or, climb the second set of stairs into Gun Shop’s second floor for a bird’s eye view of Back Alley. This second floor is also where you’ll find a potential HQ spawn point, making that view of the Back Alley a main overwatch point against attackers.
From here, you can descend one last, hidden set of stairs into the street. Or, you can hop onto a slightly lower rooftop and rain down death from above.
14. Ruins
Accessible from Road East, Market, and Back Alley, these ivy-covered ruins are a shadow of their once-glorious architecture.
An open-air path to the left of Ruins leads into the Back Alley, from where you can intercept enemies moving from the Gun Shop or Market Rooftops. But, Ruins’ main lane shines in Hardpoint or Headquarters, where an objective is placed on the covered, grassy path that directly links Road East to Back Alley.
No matter the mode, this narrow space is great for up-close-and-personal gunfights, launching attacks on enemies leaving the Gun Shop, or maneuvering to the Market Rooftops in relative secrecy.
Tips
1. To the Flanks! Make good use of the flank routes at either side of Rammaza, as both routes can be navigated in multiple ways. Bridge is an excellent path from east to west, both on the ground and above it. And, Back Alley makes for quick traversing between spawn locations. Just watch out for enemy foot traffic.
2. Extend Your Barrel
With multiple uninterrupted sightlines at all levels of the map, longshot kills are a hallmark of combat in Rammaza. To really take advantage of how far across the map you can see, equip a longer barrel to your weapon for satisfying cross-map devastation.
3. Check Your Corners Trust Captain Price. For as many long-range sightlines as there are in Rammaza, there are also many cramped spaces and tight corners. In spaces like the Café and Electronics Shop, you’ll want to proceed with caution. Mounting a powerful marksman rifle or shotgun to your corners before entering a shadowy space can save you a respawn or two.
4. Use Equipment While playing objective modes in Rammaza, the open spaces can leave you vulnerable to enemy approaches while capturing a flag, retrieving a bomb, or guarding a data center. Flash, Stun and Smoke Grenades are an objective player’s best friend. And, consider equipping the Shrapnel perk to spawn with two pieces of lethal equipment. If you use up one Molotov, hey – you can always toss another.
5. Have fun!
Rammaza’s complexity makes for an exciting, smooth flow of combat. The unpredictable urban setting leaves tons of room for experimenting with creative tactics and strategies. And, with Day and Night versions available, no two matches in Rammaza are ever the same.
Now, get out there and show us what you’re made of. Stay frosty.
For more information and the latest intel on Call of Duty®: Modern Warfare®, check out: www.callofduty.com, www.youtube.com/callofdutyand follow @InfinityWard and @CallofDuty on Twitter and Instagram and Facebook.
For more information on Activision games, follow @Activision on Twitter,Facebook, and Instagram.