Modern Warfare® Tactical Map Intel: Aniyah Incursion
Get the advantage over your enemies with this breakdown of this tactical variant of Aniyah Palace - Aniyah Incursion, including objective information and a detailed map walkthrough
Modern Warfare® Tactical Map Intel: Aniyah Incursion
Get the advantage over your enemies with this breakdown of this tactical variant of Aniyah Palace - Aniyah Incursion, including objective information and a detailed map walkthrough
April 22, 2020
by Daniel Noel
A bombed-out palace stands over the landscape two kilometers outside of El Nadaar, Urzikstan. Welcome to Aniyah Incursion, a 6v6 Multiplayer map that primarily features the enclosed portion of Aniyah Palace. This 6v6 version centers right onto the palace and its immediate vicinity, challenging players to fight through the rubble for control over the second floor and the streets below.
Part of the Season Three content offering, Aniyah Incursion rewards all styles of play, from CQB loadouts shooting it out in the palace to sharpshooters exchanging shots over and through the streets. Success goes to the Operators who can best navigate the royal terrain and outflank the opposition.
Read on for a full breakdown of Aniyah Incursion, from the Crossroads to the School and everything in between:
Lay of the Land
A once exquisite palace is now barricaded and occupied by military forces vying for control of the area. The building has been bombed and damaged in the fighting, but it still stands. With many entrances to the first and second palace floors, control of the building is tenuous at best, requiring a major defensive effort as reinforcements pour in from every angle.
The previously busy streets are now littered with military supplies and housing, drawing the Coalition and Allegiance forces in an effort to secure new resources and positioning. Set on day 102 of the ongoing conflict, it’s only a matter of time before the fighting intensifies into the greater area. Until then, the focus is on the palace.
Map Detail
Aniyah Incursion is a medium sized map built for 6v6 playlists. The palace dominates the center of the map with a diversity of distinct zones in its immediate vicinity.
Here are the 12 zones this map contains:
1. Crossroads
2. Pool House
3. Swimming Pool
4. Tents
5. Palace Entrance
6. Palace
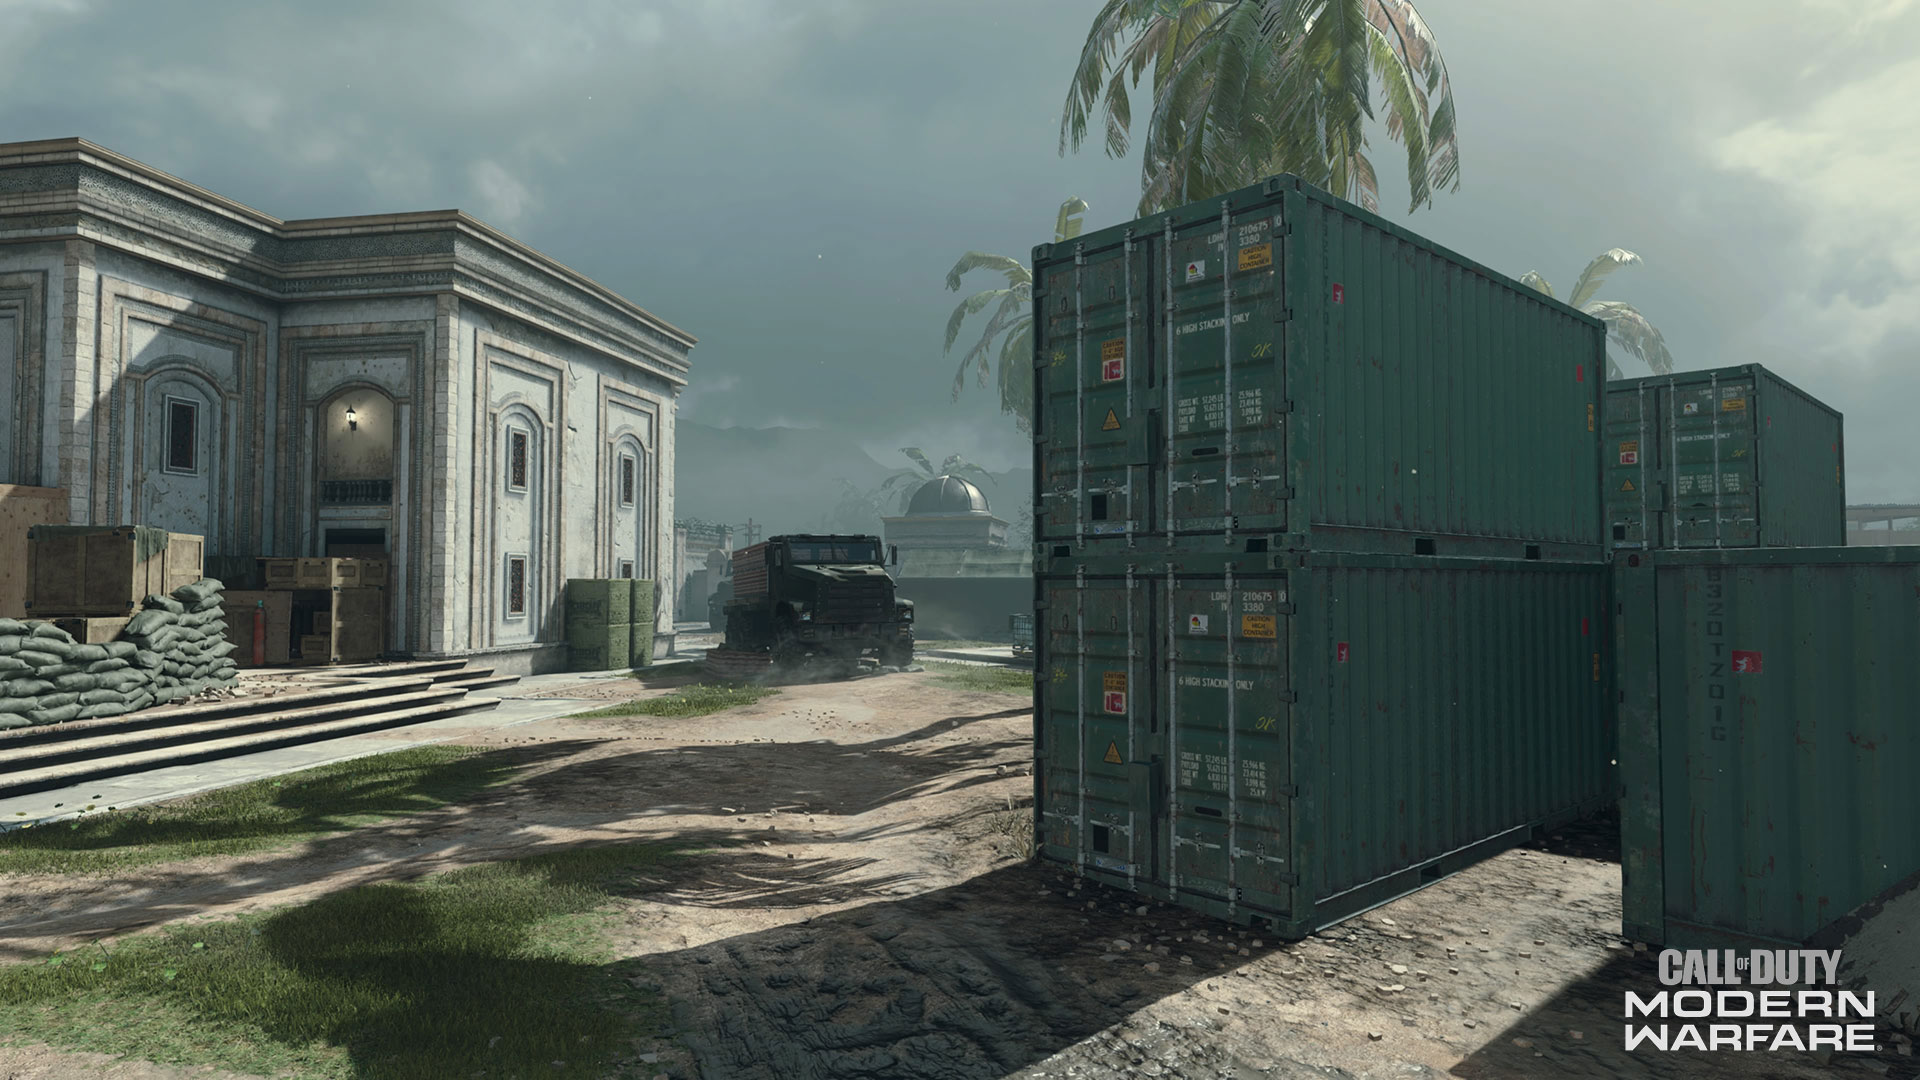
7. Cargo Containers
8. Palace Sandbags
9. Supplies
10. Barracks
11. Statue
12. School
Map Zones Breakdown:
Aniyah Incursion: Map Overview
Aniyah Incursion: Map Zones
Aniyah Incursion: Domination
Aniyah Incursion: Hardpoint
Aniyah Incursion: Search and Destroy
Aniyah Incursion: Cyber Attack
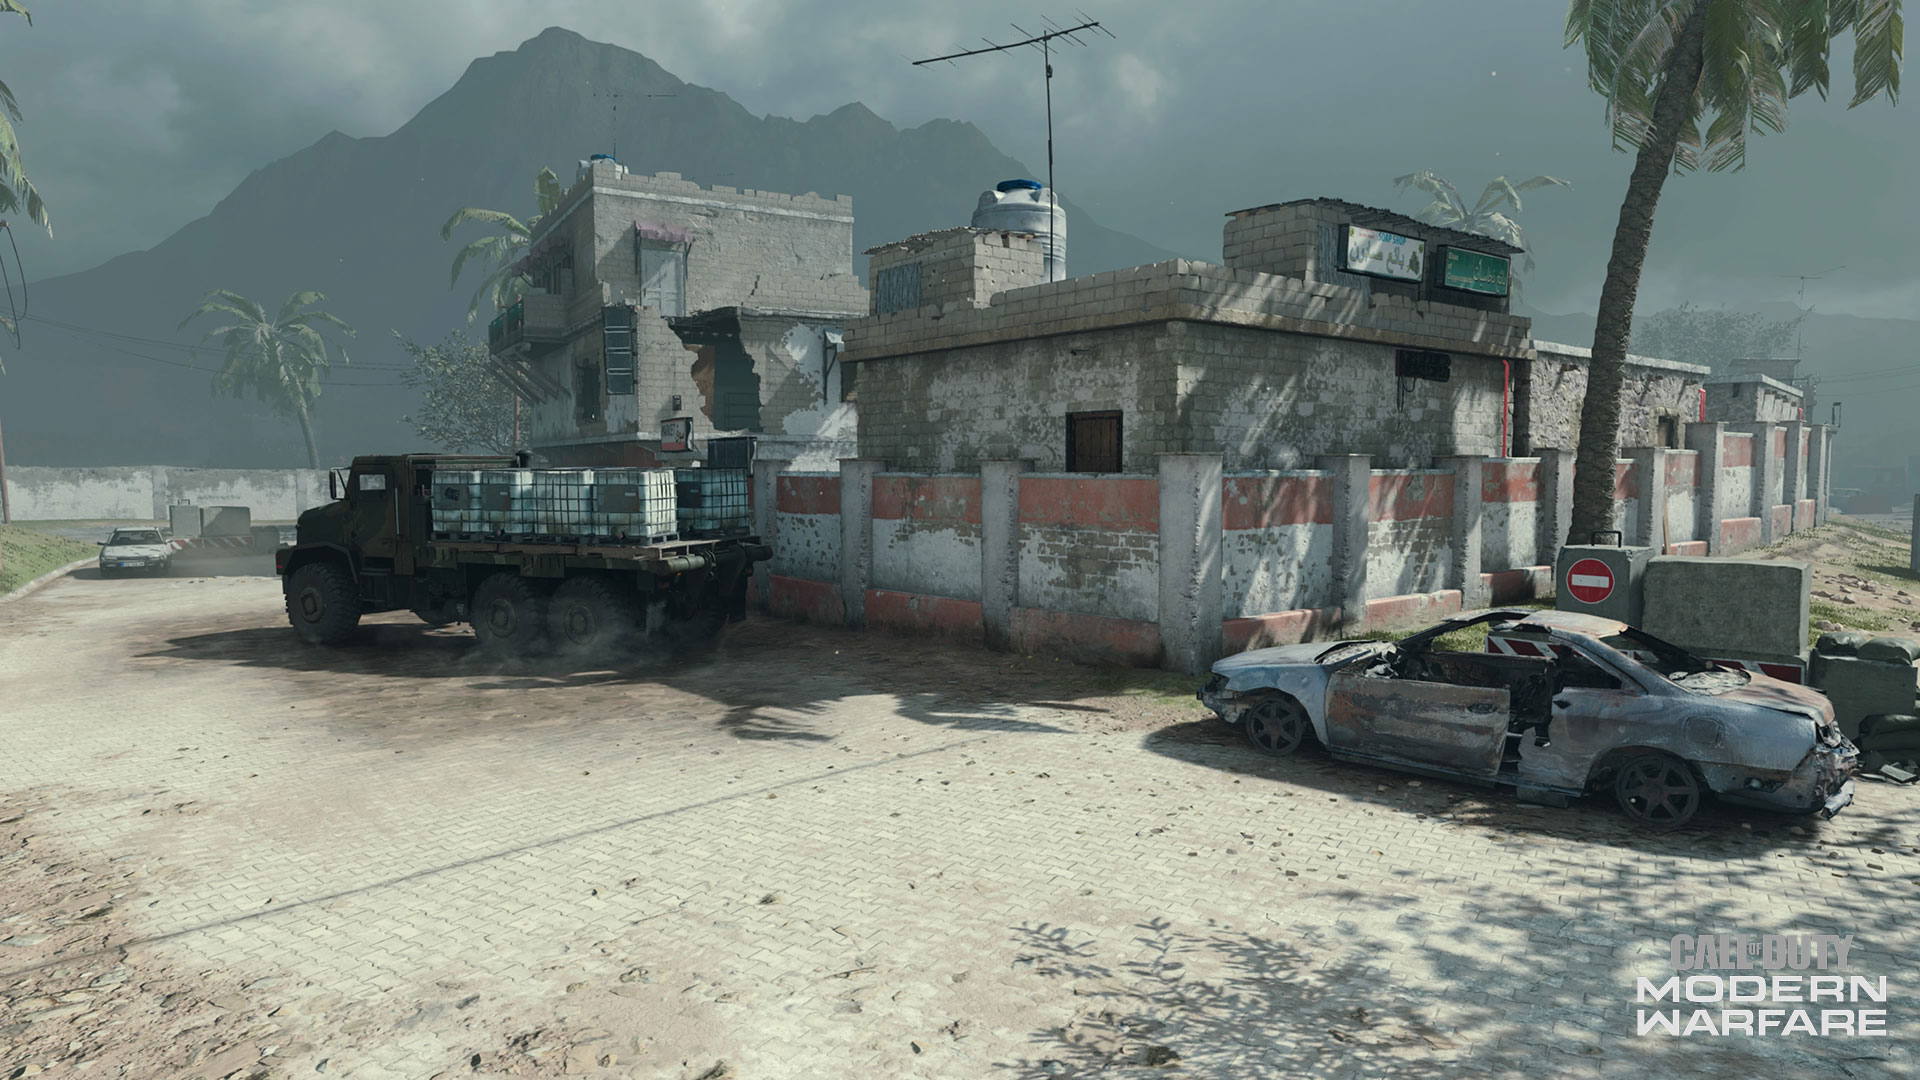
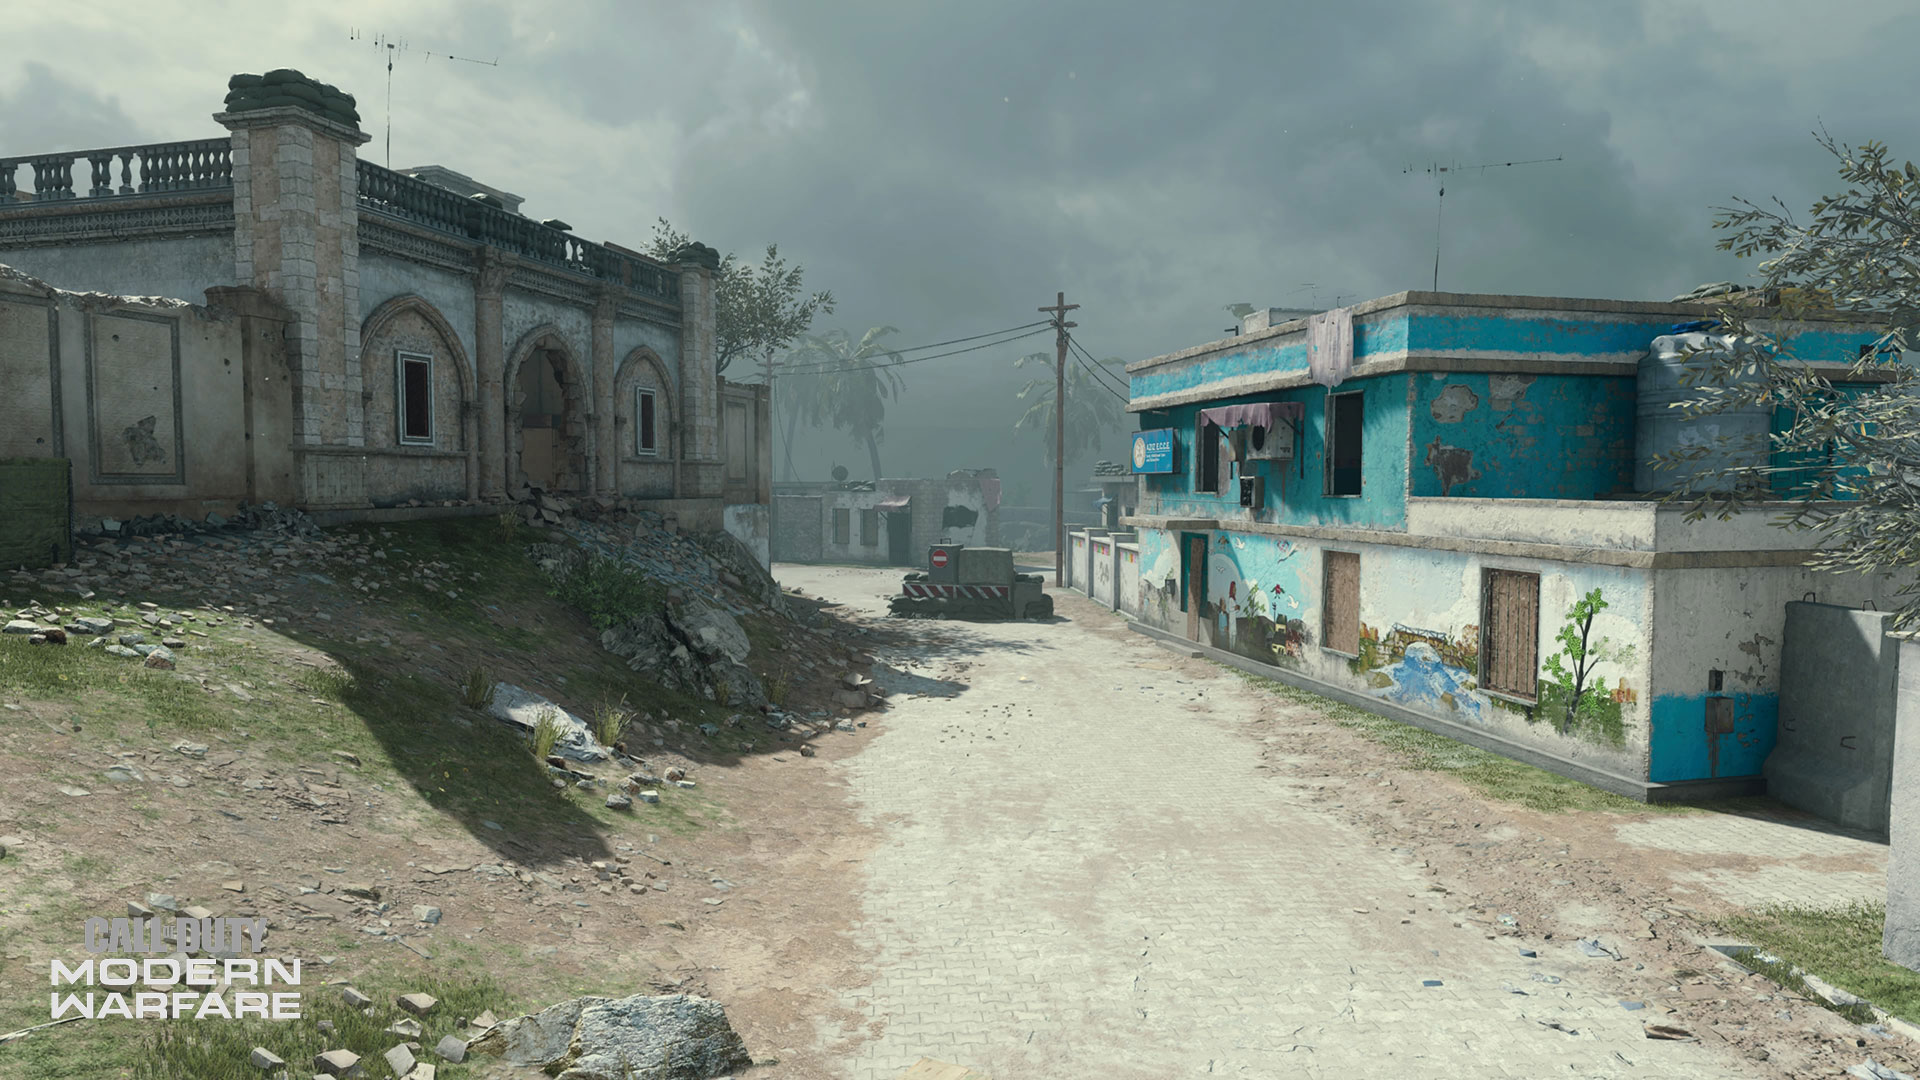
Crossroads — Coalition Spawn
Except for a supply truck and some abandoned cars, Crossroads is open ground and as such acts primarily as a launching point into the main portion of the map to the east. There are four total pathways toward the palace: two in the north — one leading to the Pool House and the other to Tents — and one central and one southern route leading straight to the Palace Entrance.
The key point of interest here is a mountable trio of crates by the southern entryway, where players can shoot into the Palace Entrance from behind the wall. Sharpshooters can be especially devastating here, with sightlines into the palace’s west-facing windows and up toward Swimming Pool.
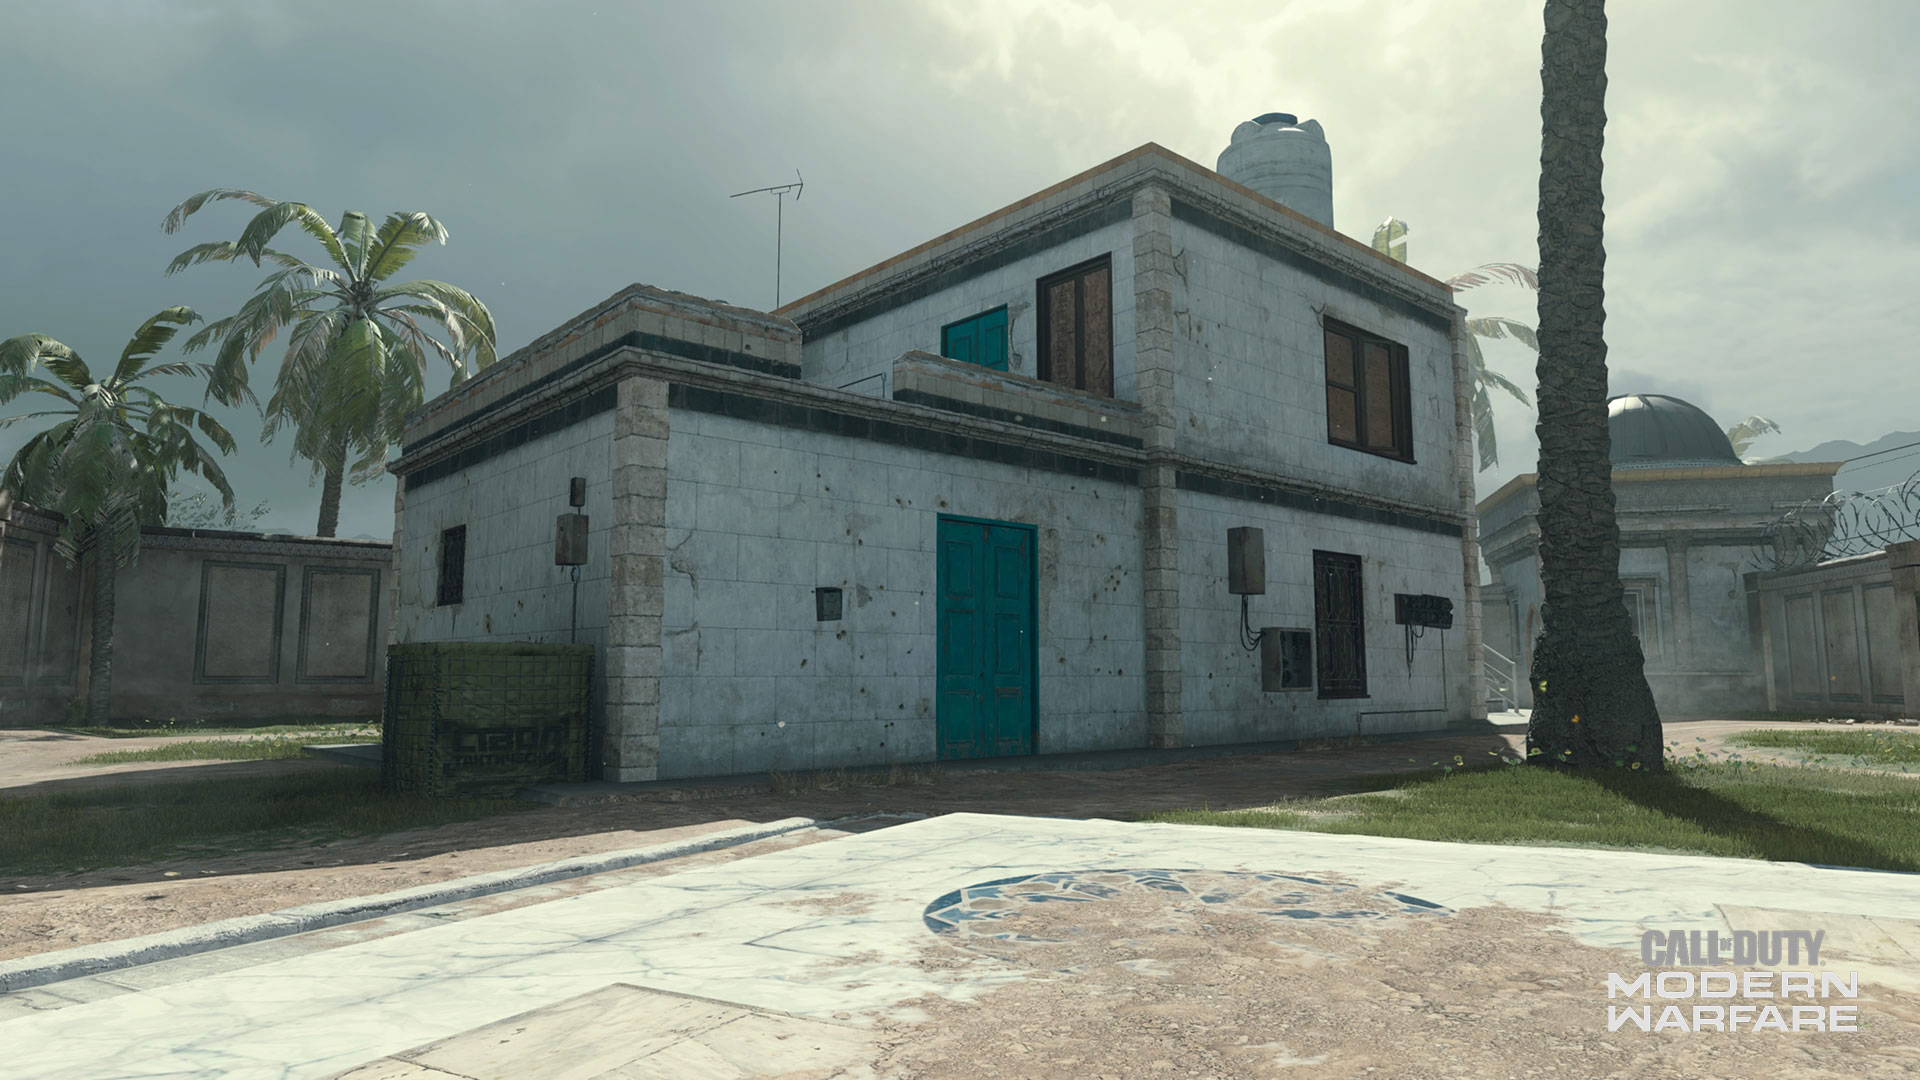
Pool House
The two-story Pool House overlooks a large portion of the northern streets, with long sight lines over the Swimming Pool, Cargo Containers, and Palace Sandbags, not to mention several north and west-facing Palace windows. As much as you can see is as much as you’re exposed, so pay attention to your angles and consider equipping the Recon weapon perk when defending this zone to see enemy nameplates at a greater distance.
Combat really heats up here in Hardpoint and Headquarters, each with an objective location on the second floor, forcing tight encounters as players vie for control of a small area. With an Overkill loadout on hand, you can break in and clear the place with an SMG or shotgun and then switch to a longer-range option to guard against distant enemies. For a surprise flank, mount up the trash heap onto the balcony and then fire away inside.
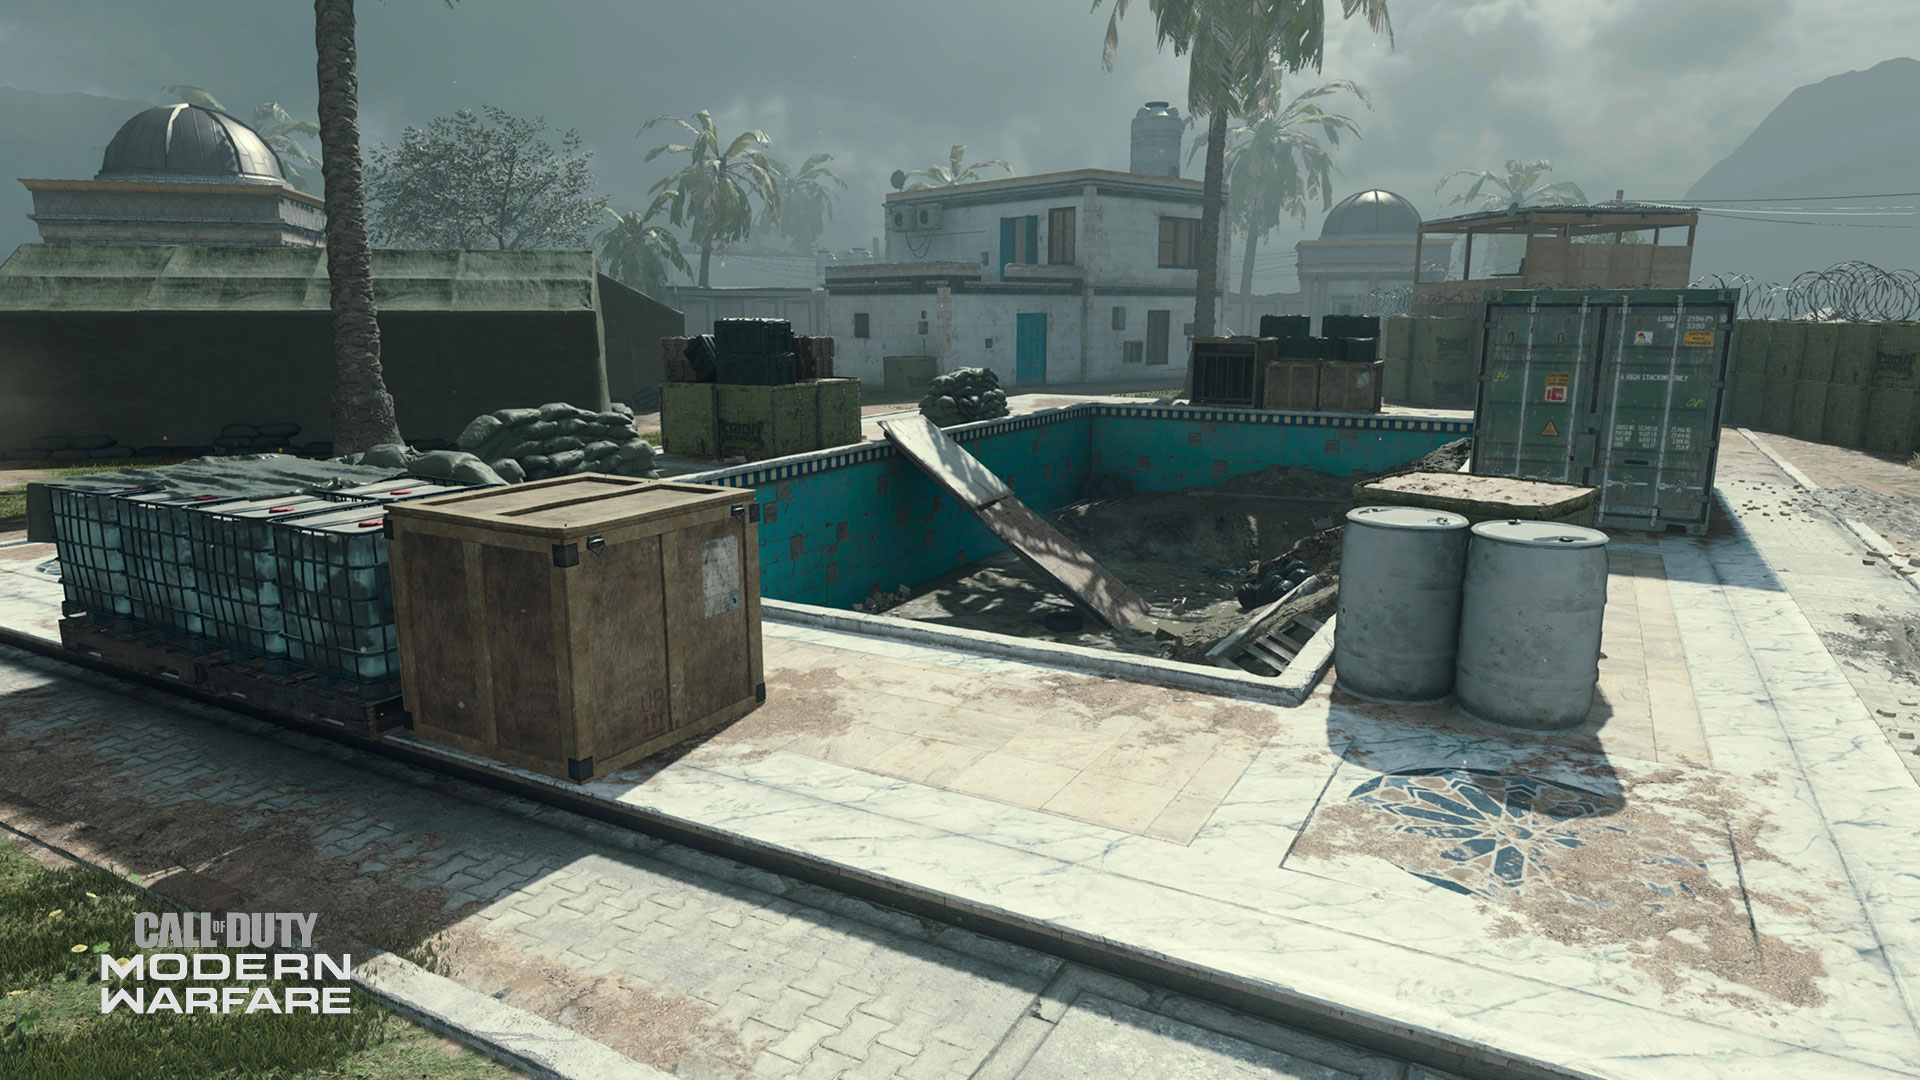
Swimming Pool
Adjacent to Pool House, Swimming Pool is in a state of disuse with a makeshift ramp leading back up to the palace grounds. The pool itself offers some protection from street level fighting, giving players a chance to recuperate from battle before running up and rejoining the fight. Some corner crates on the shallow end make for a valuable attacking point against enemy players coming into the open from Cargo Containers and Palace Sandbags, and the ramp leads straight toward Tents and the A flag in Domination.
Of equal value are the sandbags and supplies stacked around the pool’s edge. Use these for cover to defend against sharpshooters targeting you from Palace, or for a respite from battle along the palace grounds. Be on guard when passing the large shipping container, which can block your view of a nearby threat.
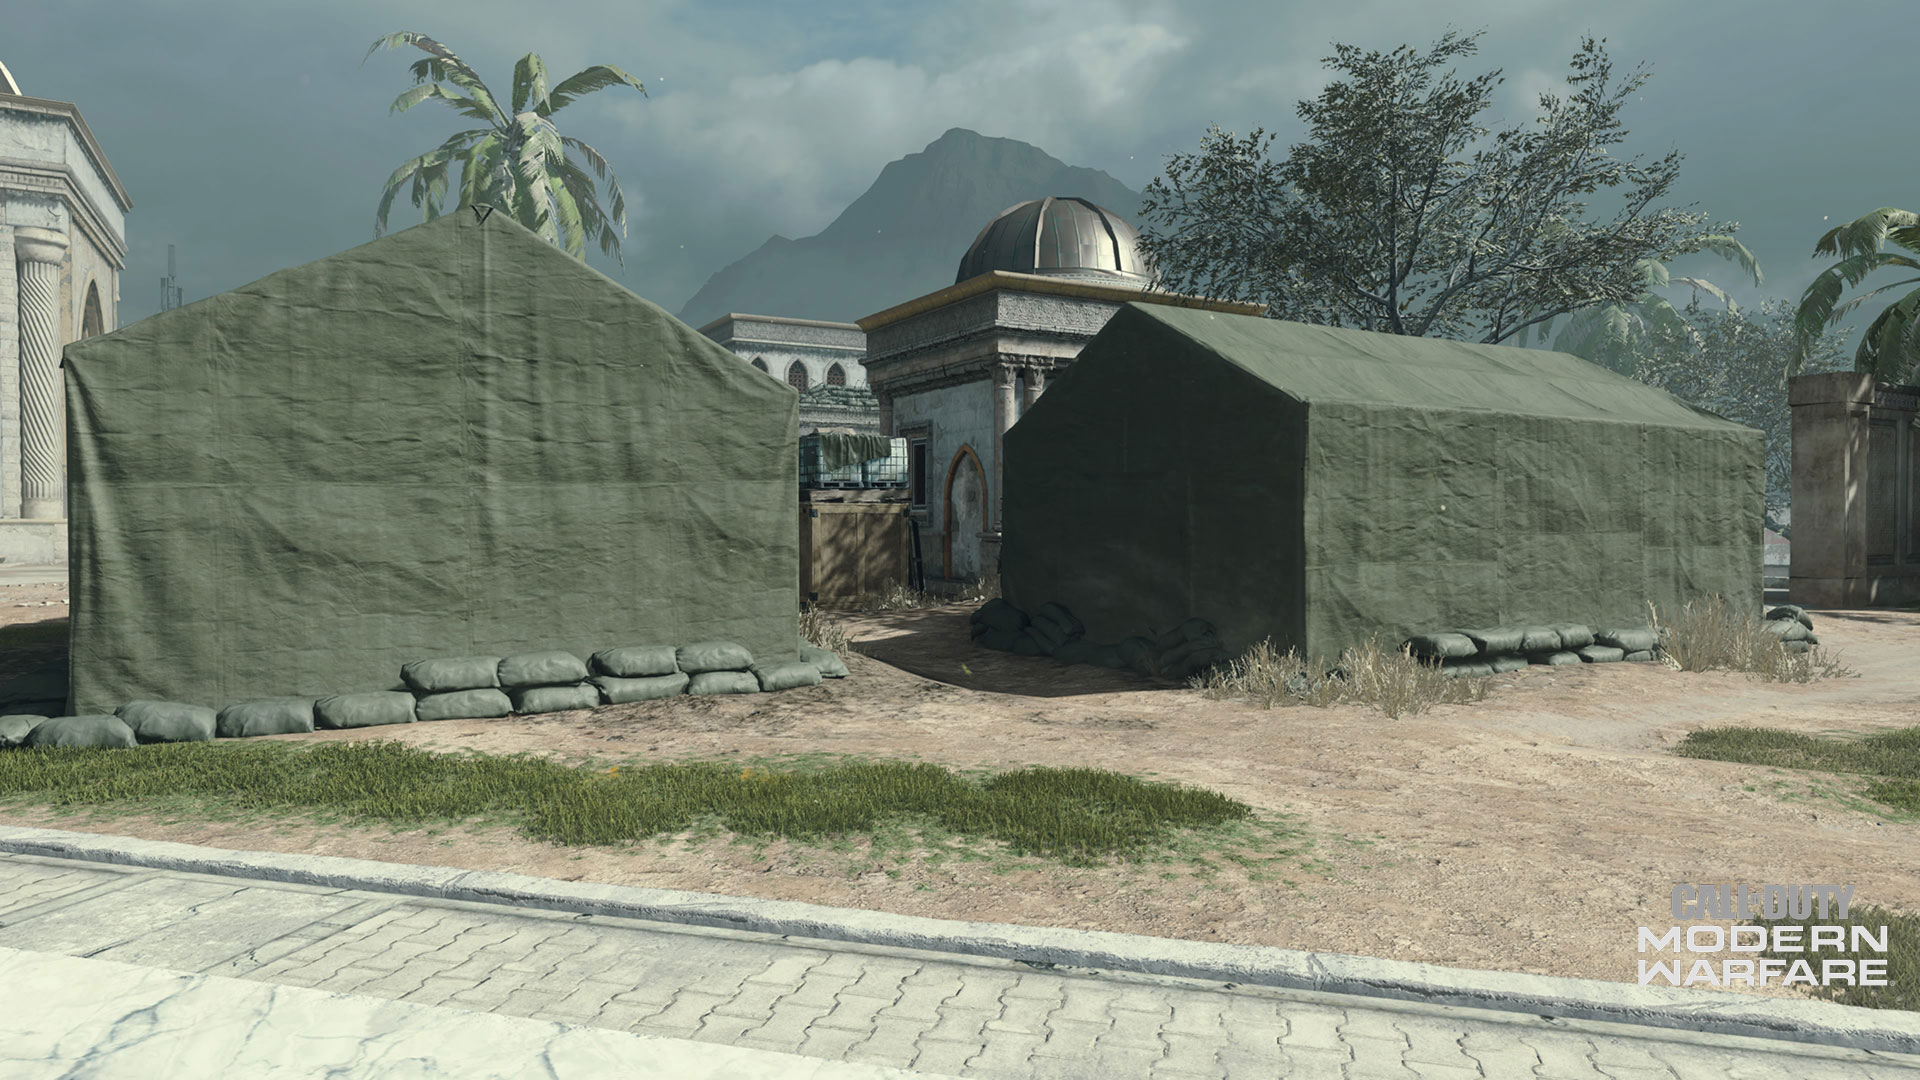
Tents
Stay light on your feet when moving through Tents, a small maze of housing and supplies set between Pool House and Palace Entrance where unsuspecting players can be taken out in an instant. Set up your own ambush here when there’s enemy movement in the area, just be careful and consider throwing down a Trophy System if you think you’ve been spotted going in.
The Domination A flag is here, so be especially wary on approach in that mode. Consider a loadout with Spotter if you’re focused on capturing A, to warn you of any traps awaiting your arrival. Toss in your grenades on the way in just to be safe. On defense, expect the same, and be ready with E.O.D. to minimize incoming explosive damage.
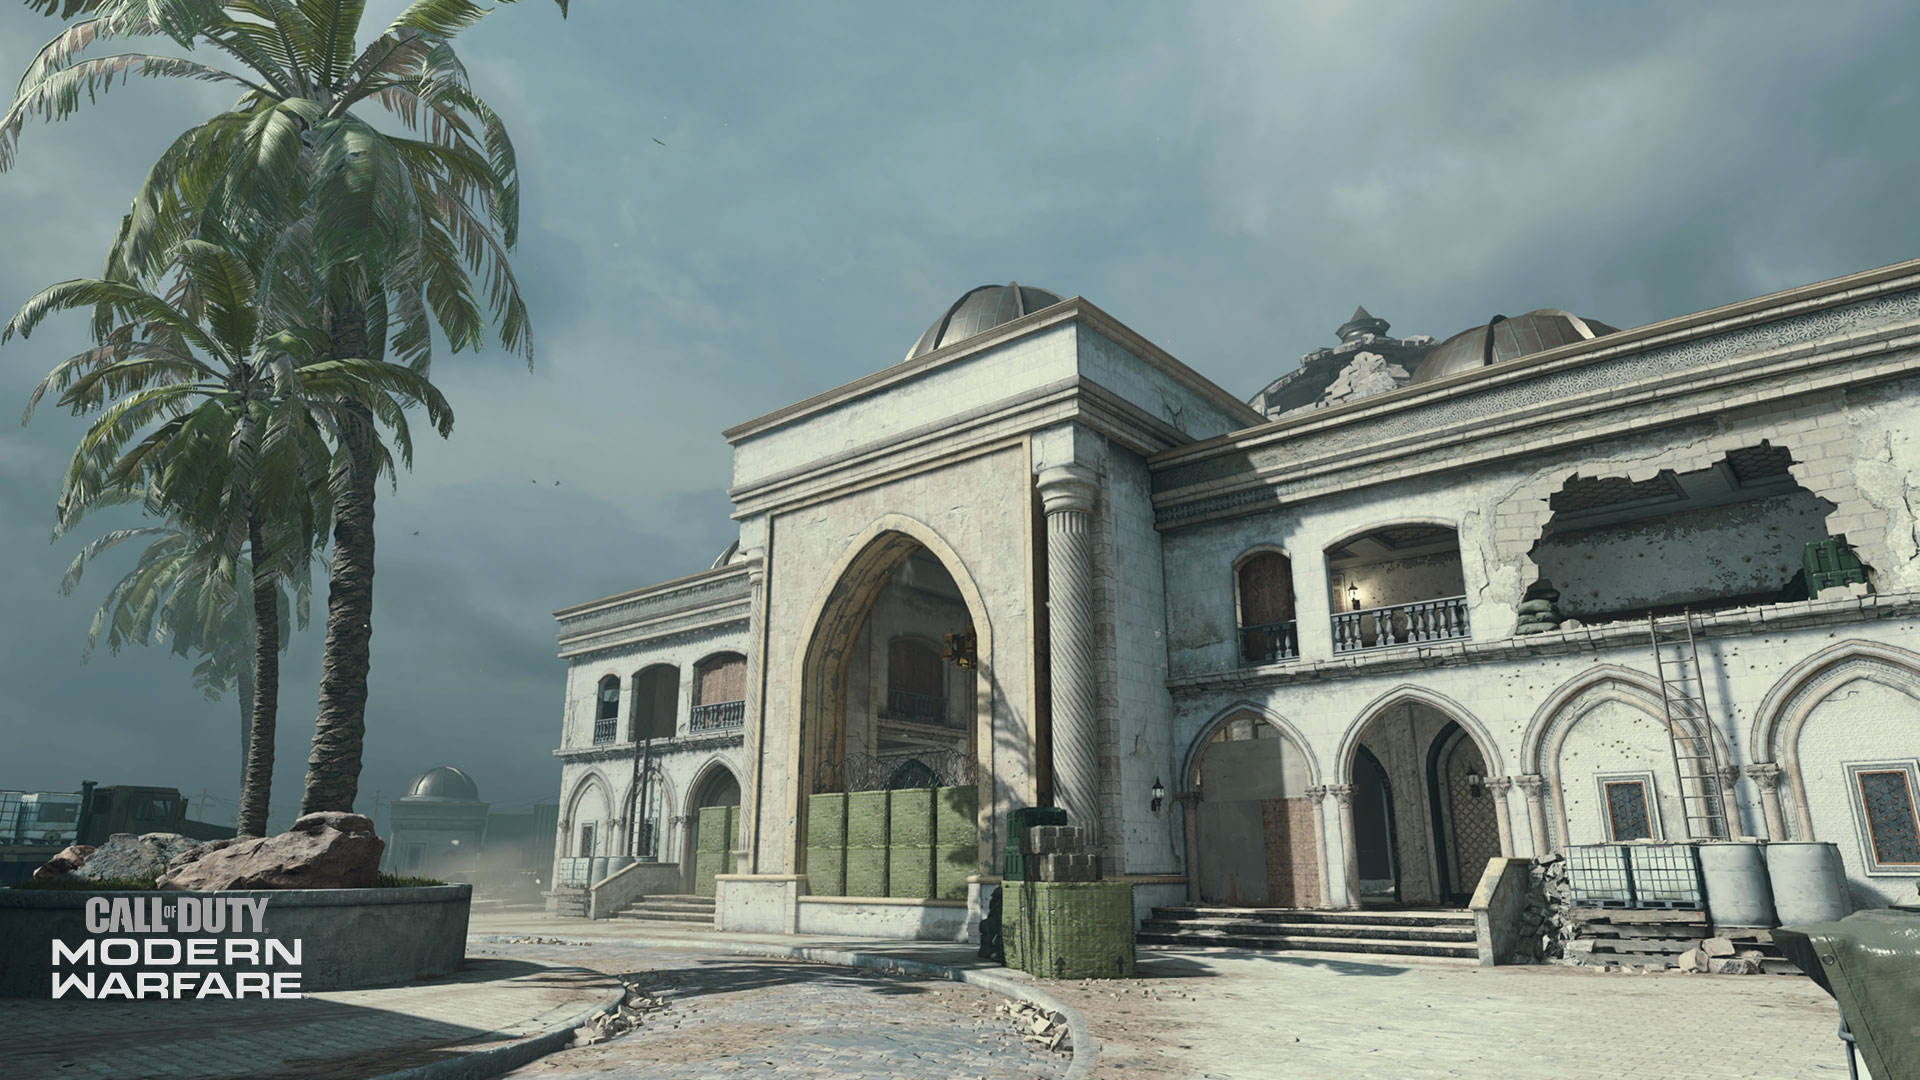
Palace Entrance
Like Crossroads, Palace Entrance is an open space that you typically want to move on from as quickly as possible. There is some cover in the form of supplies and a circular tree planter, but other than that you’re a sitting duck for enemy players shooting down from the second floor of Palace.
If Palace isn’t currently a threat, sharpshooters can set up behind the southern supply crates, cutting off runners on their way to the Pool House, Tents, or Palace Entrance. Keep an eye on the mini-map and get moving if you sense a potential attack from Palace or Barracks. When booking it for Palace, take note of the ladders on either side leading to the second floor.
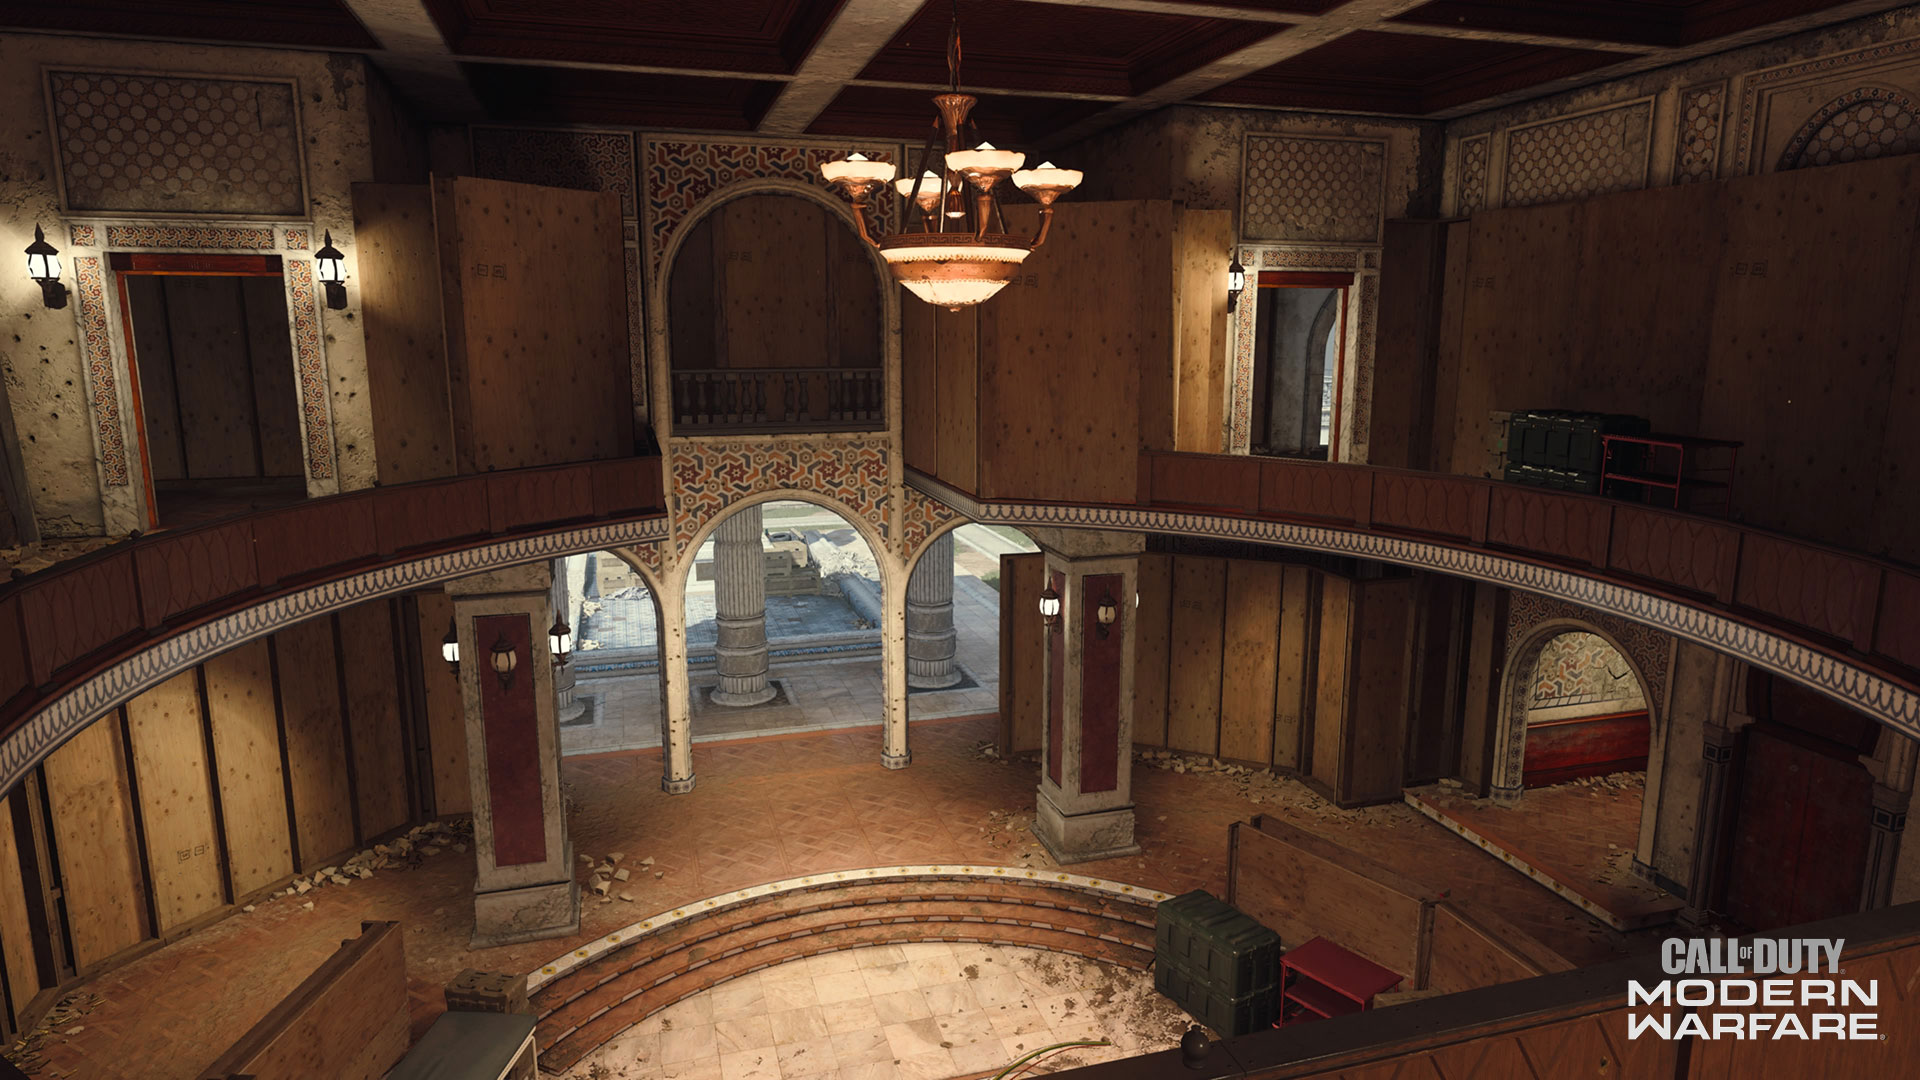
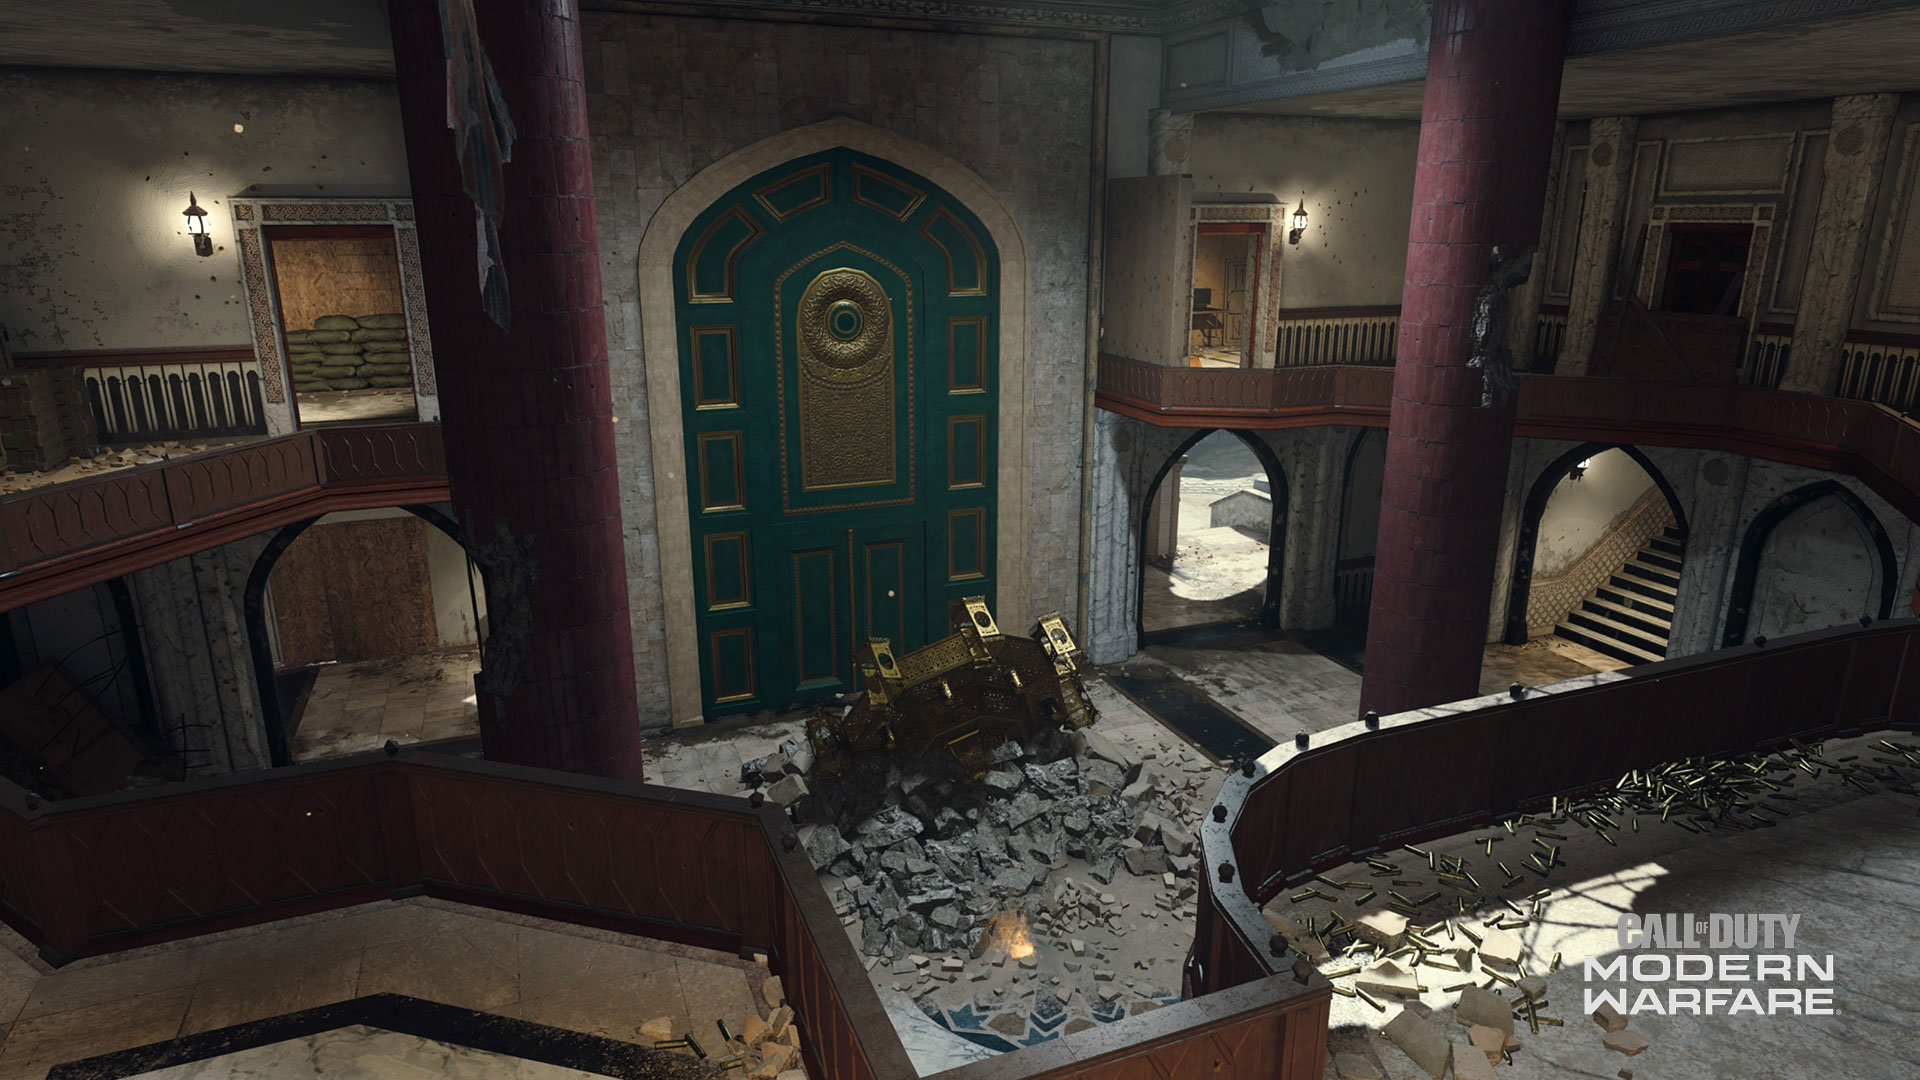
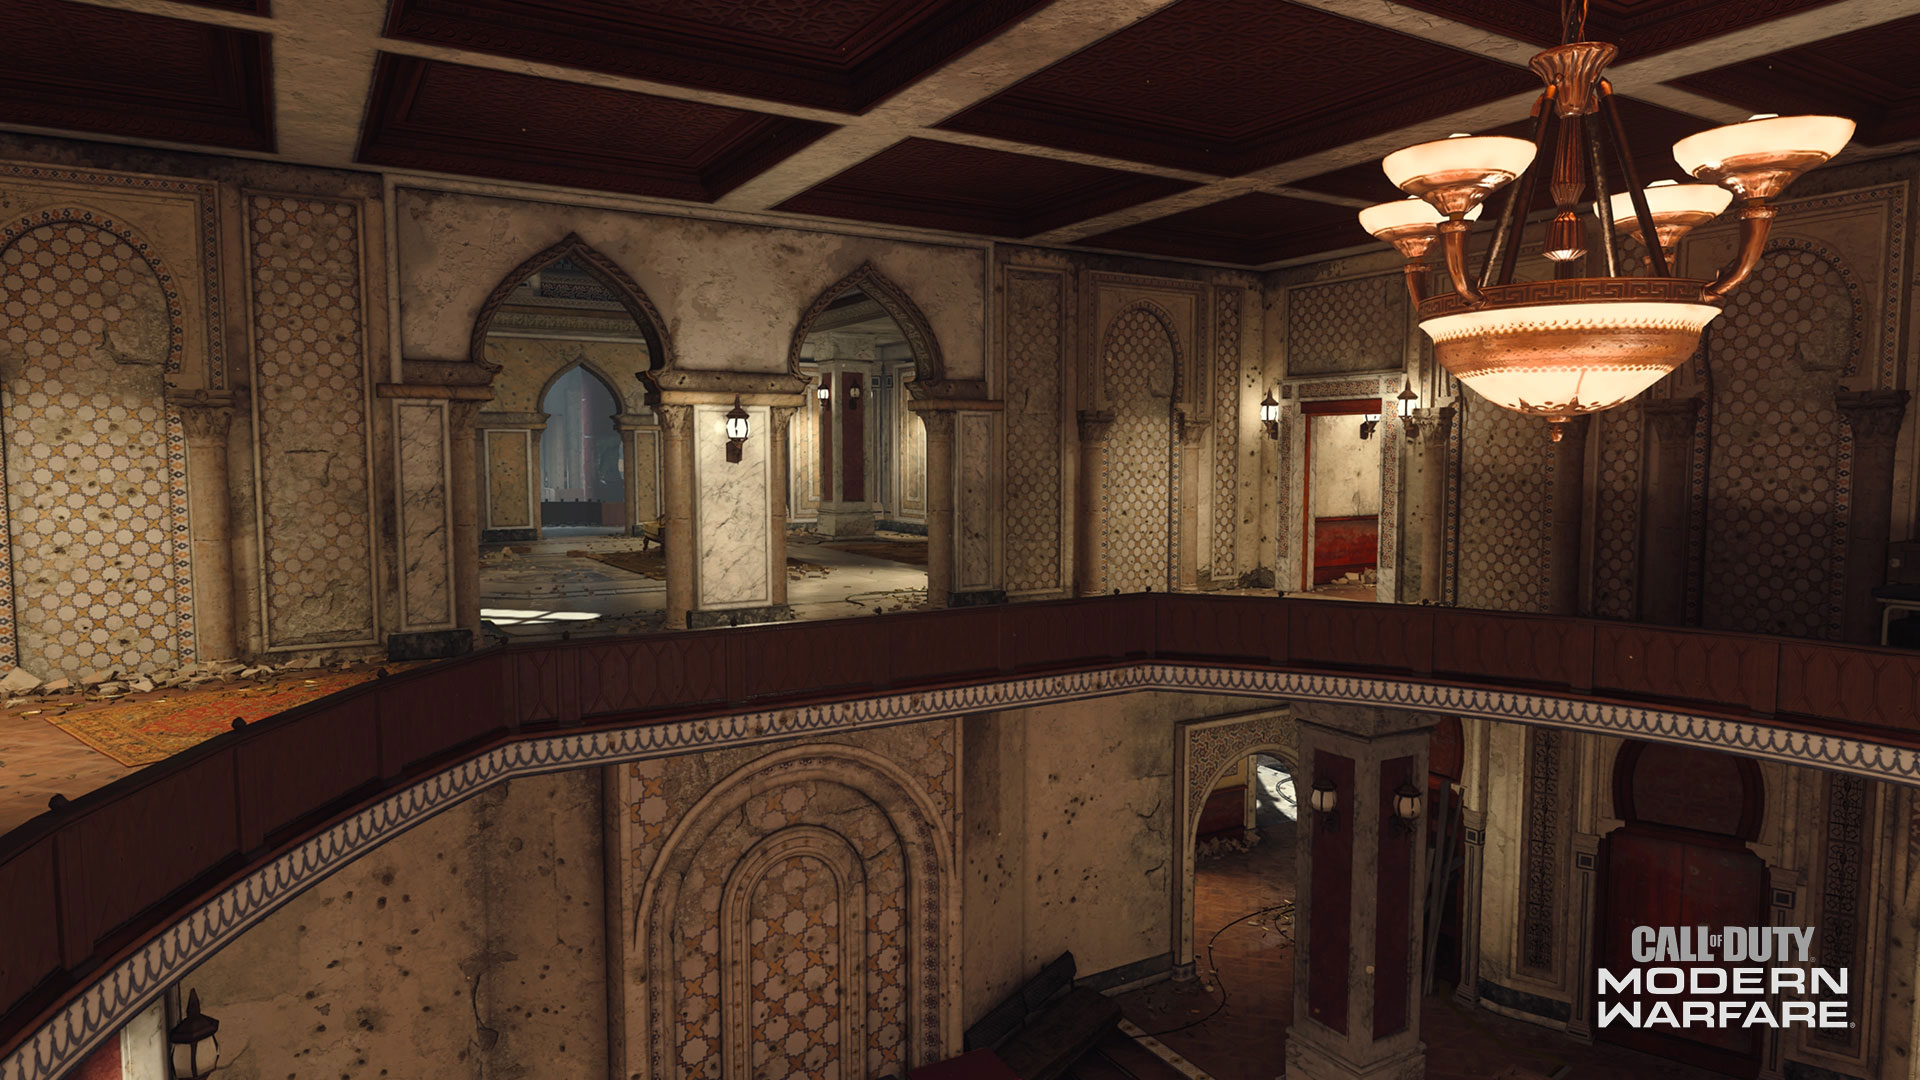
Palace
The centerpiece of the map, Palace sees a majority of the action as players vie for control of the building. Expect a lot of focus on the second floor, not just for its many vantage points overlooking the first floor and the surrounding palace grounds, but also because the second floor offers the only traversable path between the west and east side of the building. This middle pathway is also the site of the B flag in Domination and is an objective location in Hardpoint and Headquarters.
The west, north, and east facing exterior walls each provide two entryways directly to the second floor, ladders leading up on the west and east, and climbable barricades in the north. These six points are equally valuable for entering the palace or for covering the palace grounds from within. Inside the Palace, stairwells flank both sides of the west and east ends for quick access between floors. Finally, entrances from the west and east offer direct access to the first floor — just watch for enemy players shooting down at you from above. Learning this layout is key to your success on the map.
Cargo Containers
North of Palace, Cargo Containers offers cover when traversing the northern path, and is also host to the A bombsite in Search and Destroy. Switch to your pistol or dominate with an SMG or shotgun when traveling through here, as an enemy can pop out from behind one of the large containers in an instant. There are several climbable crates that you can use to get on top of the containers for a height advantage over Swimming Pool and toward Supplies, though be mindful of your positioning, as you’re open to fire from multiple angles when doing this.
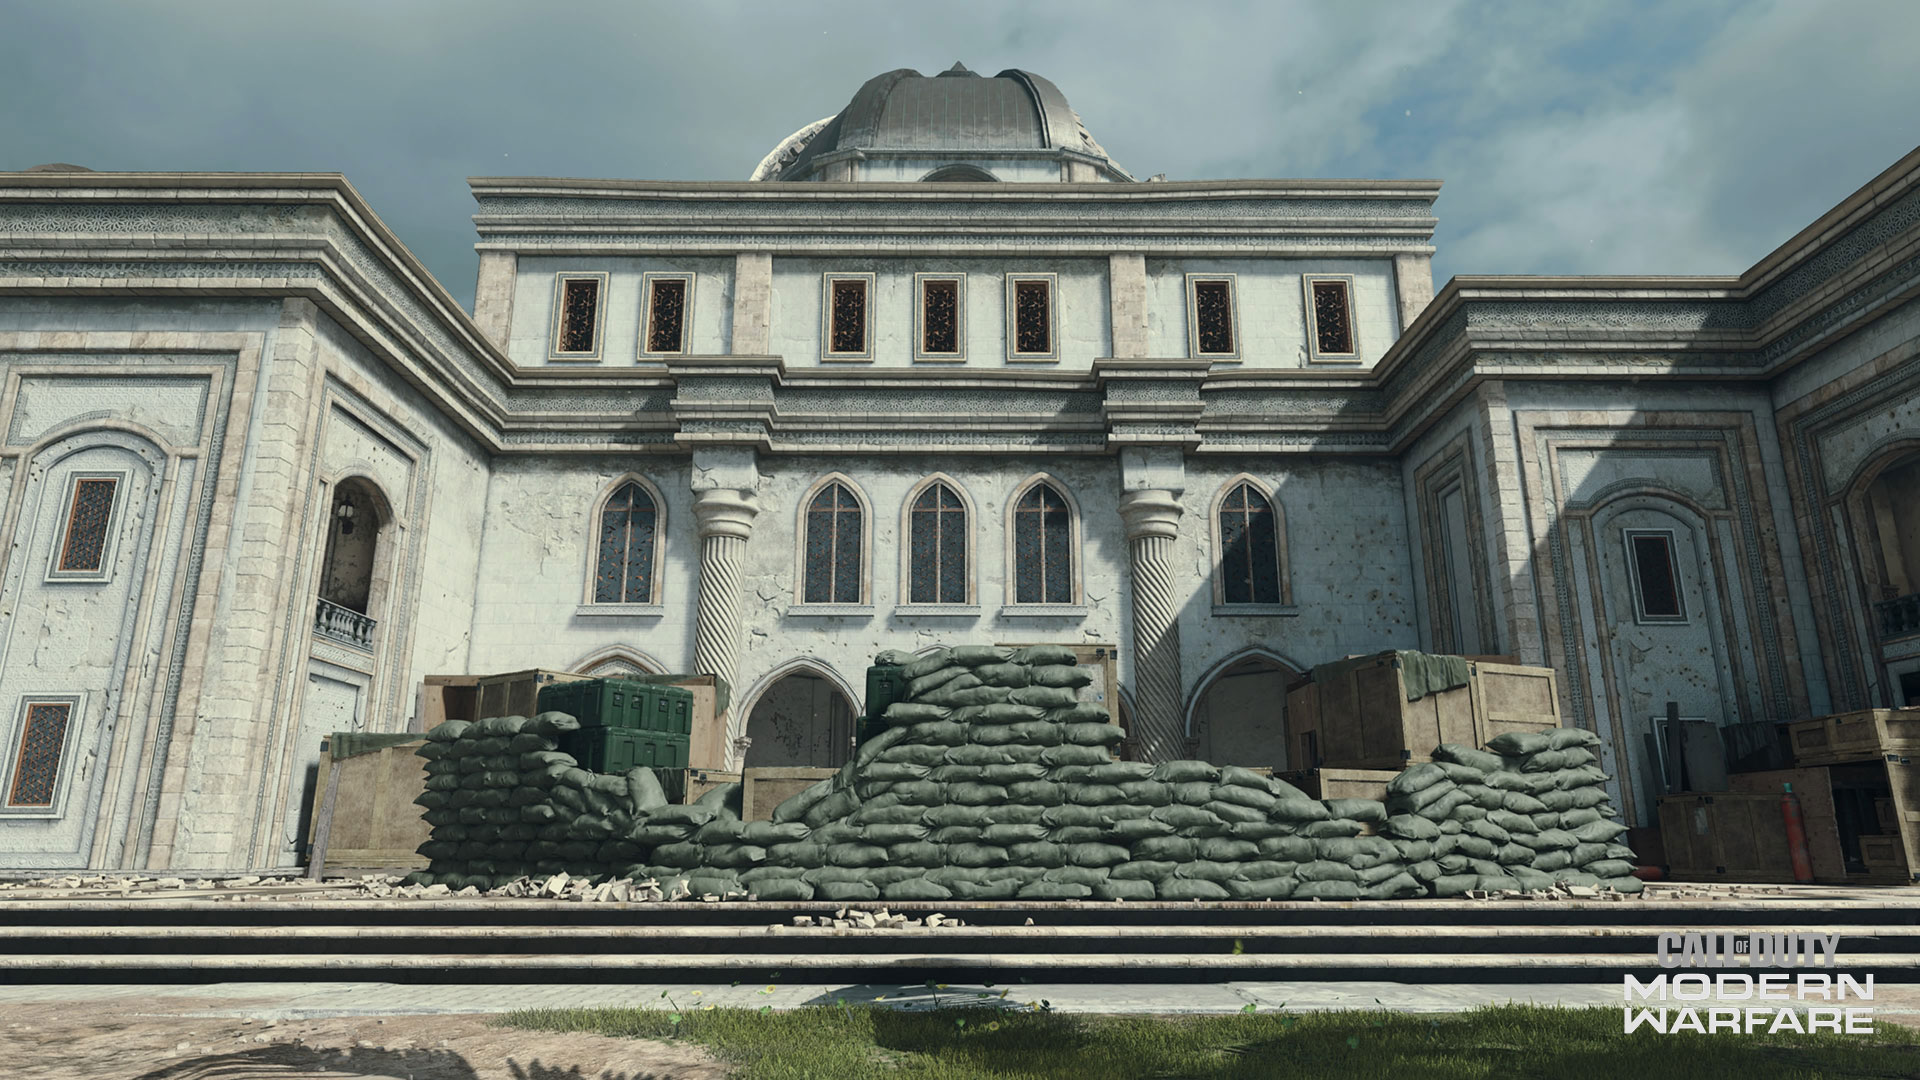
Palace Sandbags
The barricades in this zone offer valuable cover when the fighting moves north, particularly against enemies moving into and out of Cargo Containers and down by Swimming Pool. The partial views offered by the curved barricade are helpful, but big blind spots mean that you need to keep moving and watching your angles or you risk getting taken by surprise.
More important than the barricade are the four Palace entrances here. Two ground level entrances lead to the first floor west and east ends, while climbable crates offer direct access to two second floor entrances. Either climb up and get right to work in the palace or turn around and use the height advantage against enemies along the northern path.
Supplies
Supplies is one of the few areas of the map without any climbable surfaces, though it does offer one large swath of cover and one smaller one for protection when moving to or from Statue. Due to Statue’s open layout, the truck and covered supplies here often attract players looking for a safe place to peak out from. Mid- to long-range weapons perform well here, with the ability to fire into Statue and between Cargo Containers and Palace Sandbags.
Barracks
The least conspicuous pathway along Palace, Barracks cuts along a slim southern path featuring a single first floor entryway and two small plywood Al-Qatala buildings. Don’t think this means you can let your guard down, as a clear sight line through the middle invites snipers and other long-range attackers to open fire on players carelessly rushing through the zone. The area really heats up in Hardpoint and Headquarters, where there’s an objective site in the southernmost plywood house. There’s additionally a bombsite here in Search and Destroy and in Cyber Attack the bomb may spawn here.
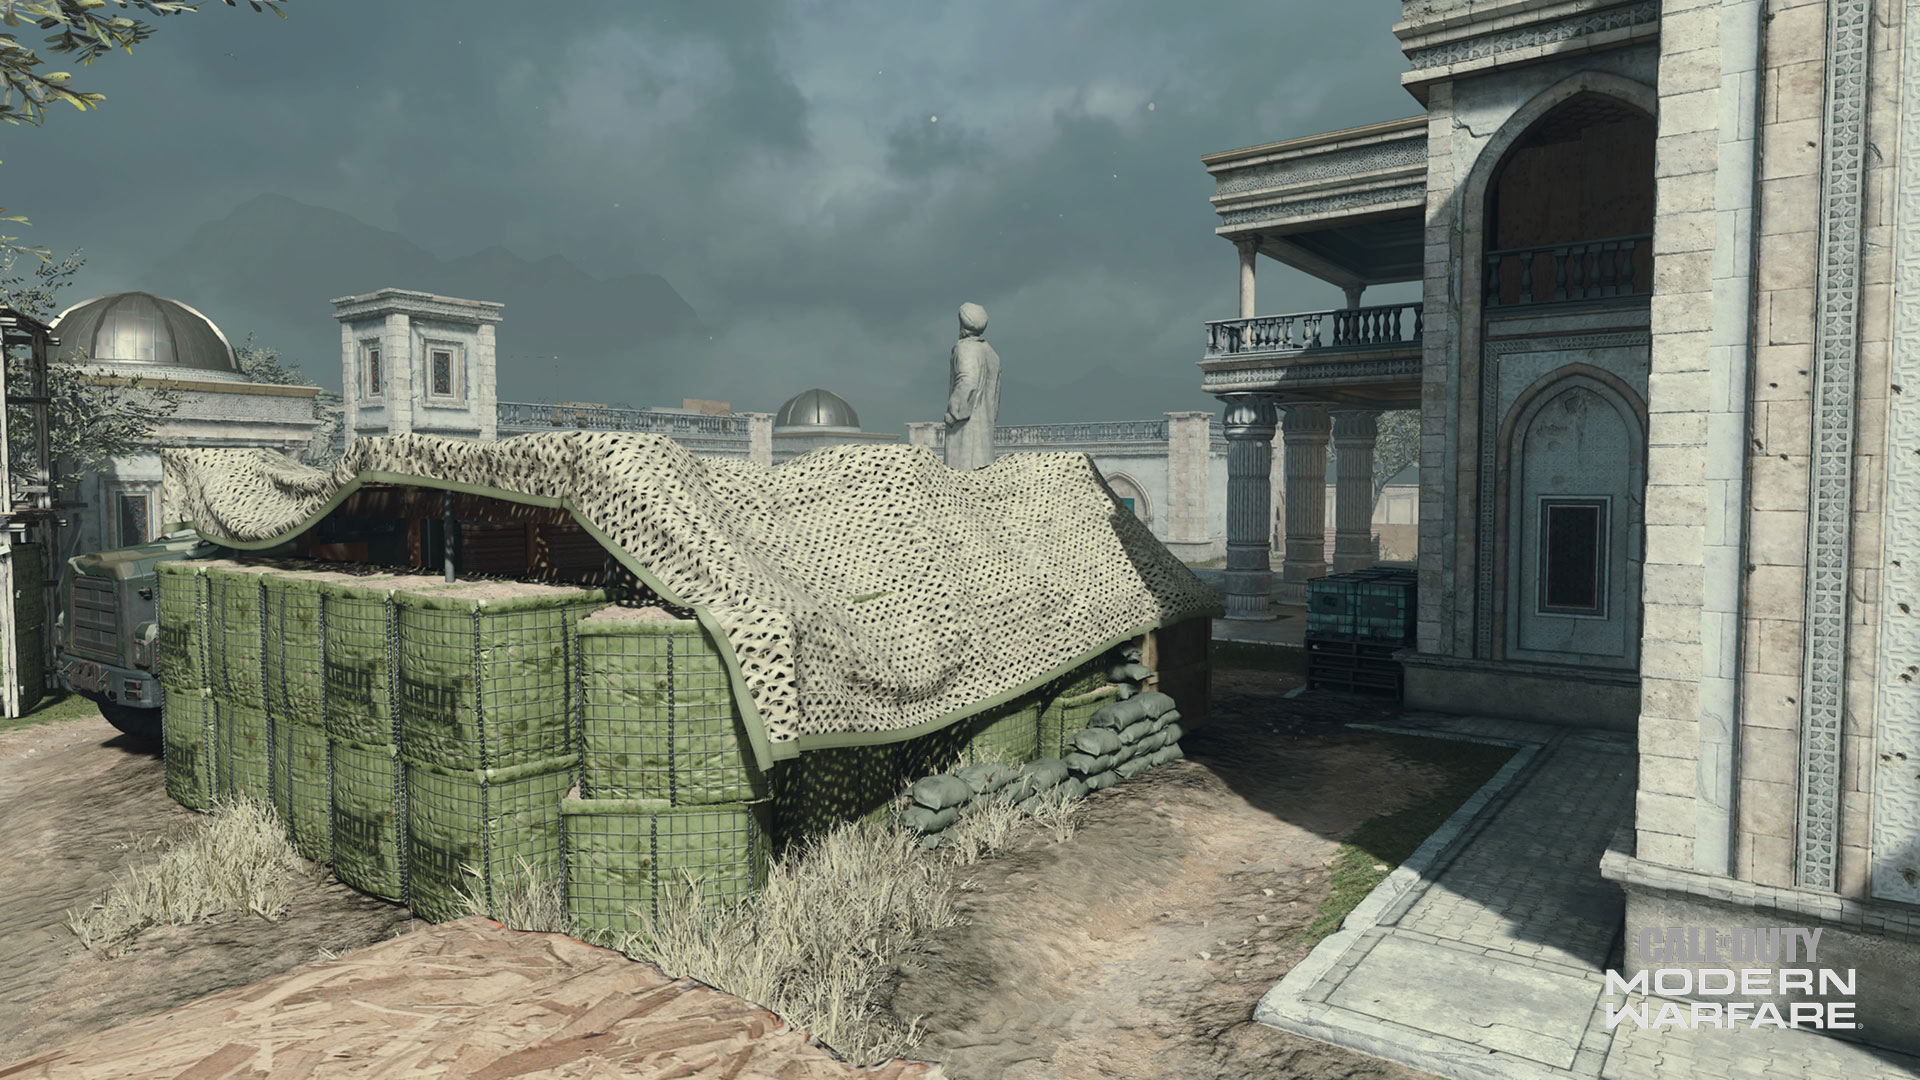
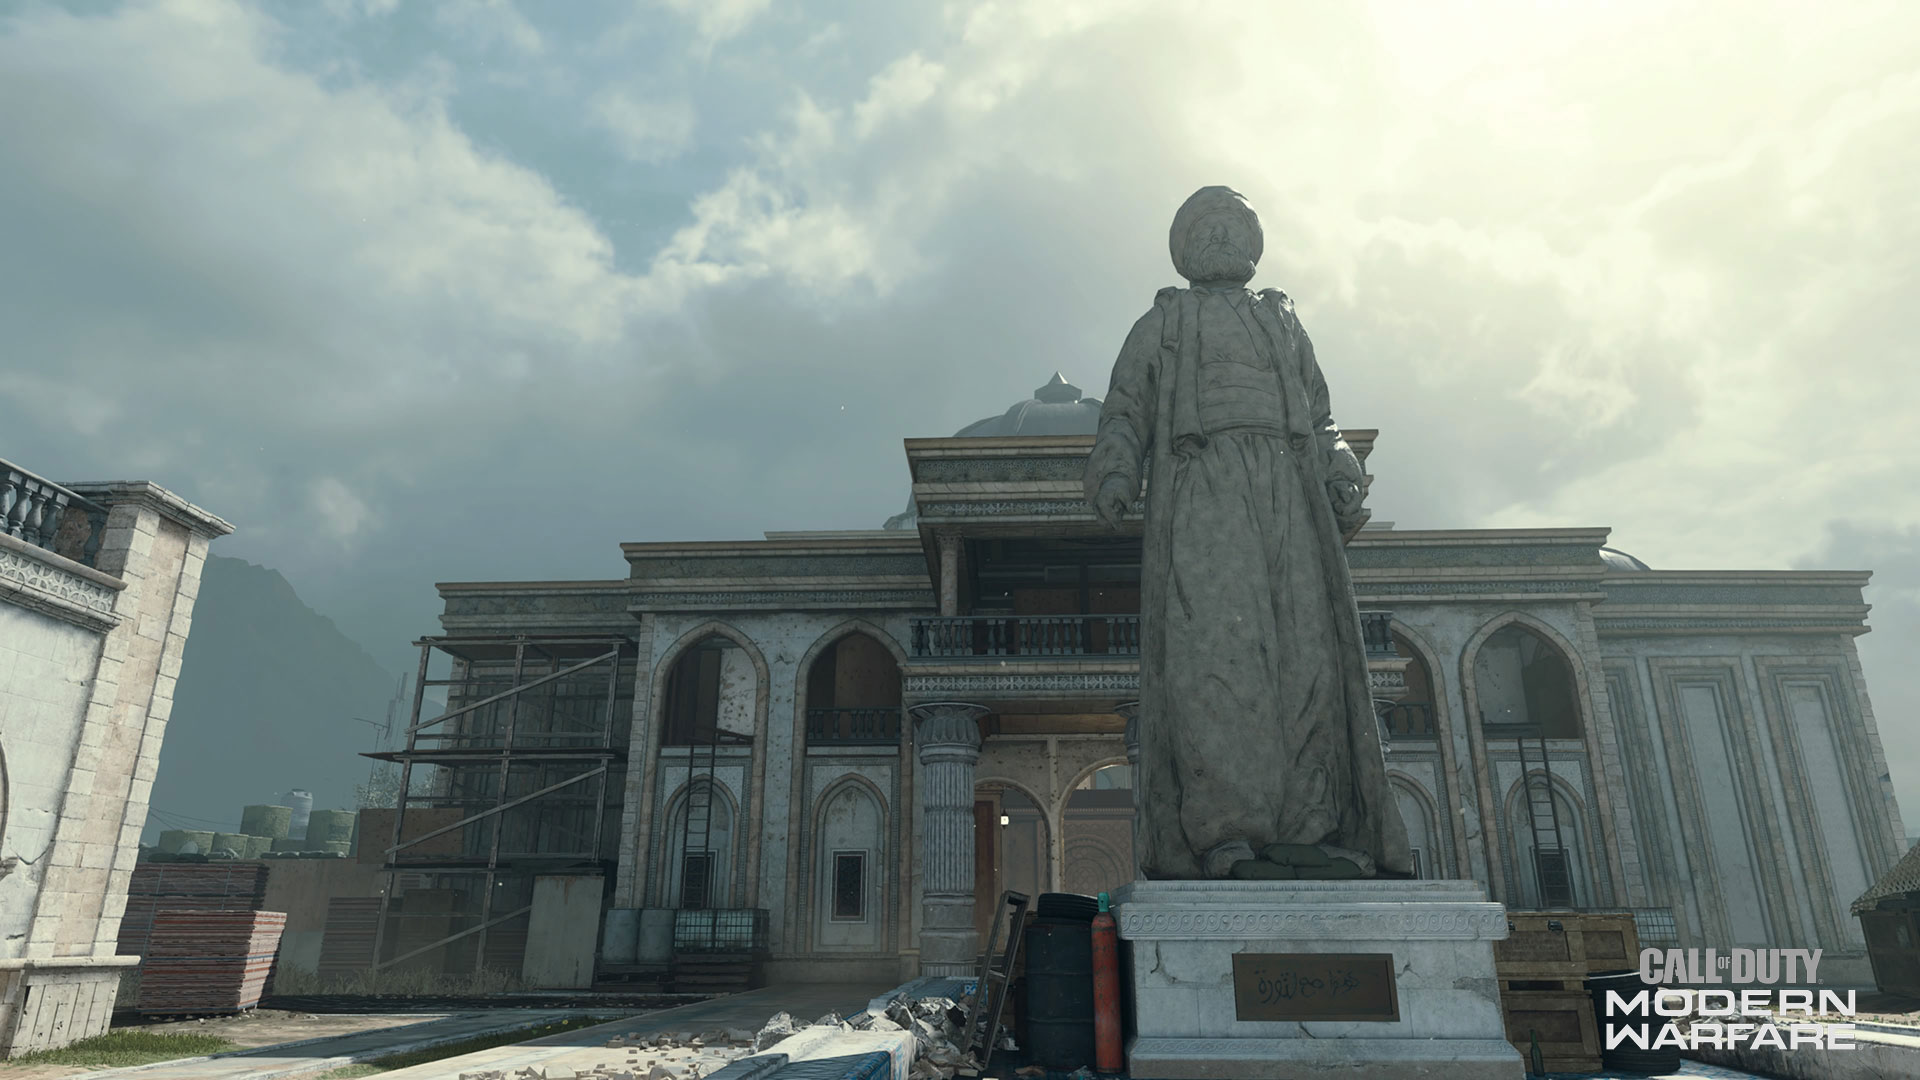
Statue
The wide-open Statue zone sits at the rear of Palace and is home to the C flag in Domination as well as an objective site in Hardpoint and Headquarters. As with the opposite Palace Entrance, there are two ladders leading up to the second floor, as well as a single pathway to the first.
Watch for sharpshooters above the ladders, or post up there yourself when you need to fight off enemies in Statue. While you can often catch players running in the open here as they approach the other side of the map, be wary of the three small buildings which enemies can use for cover to get in shots toward Palace as well as the northern and southern pathways.
School — Allegiance Spawn
School is similar to Crossroads in that it’s an open zone primarily used for traversing toward the main portion of the map. Also like Crossroads, a mountable trio of crates stacked against the wall gives sharpshooters a secure vantage point looking over Statue and part of the east-facing palace wall. Aside from hopping the wall here there are two other pathways, both leading into stone buildings facing Statue. Take your time coming out of these if you suspect resistance in the area.
General Tips
Take to the Streets
The palace dominates the landscape and draws Operators like moths to a flame, especially with its allure of second story vantage points. Smart Operators, however, use every position to their advantage, high or low. Post up by cover in the streets and cut down players rushing headlong to Palace. Reposition when you draw unwanted attention — the palace grounds offer plenty of pathways to lose your tail.
Trophy System at the B Flag
The Domination B flag stands in the highly contentious second floor pathway between the west and east sides of the palace interior. Considering the many pathways converging into this confined area, you’ll want to mitigate as much incoming damage as possible. Throw down a Trophy System for momentary protection against enemy grenades, forcing the opposition to fight you one at a time instead of clearing the room of you and your teammates with a well-placed explosive.
Watch Your Back with High Alert
Intent on holding Palace against all odds? Consider using High Alert for a heads up when someone’s got a bead on you. You’ll have to be quick, but the warning provided can give you the split-second head start needed to turn on an enemy or escape and reposition to your advantage. Pair the perk with a strong hip-firing weapon so you can swivel and fire without the need for precision ADS.
Fun with C4
Much of Palace features areas with low ceilings, like the stairways, the corners of top middle, and the broken archway on the ground floor. While cautious players may scan the floor for traps, they’ll rarely look over their heads. Stick some C4 overhead, or to the side of a pillar or wall, and be ready to detonate once you’ve lured the enemy into your trap.
Bring a Launcher
Sure, you’re mostly safe from airborne killstreaks inside the palace, but good luck surviving for long. Have a loadout with a launcher ready to go for when you need to take out a VTOL or Chopper Gunner raining destruction throughout the palace grounds. You’ll be doing your team a big favor, who would otherwise be forced to rush for cover inside the palace, hardly a safe haven. Go the extra distance and knock down some enemy UAVs while you’re at it.
Now it’s time to show the enemy who reigns. Aniyah Incursion is available now as a part of Season Three.
For more information and the latest intel on Call of Duty®: Modern Warfare®, check out: www.callofduty.com, www.youtube.com/callofduty and follow @InfinityWard and @CallofDuty on Twitter and Instagram and Facebook.