To those veterans who remember the classic map from within the Call of Duty universe: welcome home.
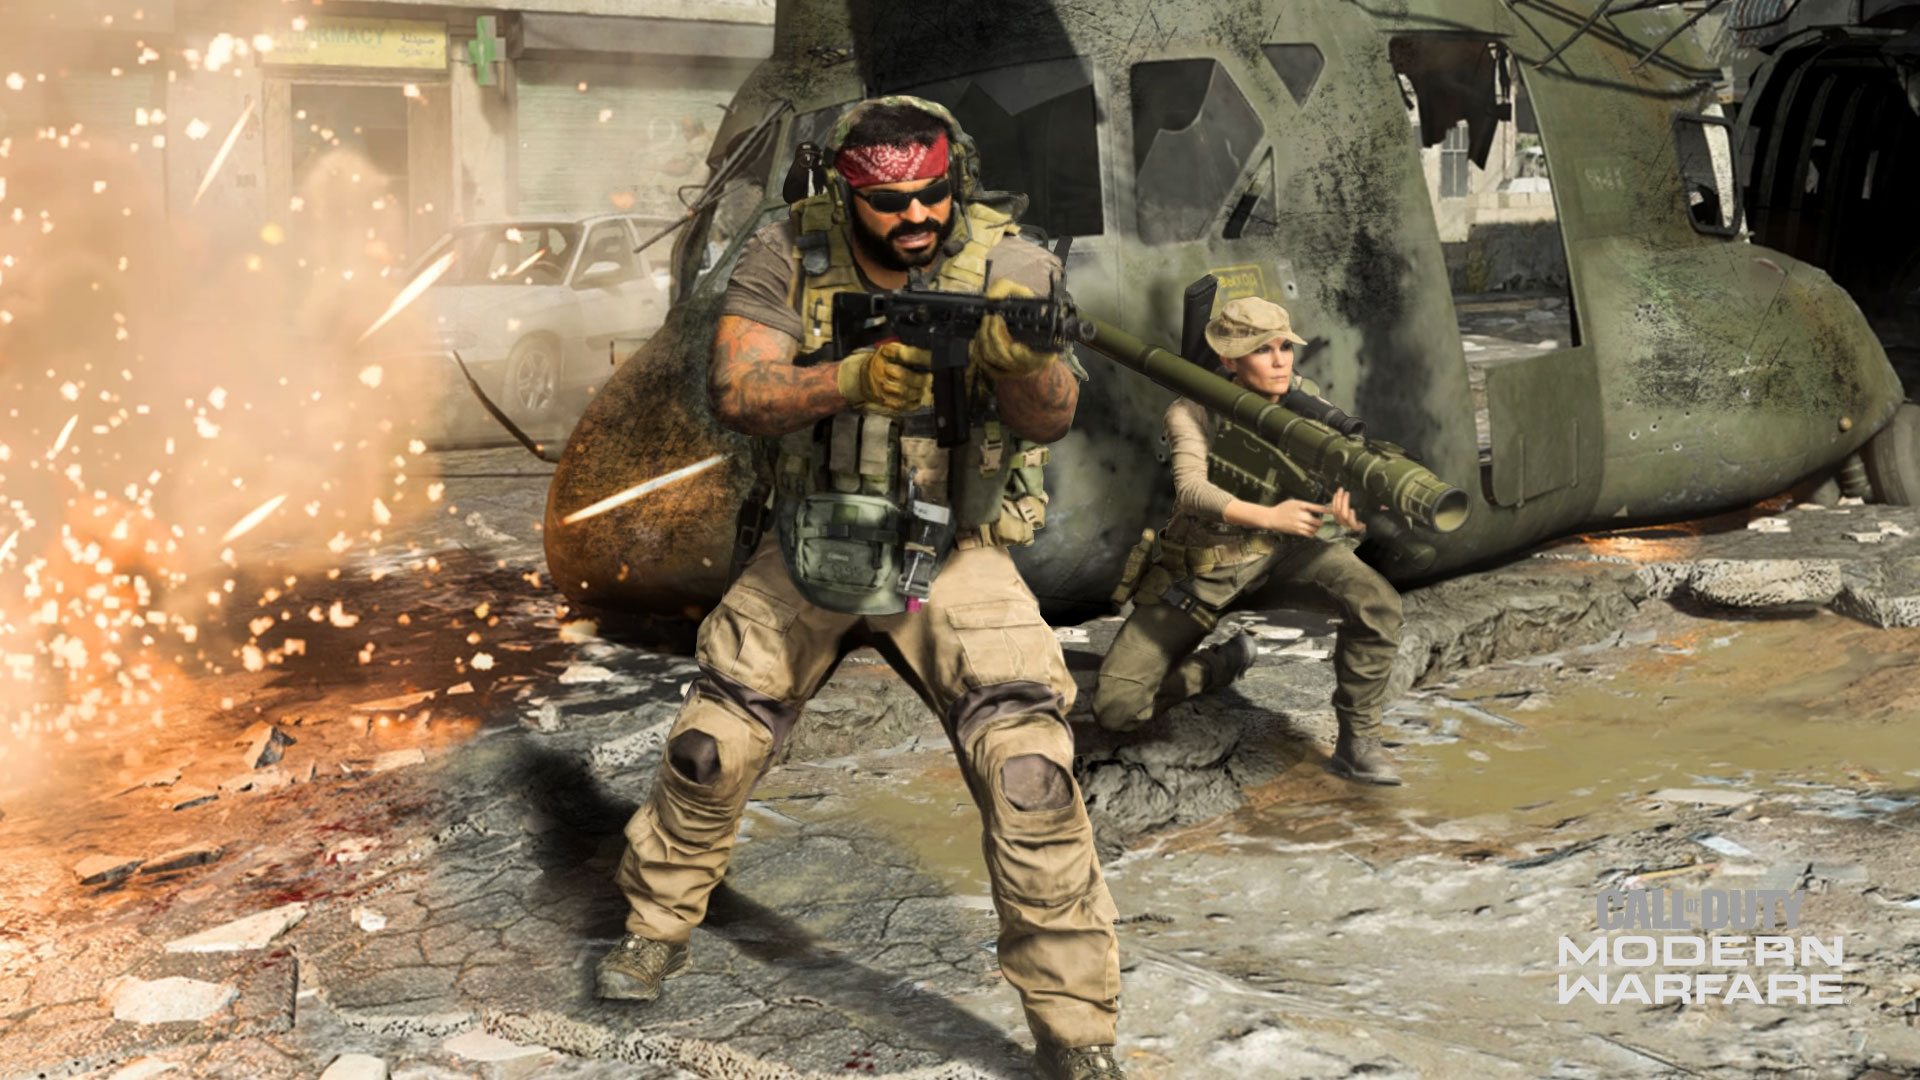
Crash, one of the staple Multiplayer maps of Call of Duty® 4: Modern Warfare, has returned as part of Season 1 for Modern Warfare. The latest version is set within Urzikstan and is the focal point for Season 1’s backstory.
This is your complete guide to Crash.
Lay of the Land
Crash has the unique distinction of not being a remaster; rather, it is a reimagining of the classic Multiplayer map. That applies not only to some of the new areas you’ll find here, but also its story.
Here’s why you’re fighting here:
Somewhere in an Urzikstan town, the Allegiance have shot down an Al-Qatala cargo chopper carrying chemical weapons. Seeing this blast, members of the Coalition were first to the scene and discovered these deadly weapons.
However, once the Allegiance arrive for their investigation, a conflict over who owns the gas discovered in the downed helicopter ensues.
Crash is this conflict zone; within the confines of this map, you’ll see containers of this gas strewn around the crash site. Familiar buildings may have more detail than you may have once remembered, and sections that were previously sectioned off by boundaries now offer new and exciting ways to engage against enemy forces.
Map Detail
Crash is a medium sized map with a variety of engagement opportunities. Whether it’s long sightlines that lead to sniping battles or intrabuilding close-quarters conflicts, the action here is sure to be fast, frenetic, and fun.
Here are all the map’s zones:
1. Apartment
2. Curved Street
3. Hill
4. Alley
5. Sandbags
6. Courtyard
7. Lamp Shop
8. Pillars
9. Arches
10. Crash
11. Restaurant
12. Generators
13. Pharmacy
14. Broken Wall
15. Passage
16. Overlook
17. Barbershop
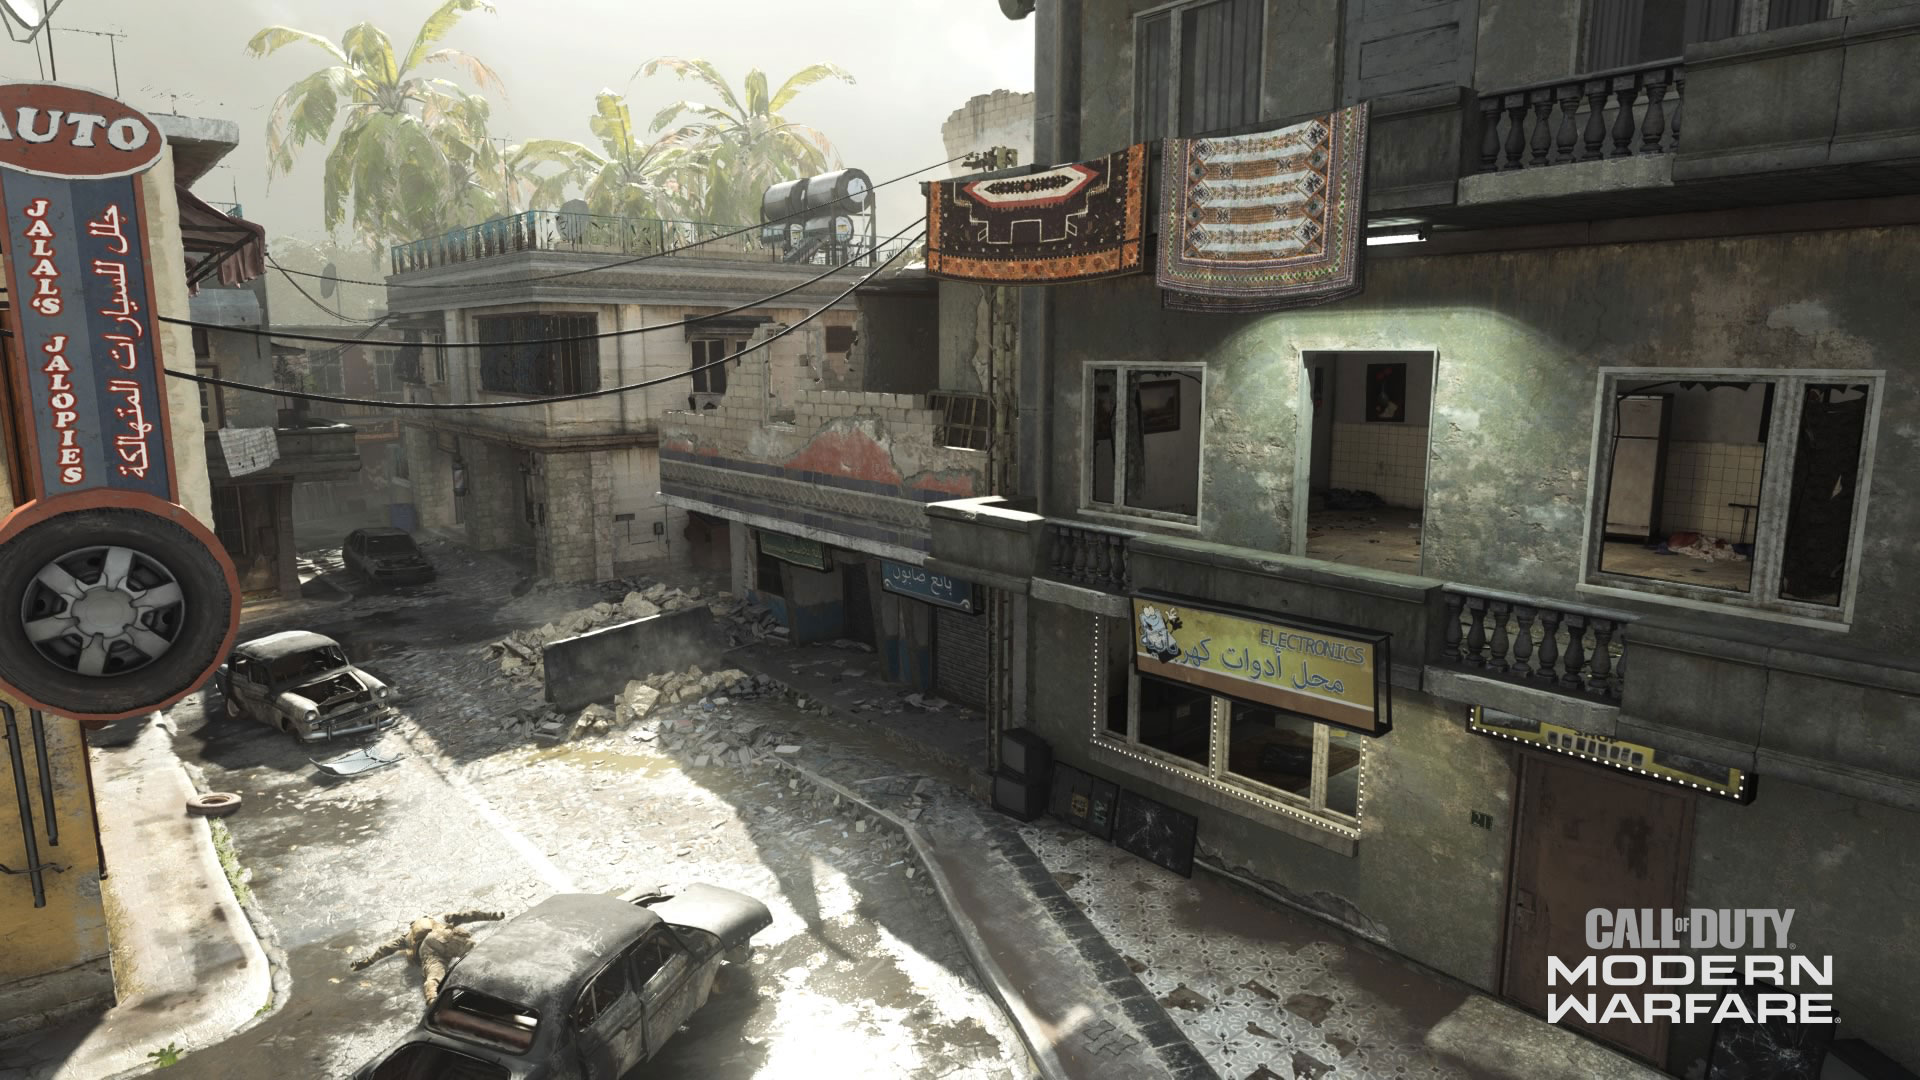
18. Electronics
19. Garage
Map Overview:
The following set of maps detail the entirety of Crash, including the zones, the locations of important areas in different game modes, and a topographical image. Swipe or click left or right to see them all:
Map Zones Detail
1. Apartment (Coalition Spawn)
One of the first new areas within Crash is where Coalition members spawn: a small alley next to an apartment is now accessible but acts mostly as a launching point for your ensuing battle with Allegiance forces.
The apartment, on the other hand, could provide a great watchpoint over the map’s eastern region. This intricate two-story building has a wonderful deck that can provide a solid view over the Hill, Curved Street, and other buildings below.
Defending this area during objective game modes, such as in Cyber Attack where the Coalition’s Data Center lies on the second floor, may be easier to do by using its various rooms to confuse opponents. Conversely on offense, you should be careful when walking from room to room, as you never know when the enemy may attempt to clear out the apartment to take it as a sniping stronghold.
2. Curved Street
Originally, the Curved Street acted as an initial spawn point. Now, it’s a thruway to the Hill and eastern buildings.
While travelling through here, be mindful of potential snipers on the roofs of the Apartment, Sandbags, and even the Restaurant, which has a slightly obstructed sightline over the street. It may be wise to hide behind cover – the concrete barriers and cars are there for a reason – and use them to counter-snipe any pesky rooftop vultures.
In Domination, the C flag sits right in the middle of the street. Coalition members would be remiss to not capture this point from the start, while Allegiance folk may have to sacrifice their own home flag to capture this one. For either case, this area could be contested with Killstreak fire as a match continues, so watch out for aerial threats and neutralize them if necessary.
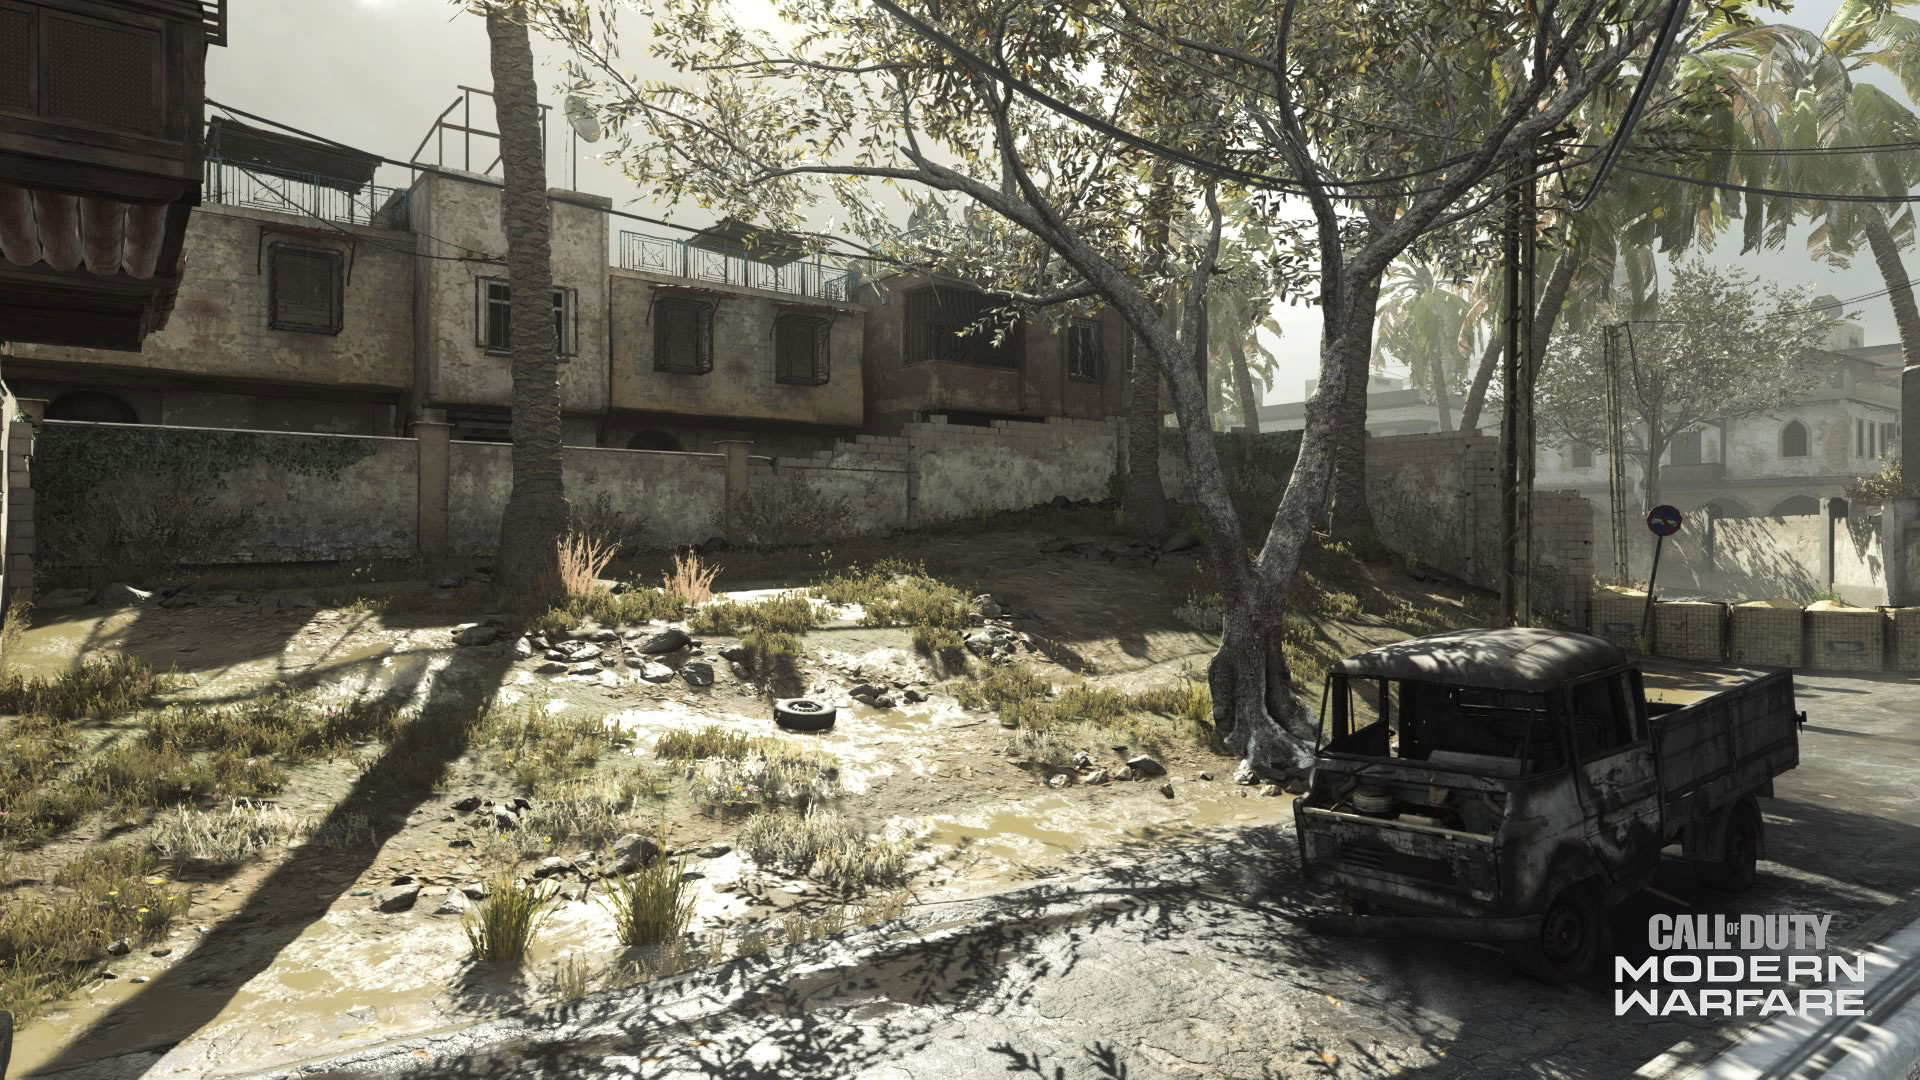
3. Hill
The Hill sometimes gets a bad rep for being a less trafficked area; outside of a Hardpoint hill or HQ spawn, there technically isn’t much here outside of a truck, some trees, and a slight incline towards a housing complex.
However, this is an area that could serve a few purposes including, but not limited to, a place for Killstreak busters to fire off their rockets.
Its place as an endpoint for the Alley and the map’s southeast corner can also play a role for flankers, especially in game modes where Crash’s center and northern routes have objective importance. This area is where an Operator has room to run around, pester folks who think they are safe in the surrounding buildings, and plan their next move behind enemy lines.
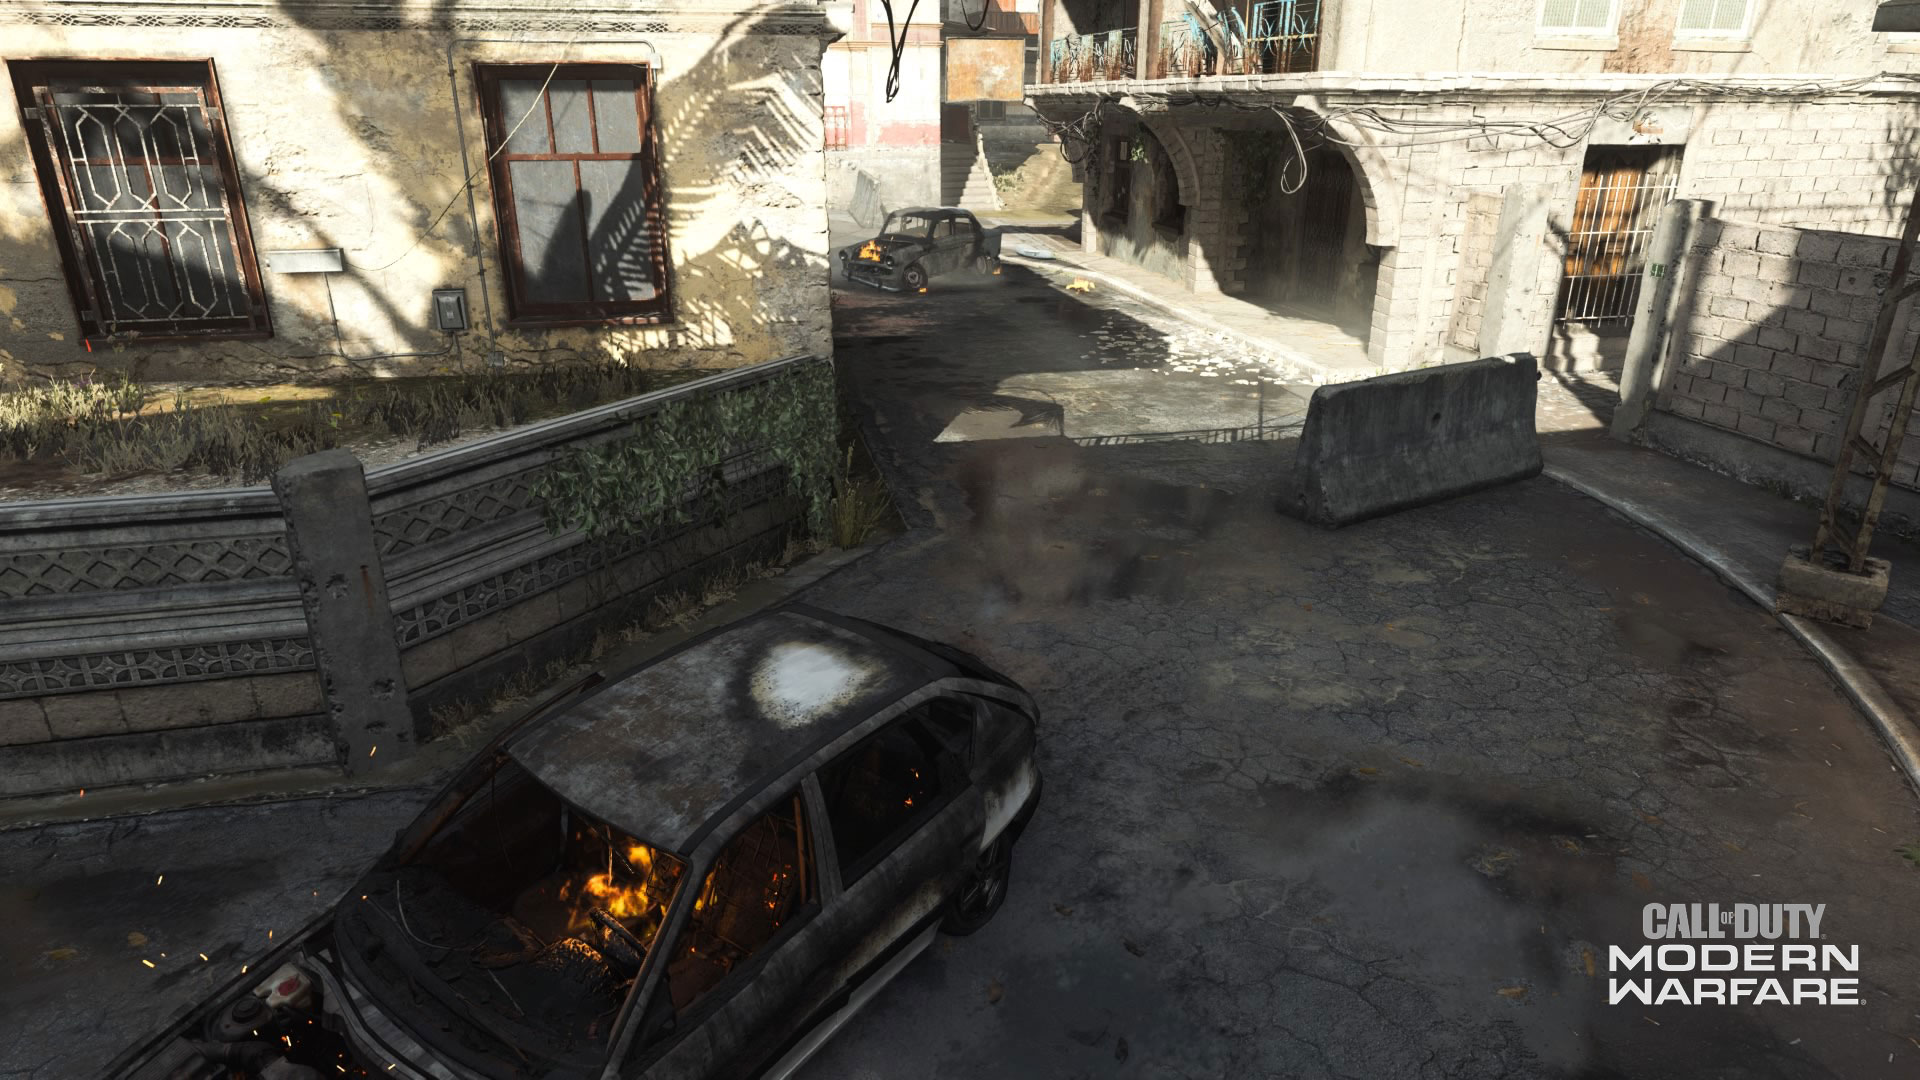
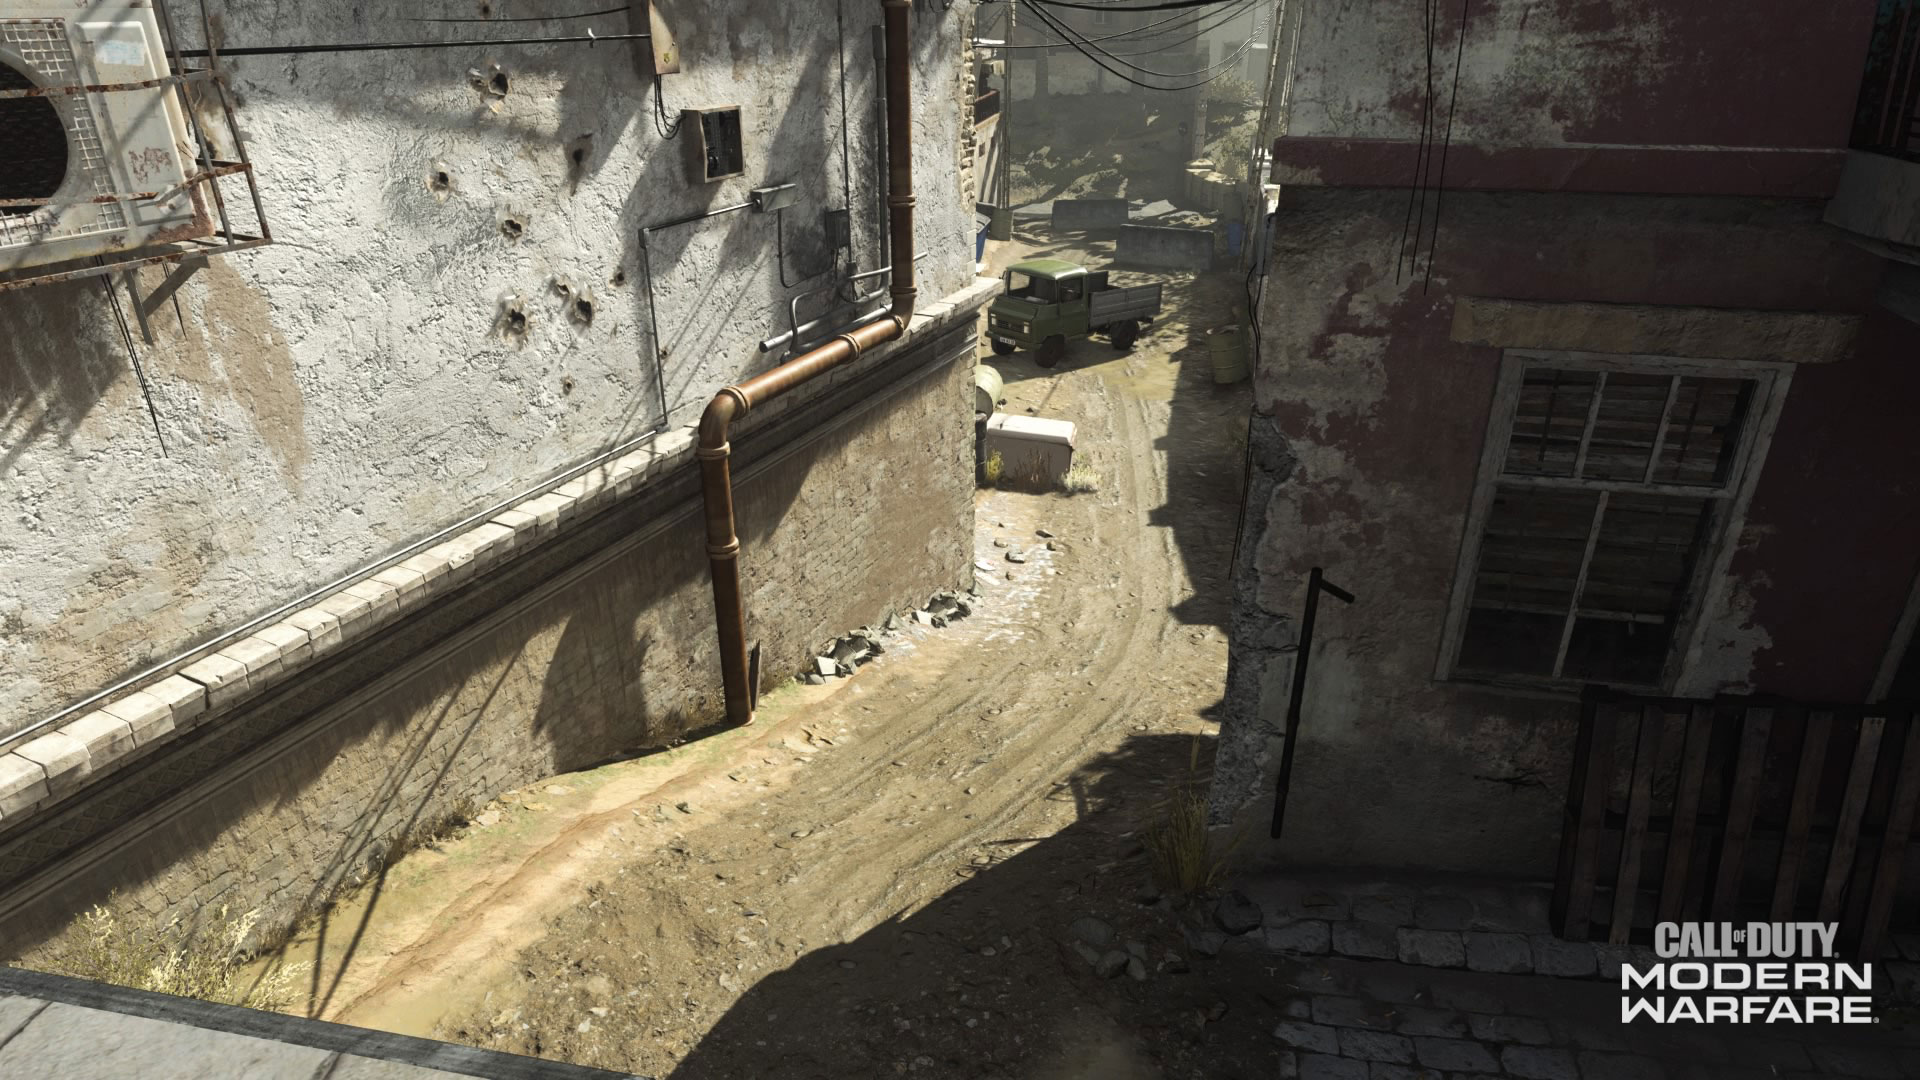
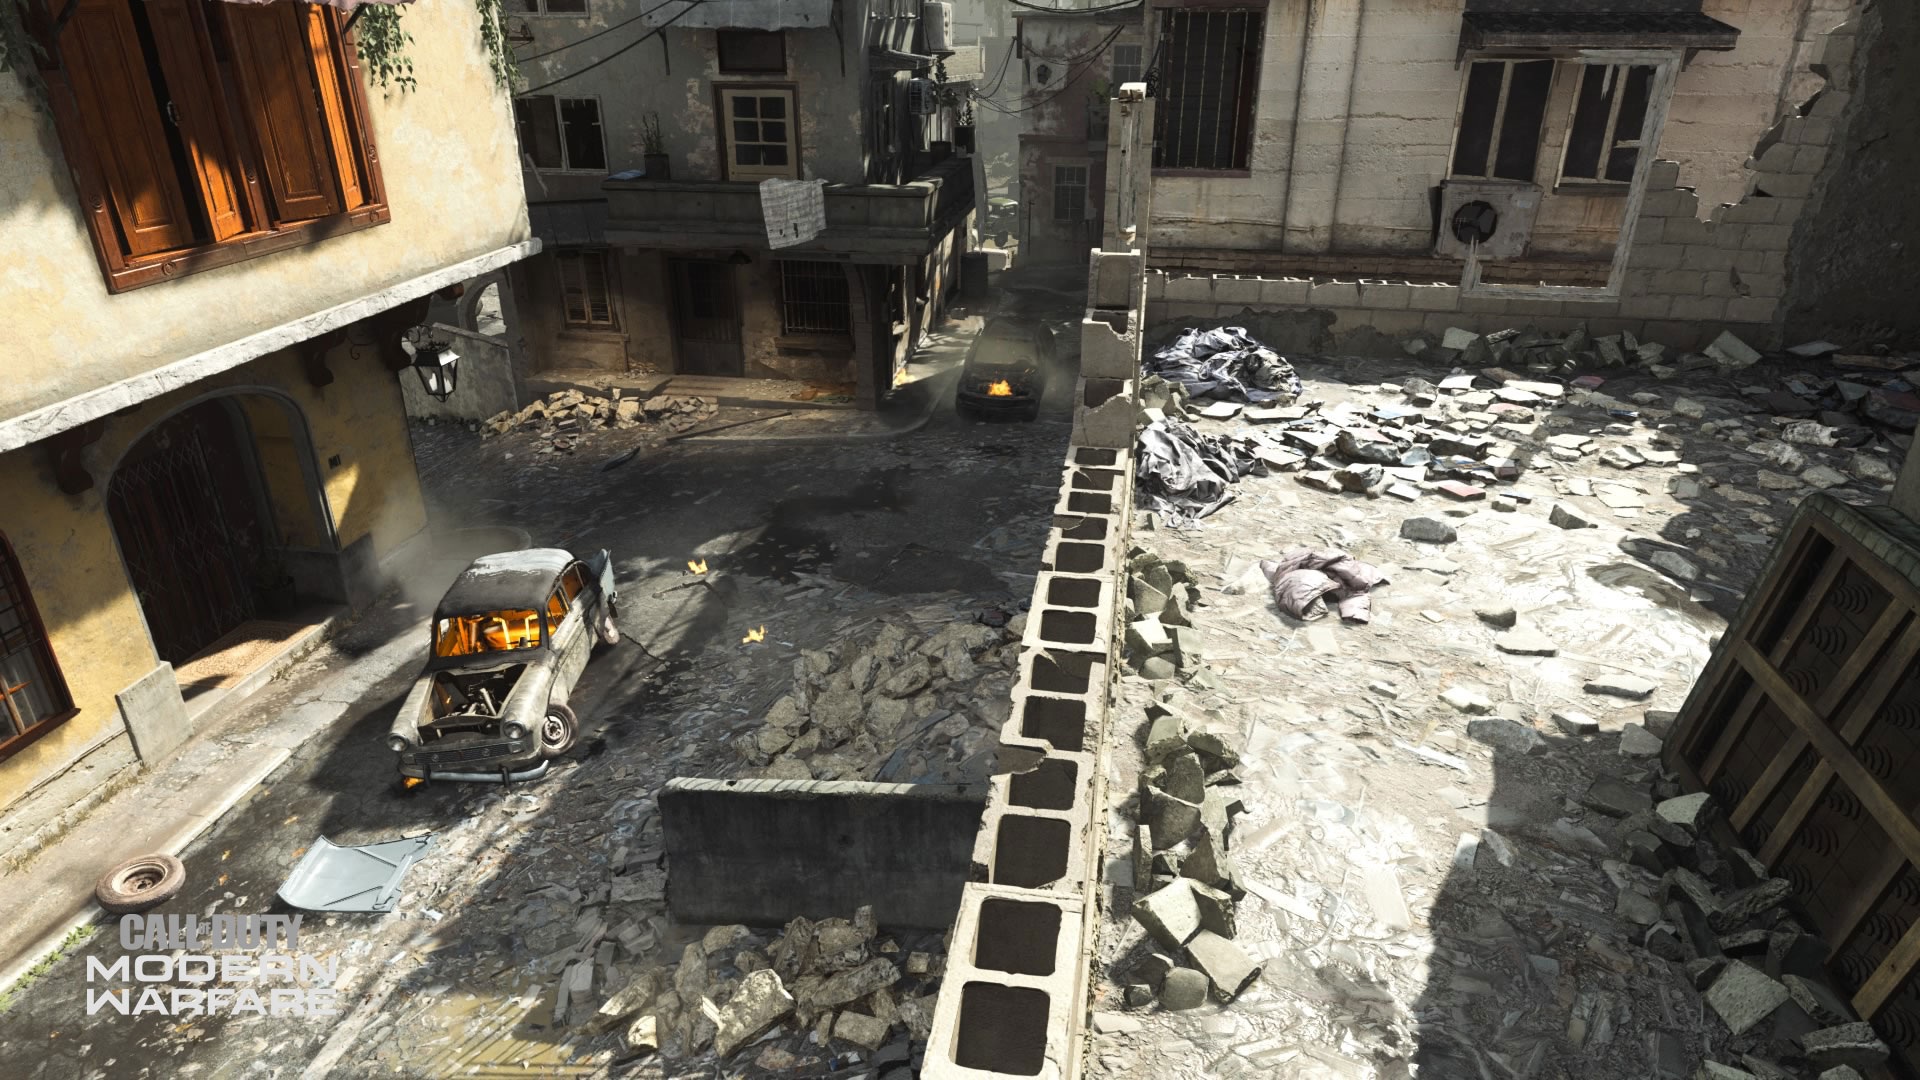
4. Alley
A long stretch of road with little cover defines Crash’s southern border.
Veterans may recognize this area as a popular place for a sniper showdown, and for good reason: it’s a deep sightline that stretches across the map. CQB Operators may want to use as much cover as possible while travelling here, lest they become sniper bait.
The Alley also has objective importance in multiple game modes, making the prospects of sniping down here even more viable. Just be ready to have a quick draw and not miss, because your enemy might just make the longshot before you do.
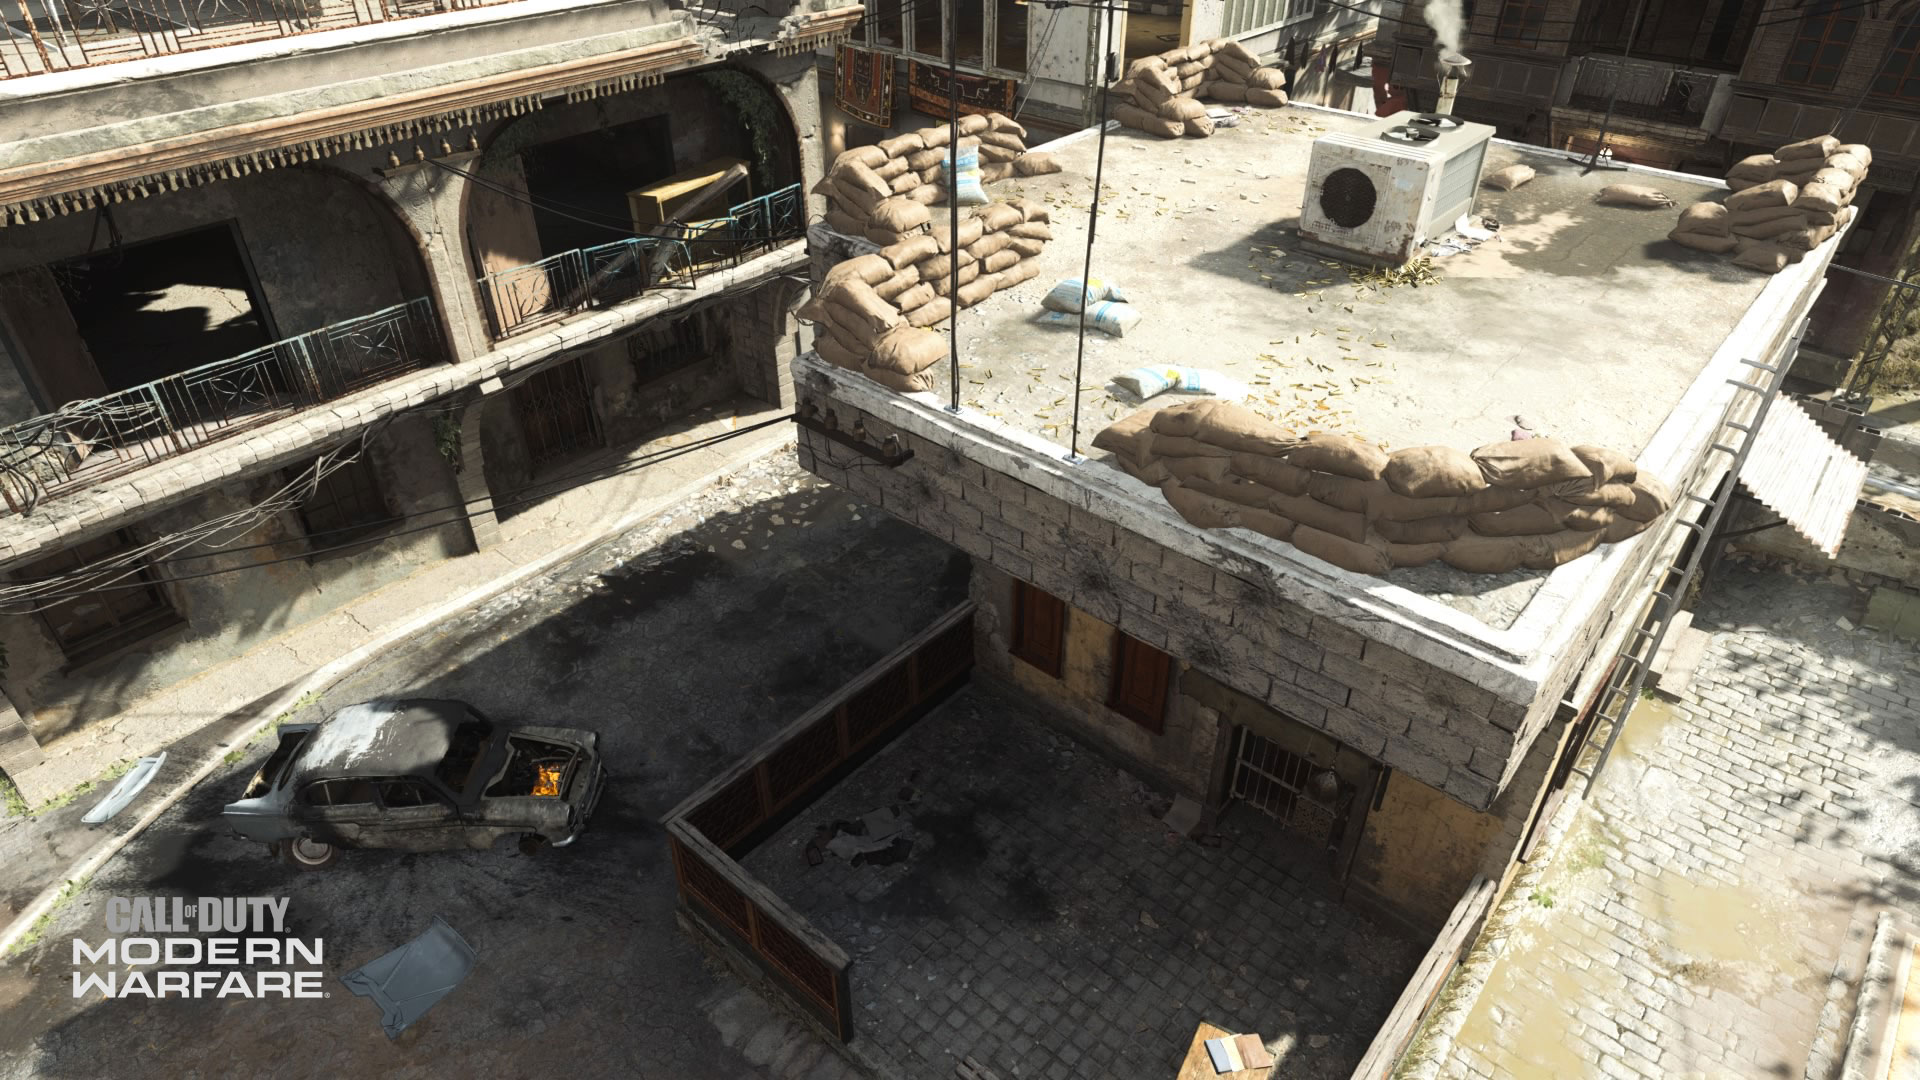
5. Sandbags
On top of a building in Crash’s northwest section has a few sandbags that act as makeshift cover. A ladder from the Courtyard is your only manageable way of getting up here, but the reward for doing so can be great.
This perch could be used to counter those holed up in the Apartment, on top of the Restaurant’s roof, or even down into the Crash site.
Just be mindful of little cover here; you are on the roof of a building, after all.
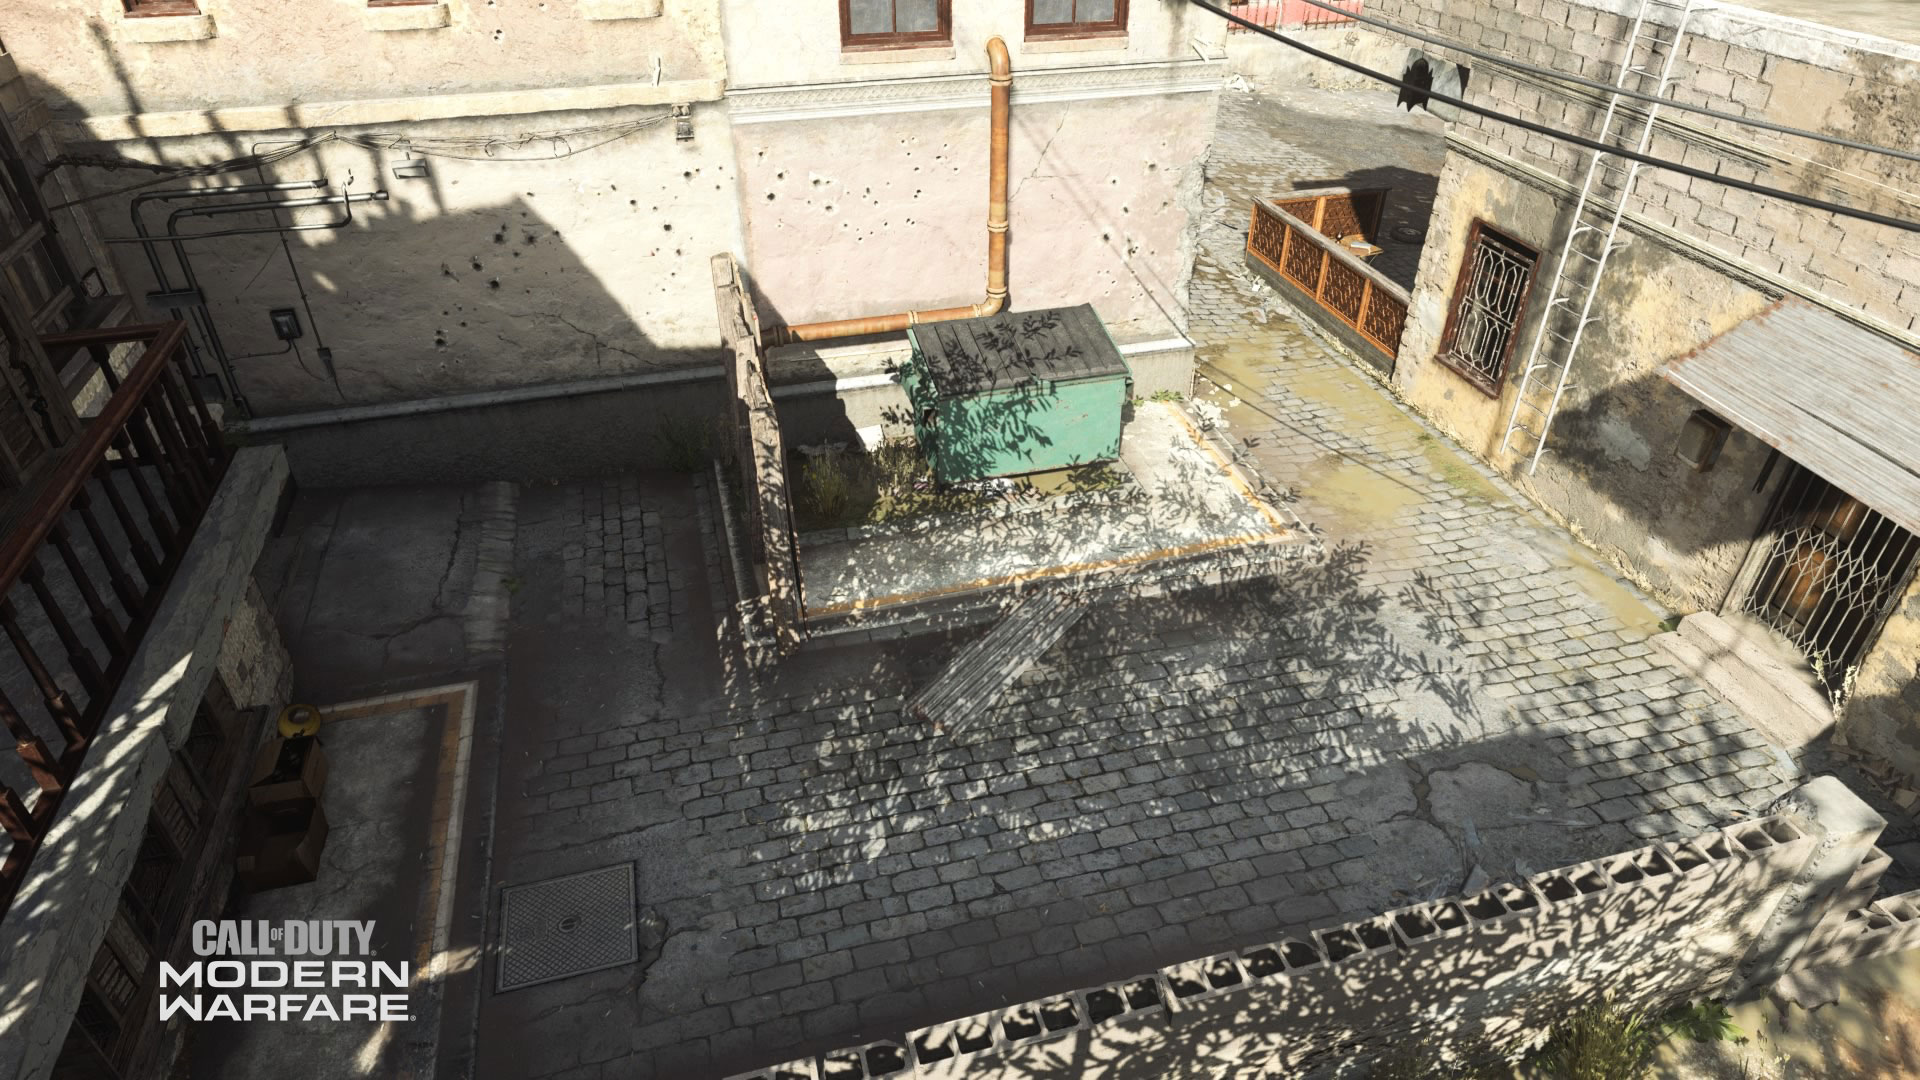
6. Courtyard
One of the smallest sections of Crash is this seemingly desolate area between the Sandbags and the Lamp Shop.
However, don’t let its size deceive you; this is where your path may cross with a hostile force, and if that happens, then be prepared for an engagement that’s up close and personal.
The Courtyard is adjacent to the Sandbags building and you can climb a ladder out of the Courtyard up to Sandbags. Technically, the metal overhang on that building is part of the Courtyard, and is either accessible from the Sandbags roof or by doing some parkour on the wall next to it.
Your reward for getting up here is a fantastic sightline past the pillars, to the Crash site, and even to a window of the Pharmacy. However, bear in mind that there is little cover here, especially on your flanks.
During S&D games, this is where the B Bomb Site lives. Defenders may have an easier time securing this point – it’s close to their spawn – so Attackers may either want to think twice before entering here, or fool the enemy into thinking they are planting at the other site.
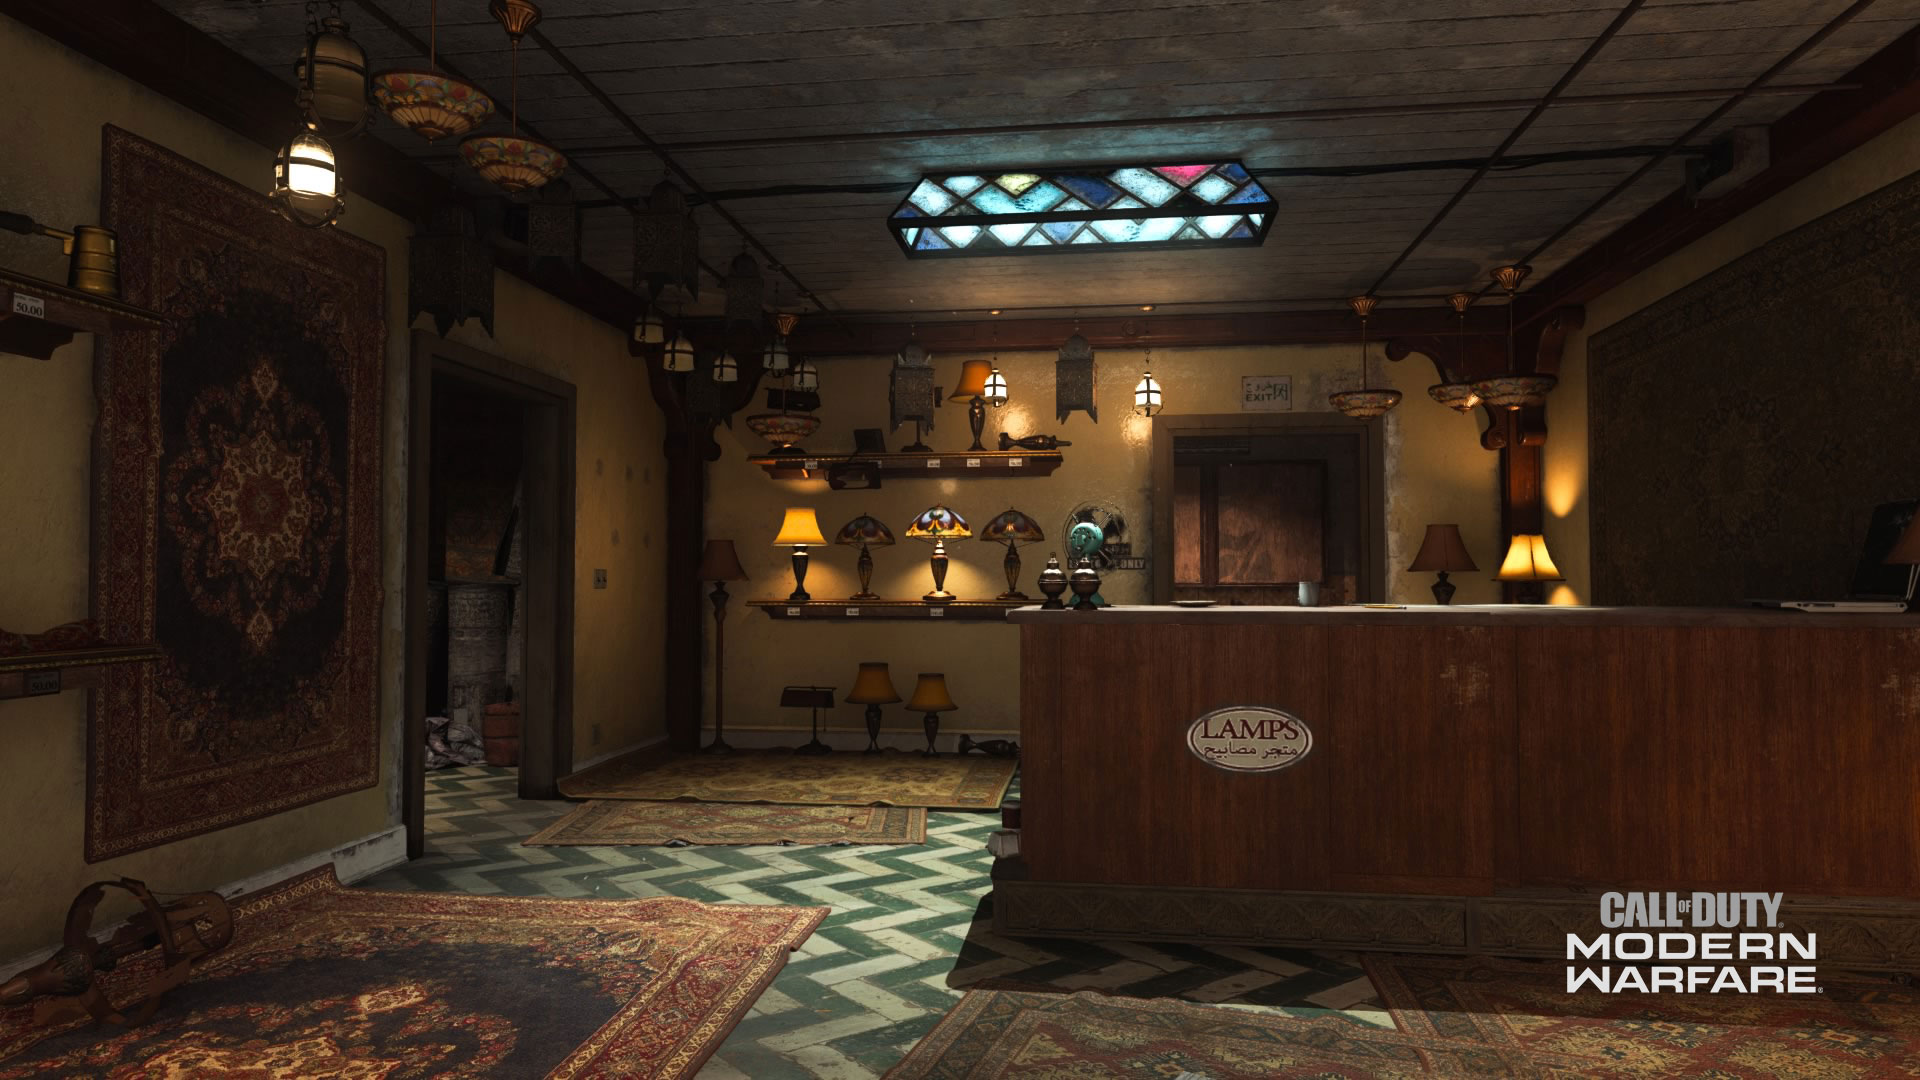
7. Lamp Shop
Accessible either from the central street, a ladder from the Alley, or via backdoor in the Courtyard, the Lamp Shop is where you could light up someone inside with a CQB weapon.
When travelling through here with a short-range weapon, be mindful of all the potential entrances into here and prepare for whatever lurks around the corner, especially during Hardpoint and Headquarters games when the hill or HQ rotates here.
Alternatively, the Lamp Shop’s second floor is where snipers can shine, as there are multiple sightlines across the center of the map, down the Alley, and also over to the Apartment.
Part of the building’s second floor is technically its roof, so watch out for aerial killstreaks or JOKR missiles that could find their way over here.
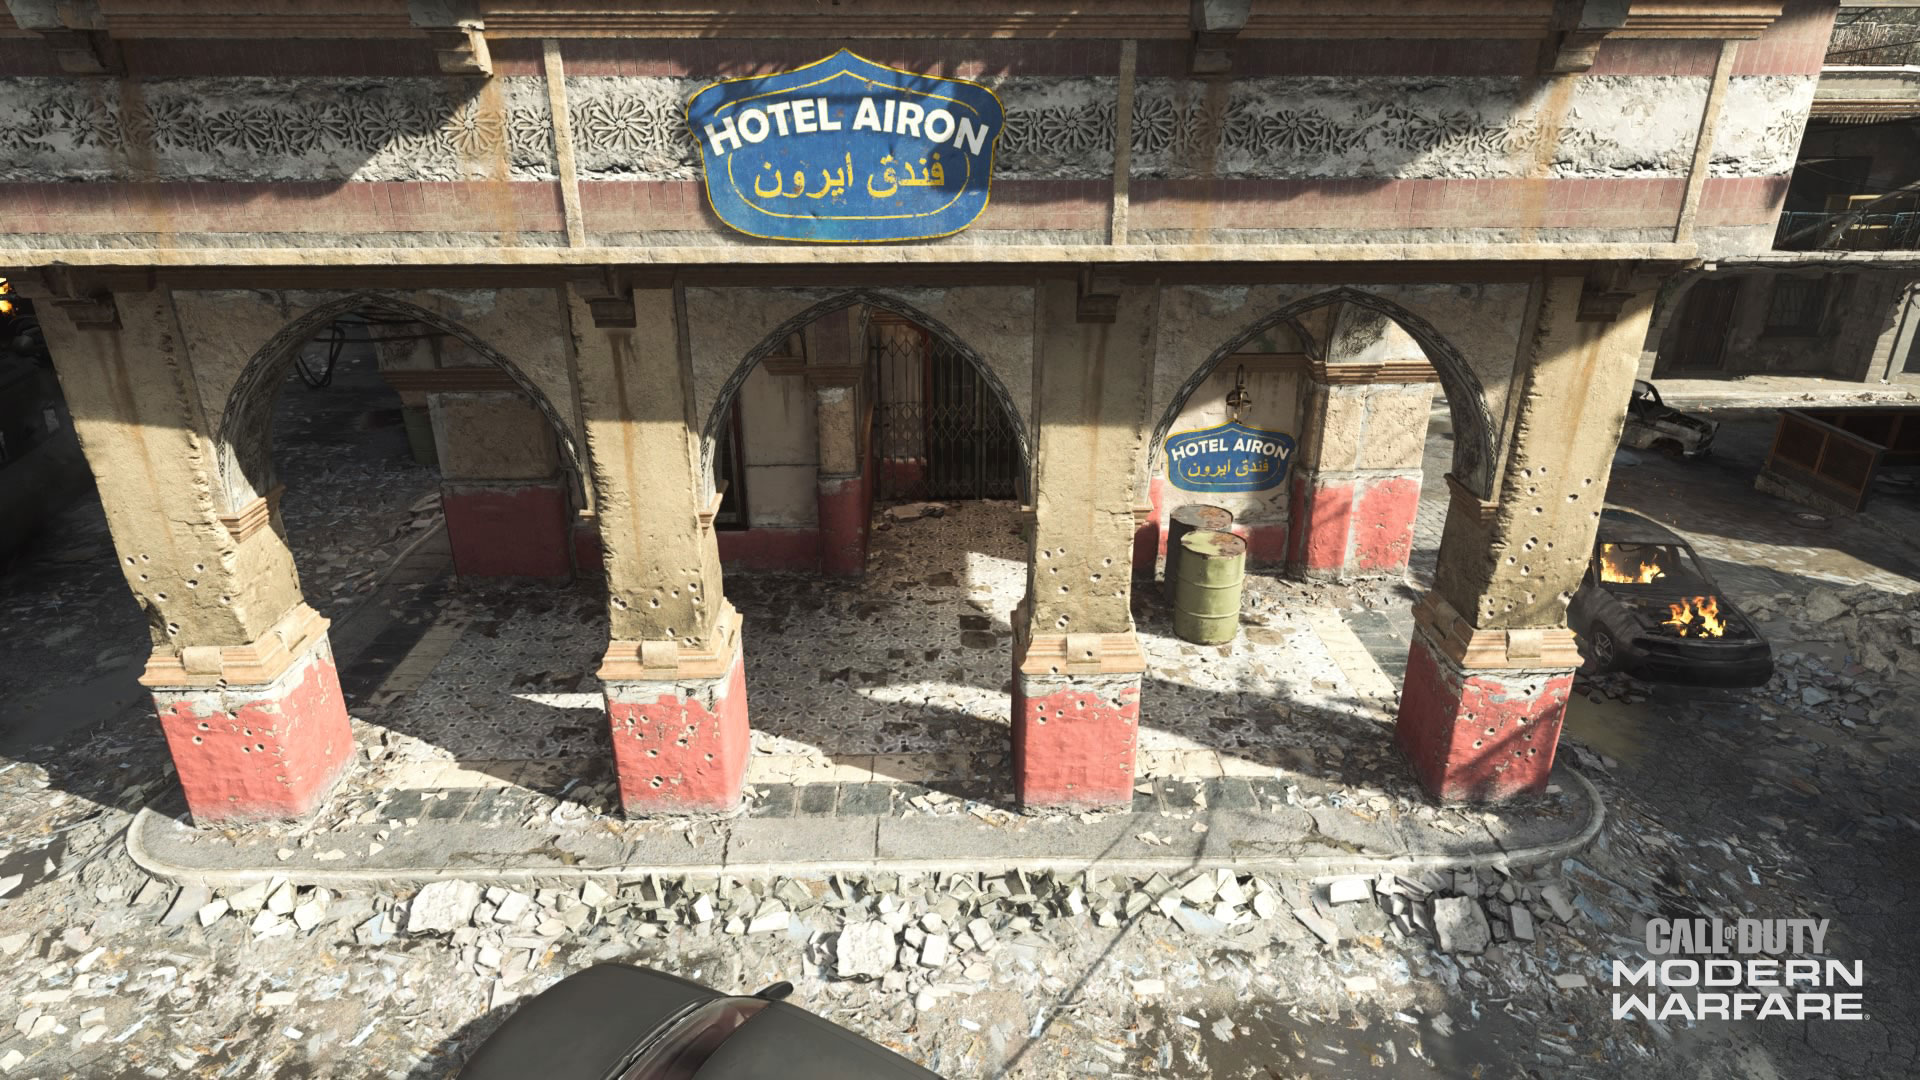
8. Pillars
While the Hotel Airon is closed for business, it welcomes partial cover for those who travel to here.
Much like the Arches across the street, those looking to get from the Crash site to Crash’s eastern portion may want to use the Pillars for cover rather than running through the streets. At the very least, the building offers a bit of shelter from aerial Killstreaks or from snipers in the Pharmacy, Restaurant, or Lamp Shop.
It also has few alcoves that you should watch out for, as they may have an enemy or equipment piece laying in wait.
9. Arches
Those who want to duck out of the Alley before crossing it entirely will find themselves here at the Arches.
This place provides a golden opportunity for counter-sniping, as an Operator can use the building’s stone architecture as cover from enemies in or on top of the Restaurant, Lamp Shop, or Pharmacy.
The Arches area encompasses much of the Crash site’s southern limit, making it a potential route for those rushing in with close-range weaponry.
10. Crash
The iconic centerpiece for this map can also be the most hectic locale.
Given its central location, little cover, and objective importance across all game modes, travelling through here can be a death sentence for those not mindful of their surroundings.
Not only should you watch out for enemy forces on the ground in and around this area, but also sharpshooters that could come from nearly all directions. And, if foot traffic wasn’t enough, then any veteran will let you know about how the downed helicopter can act as a giant bullseye for Killstreaks.
There are plenty of reasons to travel through this Crash site, ranging from crossing over lanes or capturing objectives that may spawn here. But this is a place where you may be wise to get in and out as quickly as possible, lest you join the carnage strewn about the place.
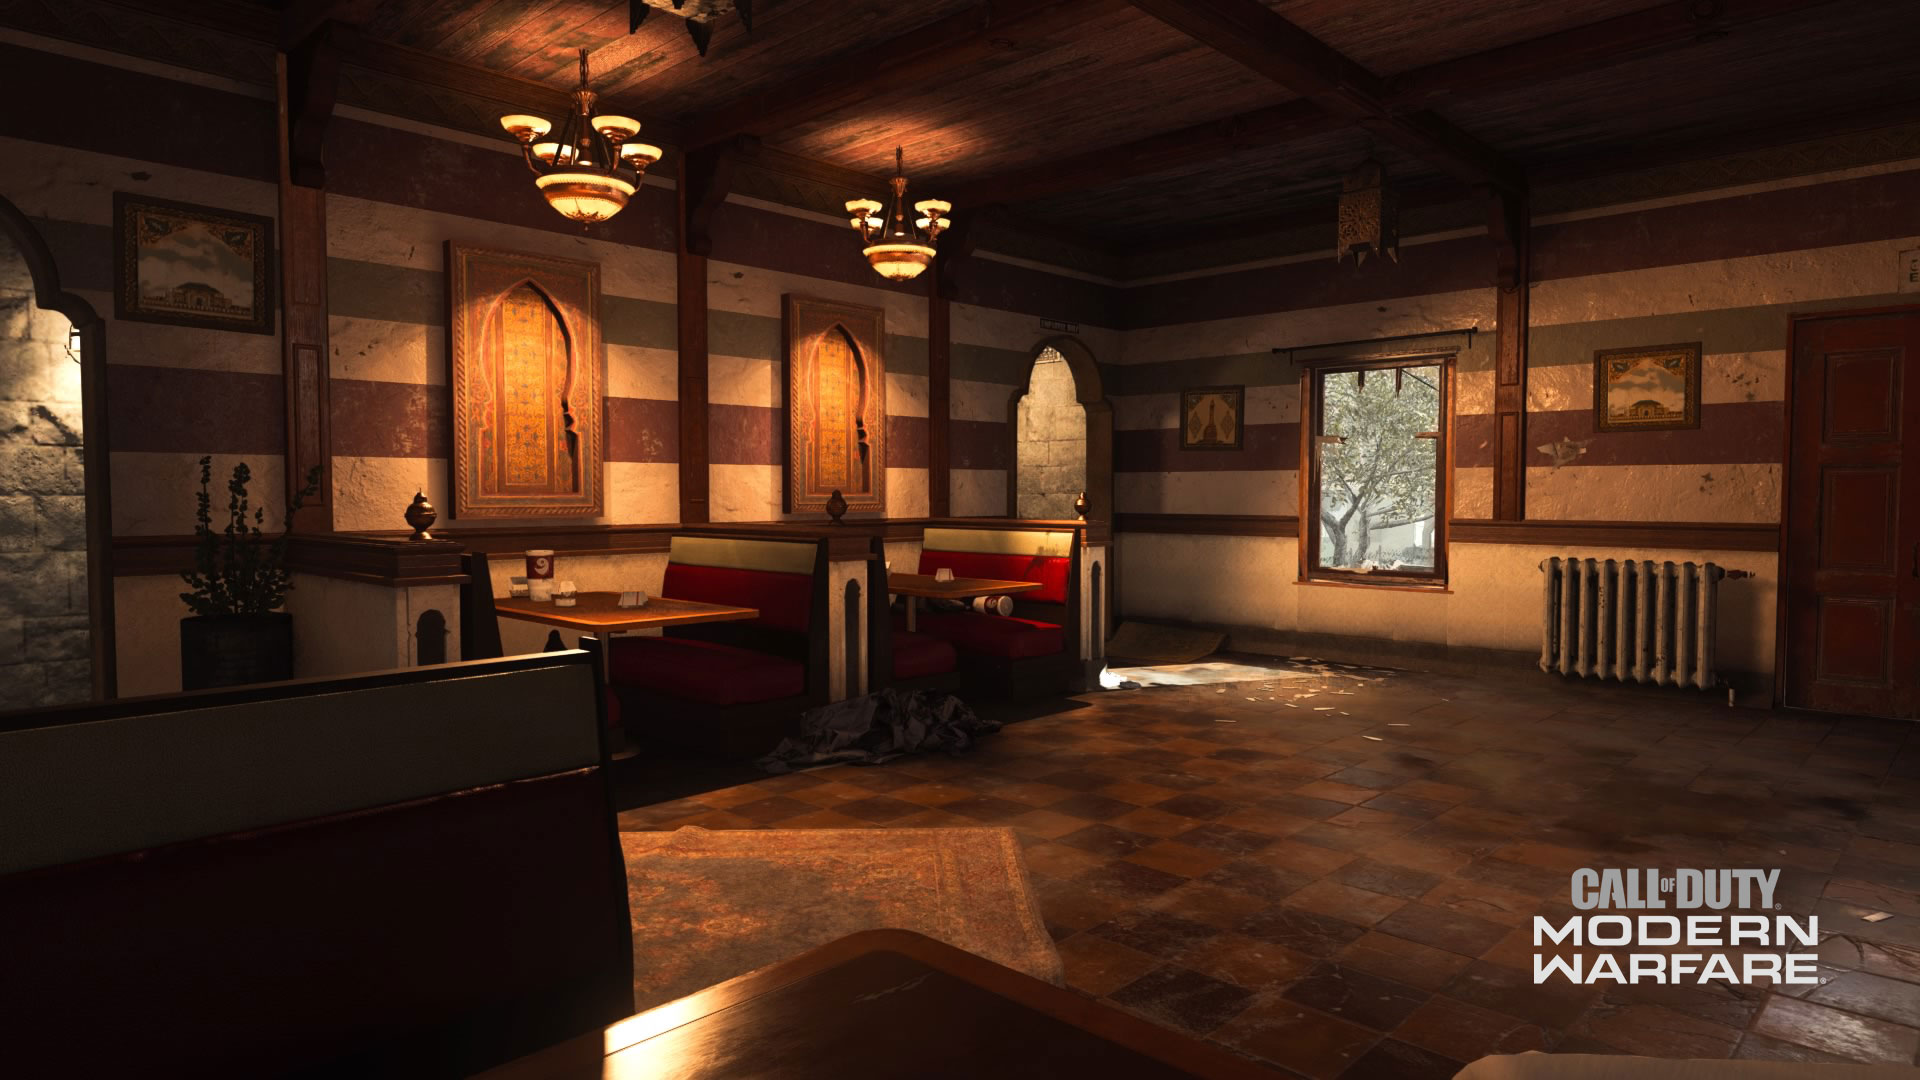
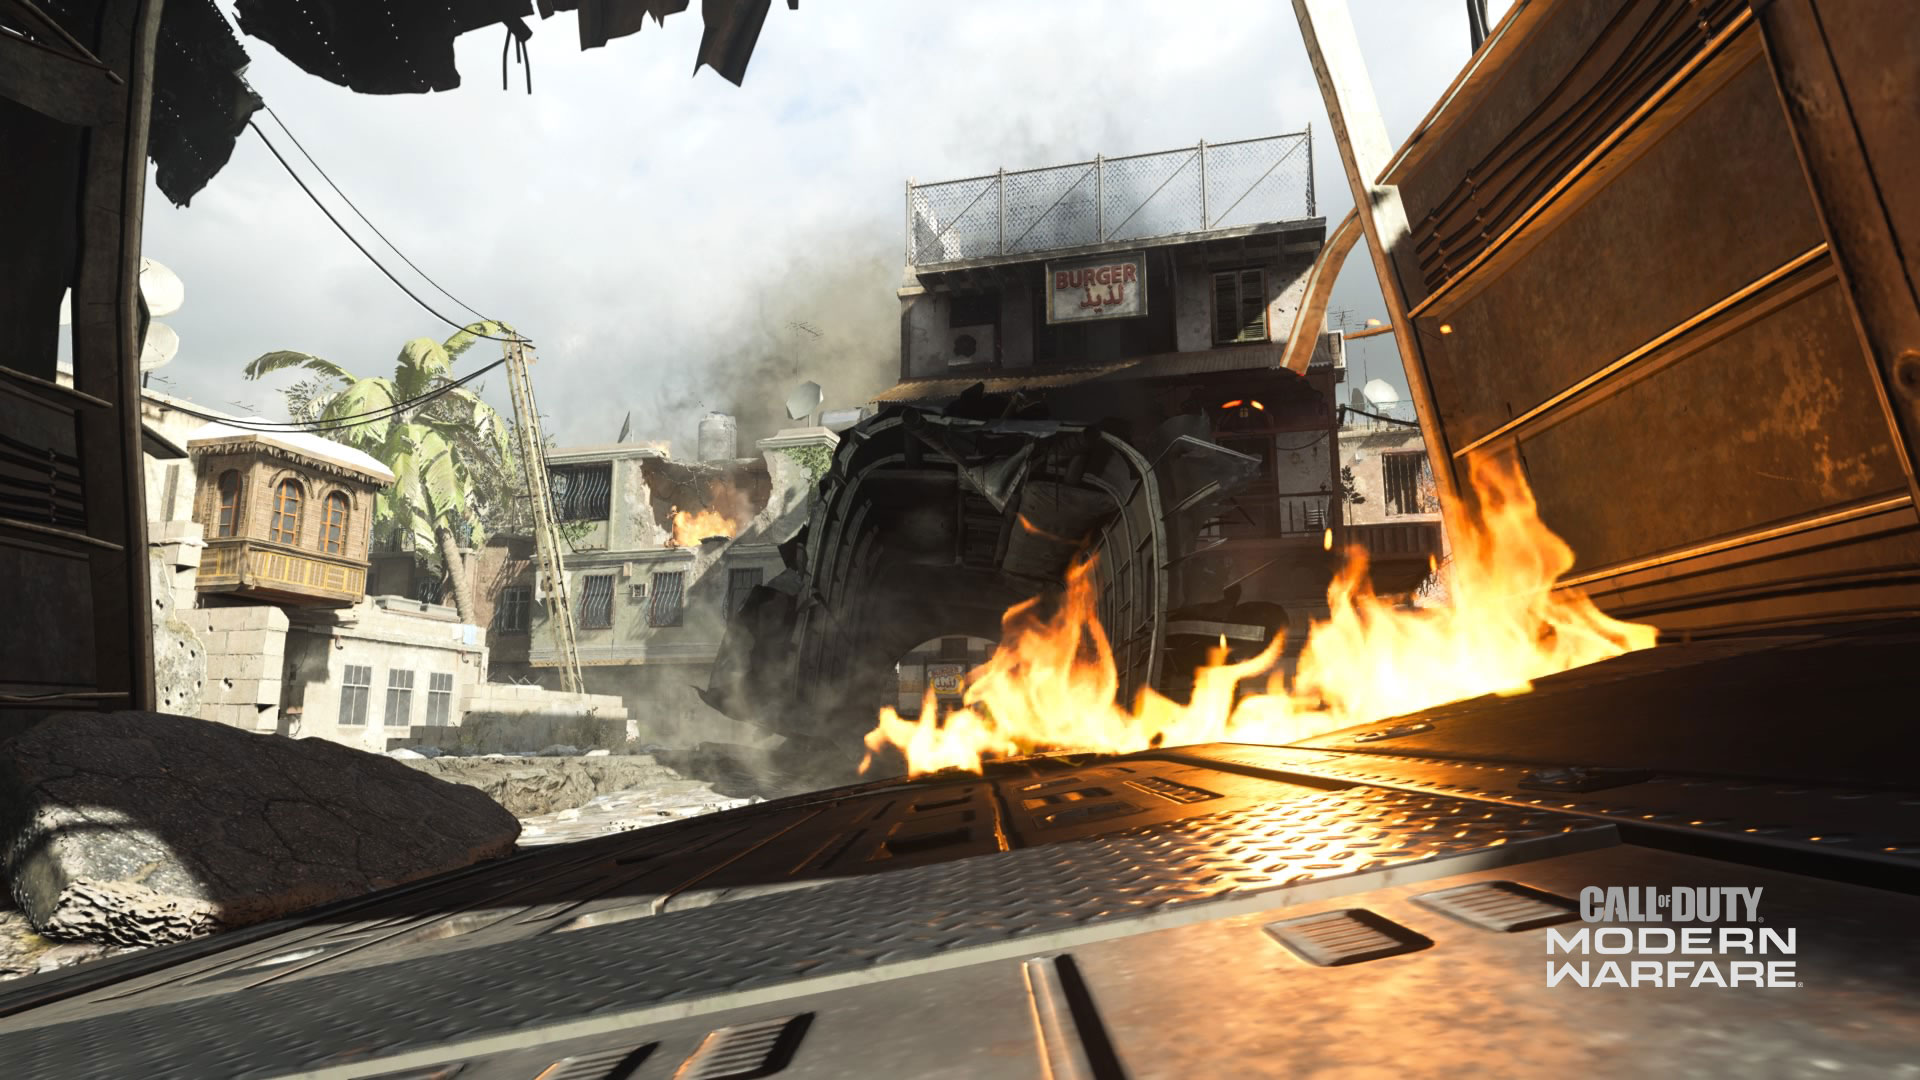
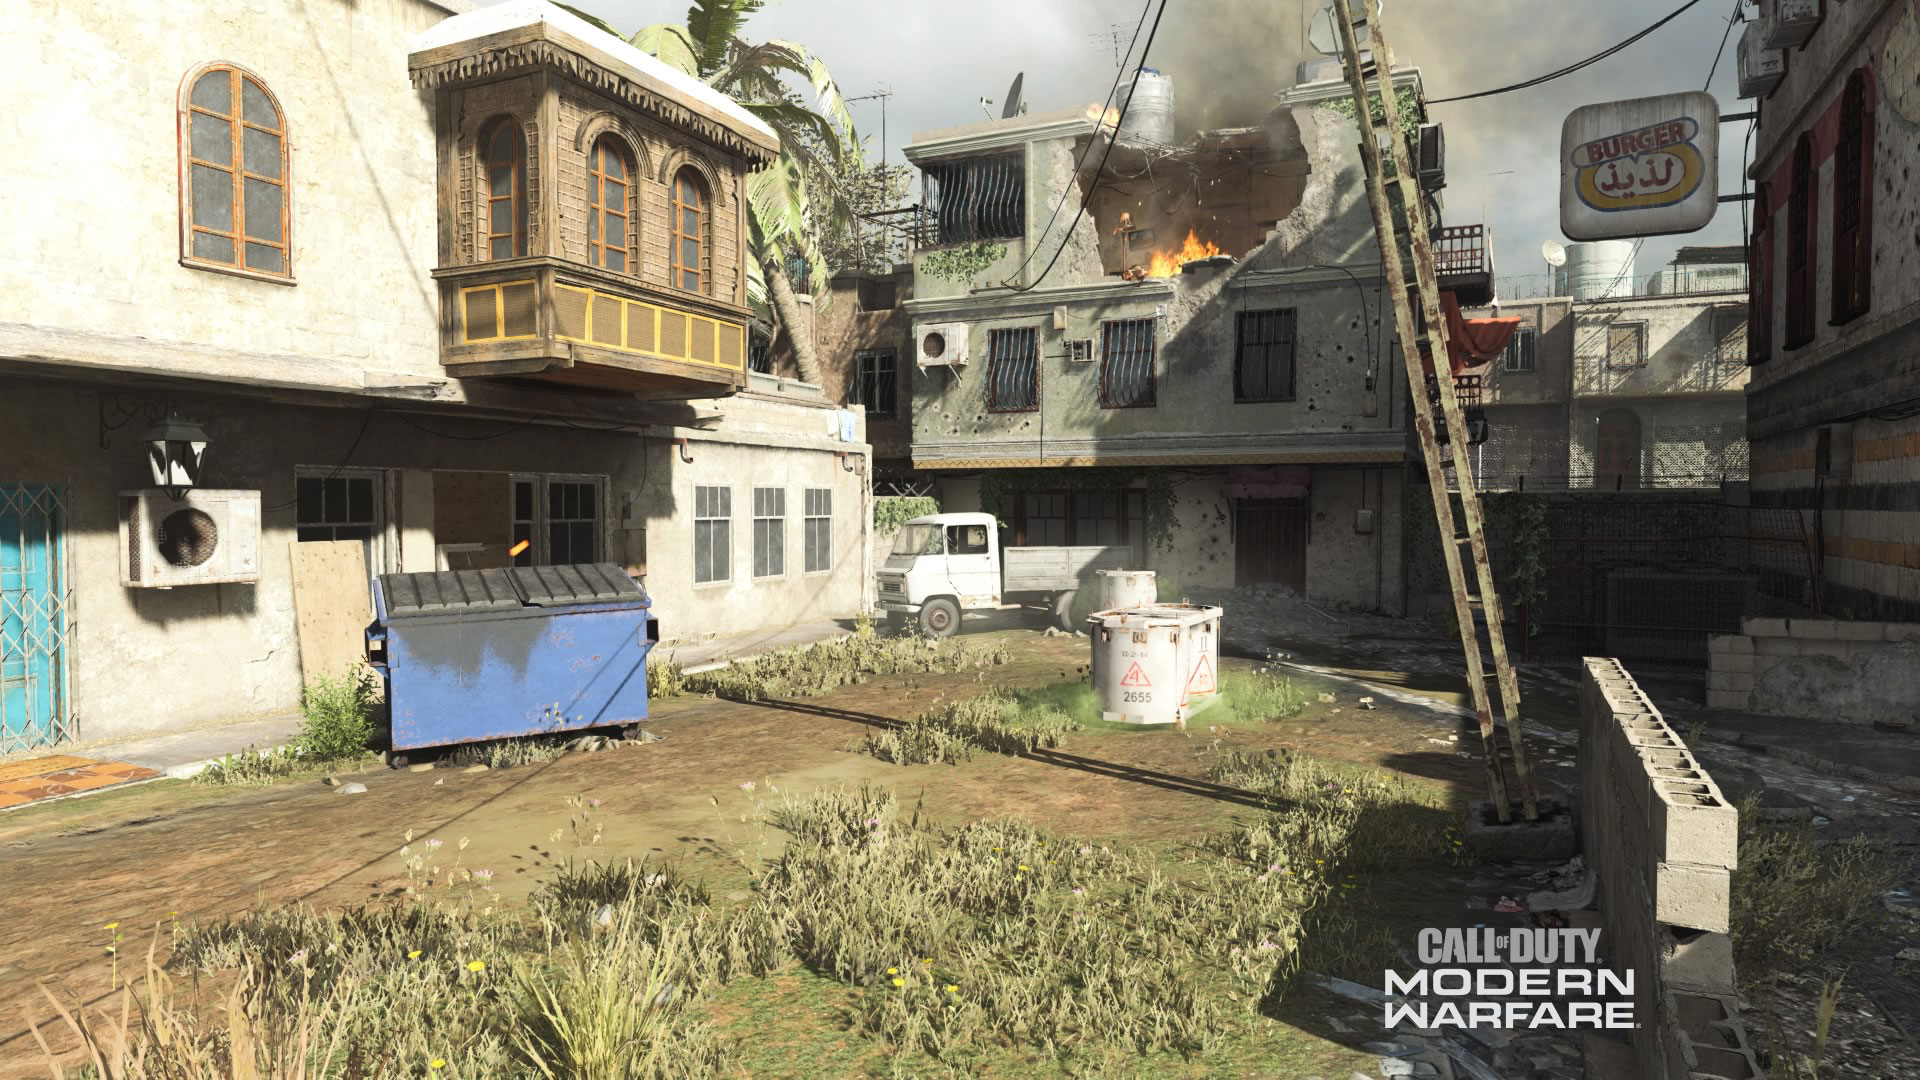
11. Restaurant
A two-story restaurant on Crash’s northern border may be just as memorable to series veterans as the downed helicopter… Although it might be because of the infamous rooftop that many snipers love to call home.
Before we get there, though, the rest of the restaurant includes a backyard with access to all three floors. It’s also where you could find one of the several Hardpoint or Headquarter locations, and a small dumpster you can mantle over to access the Crash site quicker.
The first floor is the burger joint’s kitchen and cashier area. In here, as well as the second-floor main restaurant area, is where close range weapons can shine due to the lack of interior space. An Operator may have to take extreme caution when walking around the cashiers area, although it is small enough to smoke anyone out with a single grenade.
Then, of course, is the rooftop. This has the highest vantage point on the map, giving those who travel up here a view over the Crash site all the way south to the Overlook, and all the way east to the Apartment. An Operator can get a slightly more protected view within the restaurant’s second floor, but that comes with a bigger flank opportunity with the staircase next to it rather than the ladder.
Those who want to ruin snipers up here have a couple of options: throw an explosive up onto the roof, nail them with an aerial Killstreak, sneak up the staircase, counter-snipe them from the Pharmacy, Sandbags, or other perches, or take a pistol out, climb up the ladder, and stealthily take them out with a few well-placed shots.
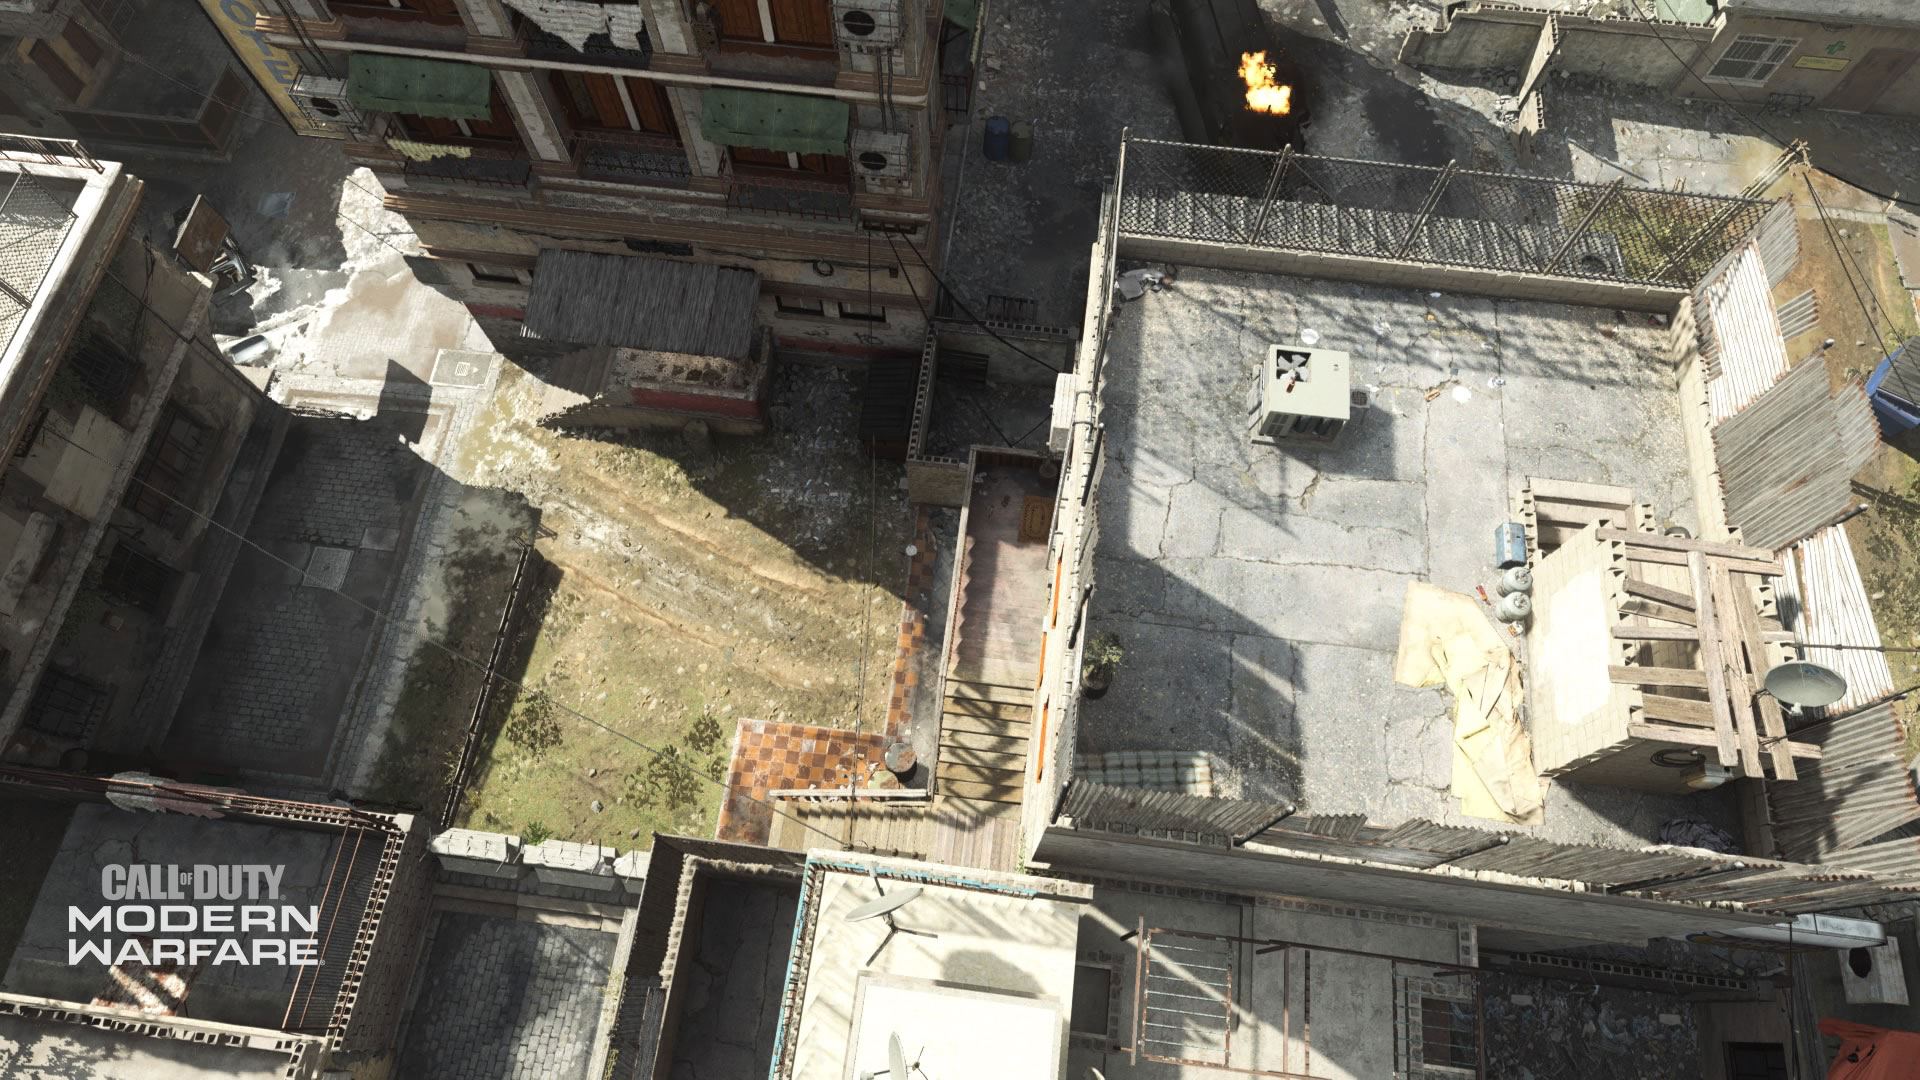
12. Generators
Right next to the Restaurant are the Generators that power it along with some… problematic containers, which most likely came from the downed helicopter.
The trucks and the containers act as cover pieces that you could fight around if you go off the beaten path and take a detour here.
Although it may not be the most highly trafficked nor notable area due to its position, it does offer unique sightlines over the Crash site and over to an Alley entrance near the Arches.
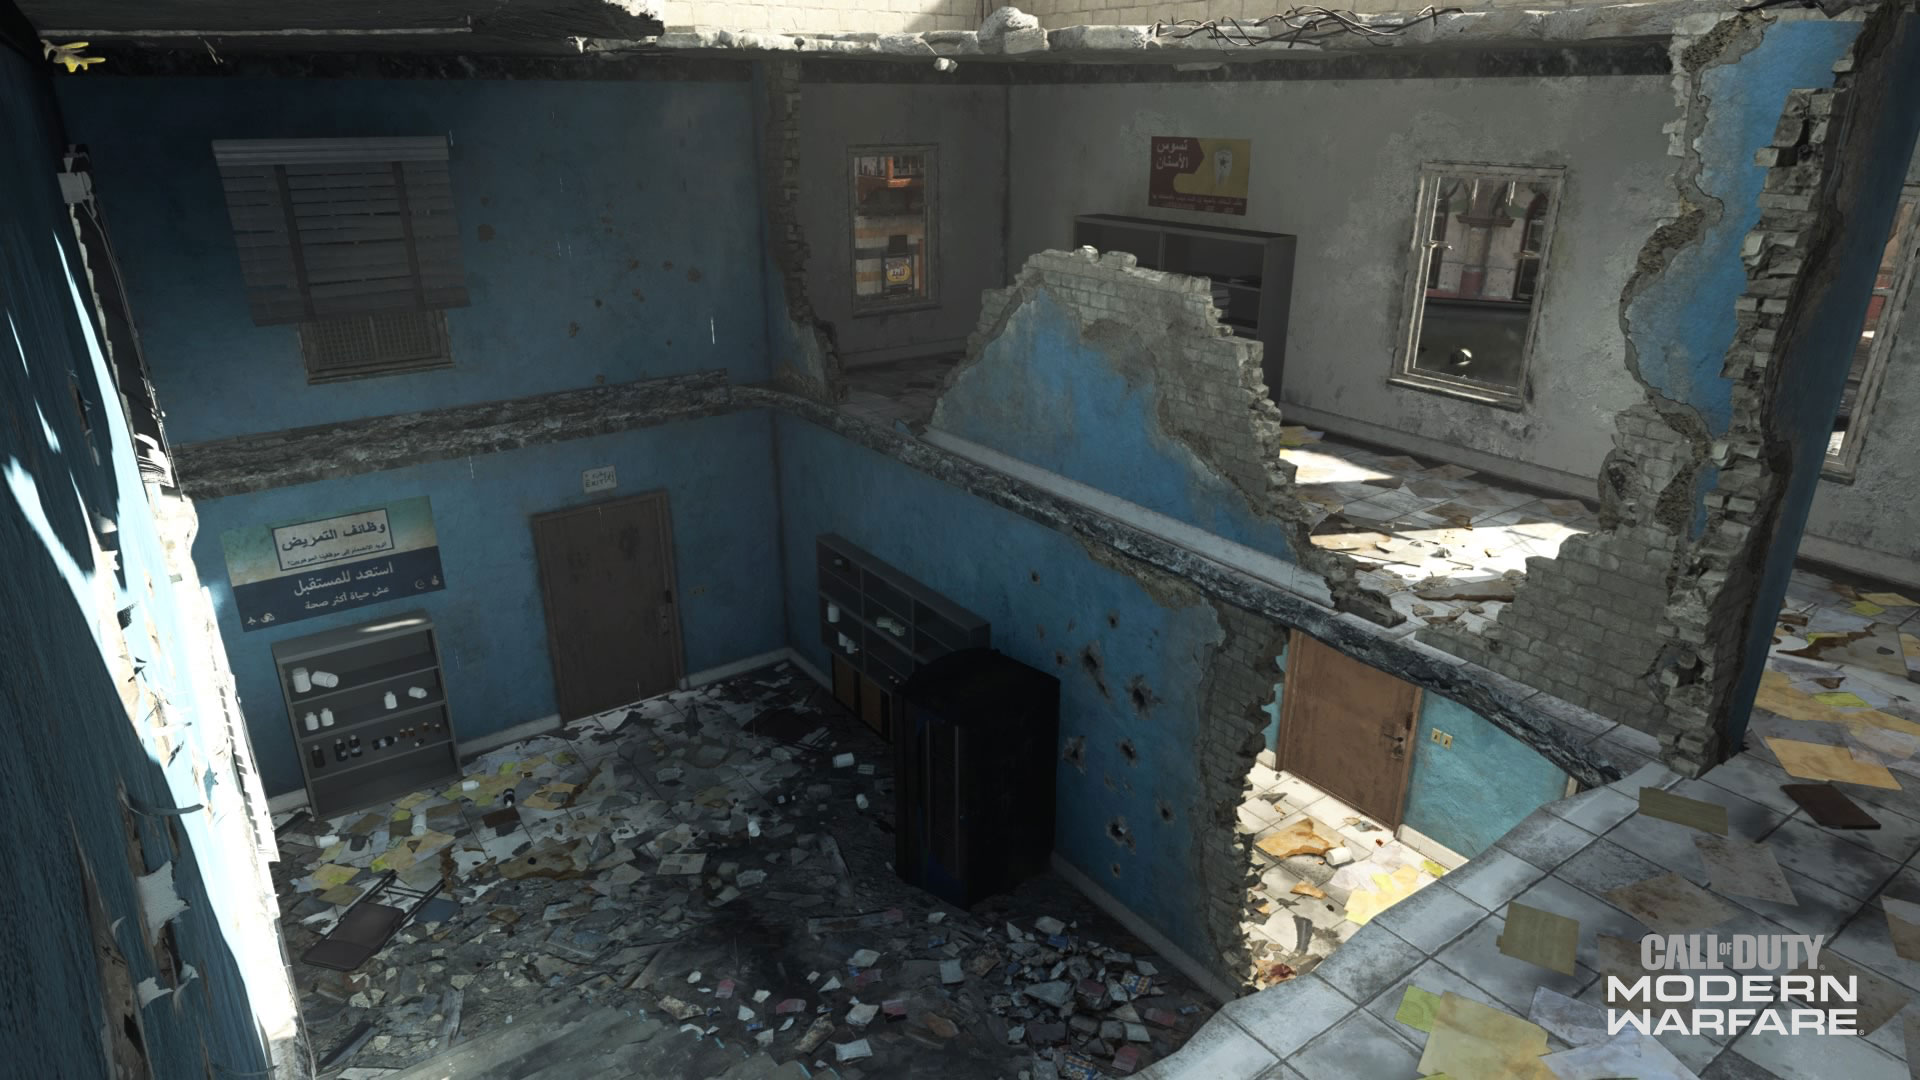
13. Pharmacy
Write a few prescriptions for butt-kicking and head to the Pharmacy for solid sightlines over the middle of the map.
This area’s interior could be a solid place for a cage match, given that there is little cover or even space to run around in. Its true value could also lie in those aforementioned sightlines, which you can take by walking up the staircase and peeking out the windows.
Just be mindful that this building has definitely seen better days; the roof is partially bombed out, meaning that a well-placed Killstreak can decimate anyone who thinks they are safe inside here.
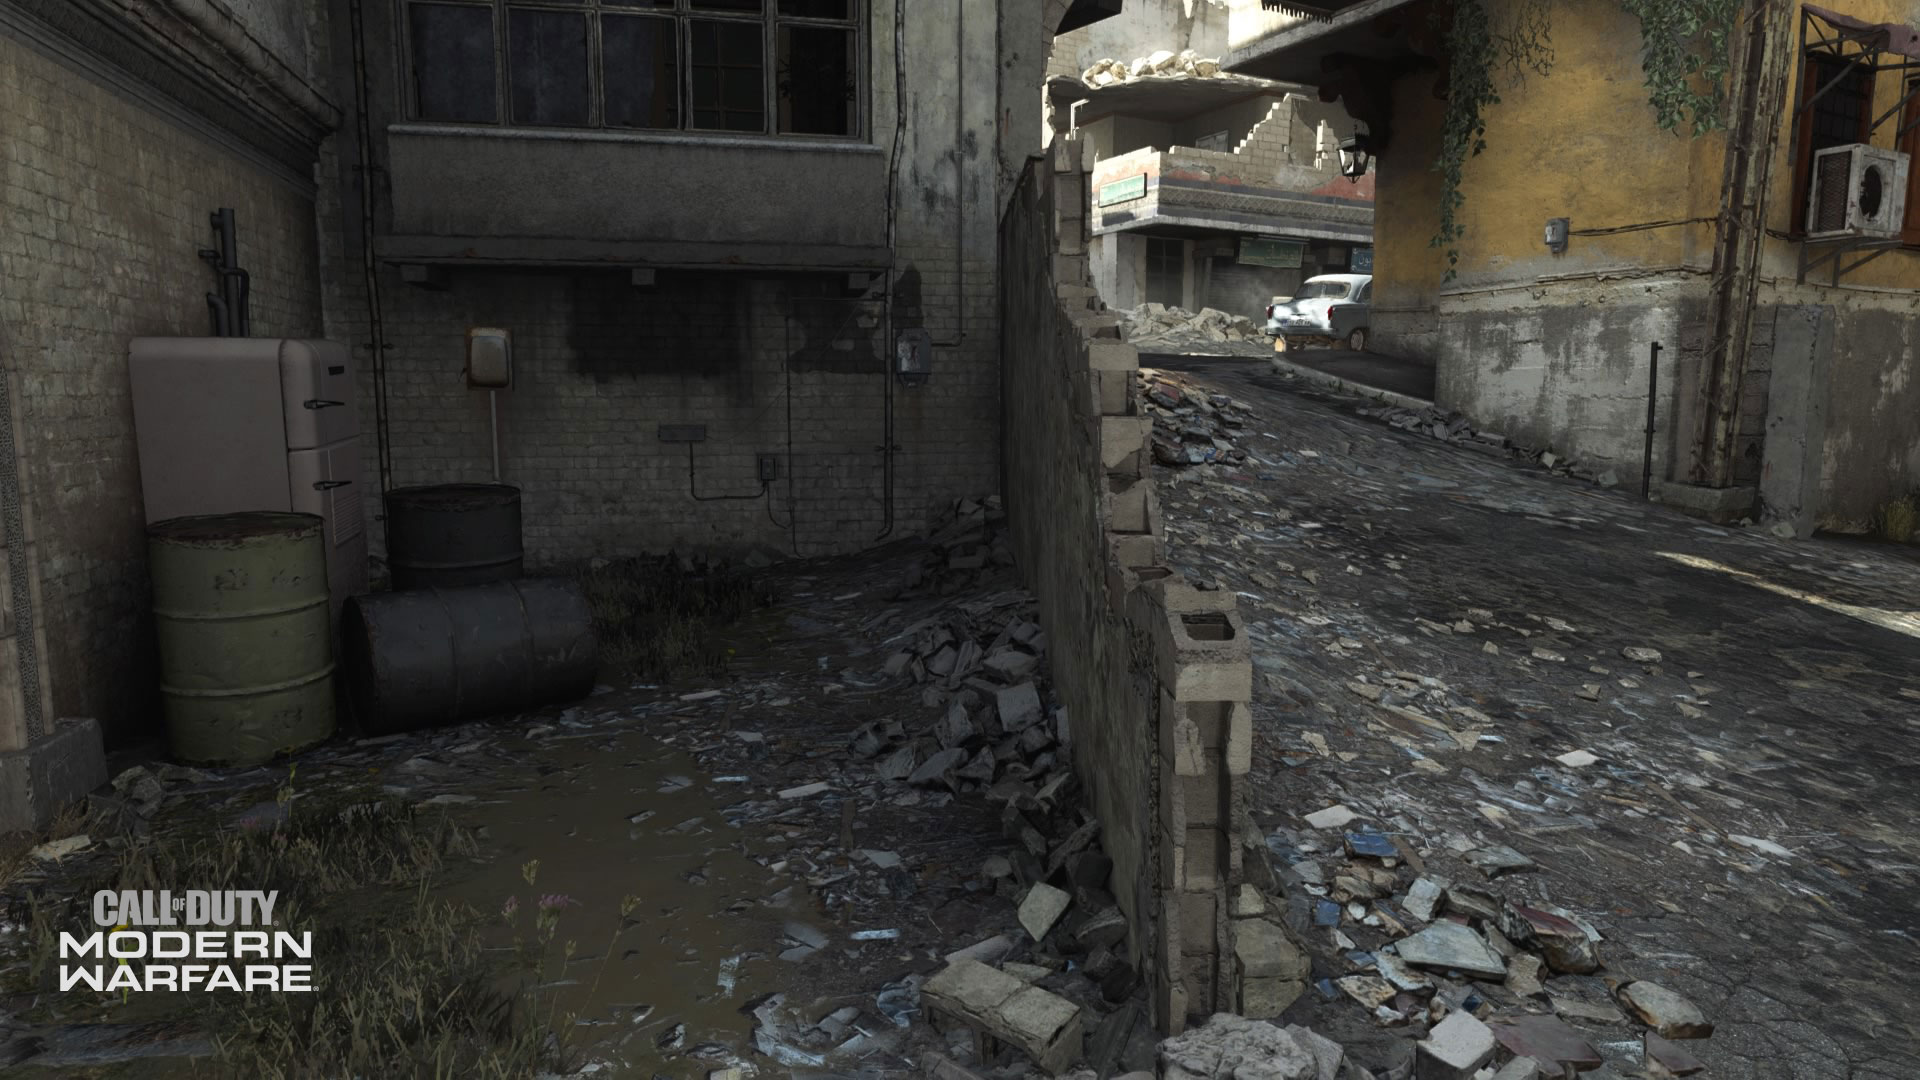
14. Broken Wall
Part dead-end, part thruway to the Passage and Overlook areas, the Broken Wall is where an Operator could counter-snipe players who have taken up residency in the Restaurant.
Using the fridges and barrels for cover, you could aim directly up and past the chain link fence surrounding the Restaurant roof to knock out any persistent enemy snipers.
The broken wall also serves as an opportunity for some advanced equipment use. Throwing a bit of C4 or a grenade over the wall could surprise someone on the other side, which could also be the key to taking down anyone who dwells deep within the dead-end.
15. Passage
The Passage was nothing more than a small alley separating the Garage from the Pharmacy and Broken Wall in previous Crash iterations. However, in the Modern Warfareversion, the Passage has a new courtyard area that opens it up to plenty of potential strategies.
One of which is to mantle atop the units pushed up against the wall and look out over to the Crash site. This mountable perch also allows you to see players coming up and over the Restaurant’s dumpster, or to bounce a grenade into the Pharmacy.
Grenades can also be banked off the backboard of the basketball hoop and over the wall to hit those who have yet to discover this new area.
16. Overlook
The main street on Crash’s southeast section are where Allegiance members will have a head start on locking down, as they will spawn mere steps away from this bustling area.
From the street, a sniper could aim towards the Alley or down to the Crash site and potentially pick off enemies below. Alternatively, the Overlook may be a place where you can counter-snipe sharpshooters who have taken over the Restaurant’s roof.
Technically, part of this area is the Electronics store’s second floor, which acts as an additional overwatch point. This higher ground can give an alternative angle at your enemies, although it may leave you more exposed as it lacks a ceiling and walls.
In Domination, the A flag sits right in the middle of the Overlook’s street. Those Coalition members daring enough to steal this flag from Allegiance forces may want to use the Garage or other buildings around here for cover, or to sweep out potential defenders.
No matter what side you’re on, be prepared for Killstreak barrages here if they are not towards the Crash site.
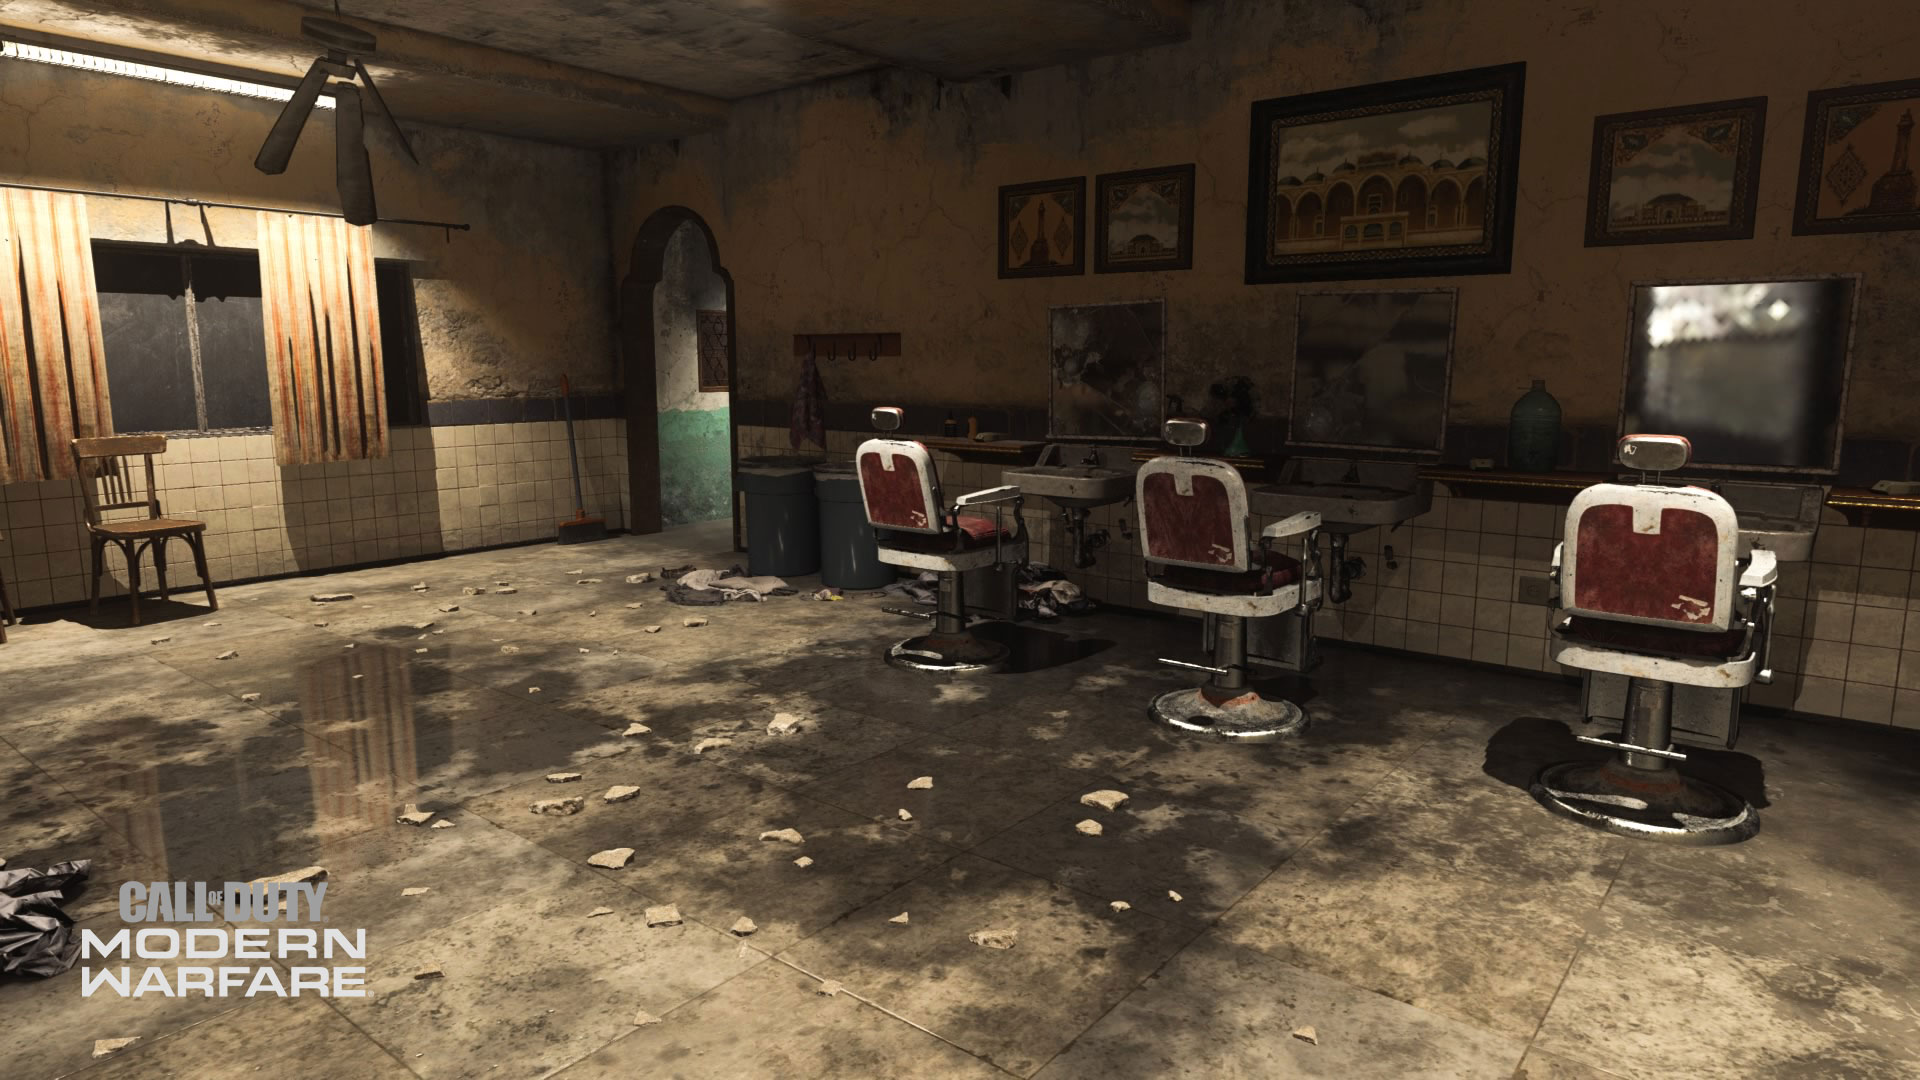
17. Barbershop
A humble barbershop is the final stop before the beginning of the long Alley.
Within this building, you may have a close shave against an enemy player. CQB loadouts could cut down hostile forces easier than long-range weapons, given the tight confines of this space.
Outside of the main building, the alleyway between here and the Electronics shop complex has a ladder where an Operator can climb up to the second floor Overlook point. If this is your path towards taking out snipers up here, you might want to pull out a pistol on this ladder and take a stealthier approach.
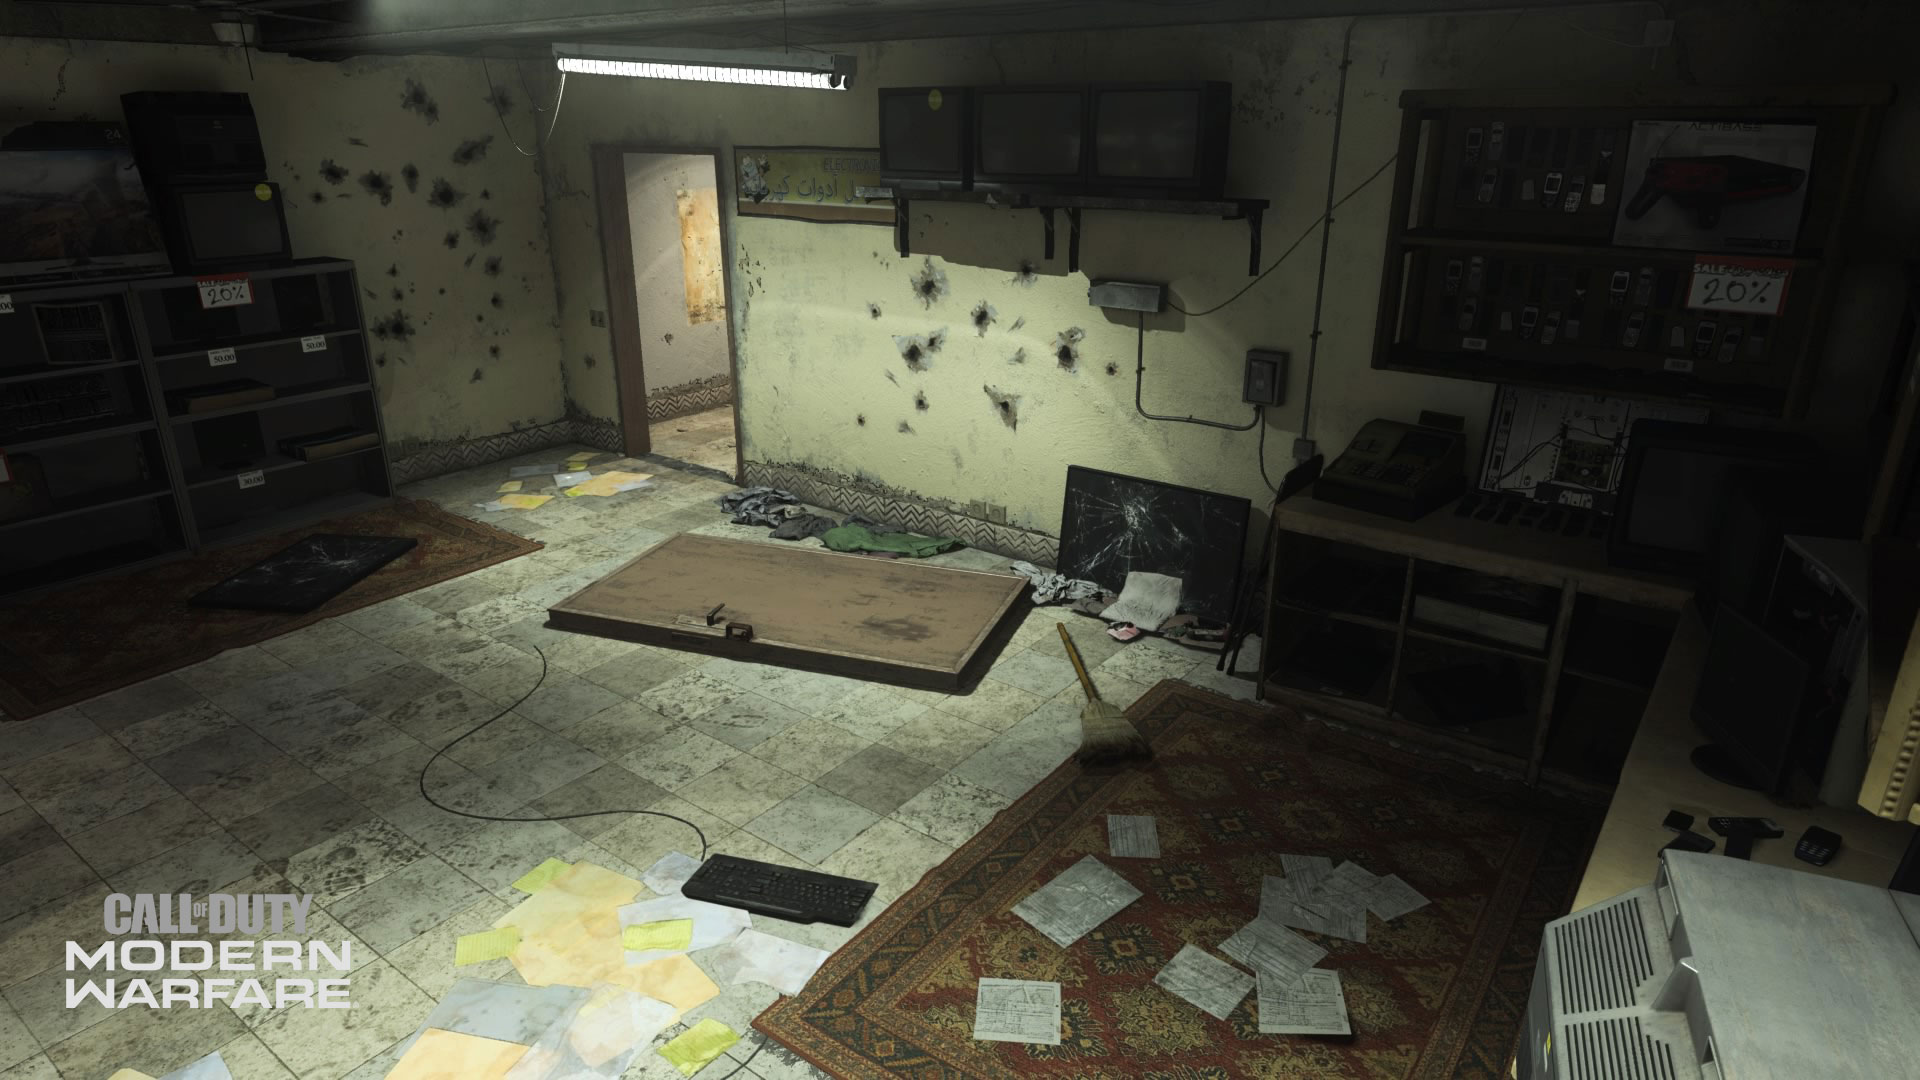
18. Electronics
Technically, this store and the Garage across the street were the final locations before the map’s western border. However, Allegiance members will spawn in the street behind these two stores, allowing for a bit more wiggle room for getting out of that initial drop point.
Given its position on the map, the Electronics store may not see too much action as a game progresses. However, if you come to Crash for an objective game mode such as Cyber Attack, Headquarters, or Hardpoint, then this may become a hot spot.
Needless to say, you might find the occasional close-quarters skirmish here, so it’s always wise to be on guard when travelling around here.
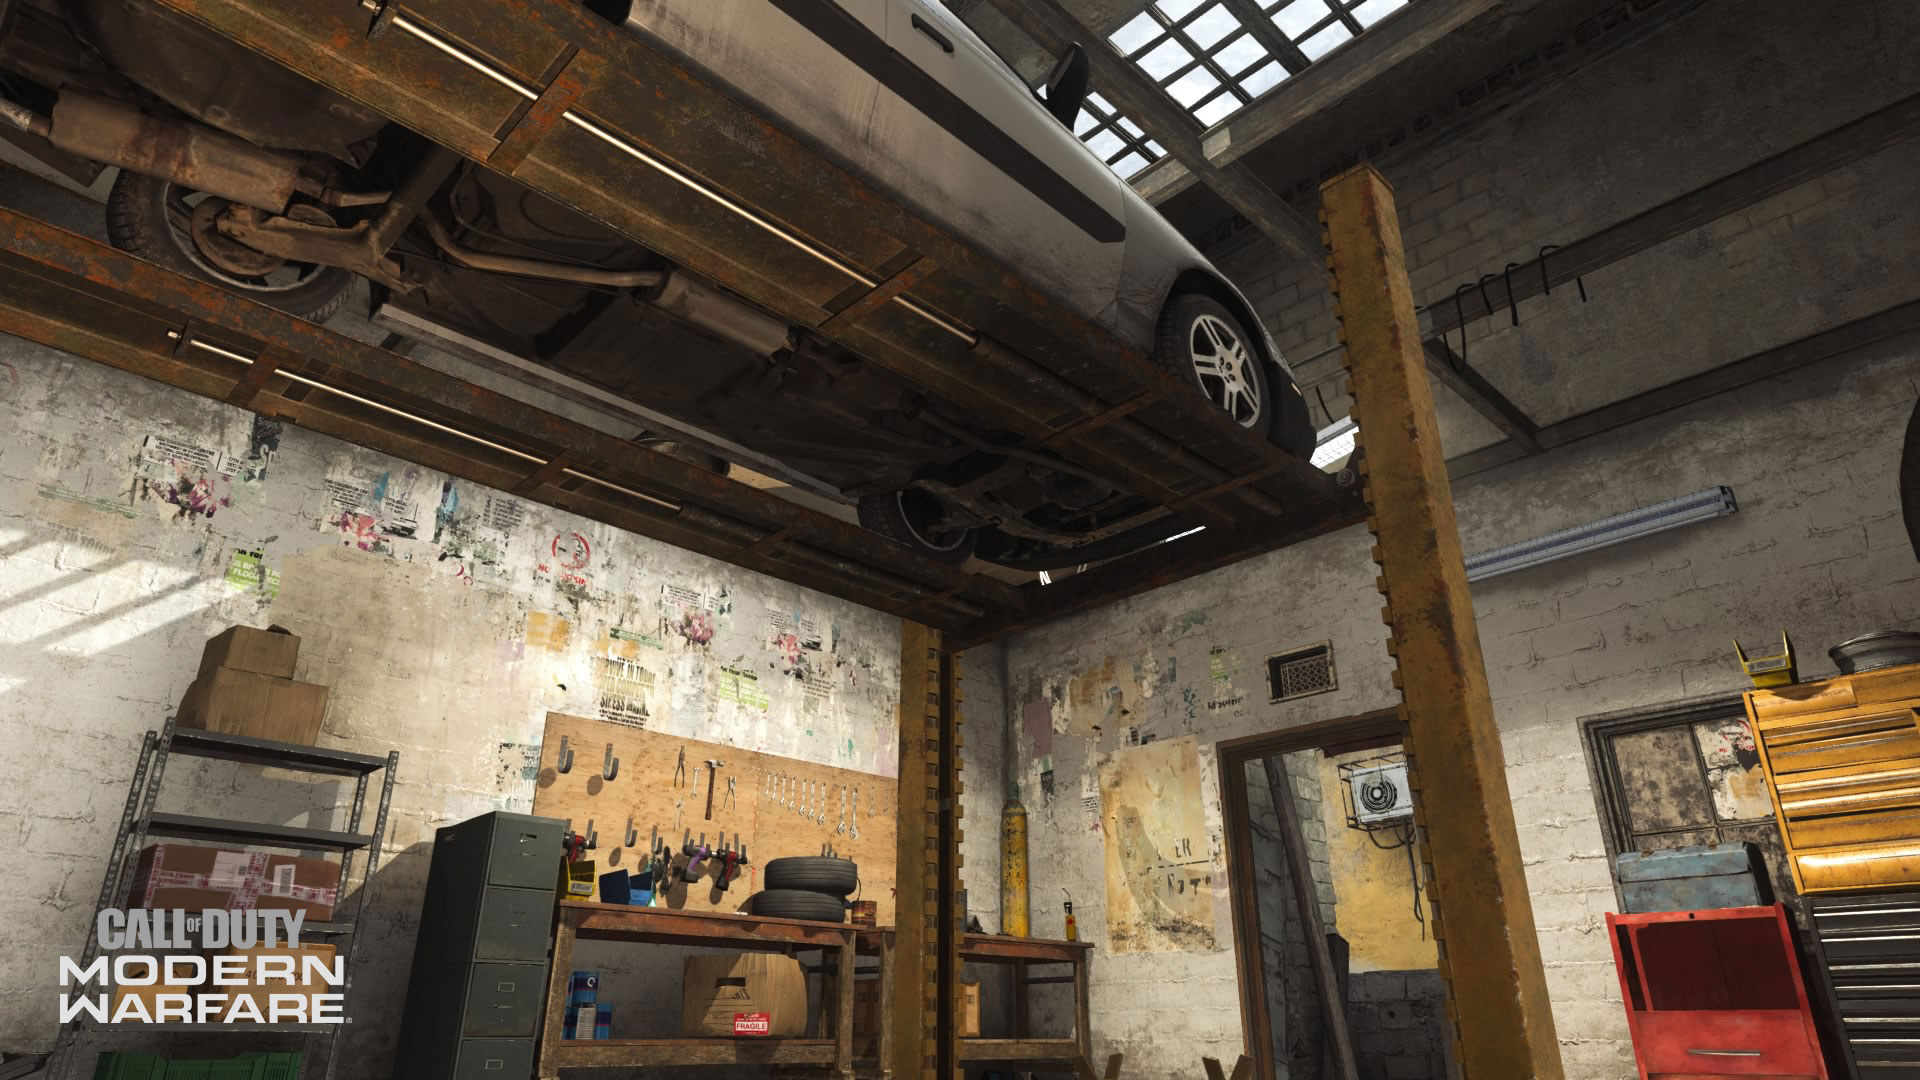
19. Garage
The other half of the Allegiance’s spawn area is a small repair shop where a car is jacked up on a lift. Unfortunately for its owner, that oil change will have to wait until after the deadly weapons are recovered.
Much like the Electronics store, this area may not see too much action given its place on Crash outside of Hardpoint and Headquarters game modes. Within those objective games, or occasionally in other game modes, you may have to fight in close-range engagements around here, using whatever you can for cover in this tight space.
However, the Garage is usually where you may take an alternative path to and from the Passage area, as there is a backdoor right in front of its staircase.
General Tips
· A Legendary Map with New Tricks. Veterans of the franchise will feel right at home on Crash, and most of the tried and true strategies from the past decade may work for you again here. Newer Operators who find themselves on this map may want to learn the ins and outs of all the new areas, as they may offer additional ways to counter those hardened Call of Dutyplayers.
· Reach for the Sky.Given the various multi-story buildings around the map, verticality can play a role on any game within Crash. Be cautious of staying out in the open for too long and watch out for sharpshooters on the various roofs.
· Turn Crash into a Crater. Despite all the buildings around the map, many of them are partially broken or have enough of an open concept for aerial Killstreaks to sneak in. Don’t be afraid to use those Killstreaks to wipe out those on or inside buildings… And when in doubt, dropping a Killstreak on the Crash site is rarely a bad idea.
· When in Doubt, Stay on the Ground Floor.Aerial Killstreaks can still be avoided around the map, but you have to be aware of your surroundings. When an enemy Killstreak is airborne, you may have a better chance at survival by hiding in stairwells away from windows and doors. Or, if you have Cold Blooded equipped and want to tackle a helicopter head-on, try using a launcher in either spawn area or within the Hill area.
· Be Patient in Objective Game Modes. Whether its figuring out how to rotate with objectives or outsmart a veteran in any objective game mode, the best piece of advice we have for all game mode types on Crash is to be patient and learn from your mistakes. This especially goes for newer players: dropping in against those who grew up with this map may seem scary, but Crash is still a fun experience that has stood the test of time. Learn from your elders, study the flow of objective games, and, above all else, have fun.
We’ll see you online. Stay frosty.
For more information and the latest intel on Call of Duty®: Modern Warfare®, check out: www.callofduty.com, www.youtube.com/callofdutyand follow @InfinityWard and @CallofDuty on Twitter and Instagram and Facebook.
For more information on Activision games, follow @Activision on Twitter,Facebook, and Instagram.