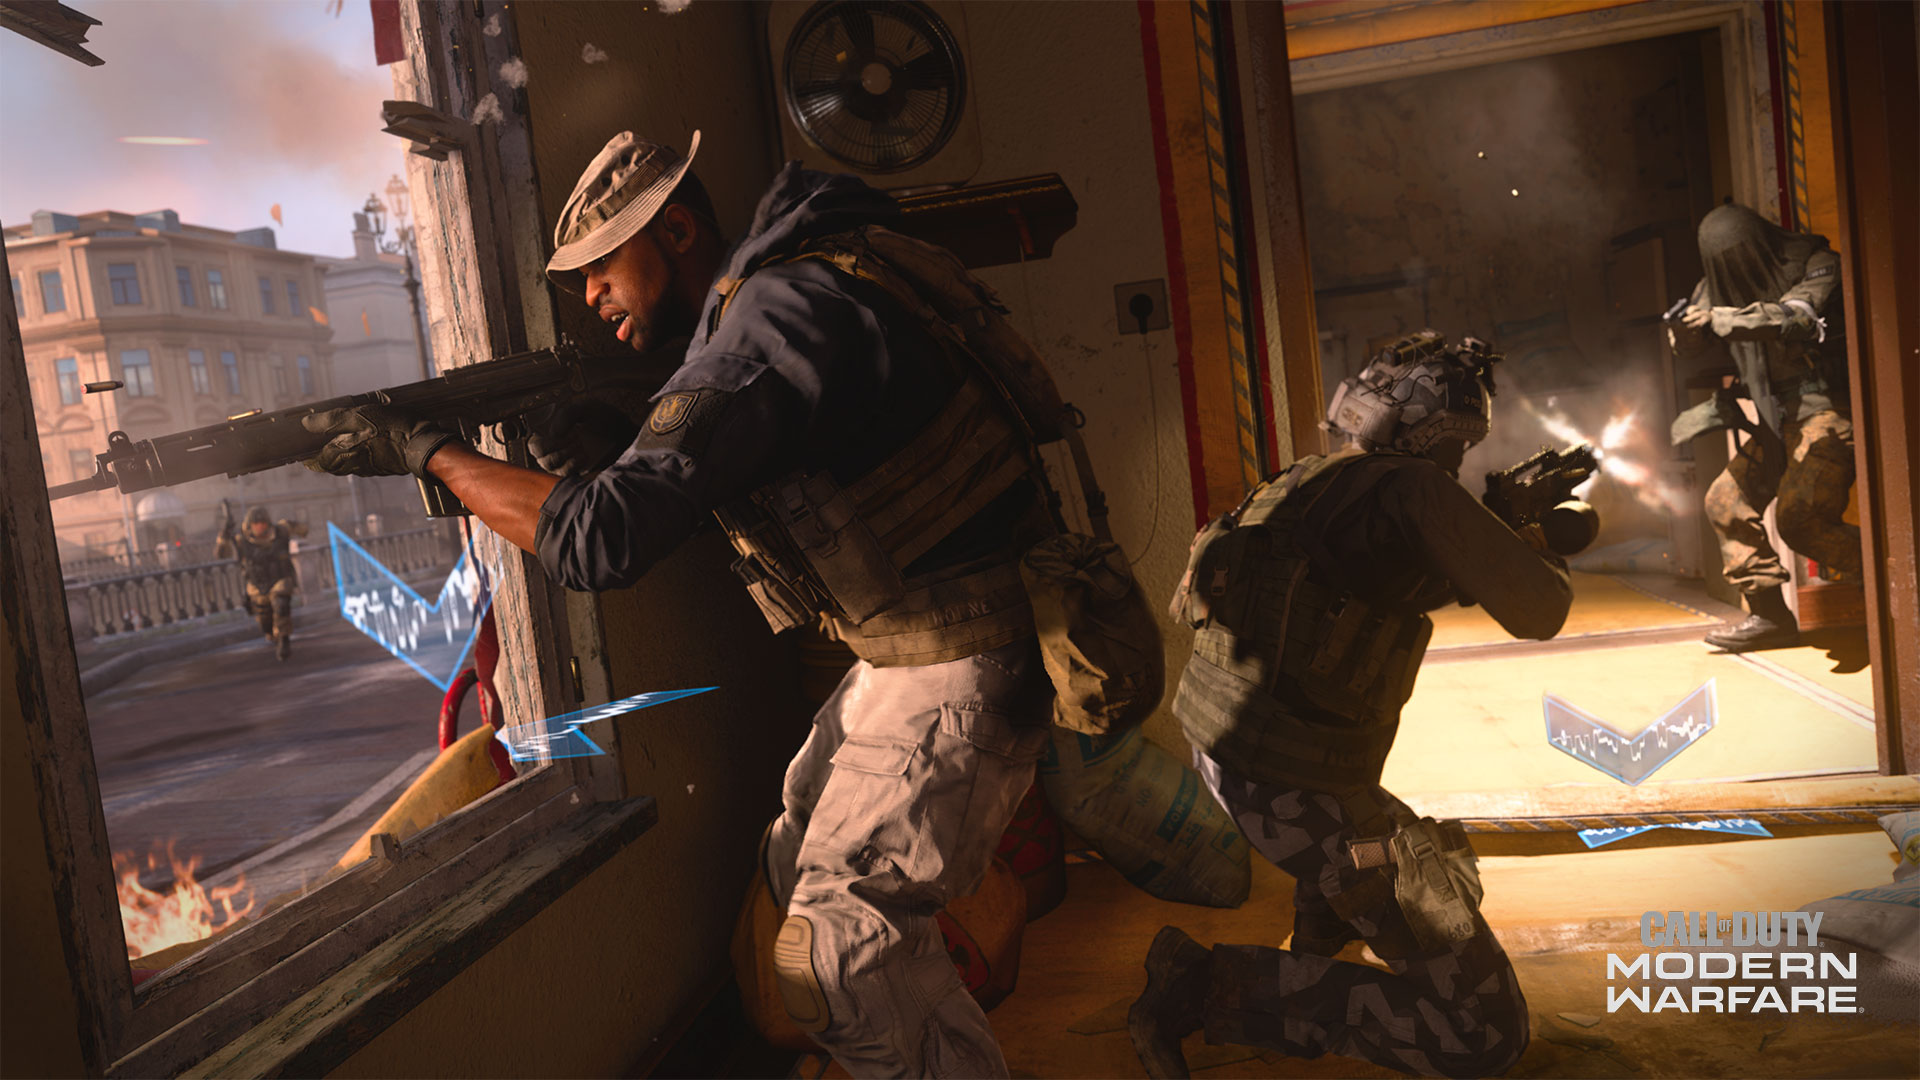
Get your hazmat suit. Toxic dangers lurk at every angle of this evacuated Kastovian metropolis.
Modern Warfare® Tactical Map Intel: St. Petrograd
Get your hazmat suit. Toxic dangers lurk at every angle of this evacuated Kastovian metropolis.
January 16, 2020
by Elle O'Brien
Operation: St. Petrograd
Day 2: 19:12:25
Prepare to explore the large-scale St. Petrograd map, site of many Call of Duty®: Modern Warfare® Multiplayer battles.
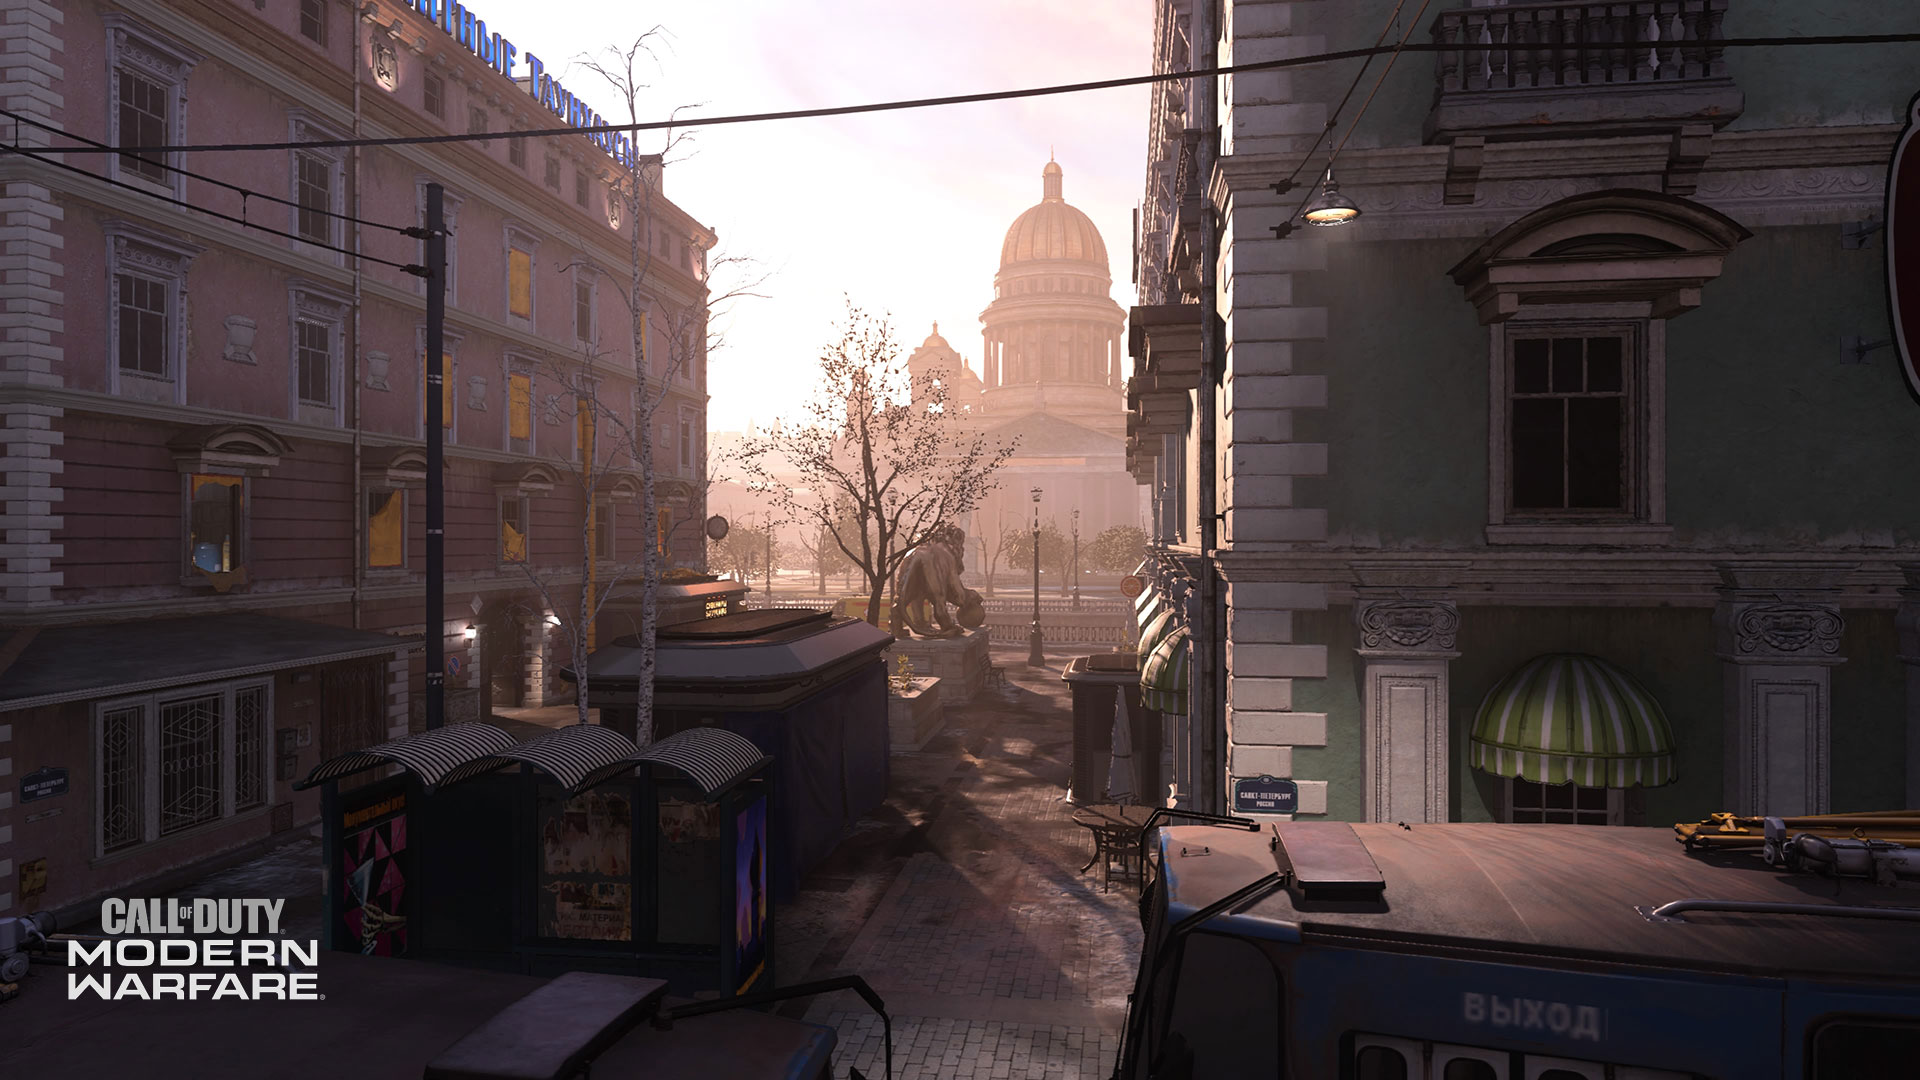
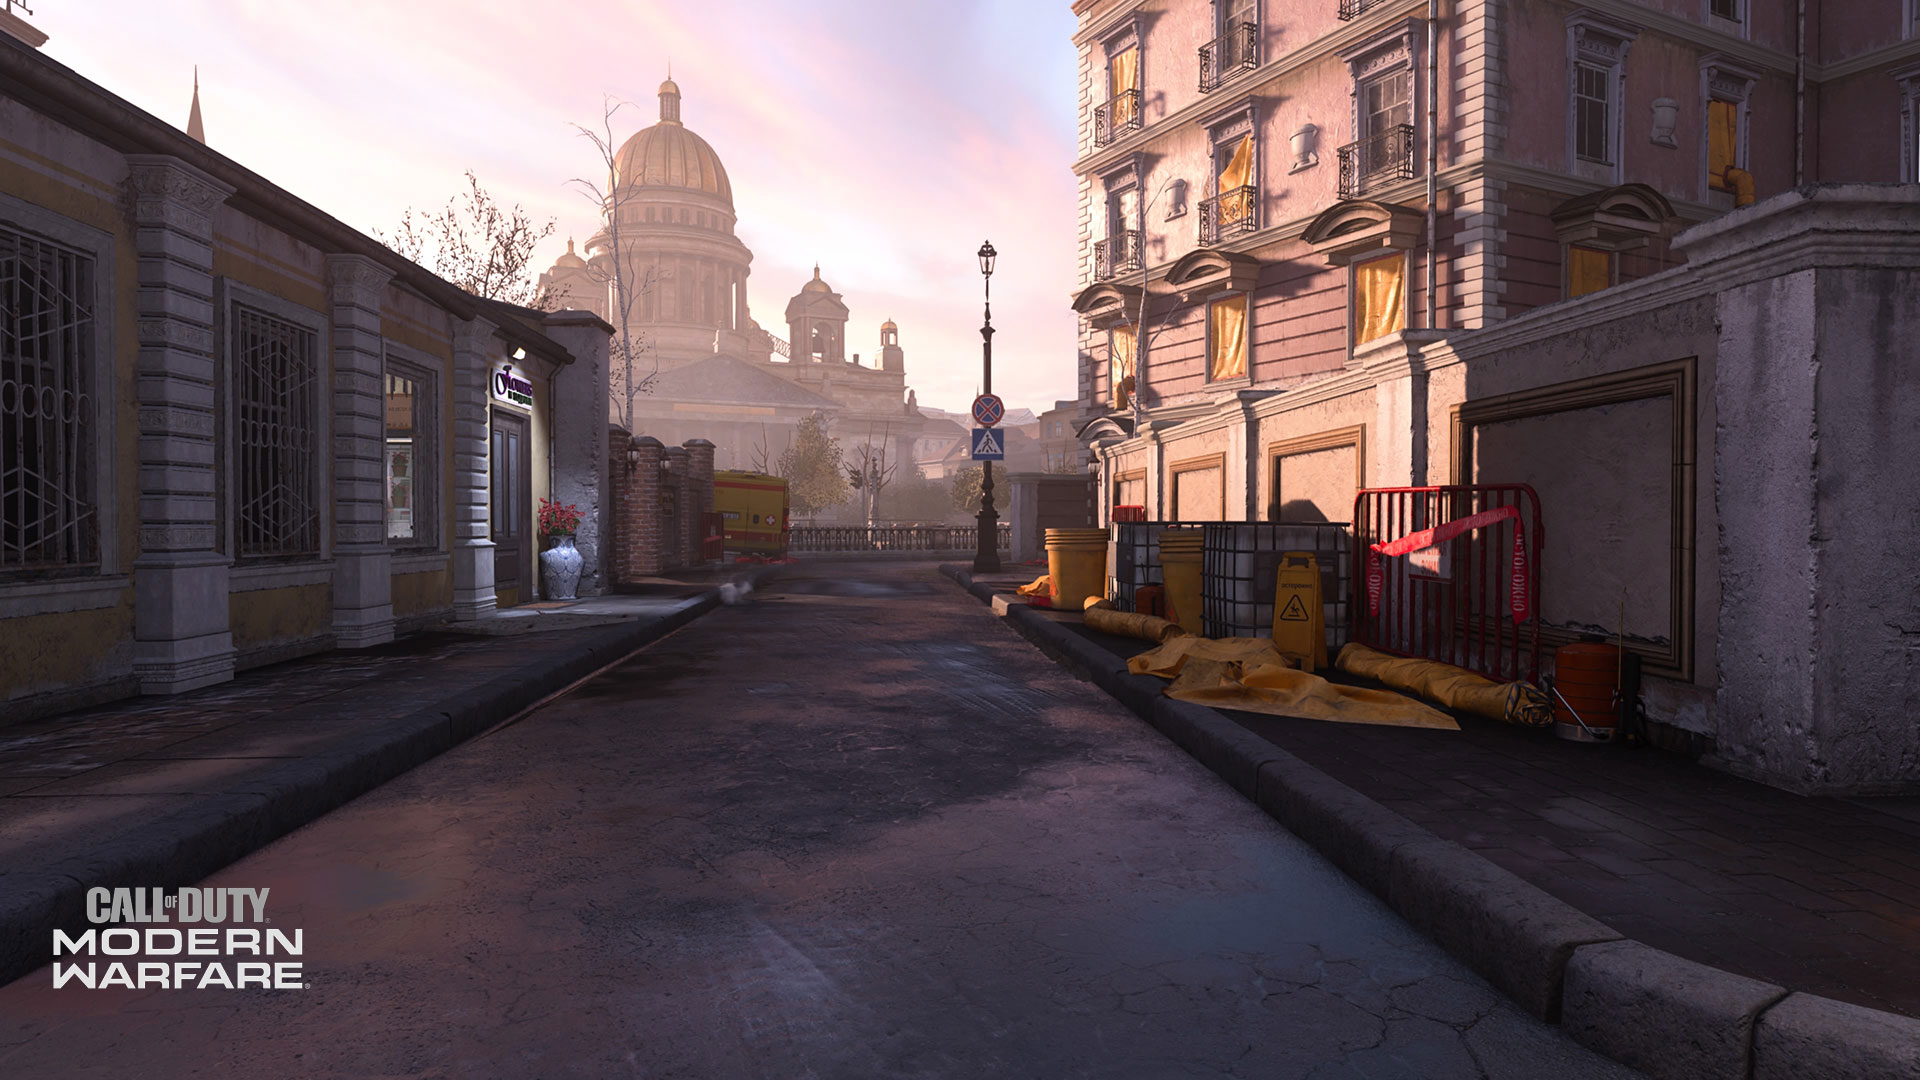
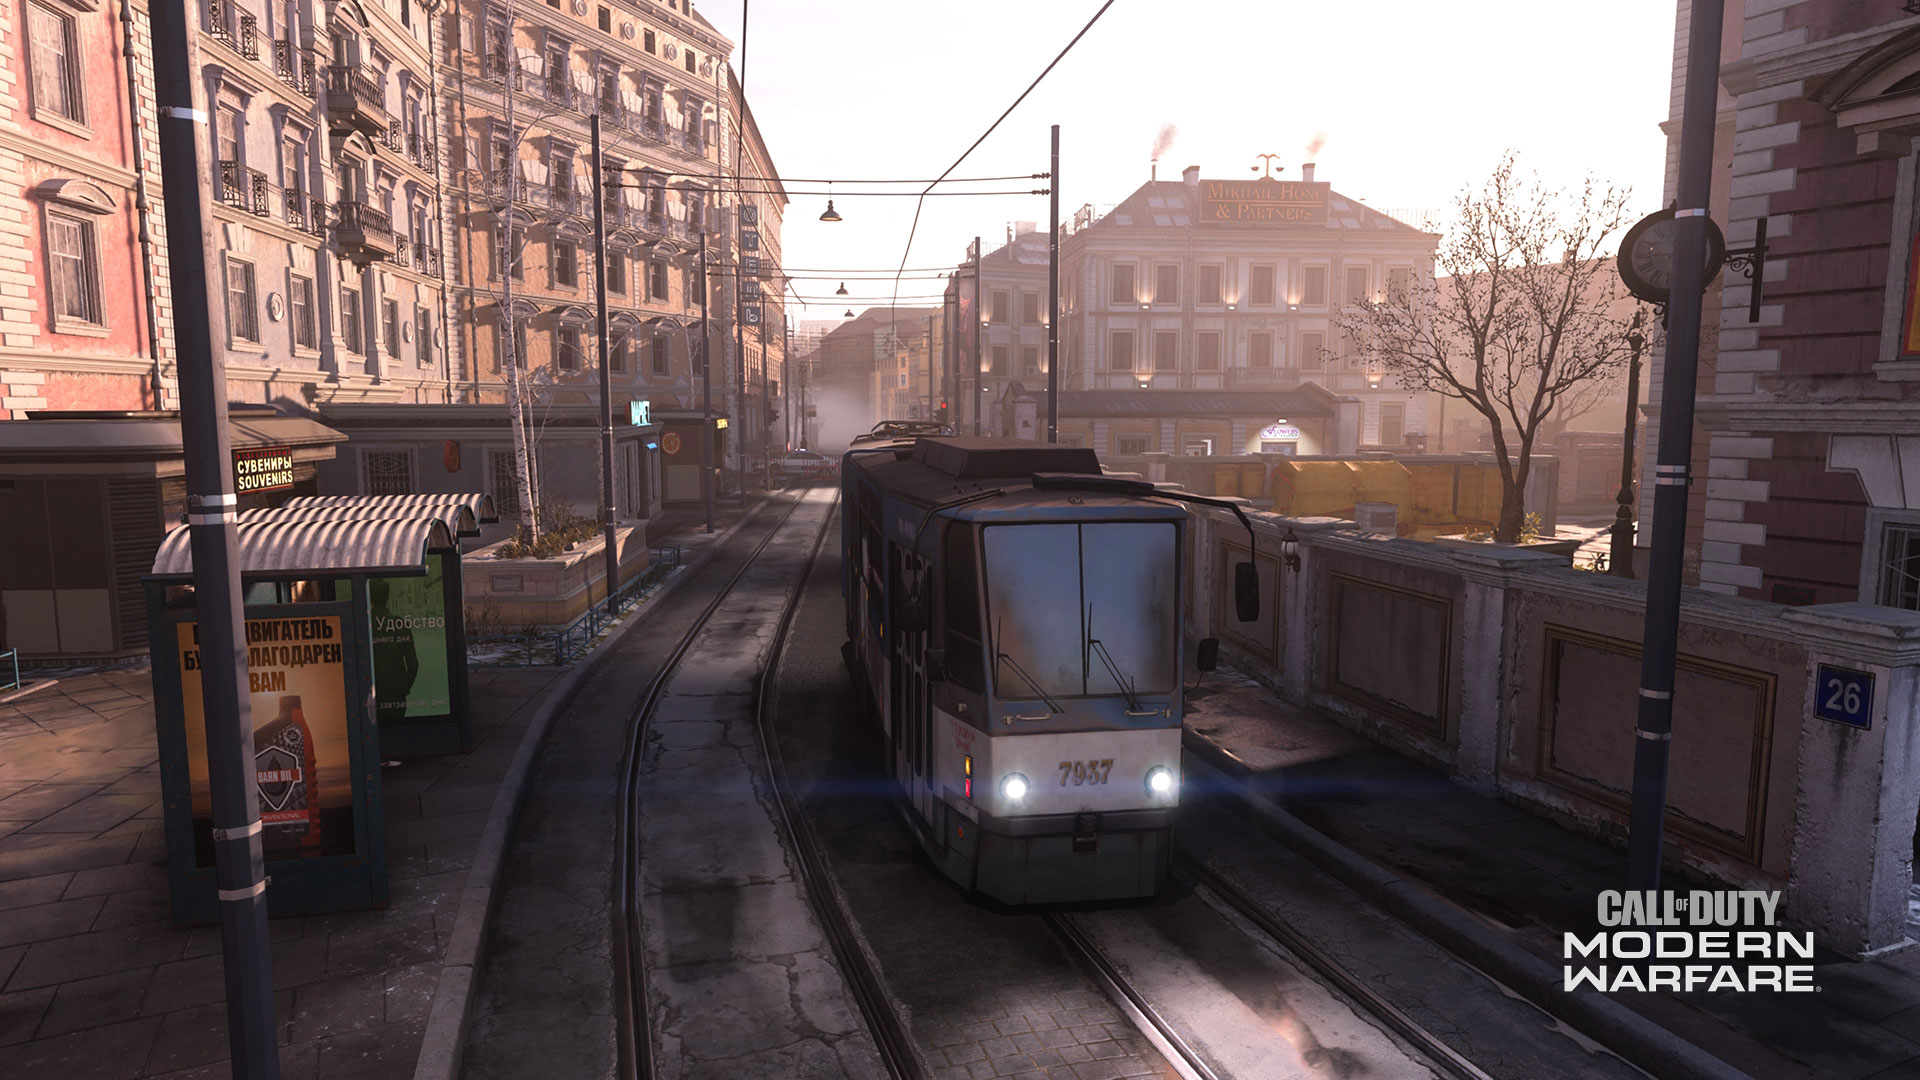
In the Kastovian city, everything is left behind. Apartments go empty, trains and first responder vehicles litter the streets, and shattered glass fills the canal.
All is quiet – except for the sounds of one raucous, all-out, wide-scale fight.
Get to know each zone of this sprawling waterside map, and you’ll soon be fit to handle any encounter in St. Petrograd.
About the Map
With 22 unique map zones to explore, St. Petrograd is a wide and complex combat arena. Situated on an east-to-west axis, the city boasts two main flank routes that run the length of the map: Canal Street at the north, and the Tracks at the south.
In between these routes, this once-bustling city offers a huge variety of playspaces to discover. Wind through maze-like apartments, infiltrate evacuated businesses, and gain vertical advantages atop roofs and trains.
Map Zones Overview
Master your knowledge of each combat zone within St. Petrograd, including objective locations and spawn points.
When a teammate calls out, “Enemy at the Lion Statue!”, or “Enemy at the Bar Street!”, you’ll know exactly where to go.
A brief list of the map zones appears below. Keep reading to learn more about each individual location.
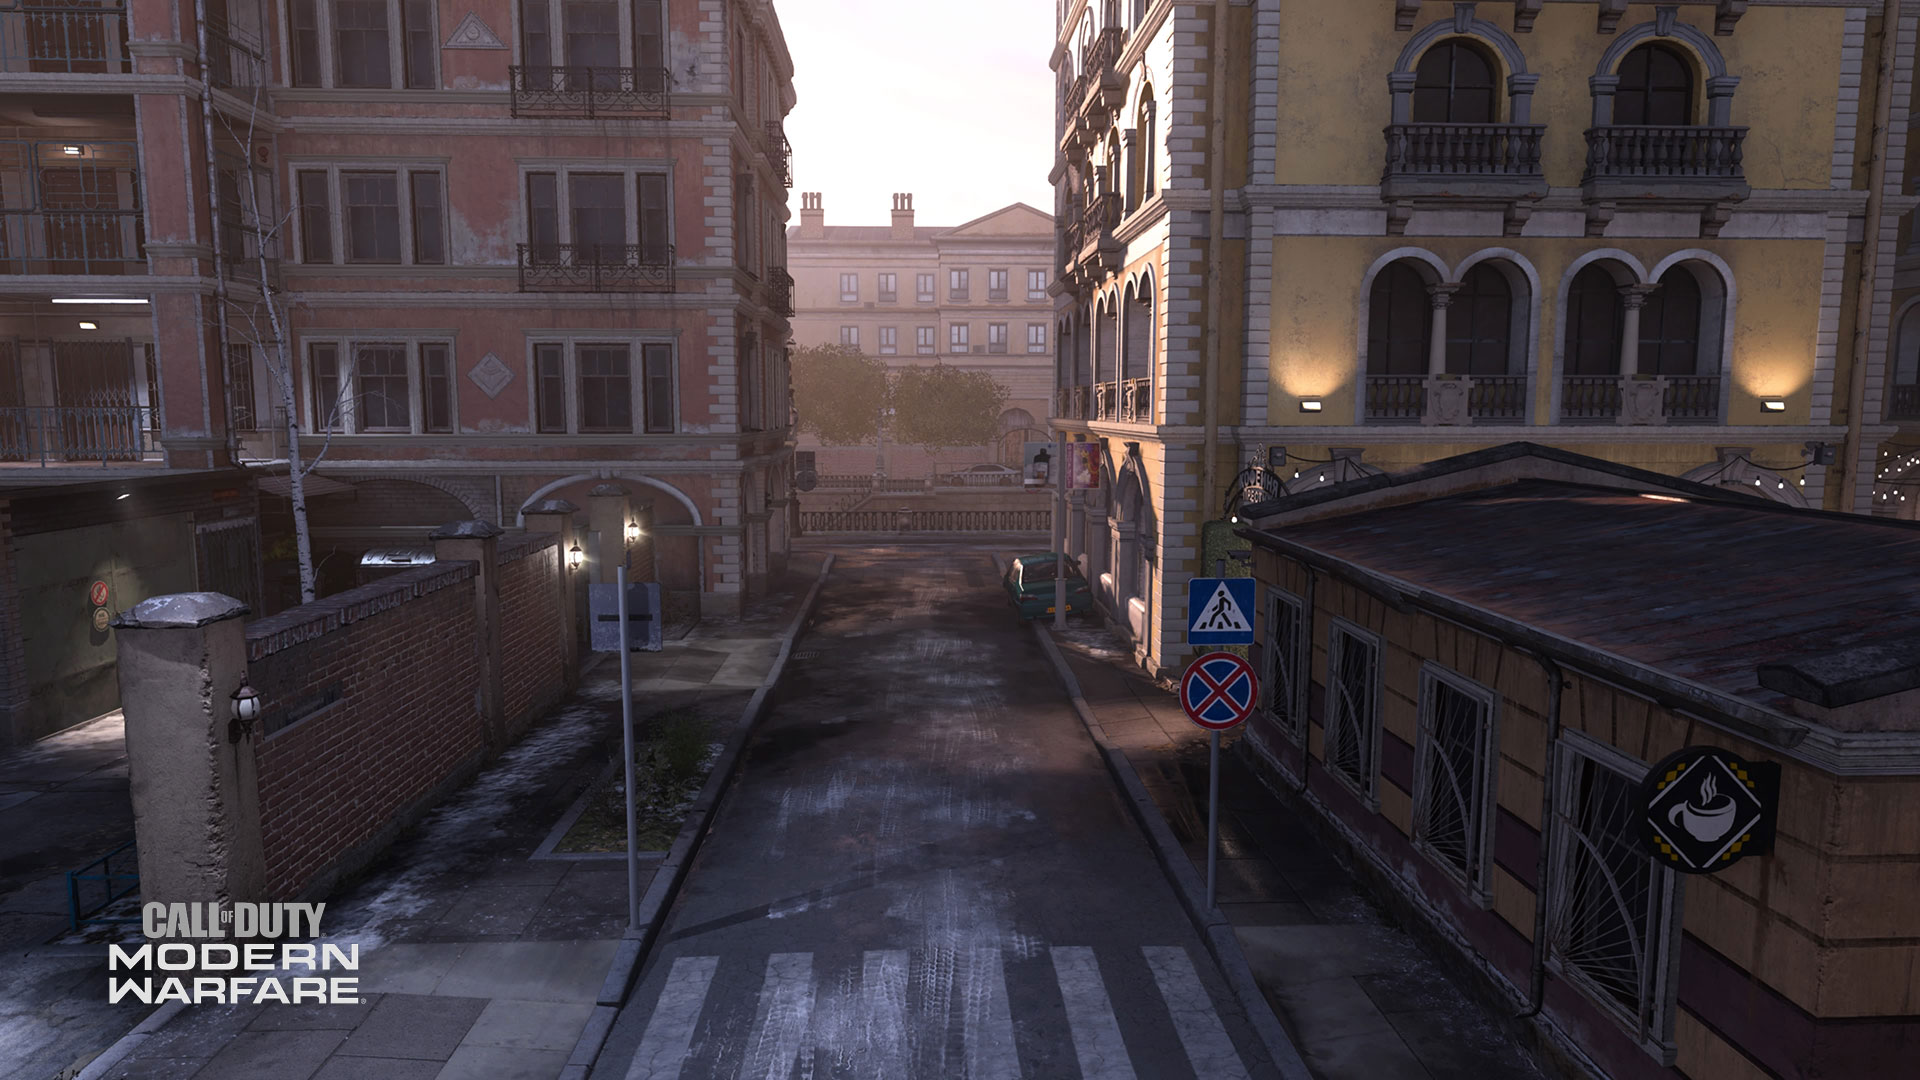
1. Tracks
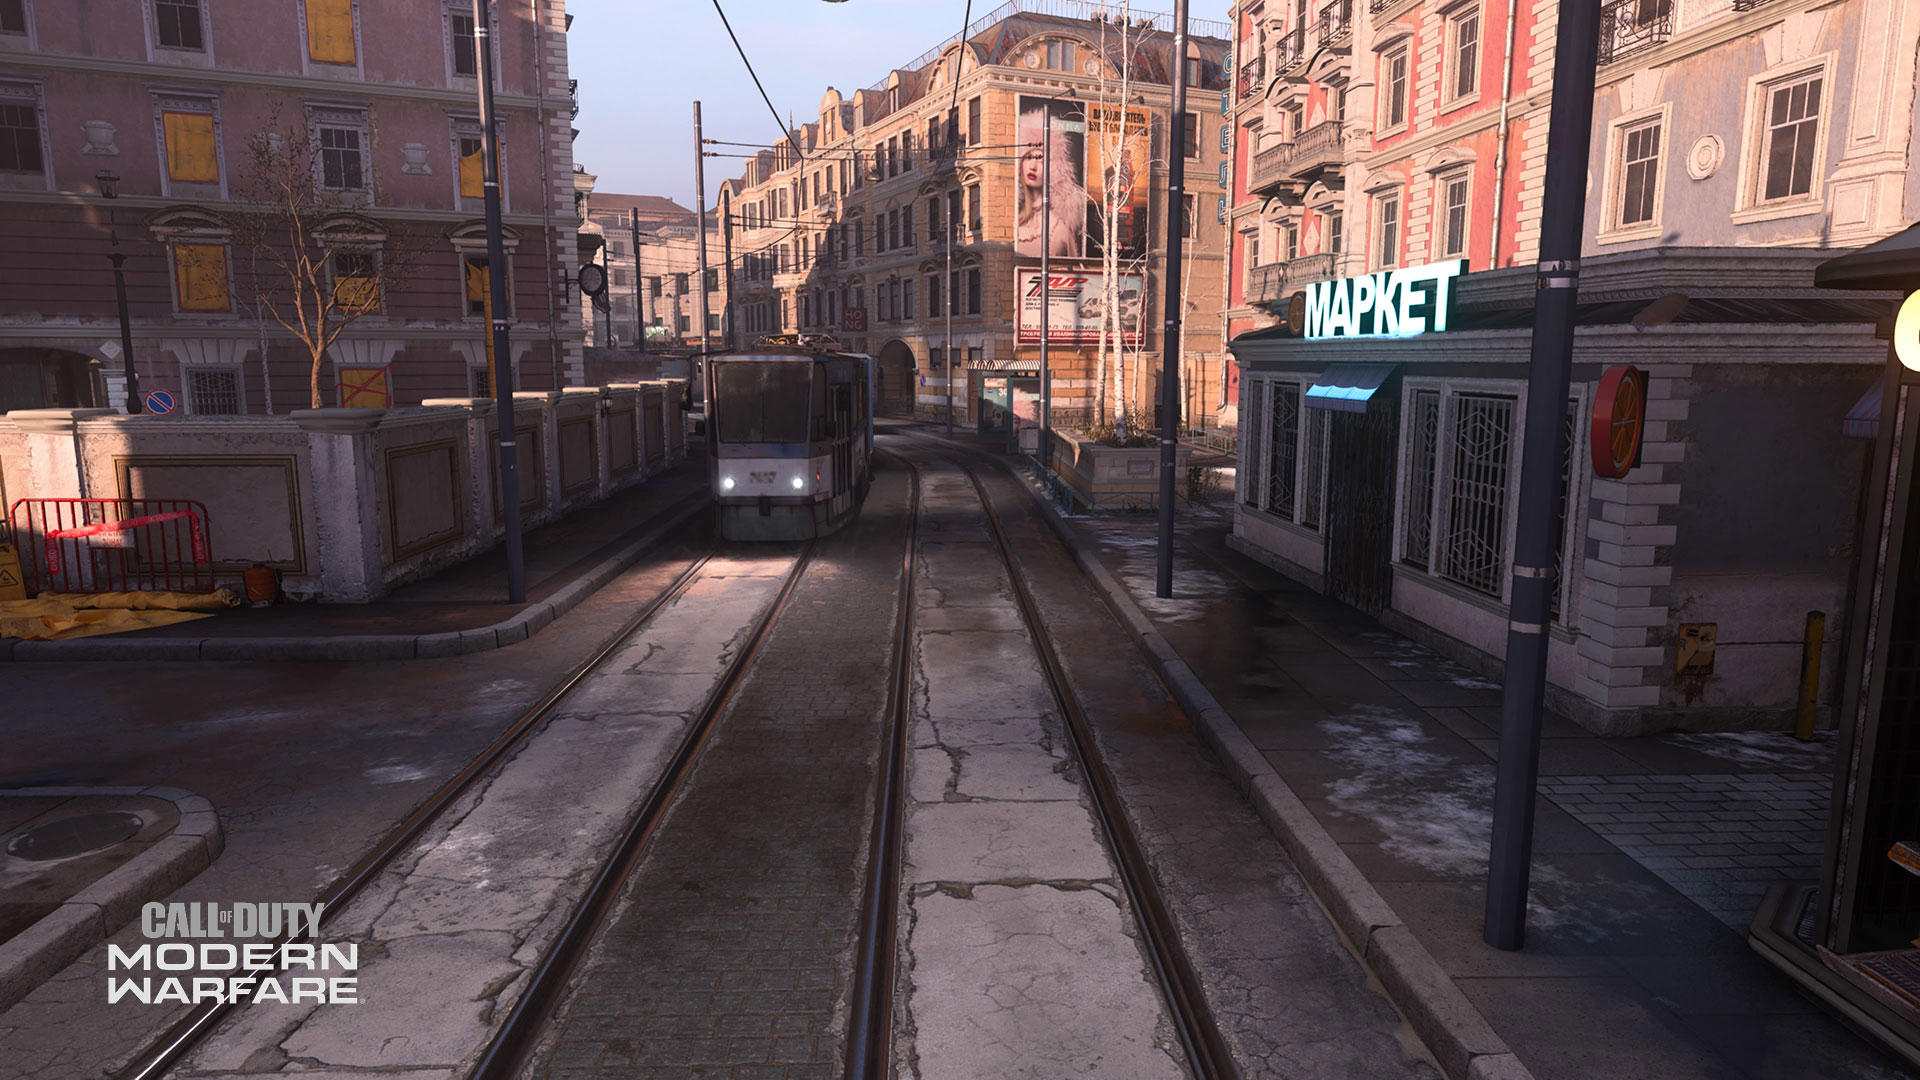
2. Street Market
3. Office
4. Flower Shop
5. Hazmat Street
6. Hazmat Building
7. Market
8. Lion Statue
9. Restaurant
10.Canal Street
11.Courtyard
12.Tram Station
13.Café Street
14.Café
15.Hotel Kitchen
16.Hotel
17.Back Alley
18.Bar
19.Pool Hall
20.Bar Street
21.Shipping Area
22.Apartments
Get a Thousand-Foot View
As your chopper drops you into the map, you’ll get a high-level glimpse of the city – but, only for a matter of seconds. Know what to expect by taking a closer look at the following set of maps and get oriented before infiltrating St. Petrograd.
St. Petrograd: Map Overview
St. Petrograd: Map Zones
St. Petrograd: Cyber Attack
St. Petrograd: Domination
St. Petrograd: Headquarters
St. Petrograd: Search and Destroy
St. Petrograd: Topography
Get Into Each Zone
1. Tracks – Allegiance and Coalition Spawn and Bomb location in Cyber Attack
In team-based modes, Allegiance and Coalition players spawn at either end of the Tracks, which stretch lengthwise along the map’s south side.
Coalition teammates spawn on the east Tracks, which are closest to point A in Domination and the first Hardpoint at the Shipping Area.
Allegiance teammates spawn on the west Tracks, which are closest to point C in Domination and offer access to a range of infil routes.
Directly next to Market, sits a possible bomb location in Cyber Attack. Consider using the Tracks as the quickest route to reach the bomb, although it may not be the safest. Scurry around the buses and scan the area for enemies to safely retrieve the bomb.
As St. Petrograd is set in Kastovia, this map guide is ordered by the routes that are immediately available to Allegiance fighters. So, starting at the East Tracks, Allegiance players will begin the match facing a row of stalled trains, with the Street Market to their left and an Office to their right.
Let’s get into it.
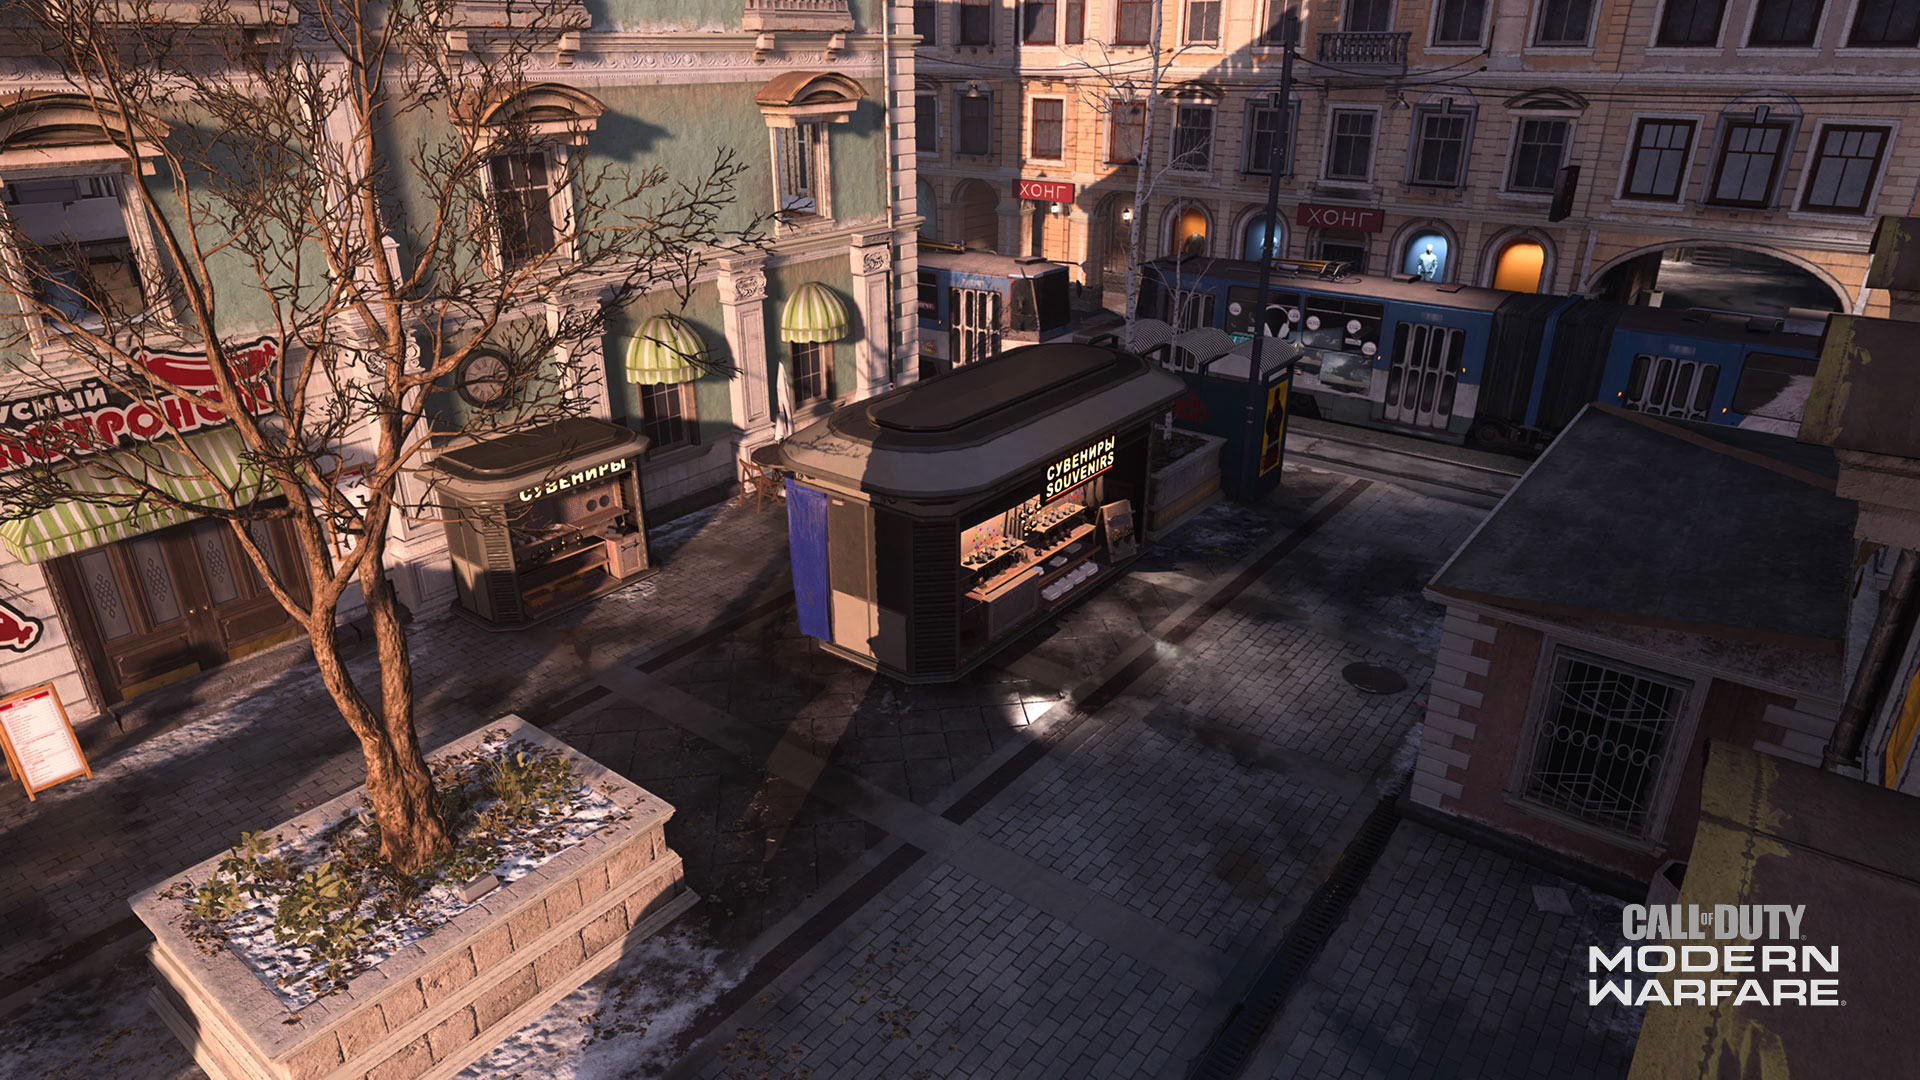
2. Street Market
Clothing kiosks, souvenir booths and a closed fruit market stand to the right of the nearest train stop, waiting for passengers who will never arrive.
This open-air zone provides plenty of space for face-to-face ground assaults. Put away your sniper for now: the curve of the train tracks significantly shorten your sightlines into the city center. Be vigilant as you make your way along the Tracks, and watch for enemies who have ducked out of sight to reload or call in an aerial Killstreak.
3. Office
Across the tracks from the Street Market, to the left of the Allegiance spawn, is the Office.
As the office building itself is closed, the Office is more of an open-air courtyard. Concealed by high walls, this desolate area doesn’t have much to offer besides skittering rats, cryptic graffiti and a lone park bench.
If you find yourself in the Office, remember to check your corners as you advance deeper into the map. The high walls hide your movements, but also keep you from identifying others’. Proceed with caution.
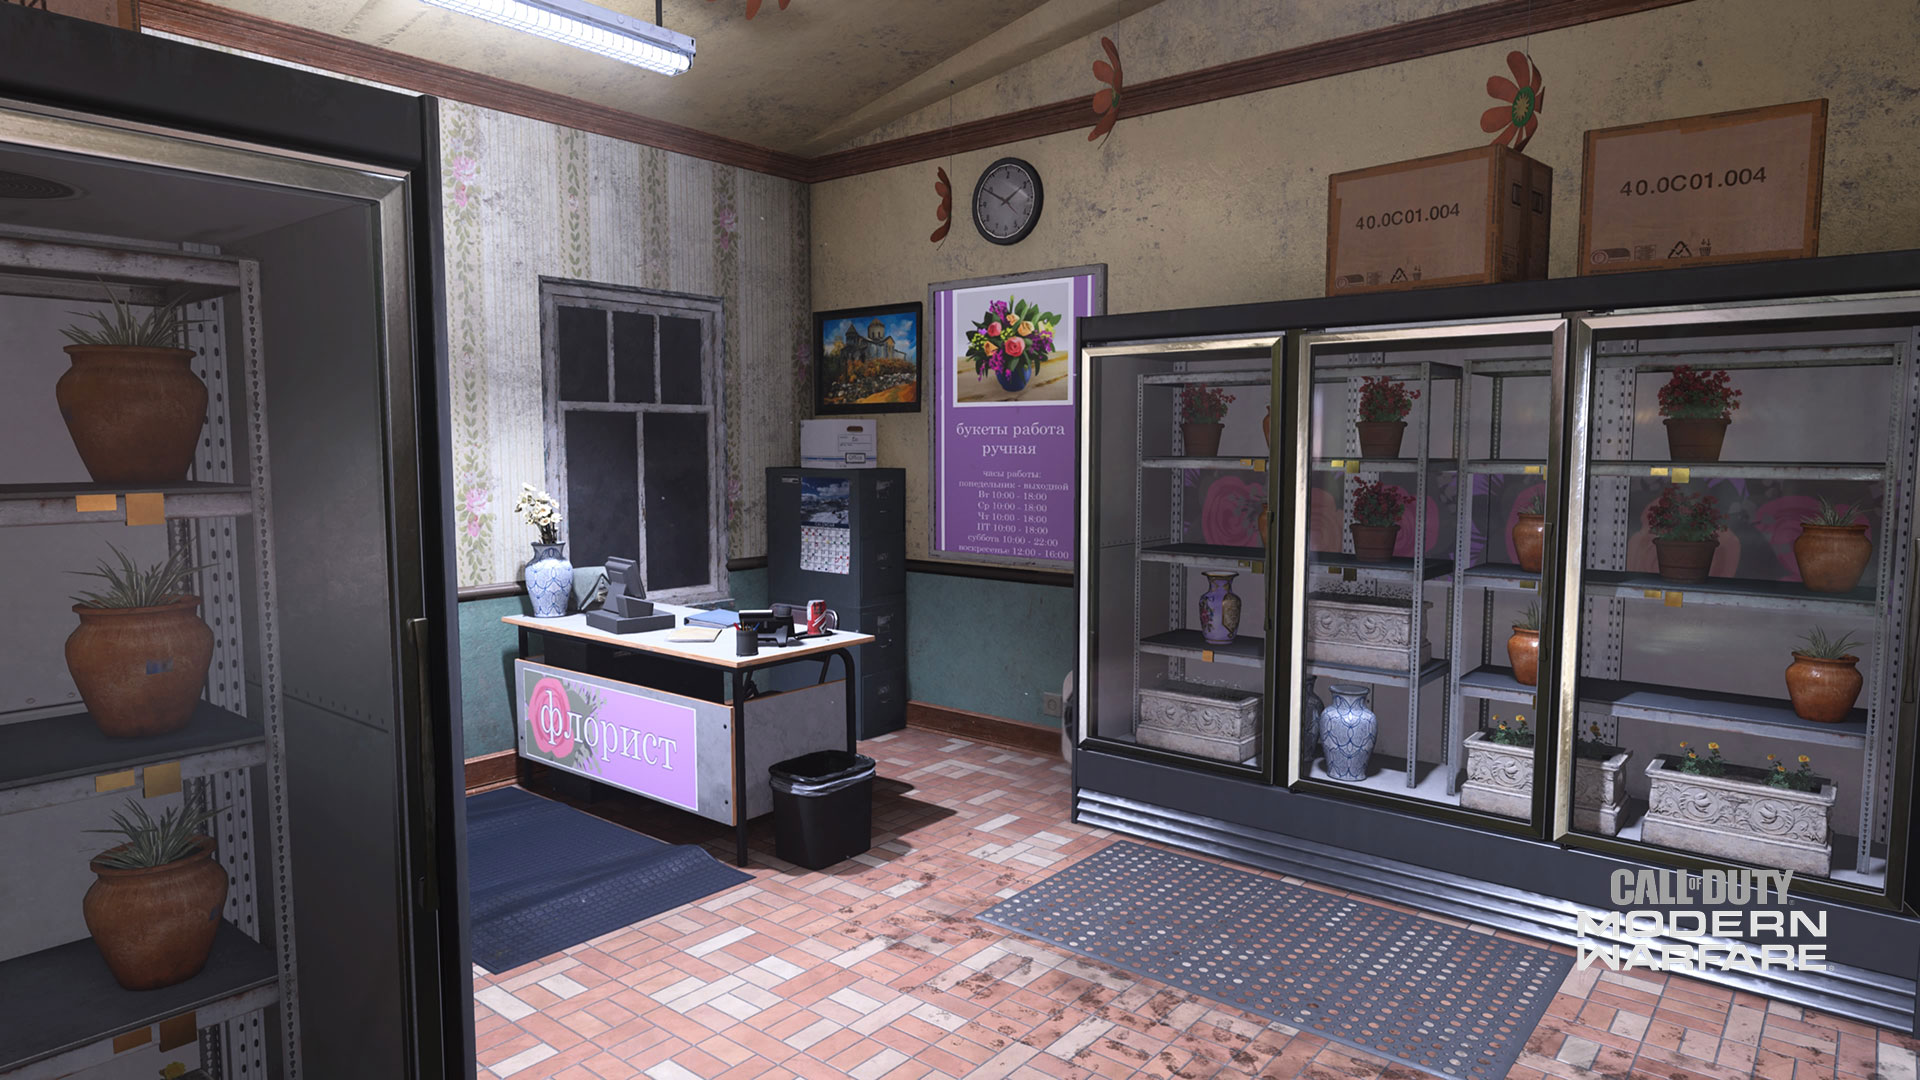
4. Flower Shop
A remnant of happier days, the Flower Shop, directly in front of Office, provides floral arrangements for all occasions: weddings, anniversaries, and funerals (mainly funerals).
Prepared flower orders are stored in several refrigerated cases, but that doesn’t stop the flies from gathering in this cramped space.
Need some target practice, or want to get out some aggression? Train your eye on the shelf of empty vases and fire away.
This zone provides a glimpse of Hazmat Street and the back door of Hazmat Building, which is one of the hills in Hardpoint.
5. Hazmat Street
One of four horizontal streets that score the map from north to south, the Hazmat Street grants access to the northside Canal Street and southside Street Market. In Team Deathmatch or Free-for-All, this location offers many opportunities for your team to spread out and take charge.
Take the Canal Street to cover the length of St. Petrograd quickly. Or, use the Hazmat Street to plan a stealthy advance toward the Apartments and Shipping Area at the map’s south side.
You can also use the Hazmat Street to enter the Hazmat Building, using the backdoor or an open window. Follow the stairs to the second floor for an advantageous view of the Market.
Need to reach the Hazmat Building more quickly, such as when capturing the outdoor C flag in a game of Domination? Mantle atop the barrels of hazardous gas and hop the wall – you’ll be capping points (and enemies) in a matter of seconds.
6. Hazmat Building – C Flag in Domination, HQ and Hardpoint, Bomb Site in Search and Destroy, and Data Center in Cyber Attack
Ruined by hazardous materials, the Hazmat Building is a disgraced former living and workspace. Manage to reach the Hazmat Building’s upper floors, and you’ll find Al-Qatala plans left on a chalkboard, with a photo of The Wolf hung beside them.
The higher floors of this building offer access to two rooftops that overlook Market, with a clear view of the B Flag in Domination or the bomb site in Search and Destroy.
Playing Hardpoint or Cyber Attack? On the ground floor of the Hazmat Building, there’s a cramped and tiny room, accessible from three sides. Find the 3rdHardpoint rotation, or one of two data centers in Cyber Attack, right here.
It can be tough to defend this small space. Keep hostiles from breaching the interior with equipment by deploying a Trophy System Field Upgrade. Or, plant a Deployable Barrier at one of the entrances and work with your team to guard the other two.
And if things really go south, you can always duck into the bathroom to heal.
On the Hazmat Building’s exterior patio, you’ll find the C flag in Domination. The flag is partially concealed from all sides, but is easily reachable from multiple routes, including the hallway separating the Hazmat Building from Market.
7. Market – B Flag in Domination
Anything goes in the open Market, which is home to the B flag in Domination.
Just one horizontal lane that stretches the width of the map, Market is highly vulnerable to attacks: from the rooftops above, from the flank routes at either side, and from enemies lurking in the Hazmat Building hallway or behind the doors of the Restaurant.
Capturing the B flag? Don’t stare in one direction for too long. As you’re fairly visible to foes, you don’t want to miss an opportunity to stop an enemy’s approach. For added cover, dispatch a Smoke Grenade to keep your movements out of sight.
The Cyber Attack bomb location on Tracks is directly adjacent to Market. If you manage to capture the bomb, use the many routes leading out of Market to quickly make your way to the enemy’s data center – whether it’s at the Bar or in the Hazmat Building.
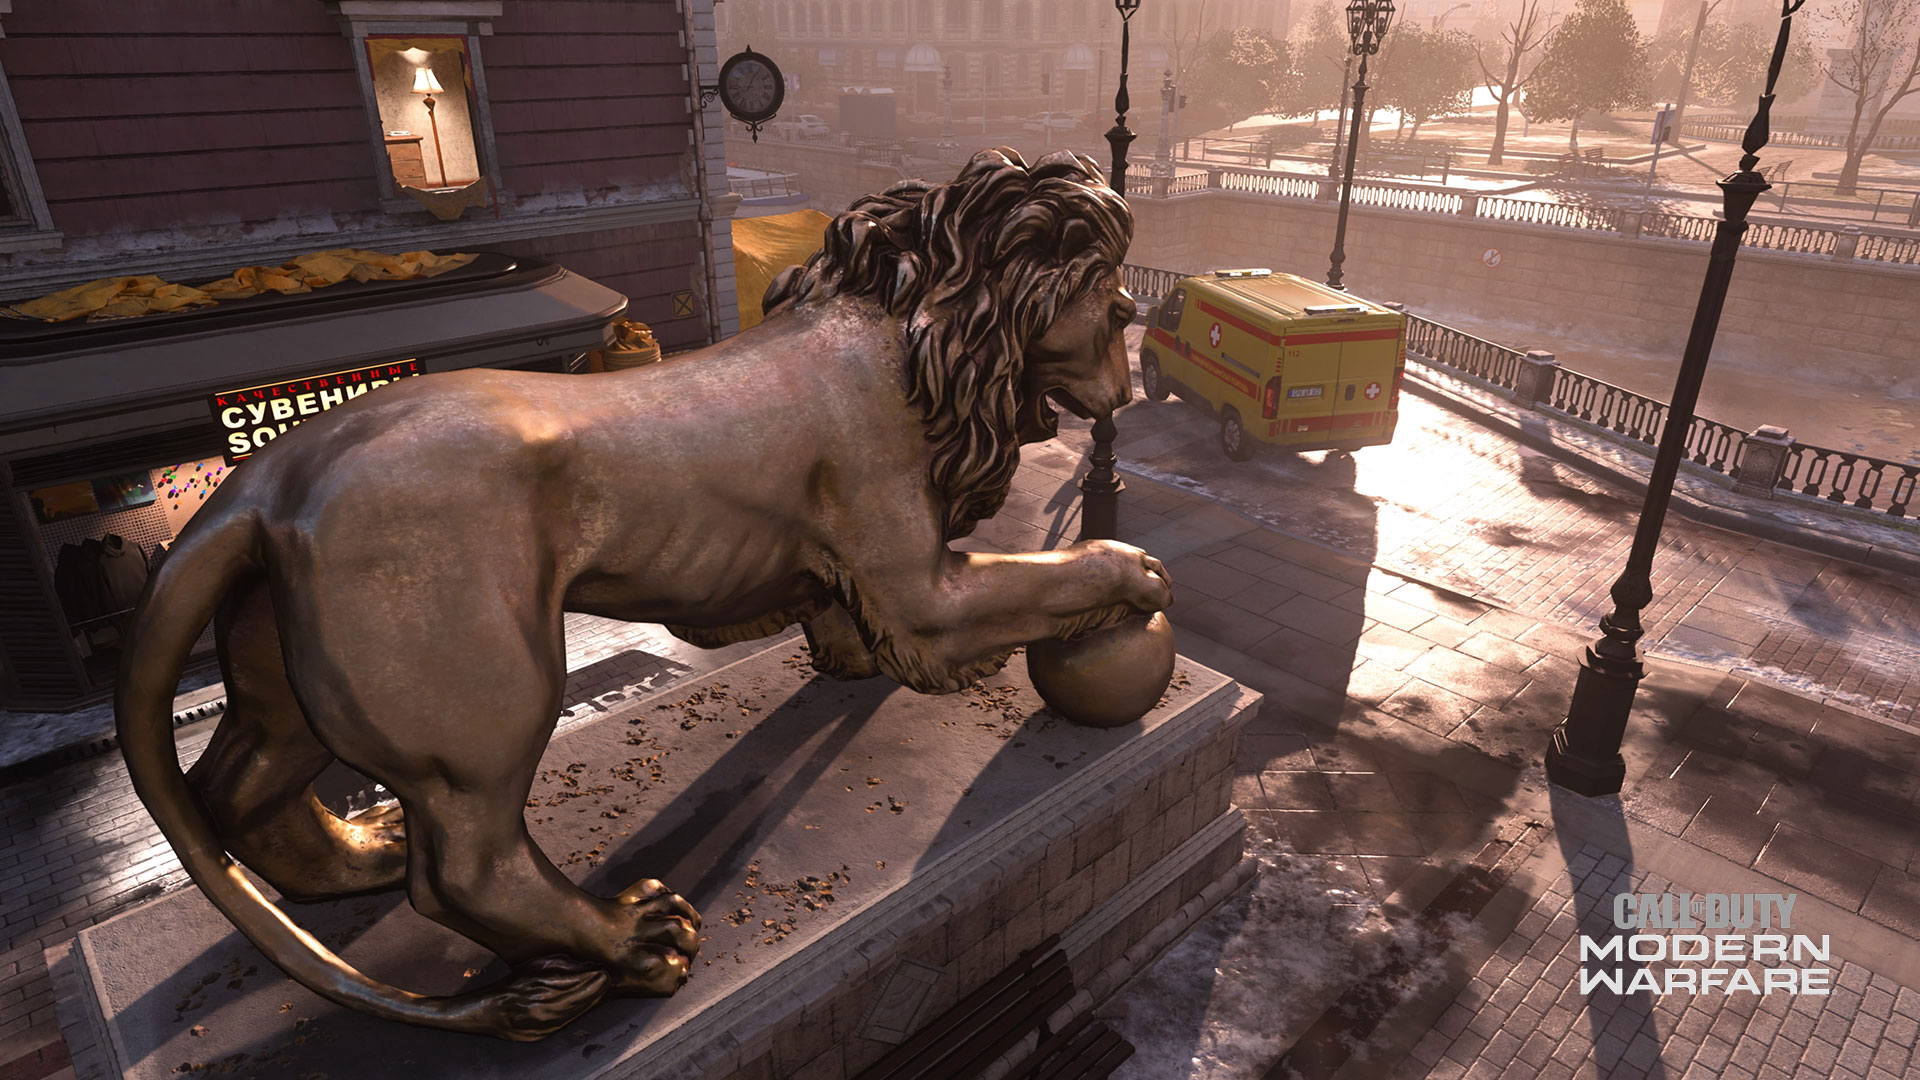
8. Lion Statue
Facing the St. Petrograd canal, this magnificent lion is pictured with its paw on a golden ball.
This massive and imposing statue easily conceals enemies approaching from the map’s north. If you’re guarding the Market, make sure to scan the area around the Lion Statue for hostile movement.
The other potential Cyber Attack bomb is located just north of the Lion Statue. Consider using the statue as cover after you’ve picked up the bomb to safely deliver it to the appropriate Data Center.
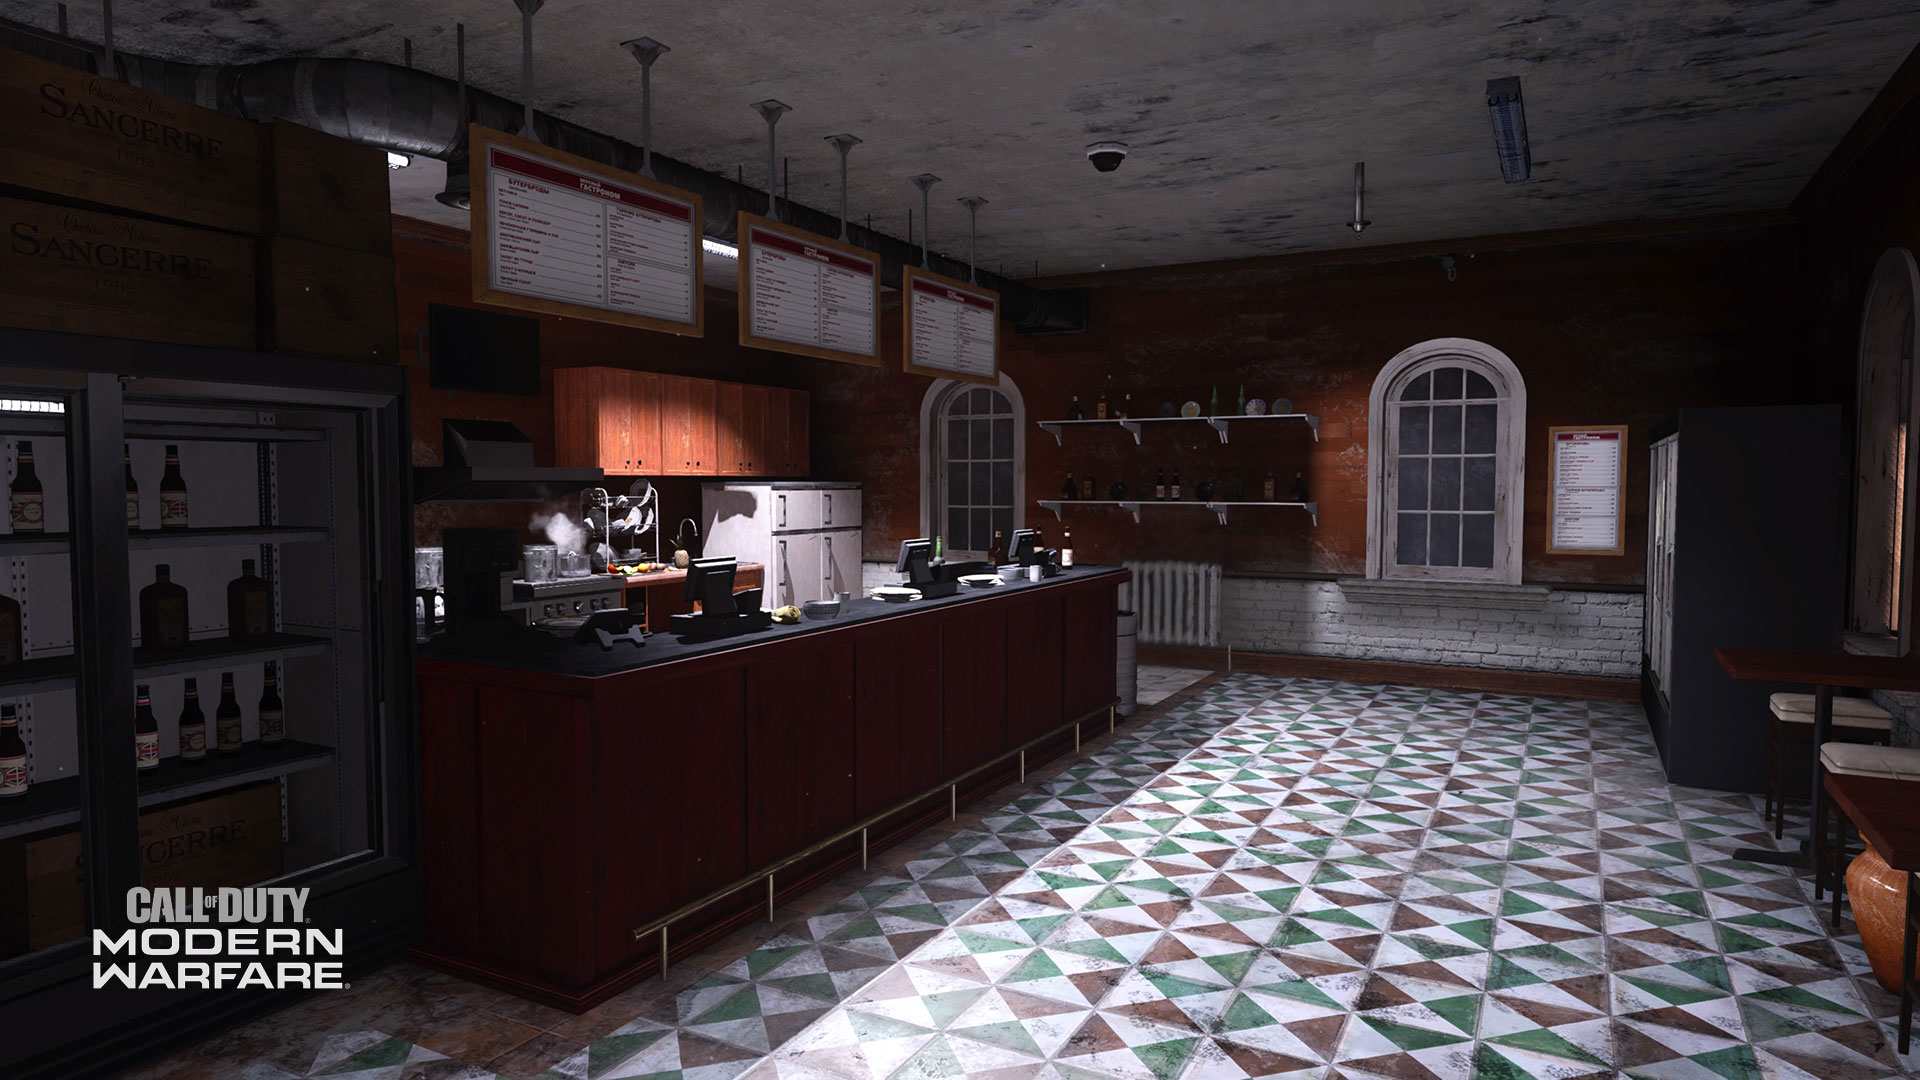
9. Restaurant – 5th Hardpoint and HQ Location
This counter-serve spot is great for a quick latte, a glass of wine, or a heavy firefight. Double doors separate the counter area from the seating area, which wraps around toward the back of the building.
A set of stairs disappears into the upper floor, where the Restaurant’s kitchen and bathroom are located. Here, the many second-floor windows provide helpful views of the stalled trains at the south, and the Courtyard at the east.
Though it’s not visible from the Restaurant’s second floors, the A Flag in Domination is located in the Courtyard, hidden by a lone dumpster. Scan the area below to spot enemies leaving A or trying to enter the Restaurant.
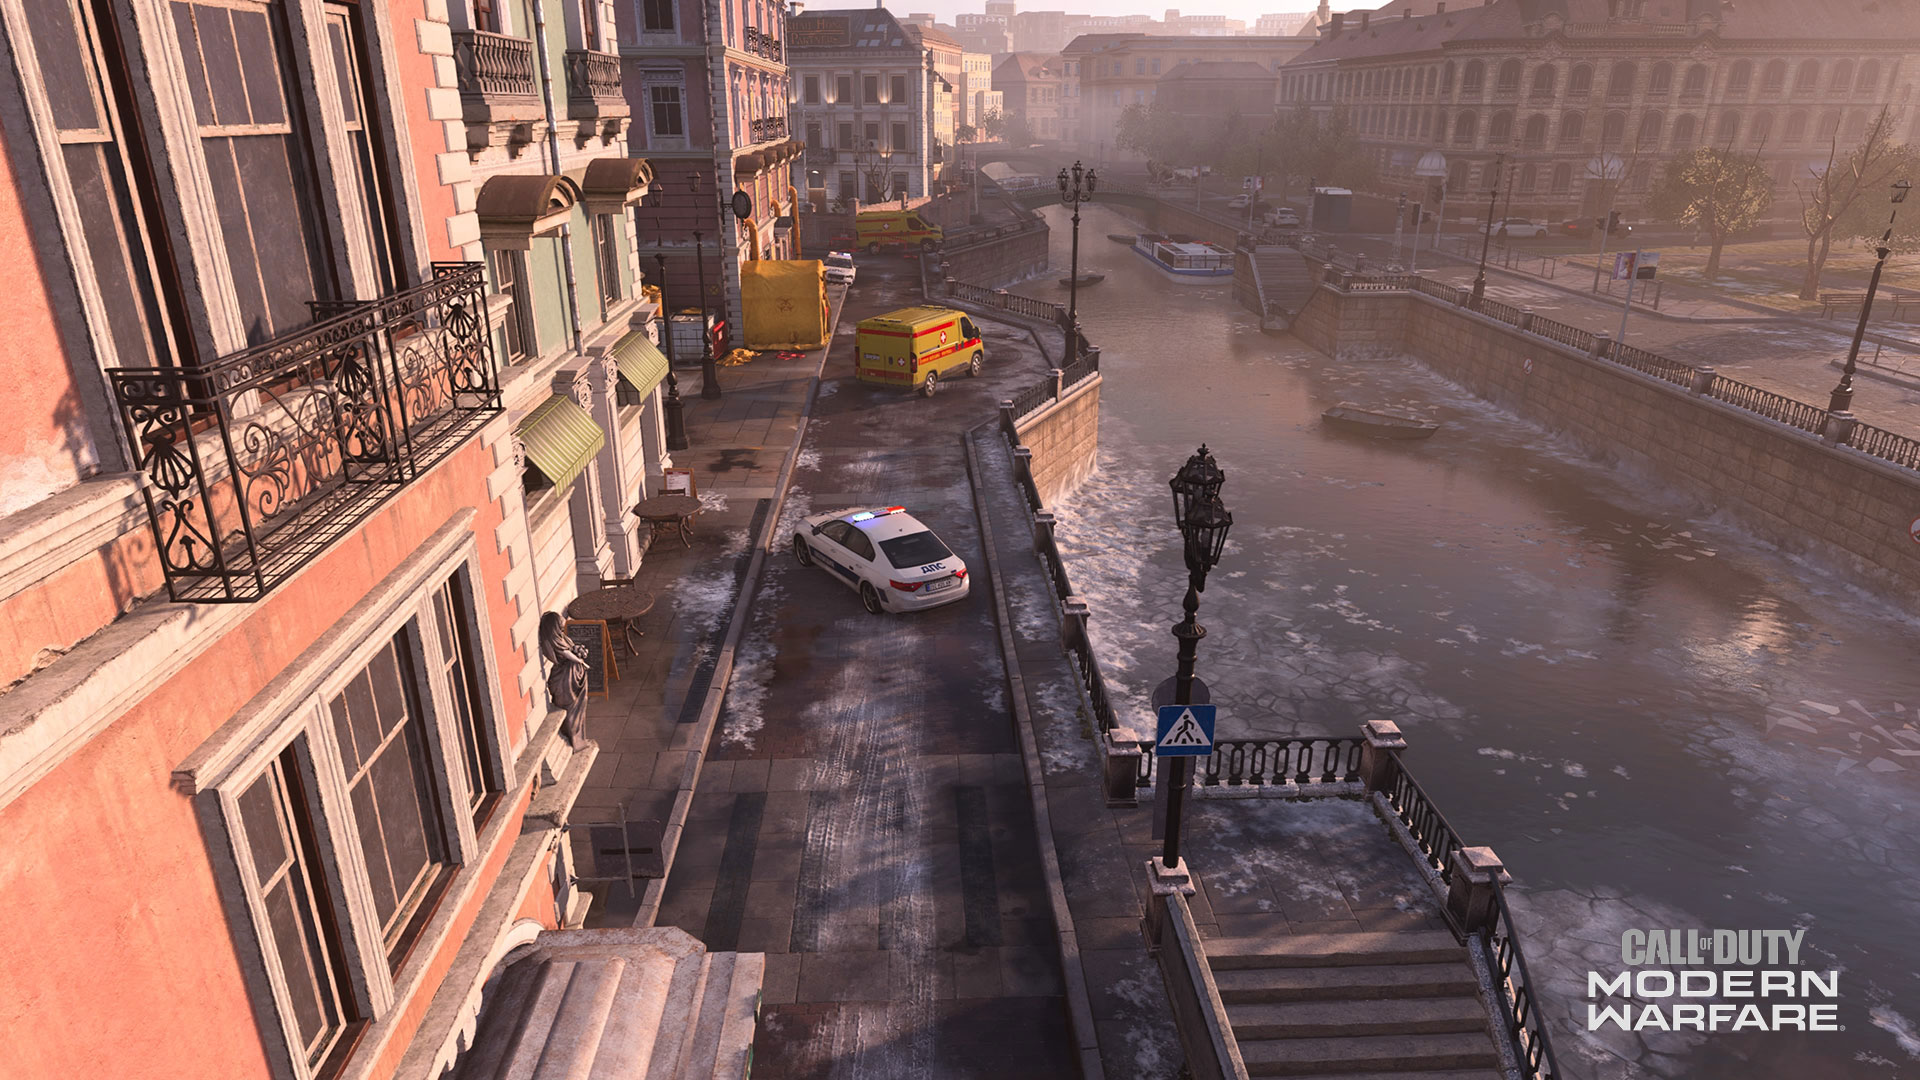
10. Canal Street – Cyber Attack Bomb location
Flanking the map’s north is the long Canal Street, which offers a quick route from one end of St. Petrograd to another.
Follow the Canal Street west and maneuver around crashed first responder vehicles to get a full view of the Market, the Café Street, and other opportune openings to spot and eliminate enemies.
Crouch behind a vehicle for cover in a firefight. Or, in Cyber Attack, use this path to flank the enemy as they carry their bomb across the map or as a direct route to pick up the bomb, should it spawn here.
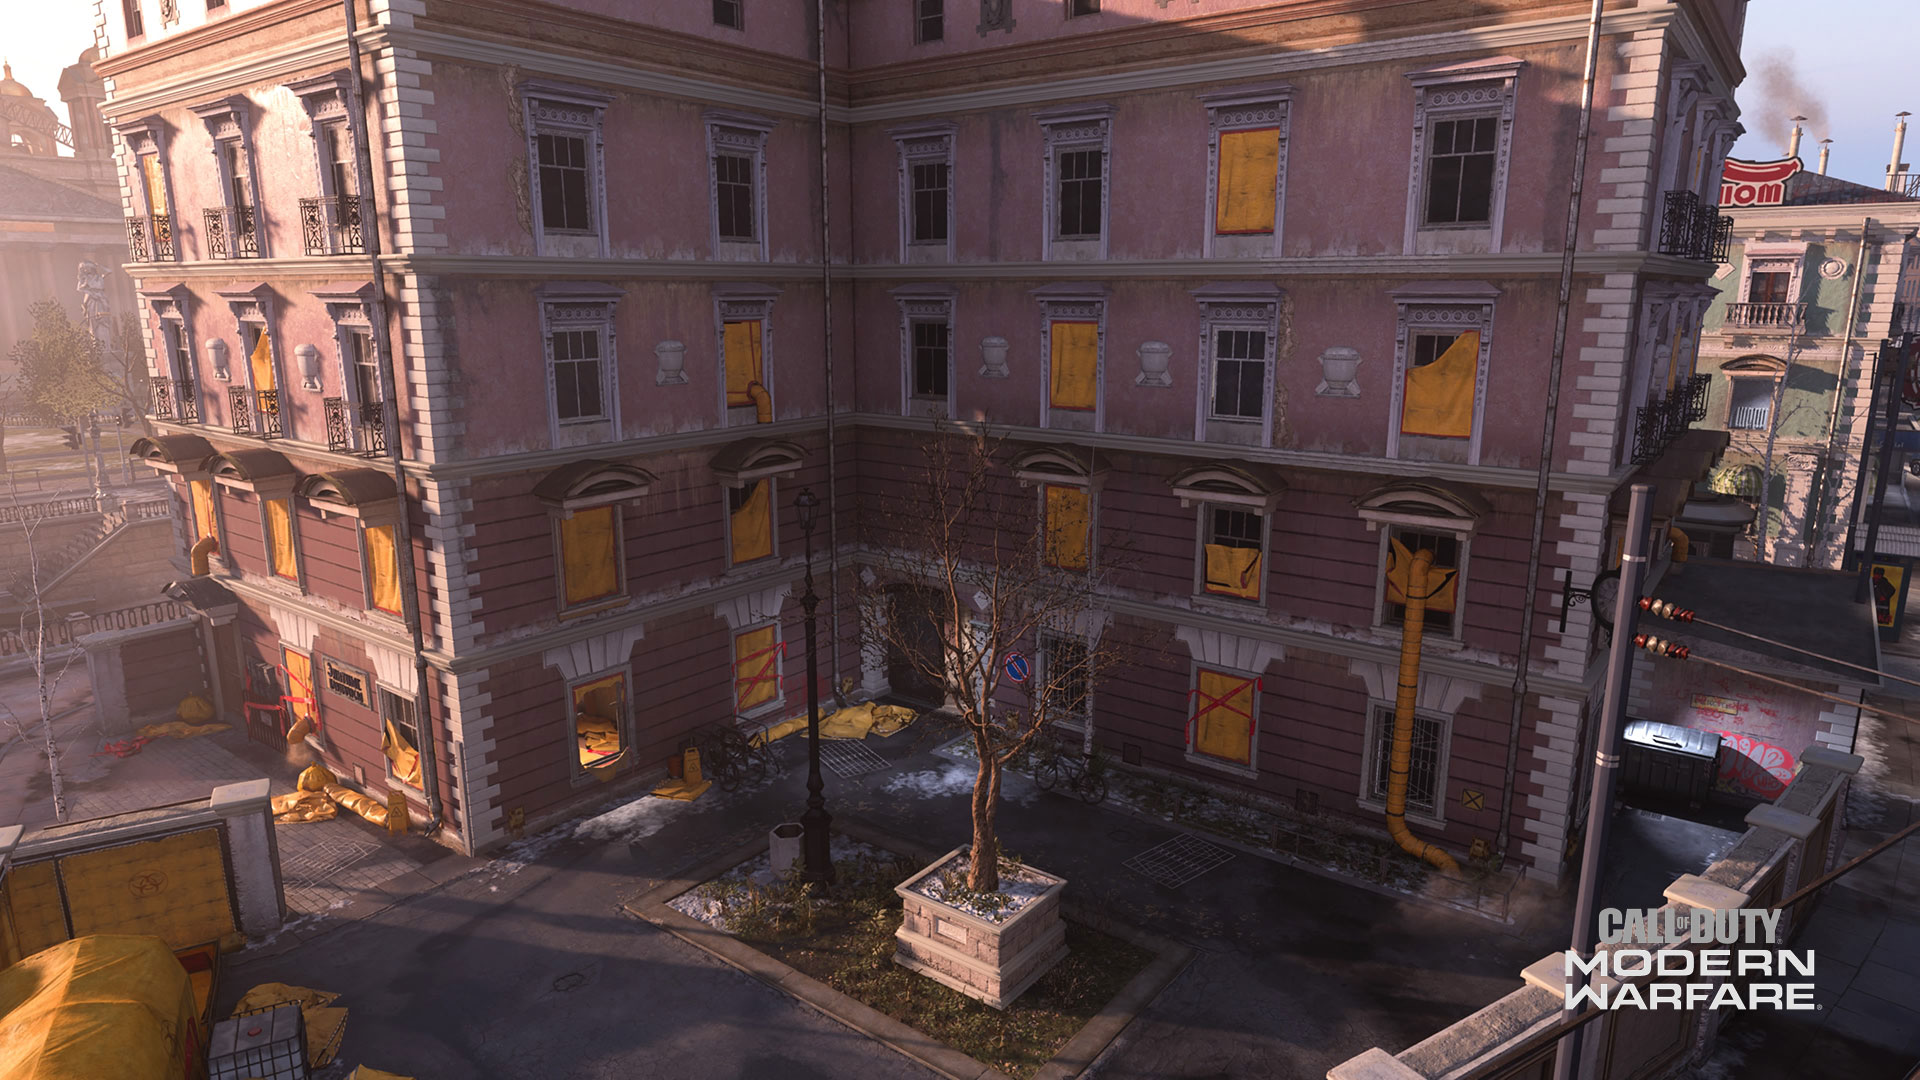
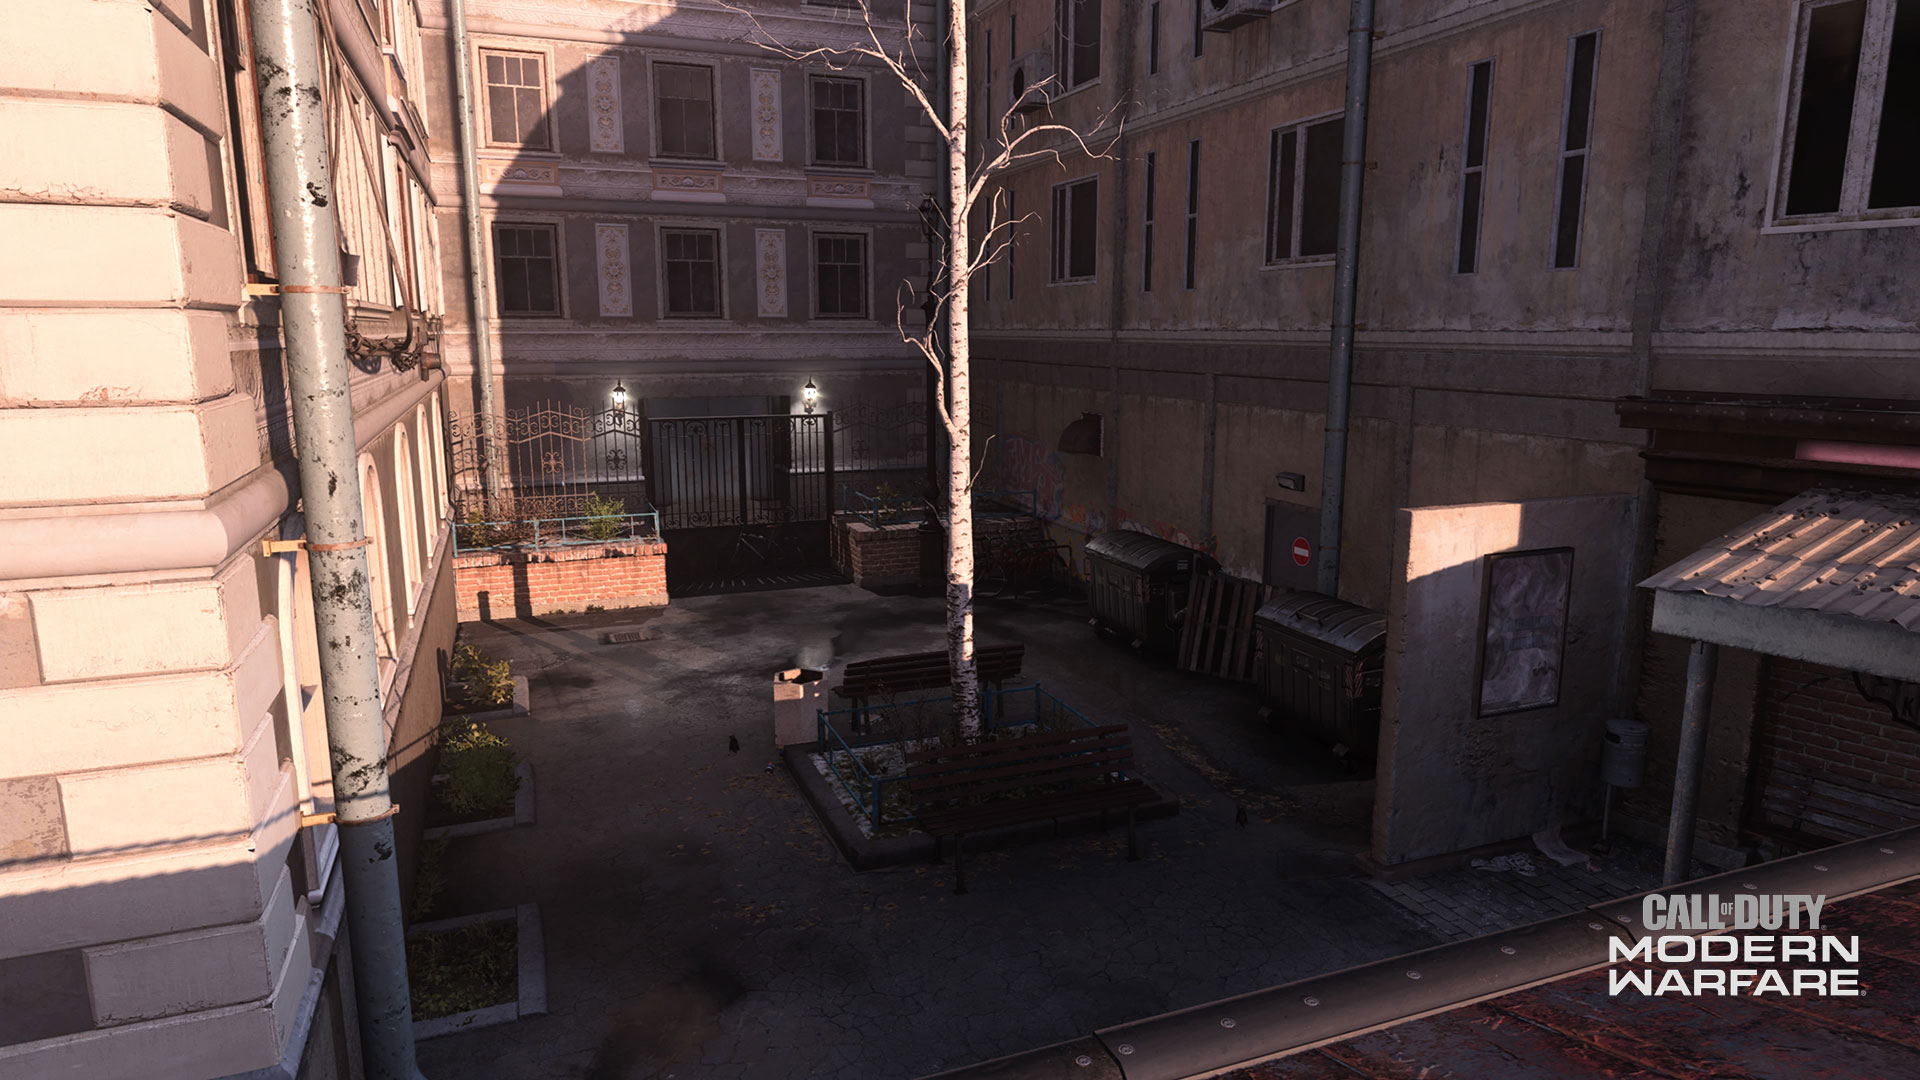
11. Courtyard – Site of A Flag in Domination
Tucked away in a corner, behind the two-story Tram Station, is the A Flag in Domination. The area that surrounds this point is known as the Courtyard.
Capturing the A Flag leaves players highly vulnerable to enemies, as the A Flag is in full view of the Café, Café Street, and first floor of the Tram Station. Need to guard your six while you hold down the A flag? The Deployable Barrier also comes in handy here.
And, defensive tactical equipment, like Flash or Stun Grenades, can keep enemies at arms’ length as you capture the bomb or call in a Killstreak.
In many modes, Allegiance fighters can congregate in this area after spawn, heading to the Restaurant and Market. No matter your team – Coalition or Allegiance – you’ll want to approach this area with caution, as the sightlines here are significantly stunted.
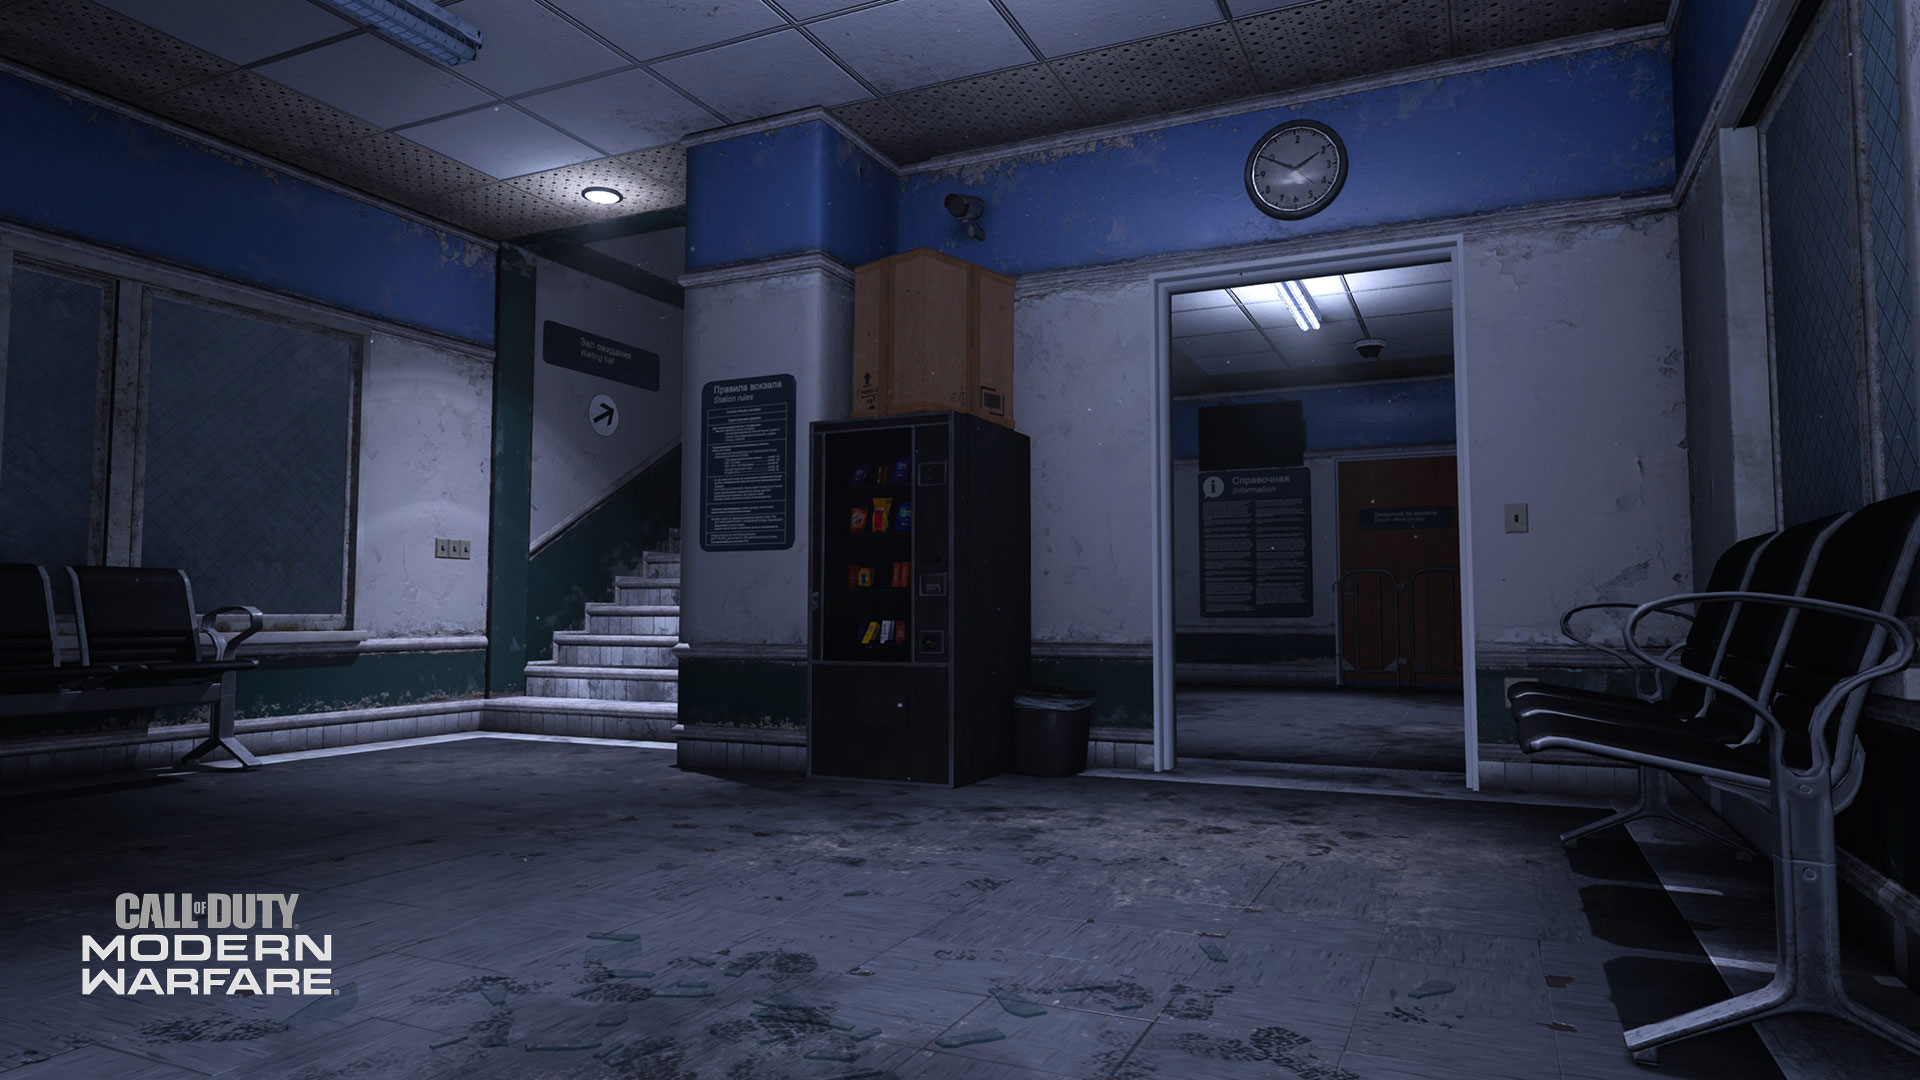
12. Tram Station
Advertisements, a vending machine and a waiting area make up the Tram Station’s bottom floor.
Upstairs, find the Tram Station’s offices, scantly outfitted with a copier, desk, and phone. Here, the windows provide a wider view of the stopped trains, Pool Hall, Back Alley and Bar Street at the map’s southwest side.
Hop out from the second floor onto a small platform, or even a stopped train. This elevated area is great for patrolling both the Courtyard and the East Tracks, but can leave you open to snipers. Be vigilant.
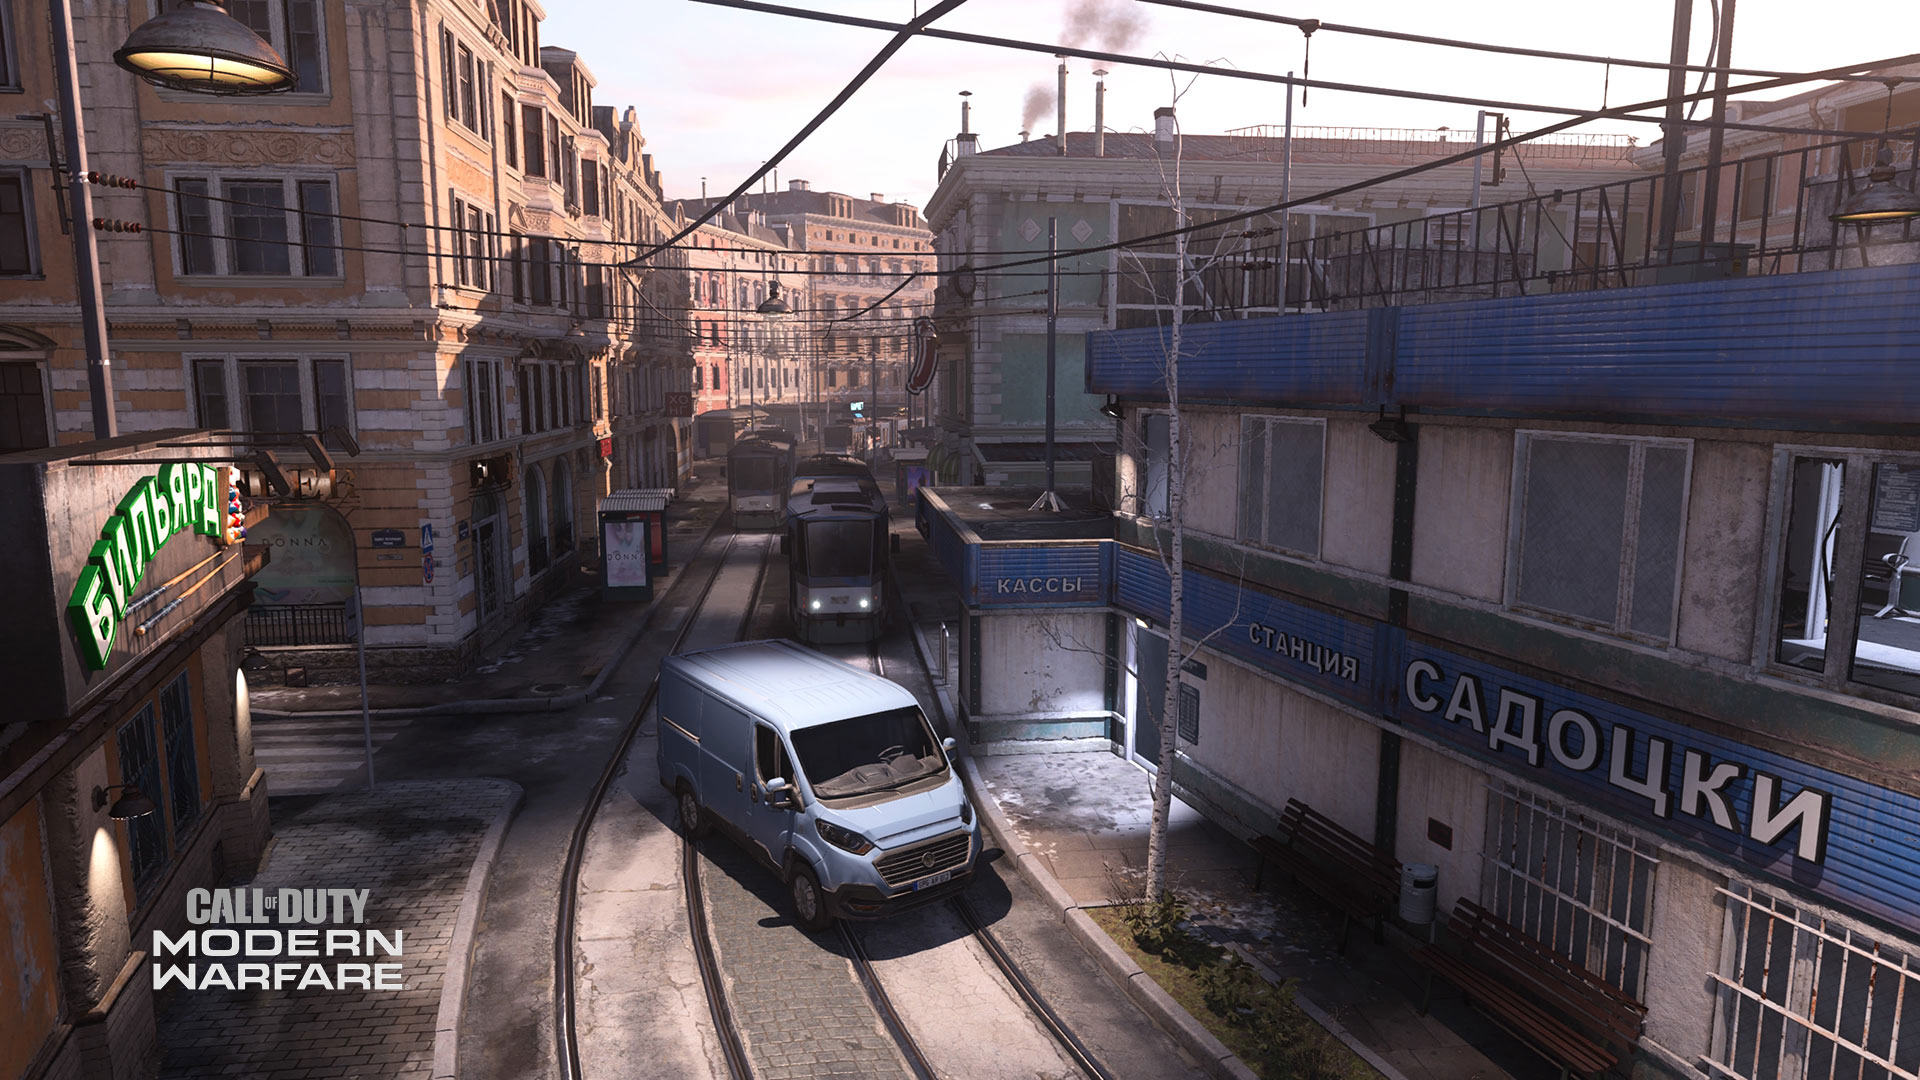
13. Café Street
The last horizontal lane running from north to south is the Café Street. It links the Canal Street flank route to the 4thHardpoint rotation: a Pool Hall and its connected Bar.
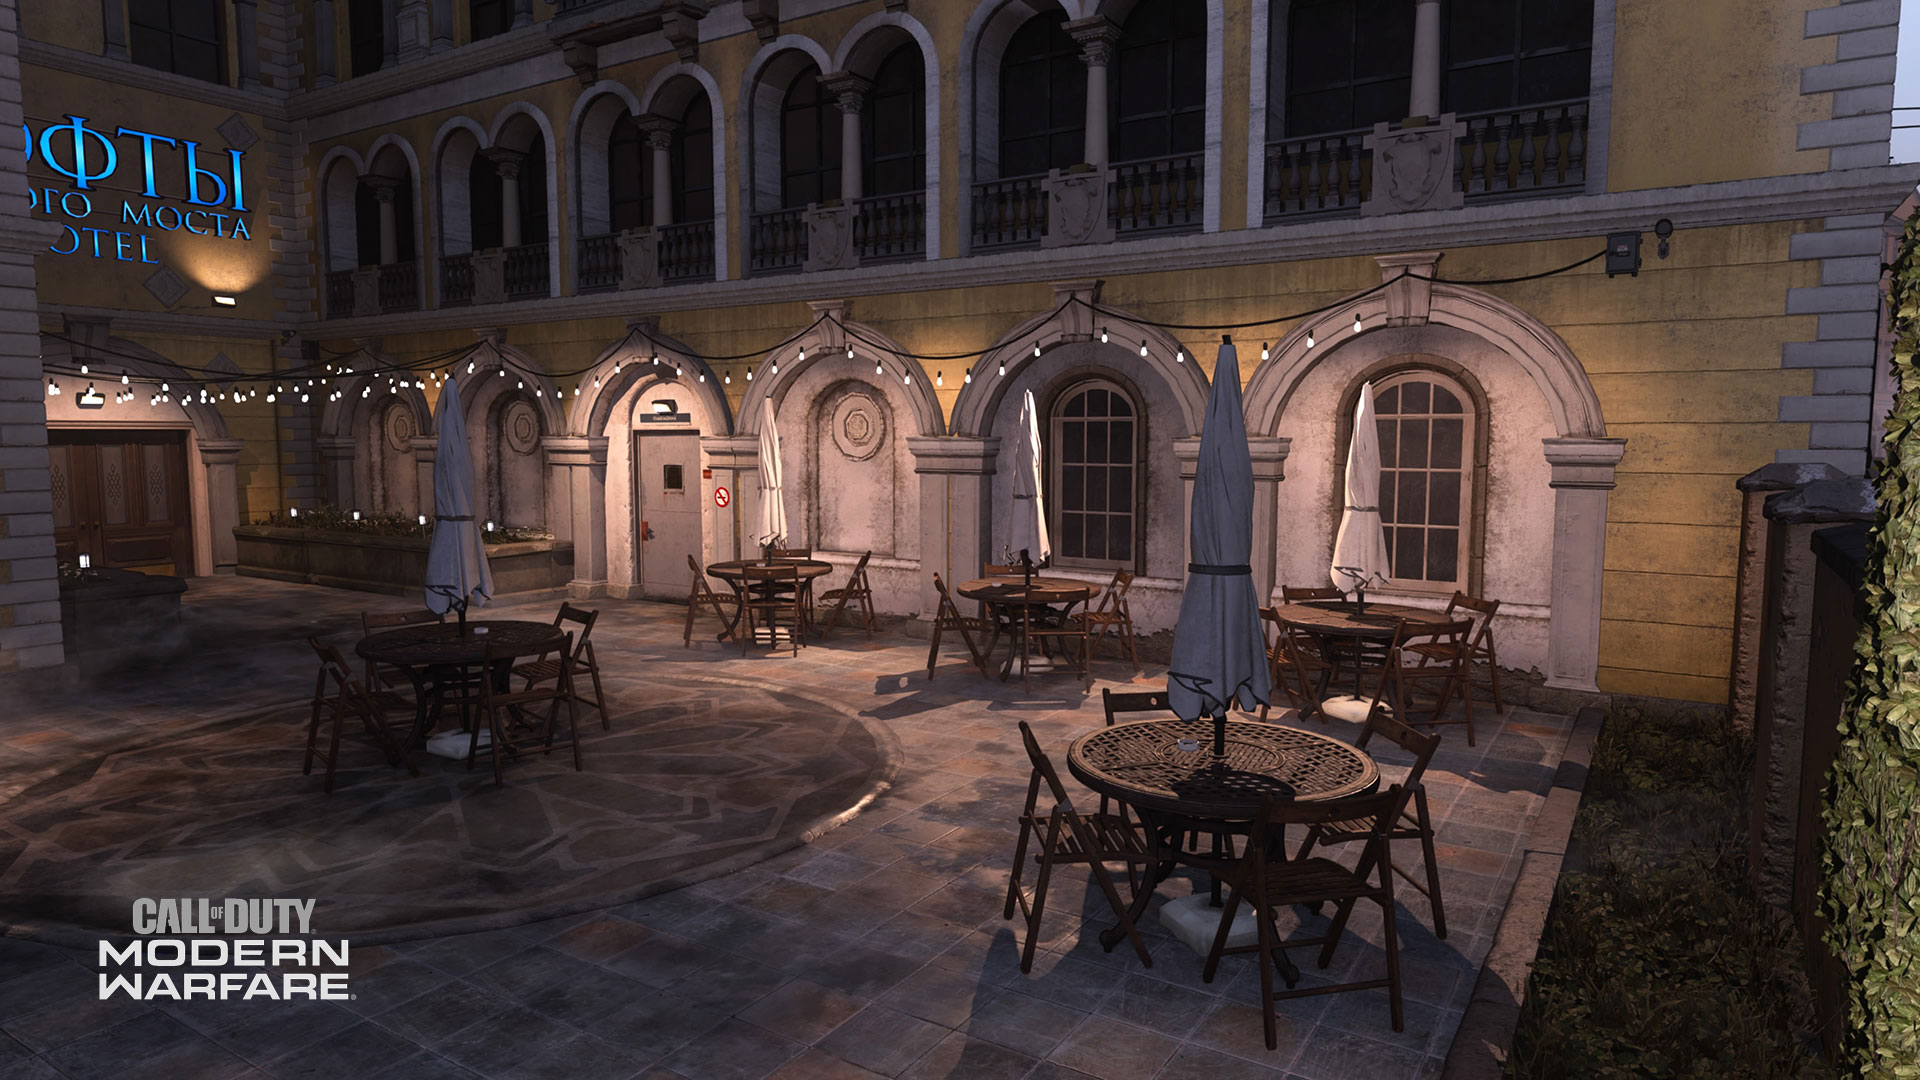
The Café Street also provides access to the outdoor Café, which is part of an evacuated Hotel.
Use the Café Street to press into the map’s more shadowy locations. Use caution as you advance, as you can be seen by enemies lurking in both the Café patio and the Tram Station’s bottom floor.
14. Café – 2nd Hardpoint and HQ location
Mind if we smoke? This semi-square, walled-off Café sits in a patio behind St. Petrograd’s only Hotel. Ashtrays dot each carefully arranged café table – perfect for coffee, conversation, and calling in Killstreaks.
Watch for enemies accessing the Café by way of the Café Street or East Tracks.
In Deathmatch modes, use the Café to slink into the Hotel lobby, which is mostly out of view (as long as the doors are closed). Exit the lobby on the other side for access to Canal Street.
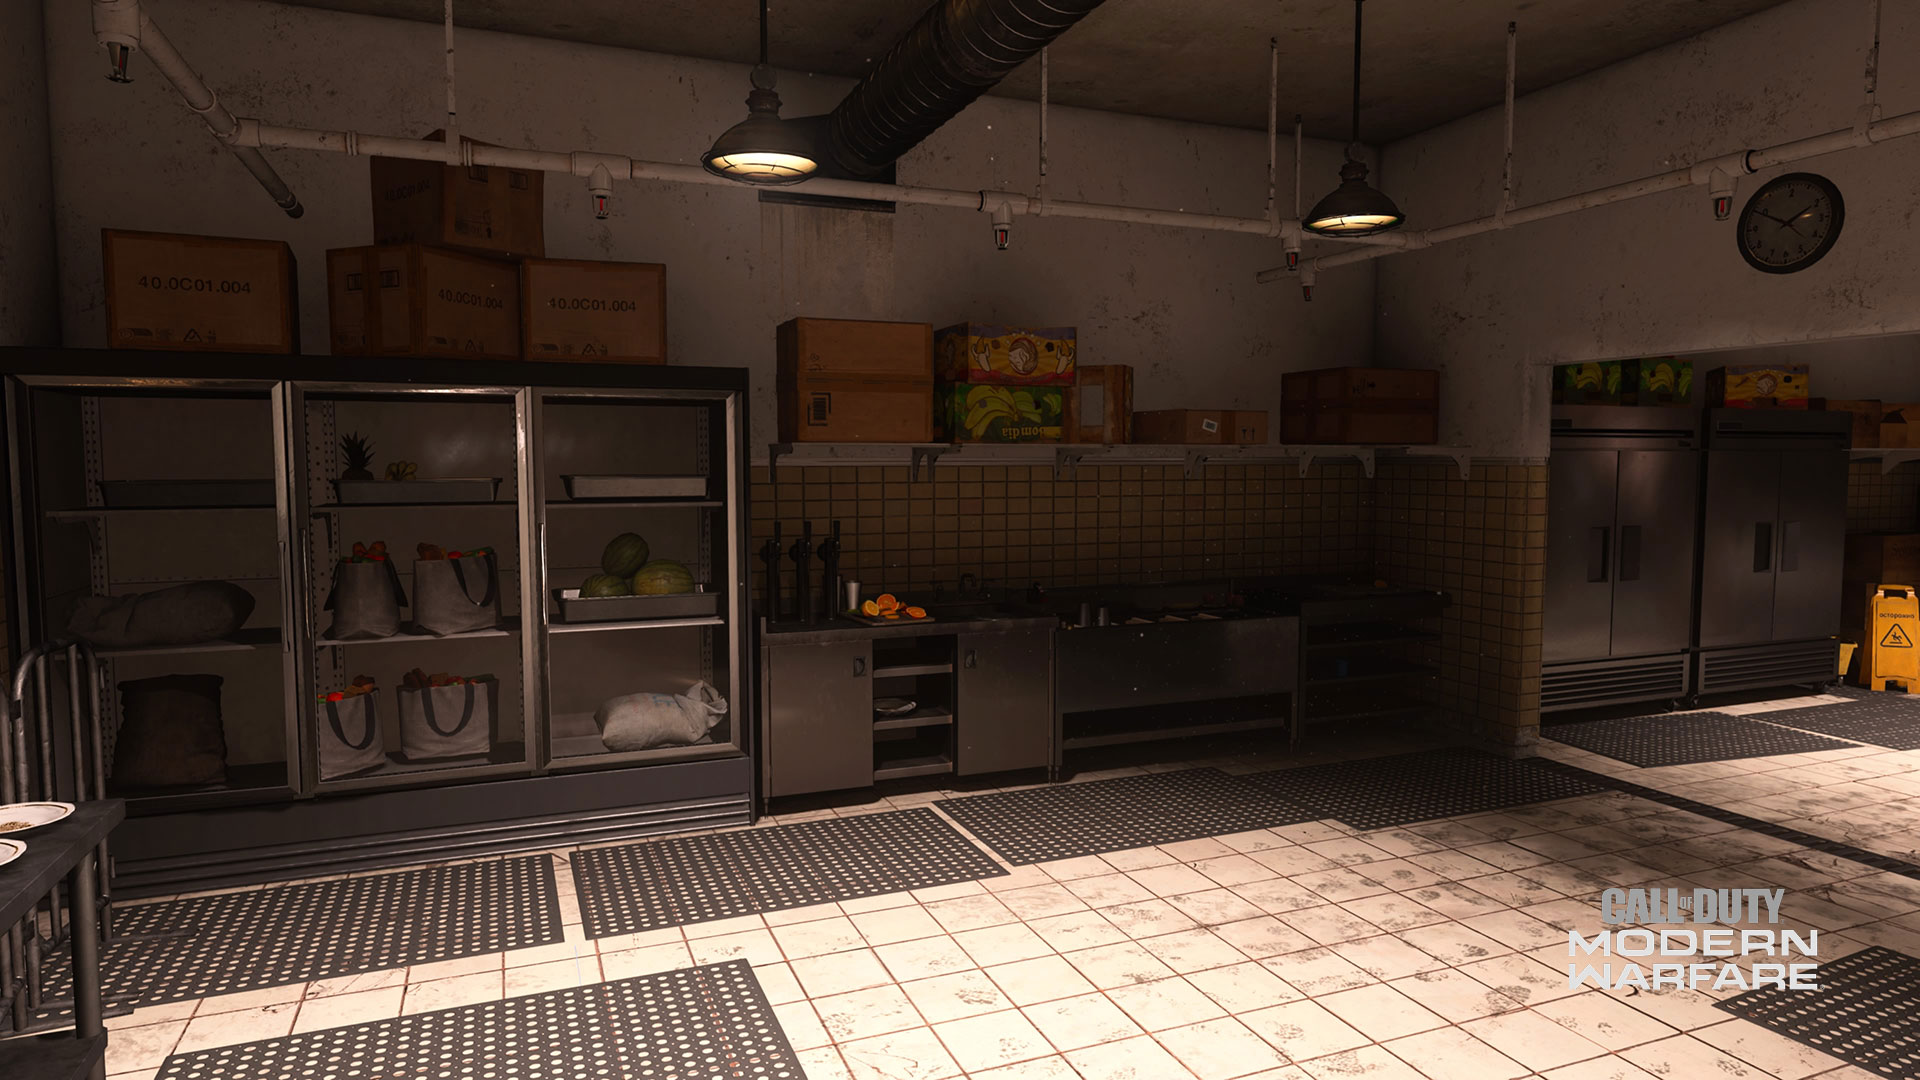
15. Hotel Kitchen
This is where the competition gets served. Industrial-grade ovens and a state-of-the-art refrigeration system make up the Hotel Kitchen, where combat centered on the Café has a chance of spilling over into this small space.
Can’t take the heat? Get out of the kitchen – and check into the Hotel.
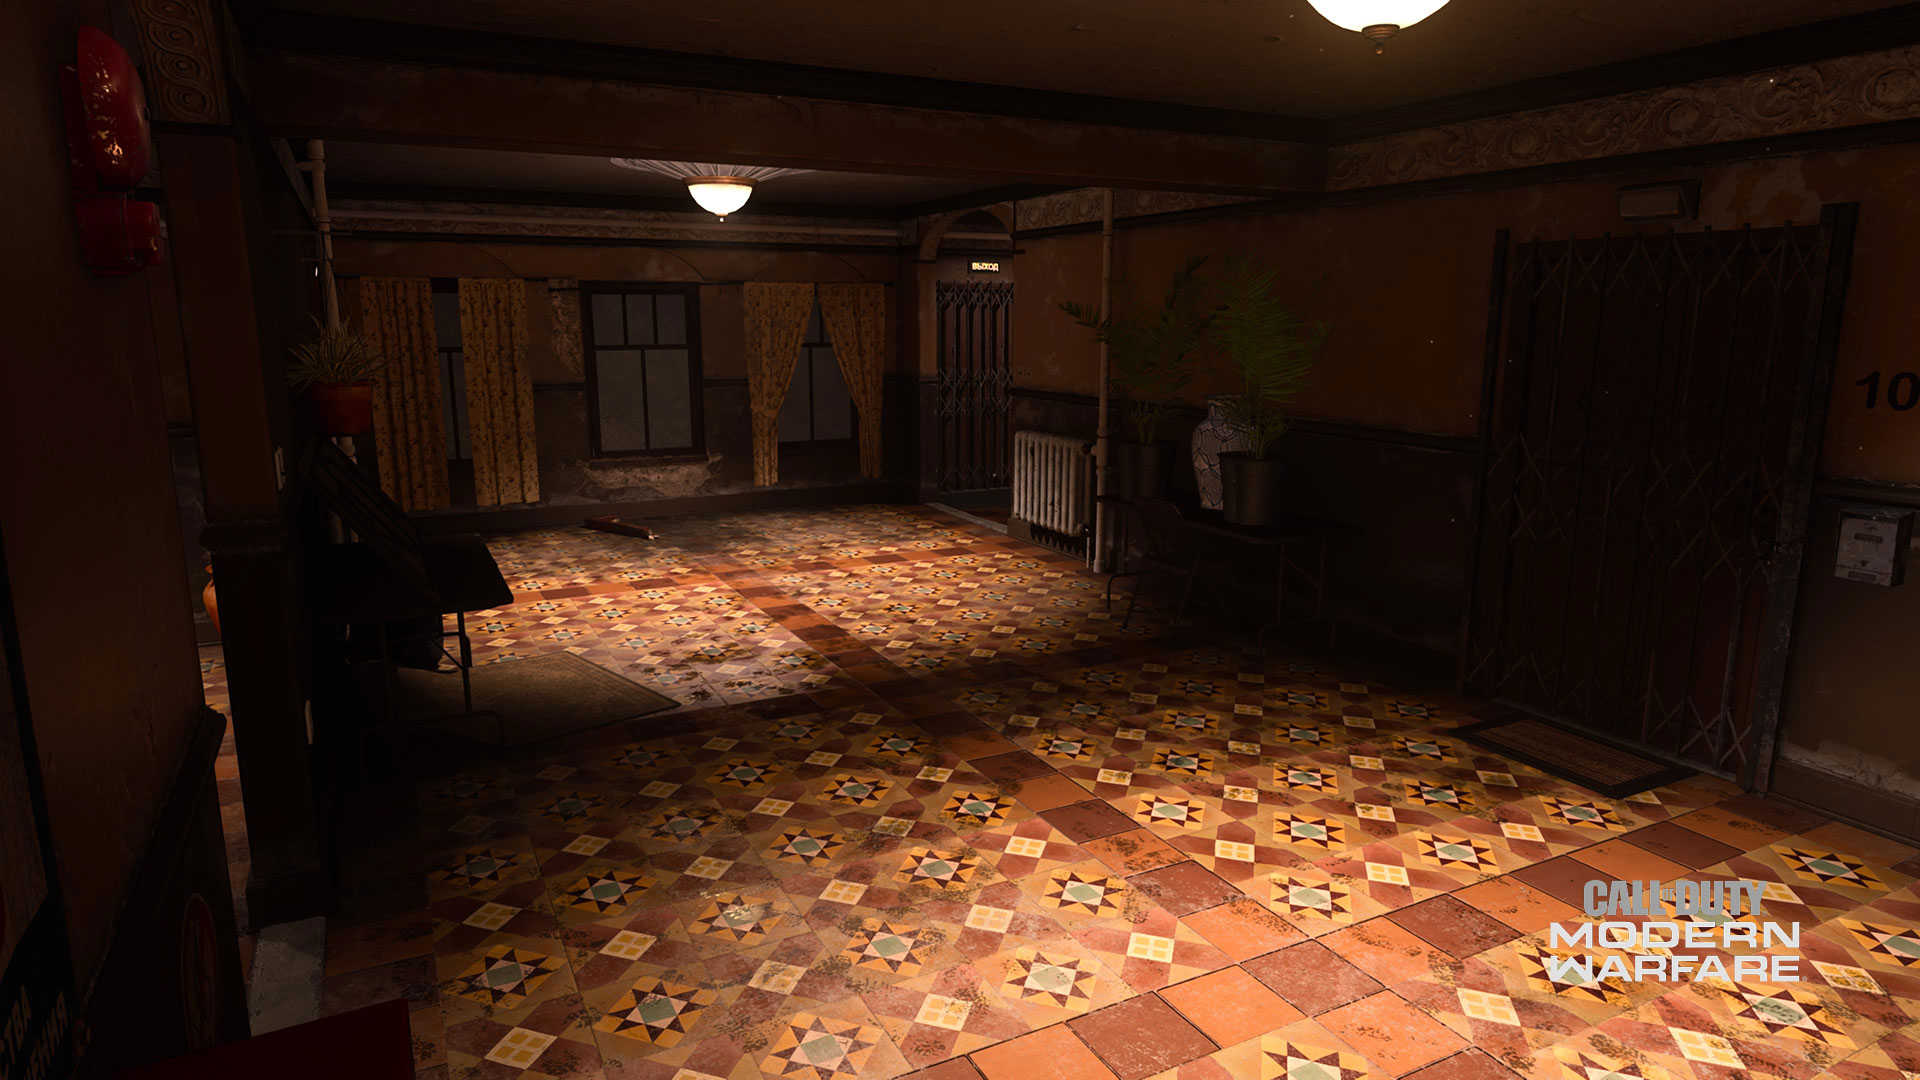
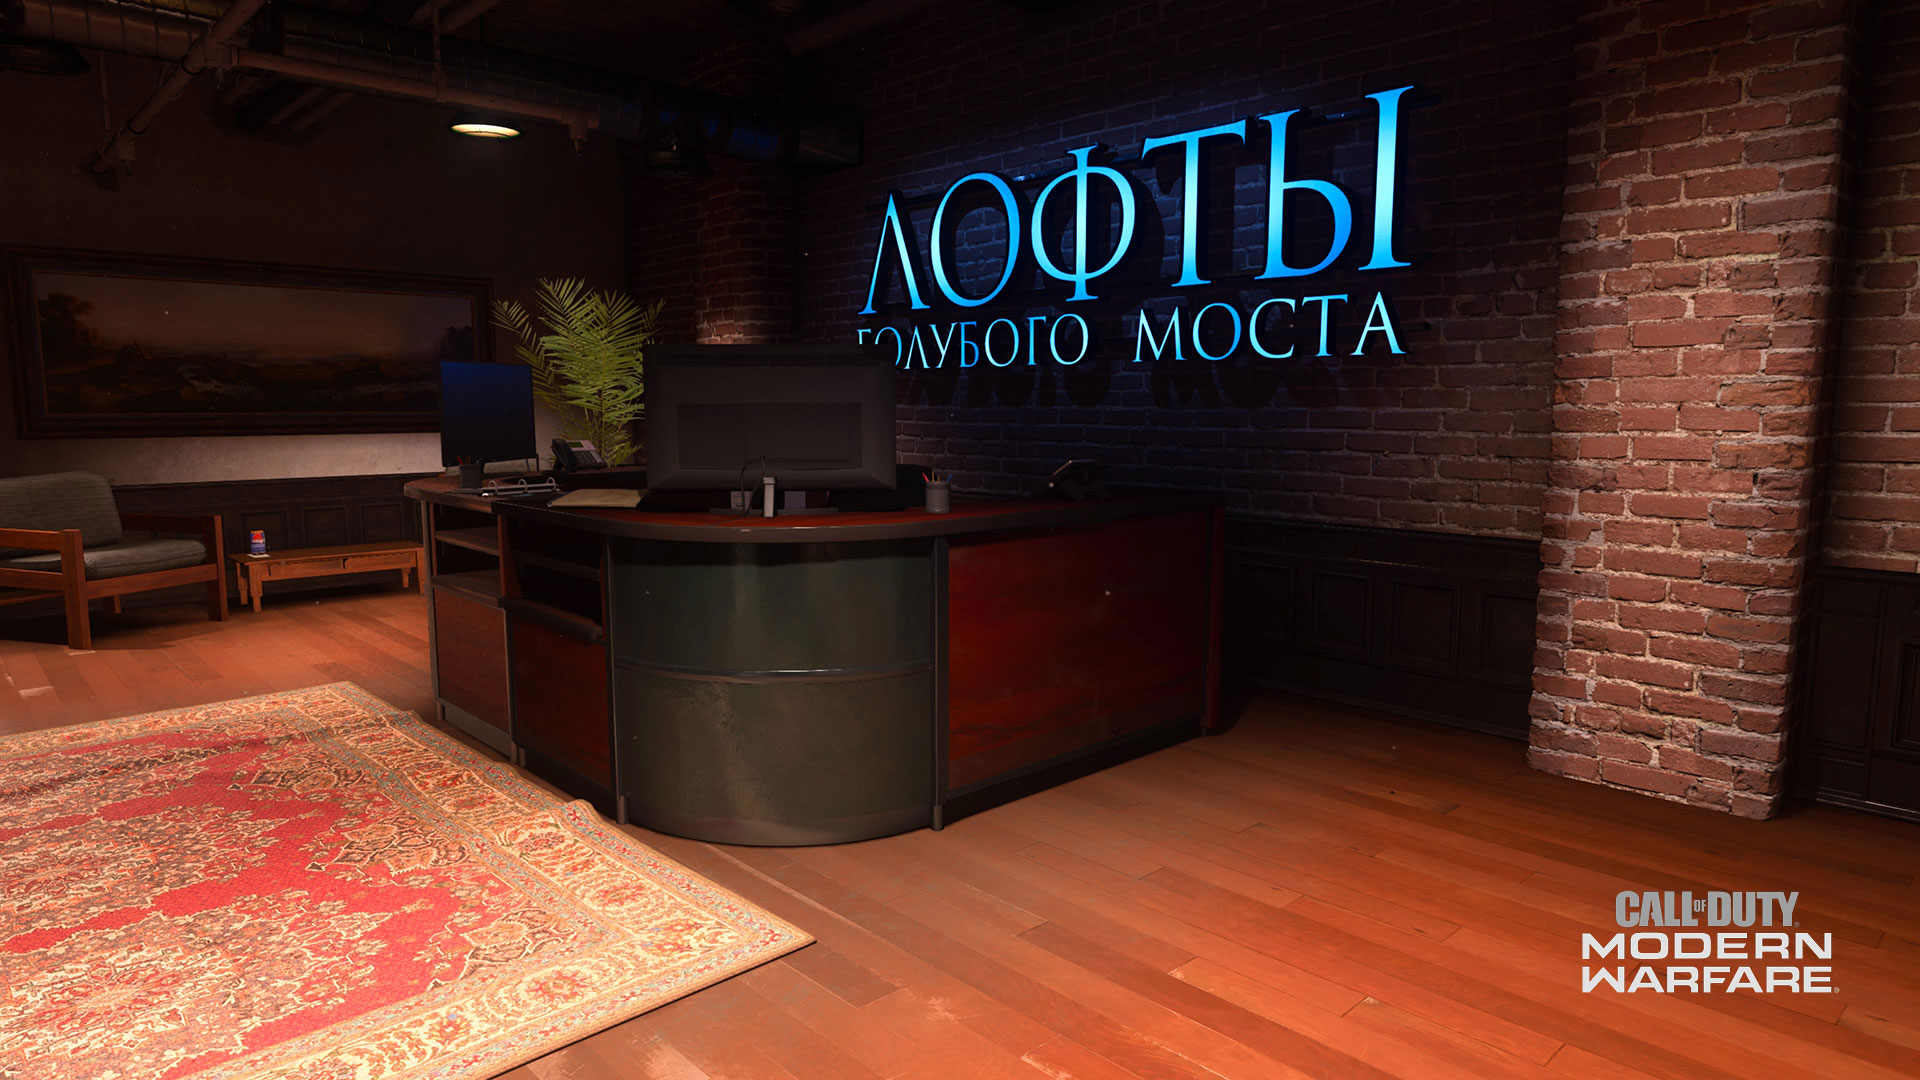
16. Hotel
The empty Hotel lobby is accessible both from the Café and from double doors on the Canal Street side.
Work from the front desk and help your foes “check out.” Or, duck inside to maneuver out of the way of a roaming enemy Chopper Gunner or VTOL.
Whenever entering the Hotel, use caution – it’s a fun hiding spot. To help capture the Café hardpoint, use the Hotel to conceal your moves.
17. Back Alley
Nothing good happens in an alley, and the Back Alley behind the Bar is no different. This narrow area, with a few naked trees, a couple benches, and a dumpster, is where heavy combat from the Bar tends to spill over into the street.
If you’re holding down the Bar and Pool Hall area, which makes up the 4thHardpoint rotation, make sure to keep an eye on the door leading from the Back Alley into the Bar. This can be a popular spot for enemies to group up and press into the Hardpoint while your team has its back turned, focused on defending the Pool Hall.
The Back Alley has a narrow view of the Café and East Tracks, making it an advantageous location for rooting out Allegiance fighters, clearing enemies headed to the Café Hardpoint, or making your way to the A flag in Domination.
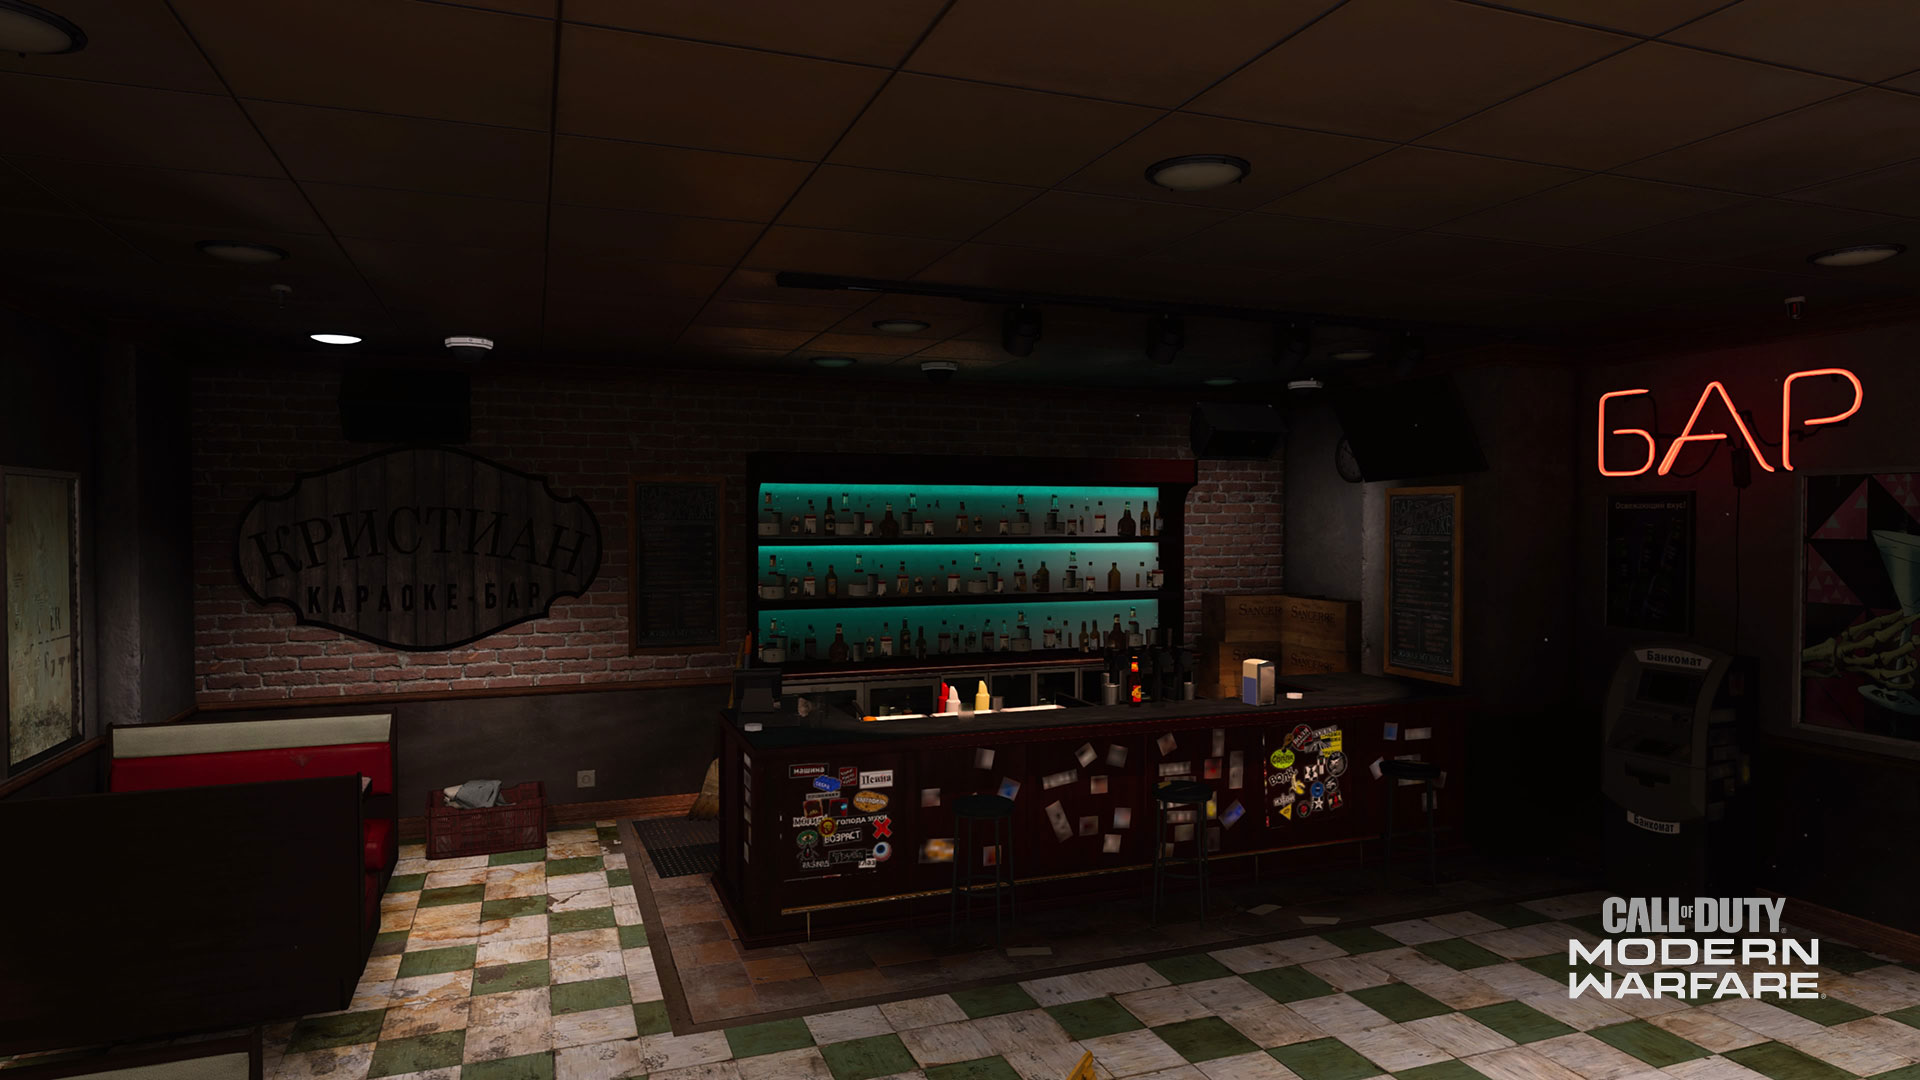
18. Bar – 4th Hardpoint and HQ location (combined with Pool Hall) and Data Center Location in Cyber Attack
Fix yourself a deadly cocktail at the Bar. Old vinyl booths, a shoddy ATM and a checkered floor give this spot an old-school watering-hole vibe.
Everyone may not know your name, but here, enemies can certainly take your number. So, look out for enemies crouched behind the bar, creeping in corners, and skulking around the western entrances, looking to earn some Killstreaks.
If you’re heading to the Data Center in Cyber Attack, consider taking the entrance through the Pool Hall or run (swiftly) across the Tracks as that area is somewhat exposed.
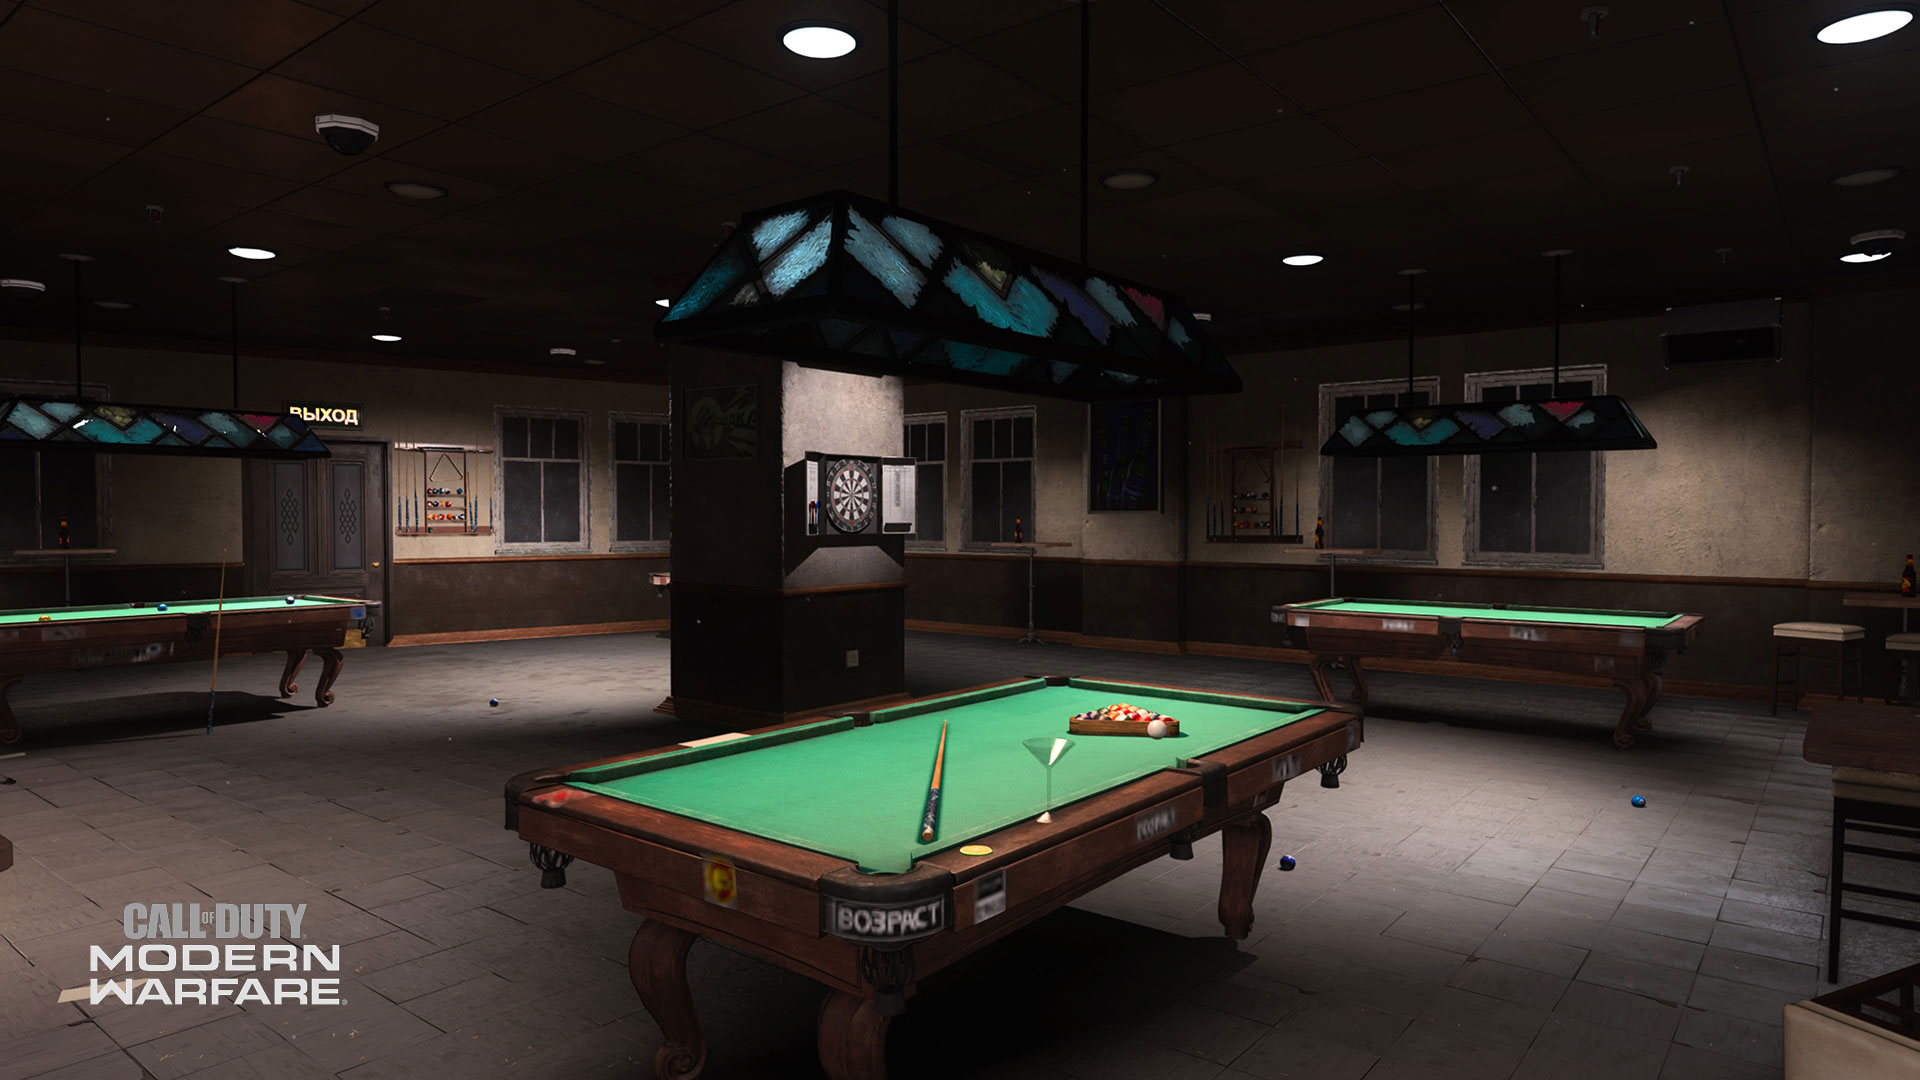
19. Pool Hall – 4th Hardpoint and HQ location(combined with Bar)
Four pool tables at each corner of the Pool Hall give this medium-sized space a small-sized feel. But, a darts game, speakers and friendly neon decorating the Pool Hall makes for a cozy, familiar setting.
Don’t be afraid to dropshot a foe when the fire gets too close to your helmet. The spaces beneath each pool table provide adequate sightlines for kneecapping any hostiles who get near.
When infiltrating the Pool Hall from the door at the Bar Street side, try mounting your weapon to the doorframe. The cramped and busy interior of the Pool Hall makes it hard to see who’s occupying the space – in some cases, until it’s too late.
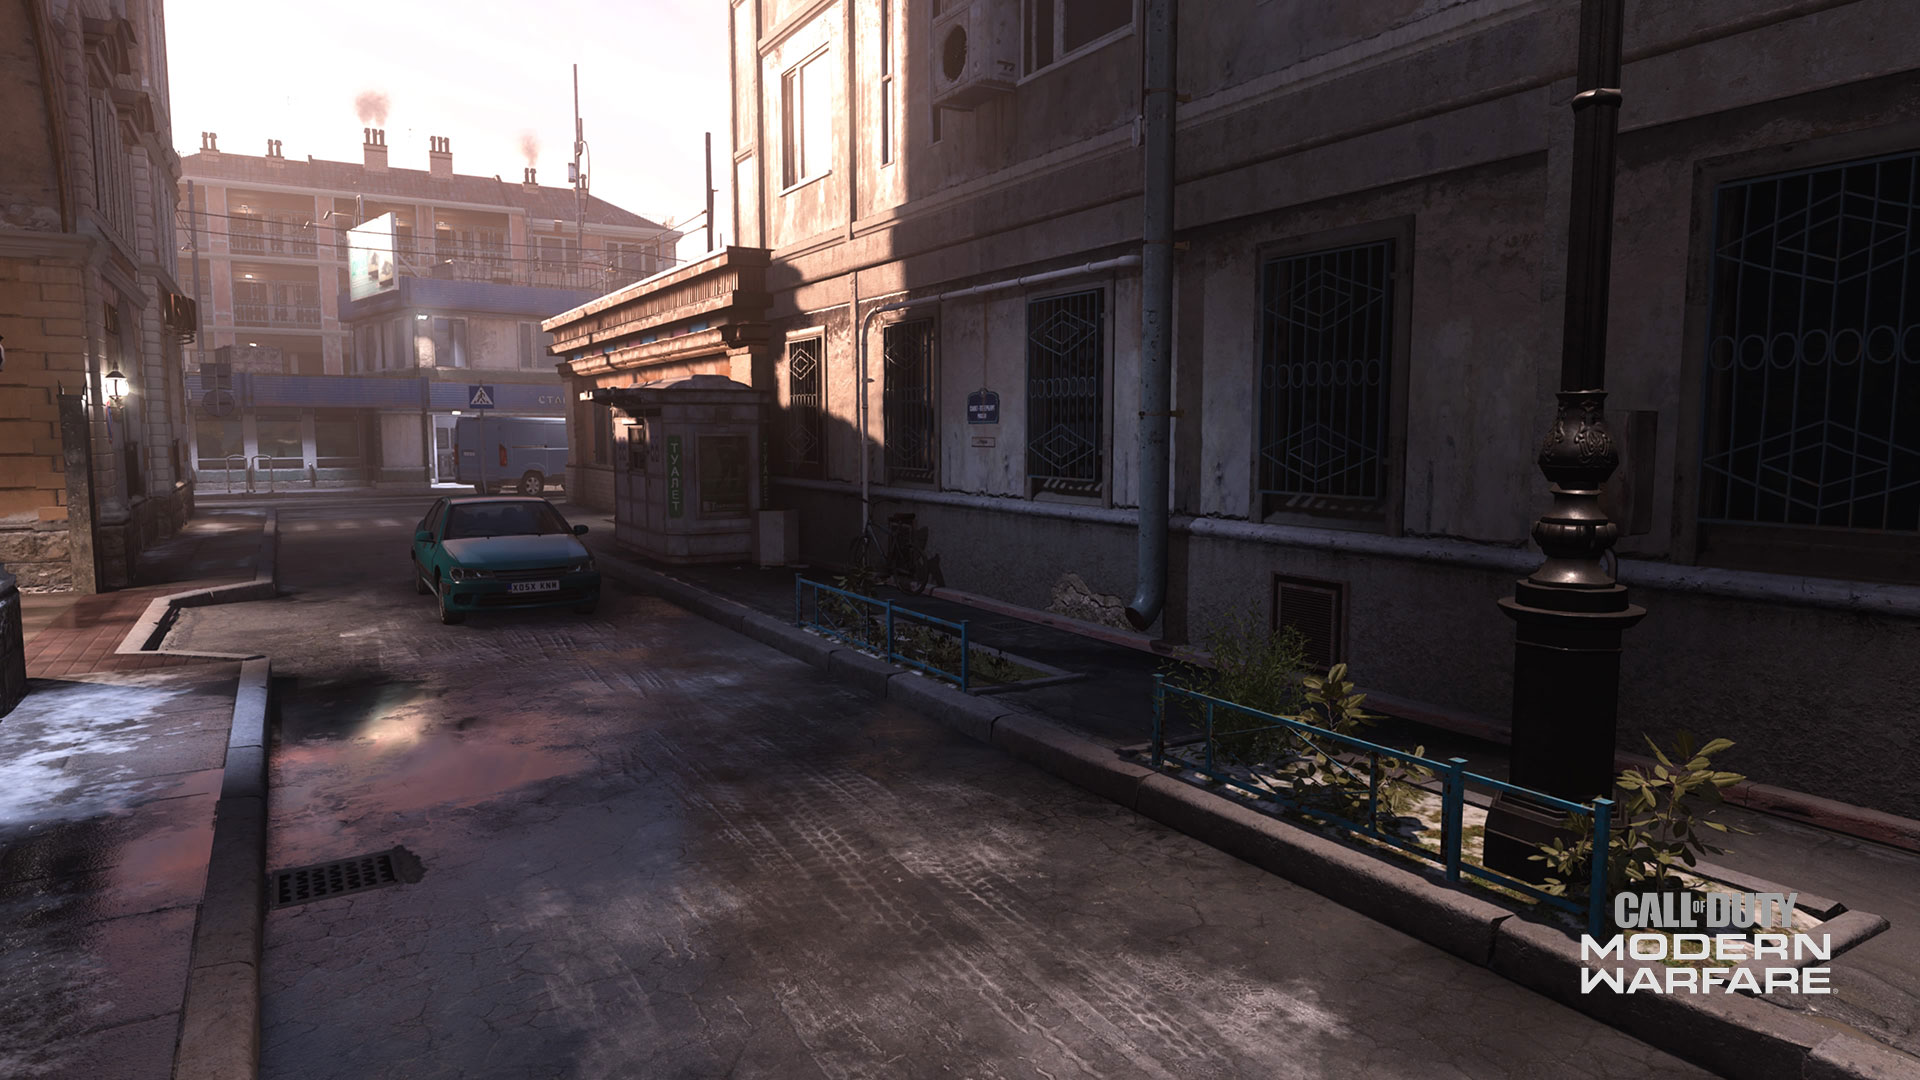
20. Bar Street
An abandoned car, some restrooms, and a discarded bike fill the street separating the Pool Hall and Bar from the Shipping Area.
Follow Bar Street to the north for access to the Courtyard, Tram Station and stopped Trains.
Or, use the Bar Street to slink into the Shipping Area, which grants access to the map’s center and to the high-level Apartments above.
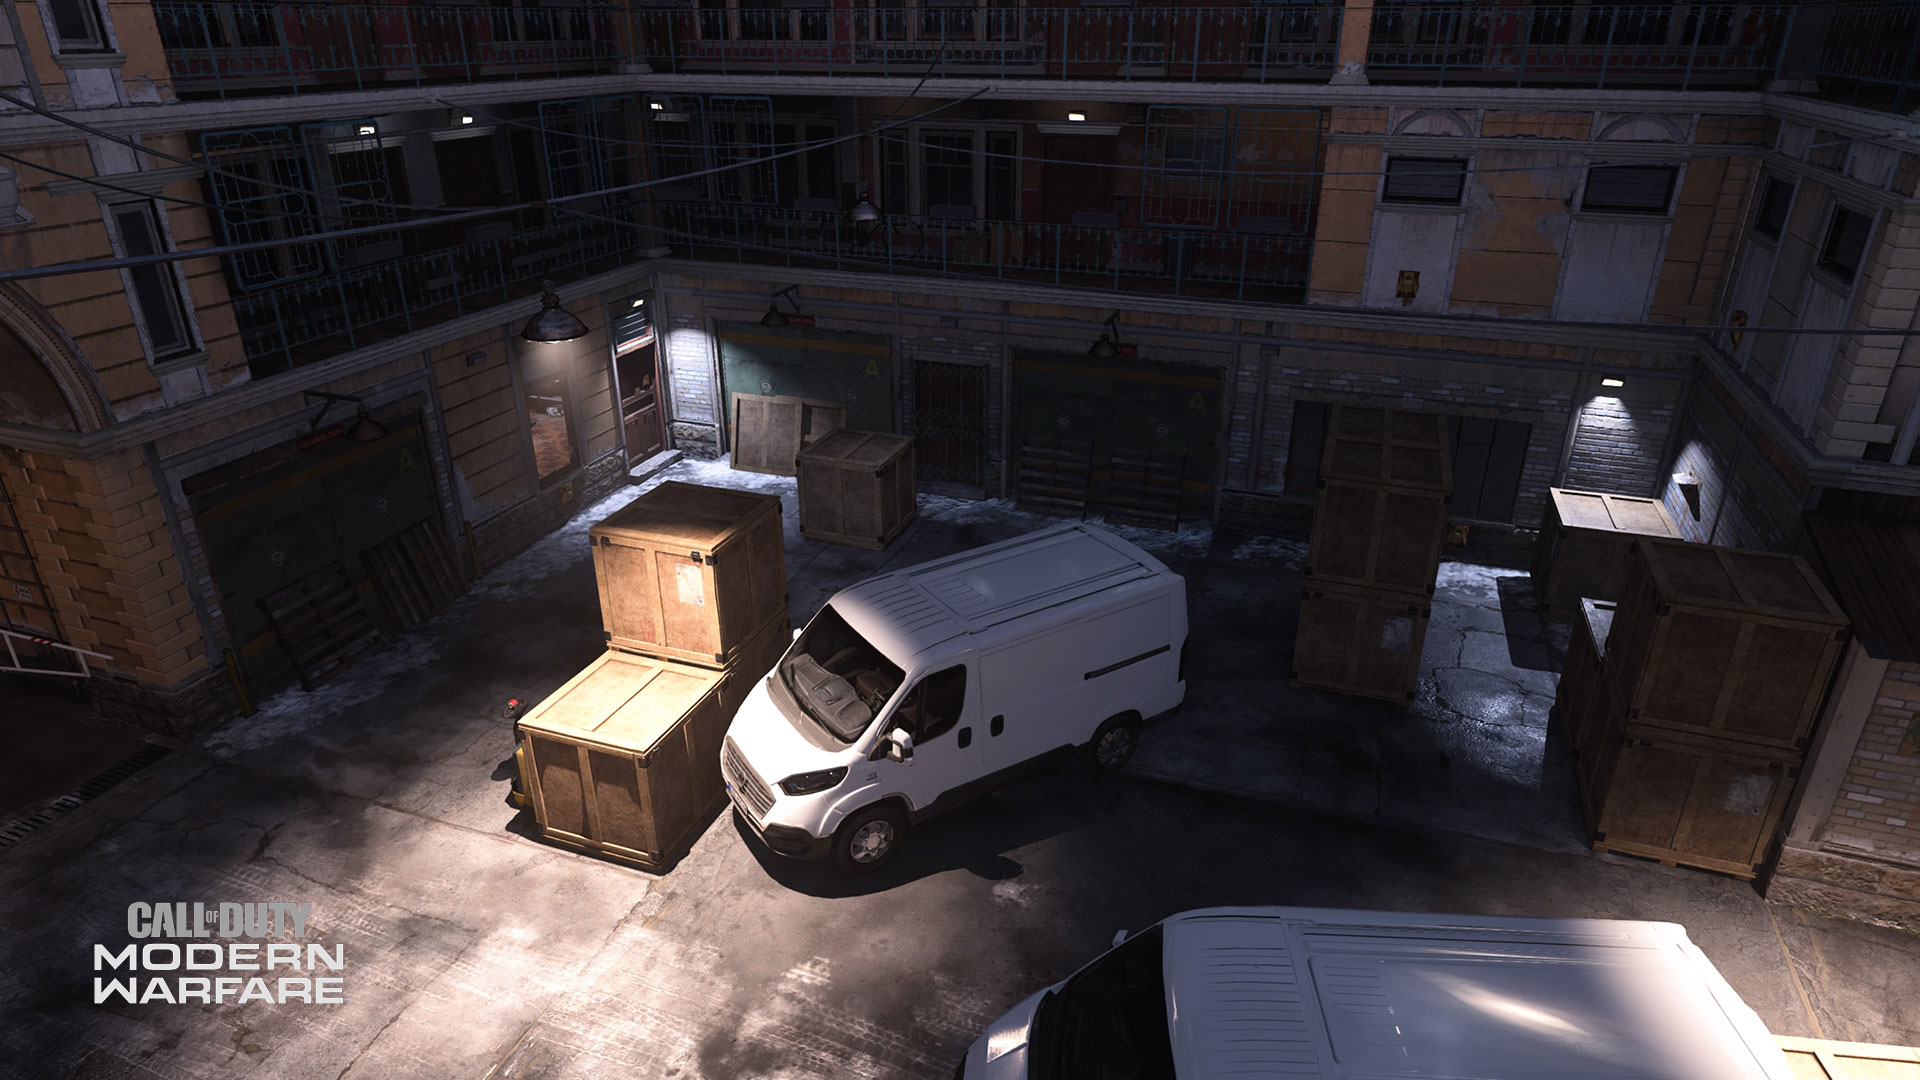
21. Shipping Area – 1st Hardpoint rotation and HQ location, Search and Destroy Bomb Site, and Bomb Location in Cyber Attack
Watch out for strangers in the Shipping Area. Two large white vans crowd the sightlines in this medium-sized location, while discarded crates have spilled onto the ground, creating a zig-zag-like infil route through the 1stHardpoint. You can use those environmental set pieces as additional cover when planting or defusing a bomb in a match of Search and Destroy.
The cramped areas inside the Shipping Area Hardpoint provide lots of opportunities for surprise attacks and in-your-face combat. Try exploring the Shipping Area with a shotgun; if an enemy pops into view, you can quickly eliminate them with a well-placed pump.
In the Shipping Area, we call that “returning to sender.”
Need to heal or call in a Cruise Missile? Buy some time with the cover that the forgotten crates can afford you.
Here, a well-tossed Decoy grenade is perfect for luring enemies to the shadowy regions of the Shipping Area. Toss, wait, then pop into view and take ‘em out.
22. Apartments
Photos of The Wolf, discarded household goods, and other signs that people left in a hurry: these are the Apartments.
A second-floor location above the Shipping Area and Street Market, the winding Apartments provide valuable vantage points for scanning the length of the Tracks or scoping out any competition inside the Shipping Area.
Two entry points into Apartments are hidden at either side of the Shipping Area. But, a set of stairs right beside the Street Market also grants you access, which is an ideal route for Allegiance fighters looking to reach the first Hardpoint quickly – and without detection.
Farewell, St. Petrograd!
Overall, this large-size Kastovian map is a thrilling location for any Multiplayer mode. Objective matches tend to pick up pace quickly: when there are specific points that centralize the combat, confrontations can spring up at all ranges.
In Deathmatch or Free-for-All modes, St. Petrograd is a wonderful space for exploring all map locations and experimenting with various tactics, loadouts, Field Upgrades and Killstreaks. And, the massive width of this map provides plenty of suspense when playing without objectives.
Pick up some general tips for gameplay, then hop in!
Tips:
1. As Above, So Below
If there’s combat on the ground, there’s guaranteed to be combat in the map’s upper floors. Make use of all levels of play in St. Petrograd, by climbing dumpsters, occupying second floors, or getting atop a train. If you’re on the ground, don’t forget to scan above you for looming targets.
2. Don’t Get Stuck in One Loadout
The sheer variety of combat situations available make St. Petrograd a fine map for experimentation. Use its mix of levels, zones, and sightlines to find your next favorite attachment, Killstreak, or weapon.
3. Check Your Footsteps
In Deathmatch modes, it can be hard to find an enemy on larger maps – until you start listening for footsteps. Be alert and listen for movement whenever you’re without a target. And to keep your footsteps undetected, equip the Dead Silence Field Upgrade.
4. Playing Makes Perfect
Now that you know where the spawns and objective points are located, you can start to anticipate the flow of enemies no matter where you’re at on the map. This is an important skill to have, as multiple objectives on this map are highly vulnerable to every angle of attack. Keep playing to get a feel for common movements, tactics, and combat points in every area.
5. Do It Like a Pro
See how the professionals handle St. Petrograd. This map, appearing in Call of Duty®’s inaugural Call of Duty World League™ season, will no doubt draw an intense level of expert gameplay during Launch Weekend at The Armory in Minneapolis. Tune in starting on Friday, January 24 to see pro teams square up on St. Petrograd and other maps.
For more information and the latest intel on Call of Duty®: Modern Warfare®, check out: www.callofduty.com, www.youtube.com/callofdutyand follow @InfinityWard and @CallofDuty on Twitter and Instagram and Facebook.
For more information on Activision games, follow @Activision on Twitter,Facebook, and Instagram.